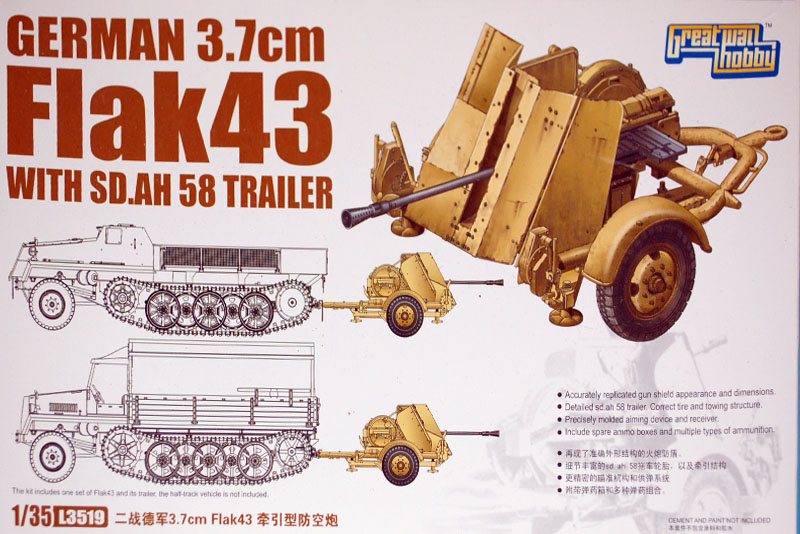
Great Wall Hobby have made quite a name for themselves over the last couple of years releasing a small number of German WW2 artillery guns, German vehicles, and German upgrade items. An interesting approach that Great Wall Hobby have taken is to release some of the models with a variety of upgrade parts. The model I am reviewing here is the base model, which consists of plastic parts and a small PE fret. The model is also available with a more advanced PE set and another version has the PE set plus a turned metal barrel.
Contents
The top opening box contains;
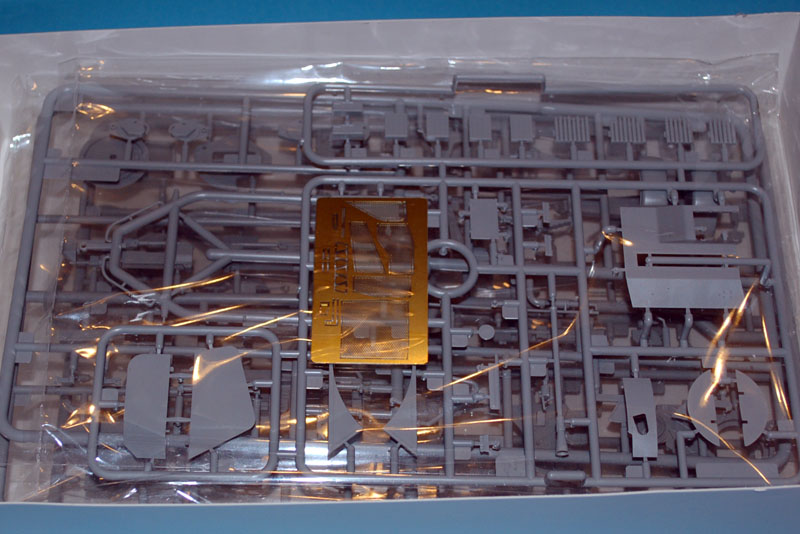
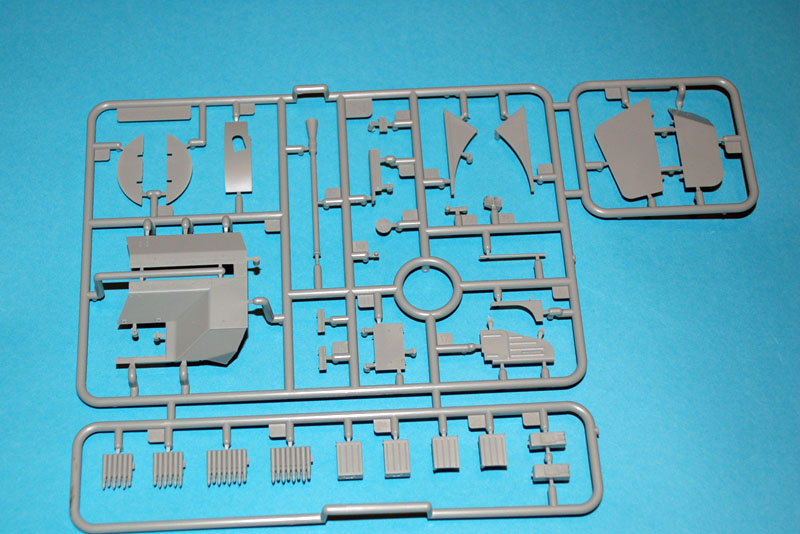
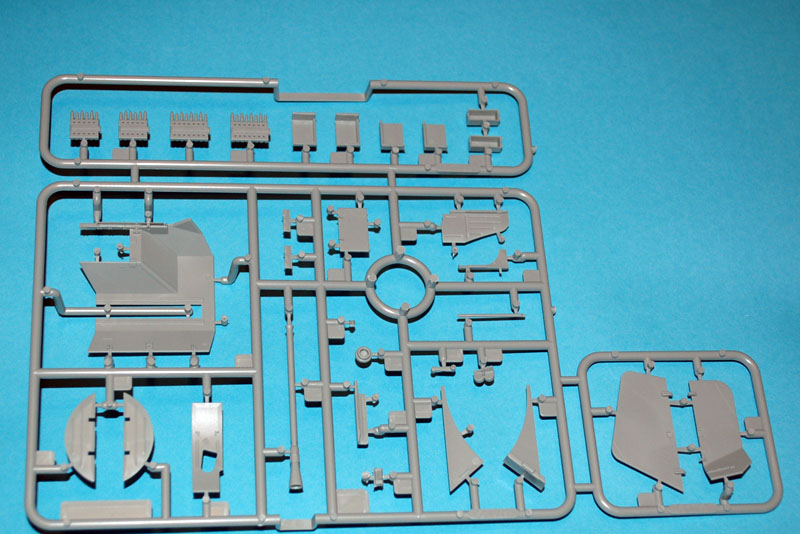
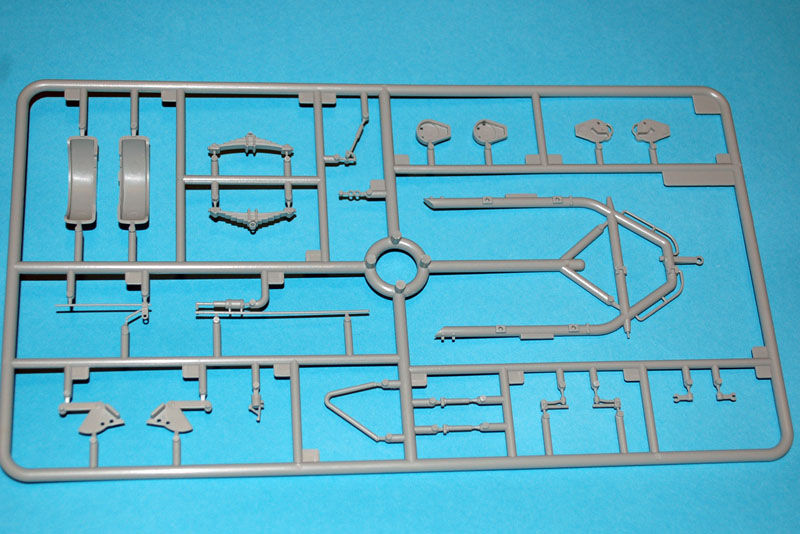
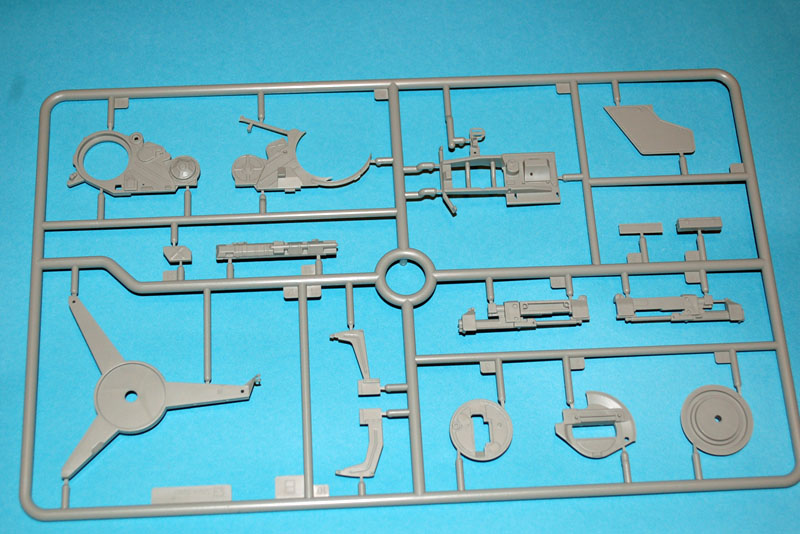
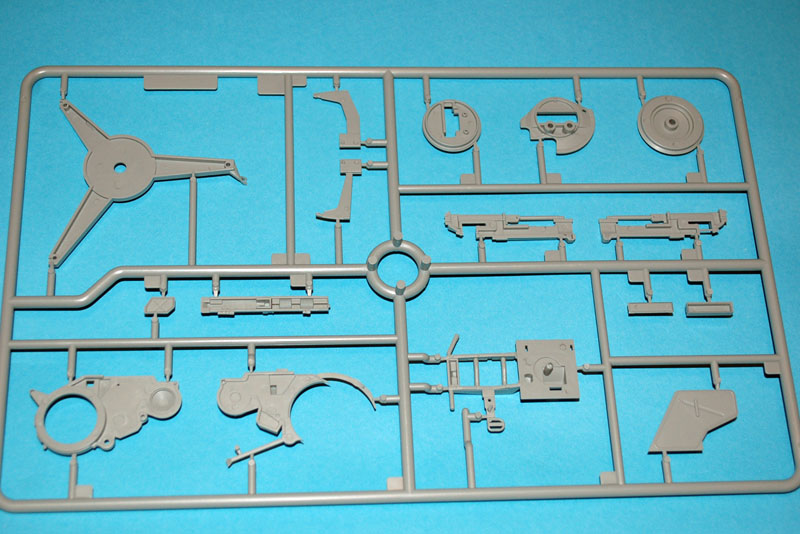
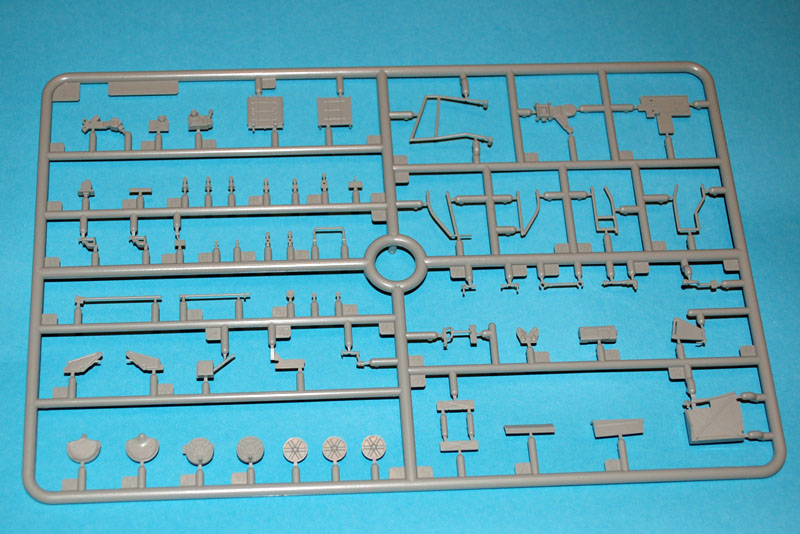
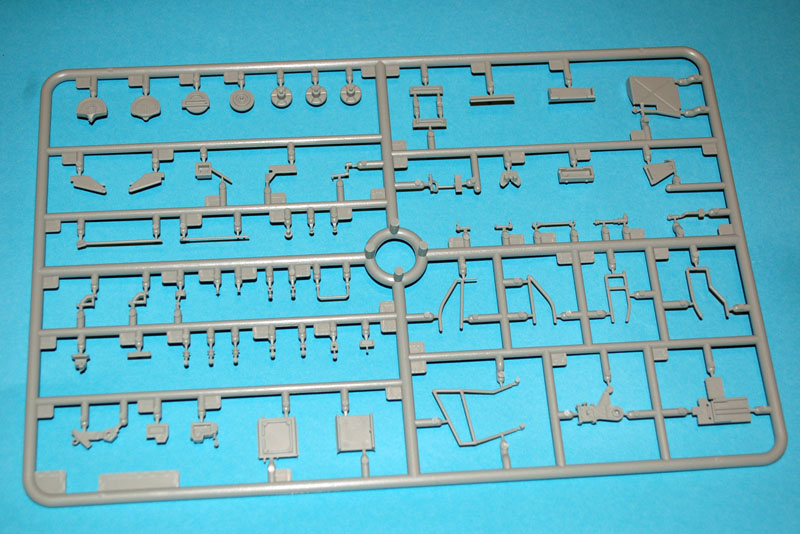
Six sprues moulded in light grey
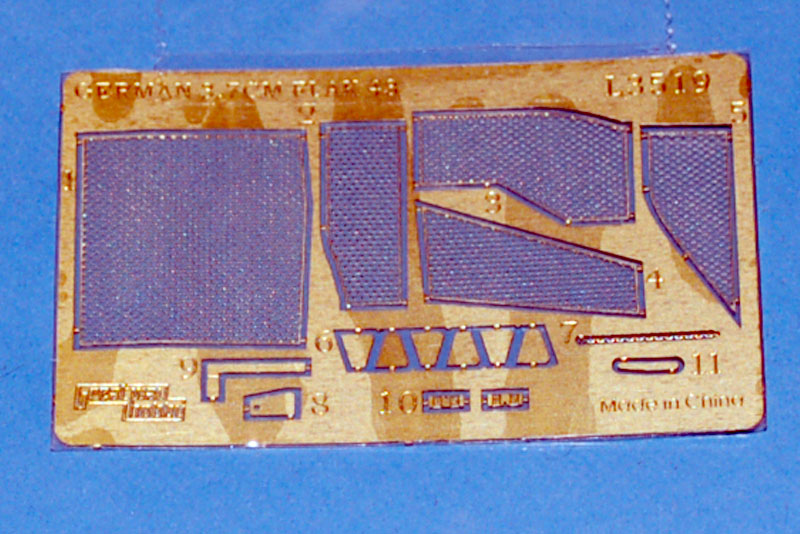
A small PE fret
A small booklet of instructions
in the box
Each of the light grey sprues is supplied inside its own plastic bag with the exception of the 2 sprues containing the wheels which are packaged together. The PE fret is in its own plastic bag, but that is taped to the outside of one of the sprue bags, this would seem to be acceptable but it does leave the PE fret open to flex damage, in my case the PE fret was very slightly beveled but otherwise ok.
The six plastic sprues are all perfectly moulded and very well laid out. The part numbering system is very logical making for excellent ease in locating the parts you need (some parts are so small that if this was not the case you would struggle to locate them). I have no concerns about highly praising Great Wall Hobby for the approach they have taken in the sprues for this model. The connections between parts and the sprue should also be mentioned as they are very small and minimal in number, there are also very few moulding nipples used making the clean-up of parts as easy as possible.
The moulding itself is of a very high standard with crisp lines and detail and the very minimal of mould seams. During the build I have only managed to find one piece with two very shallow push out marks which are on part of the travel lock mechanism which is hidden under the gun mount. Apart from these two blemishes the model scores very highly in this respect.
The instructions are one area where improvement is needed. Each step is really five or six steps, rather than one, which could lead to easy mistakes during assembly. The parts are all correctly identified and numbered, but another area where this otherwise excellent model suffers is that the location of some of the parts is not clearly identified in the instructions which again leads to easy to make mistakes.
I have left this in-box portion of the review short as everything will be covered in more detail during the build.
the build
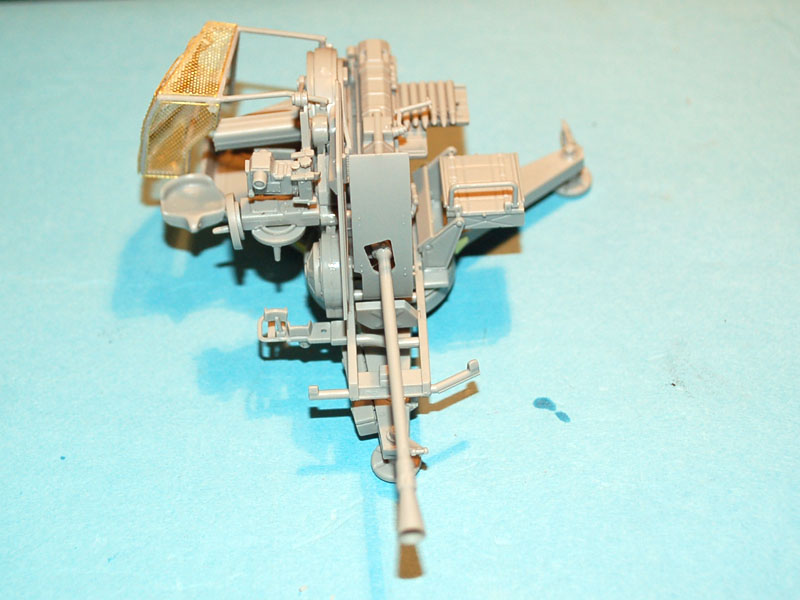
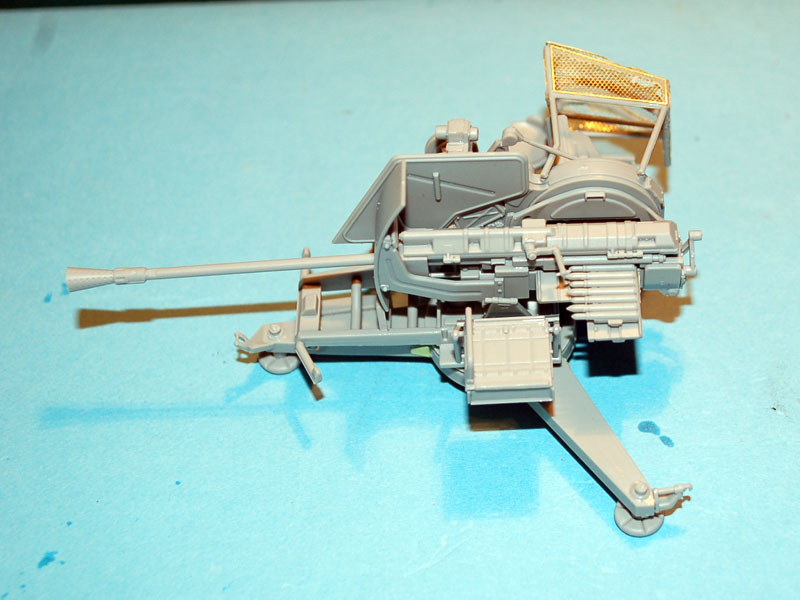
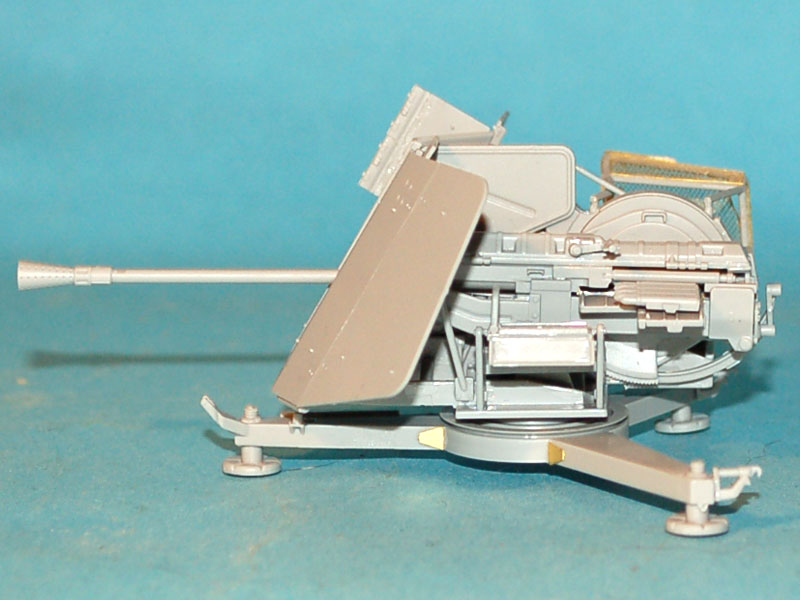
With this model there are two display options, and two build options. You have the option of the Flak 43 shown ready to fire, or locked down on its trailer in travel mode. You also have the same option with the flak 43 minus its gun shield shown in either mode. I decided to build the flak 43 with gun shield and shown in its firing configuration. An example of my earlier statement is that this configuration, and for that matter the travel mode configuration, is shown as complete in five steps, with two extra steps added to cover assembly of the trailer.
Stage one covers assembly of the gun and its mount, which is really four steps and a small sub assembly and I will cover it as such;
First the sub assembly which consists of three parts and is the sighting system for the gun. Assembly is straight forward with a slight problem locating the lug on parts C2 and 3 into the receiver on part C33, it should be remembered that this part is made to be moveable via a pin (C20) hidden in the gun body upright. This enables all of the parts to move up and down and align with the gun barrel, I however recommend that all moveable parts are glued in place once the desired angle and position is decided upon by the builder in order to prevent damage and breakage in the future.
Step one builds the central upright of the gun body and only consists of four parts plus attachment of the earlier sub assembly. The three main parts go together well, but the pin that glues into the sighting sub assembly is very tight and because of this I forced the pin through the body but did glue the sub assembly to it.
Step two again consists of four parts and covers the base of the gun and attachment of the upright. The fit of the parts is again very good and speaks highly of the model thus far.
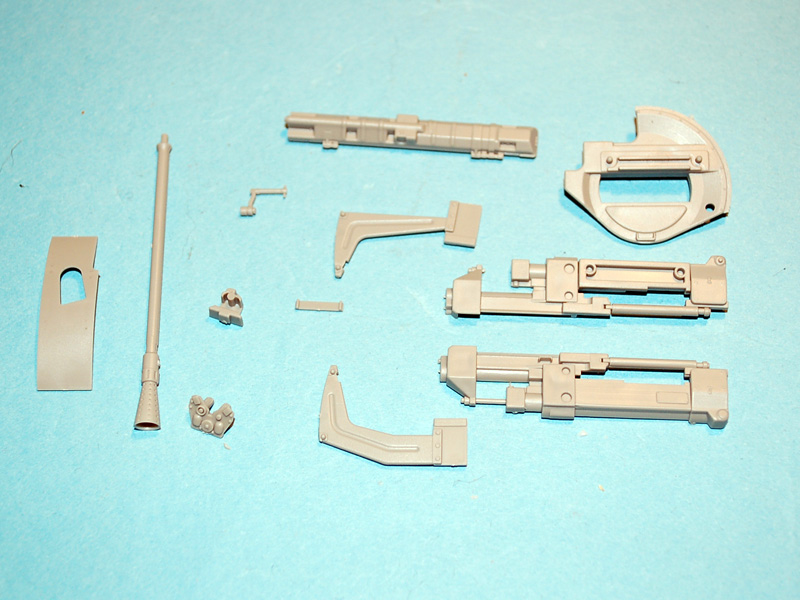
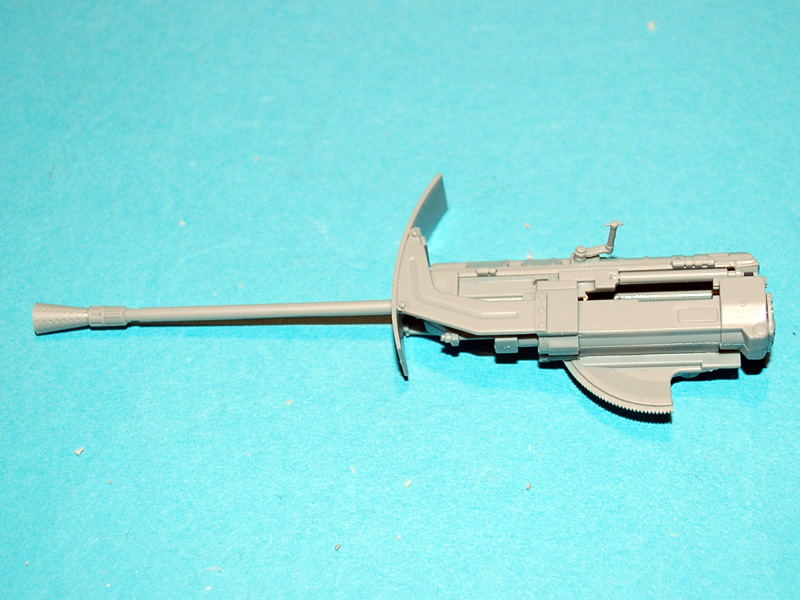
Step three covers the assembly of the gun itself and consists of eleven parts. Some points to remember are to make sure you attach C6 to B13 before attaching B13 to B4 and 5 or you will struggle to attach it later. C7 is a thin brace between parts B10 and 11, do not make the mistake of attaching N3 (part of the gun shield) before attaching part C7.
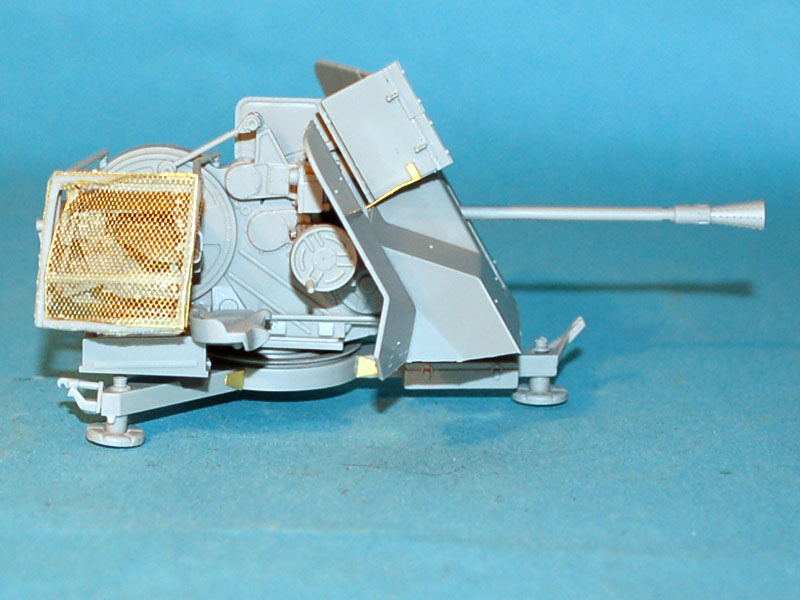
Here we have my first concern about the model and that is part N5 (gun barrel), dont get me wrong the barrel is good for injection moulded plastic but the quality of the kit really deserves a turned metal barrel for the flash guard more than anything in order to keep the standard it has set. If you wish to stick to the manufacturers own products this bumps the price up to £25.93, and for that price you will also get ammunition and cartridge cases. Back to the assembly all parts are a good fit even where the minimal of mating surfaces is concerned.
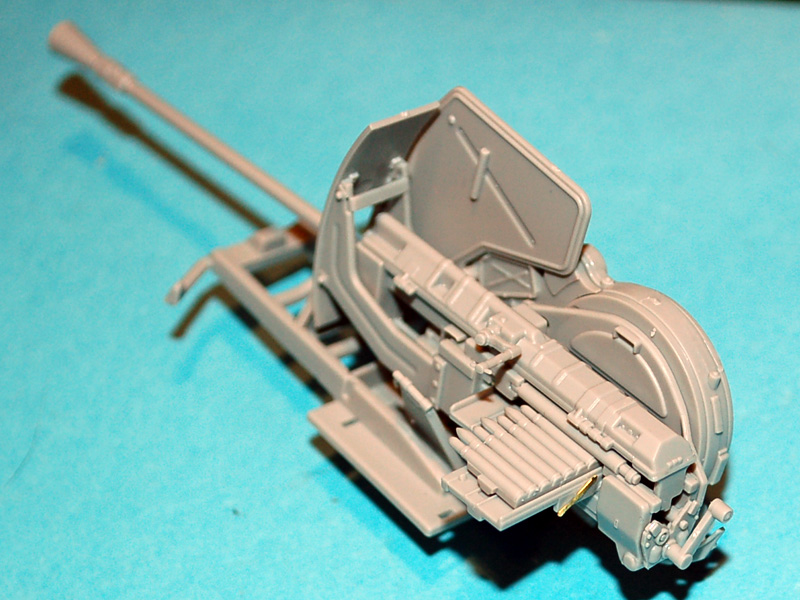
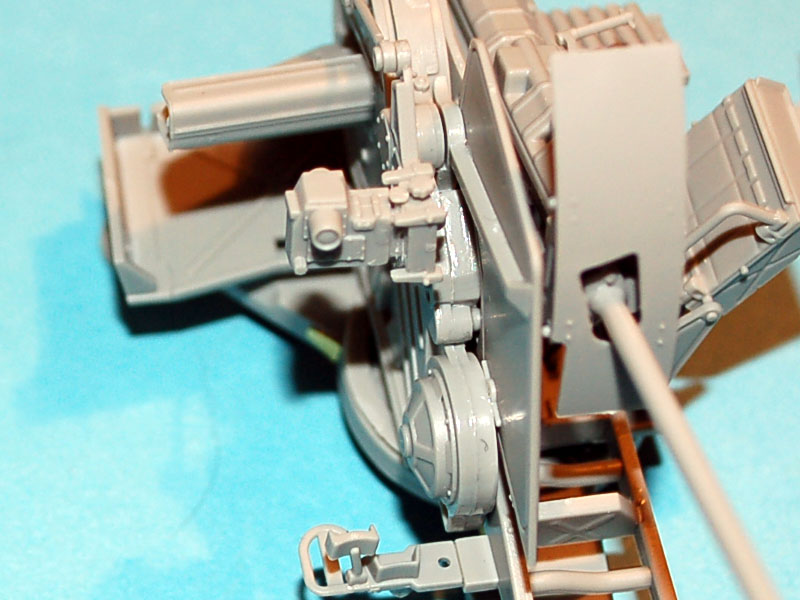
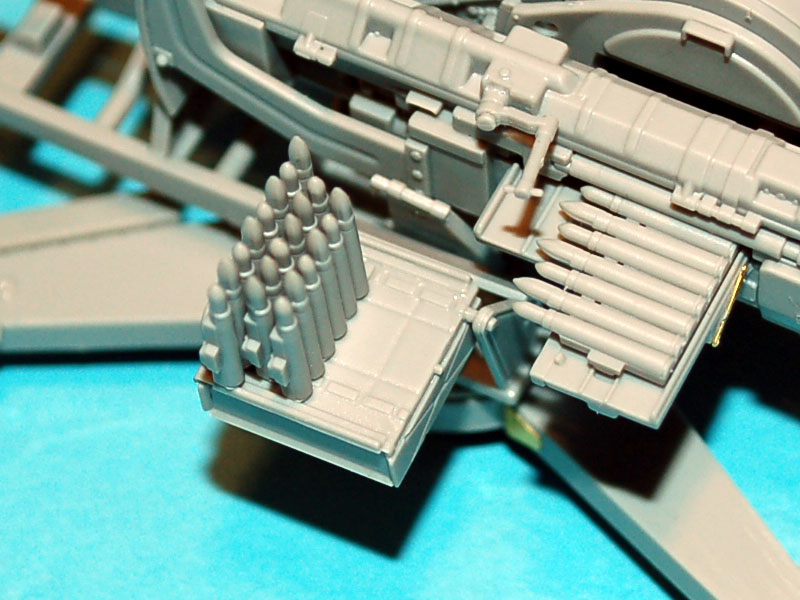
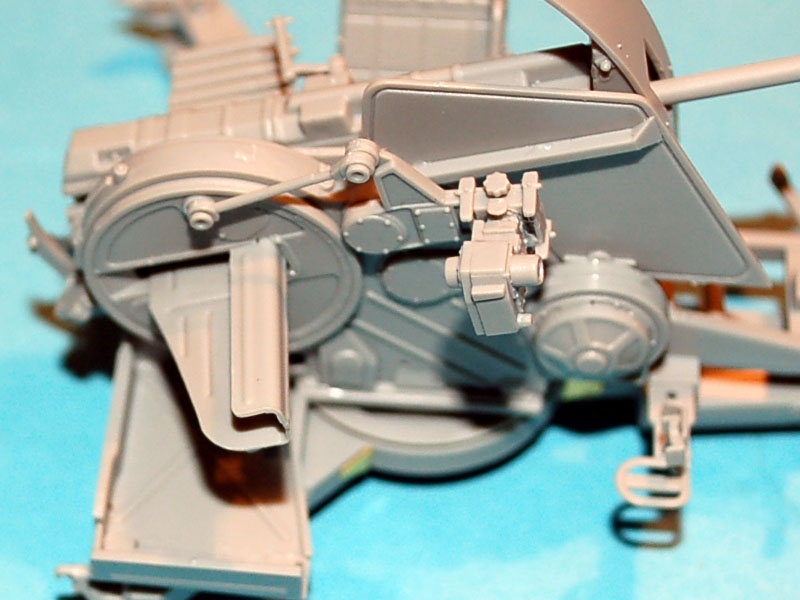
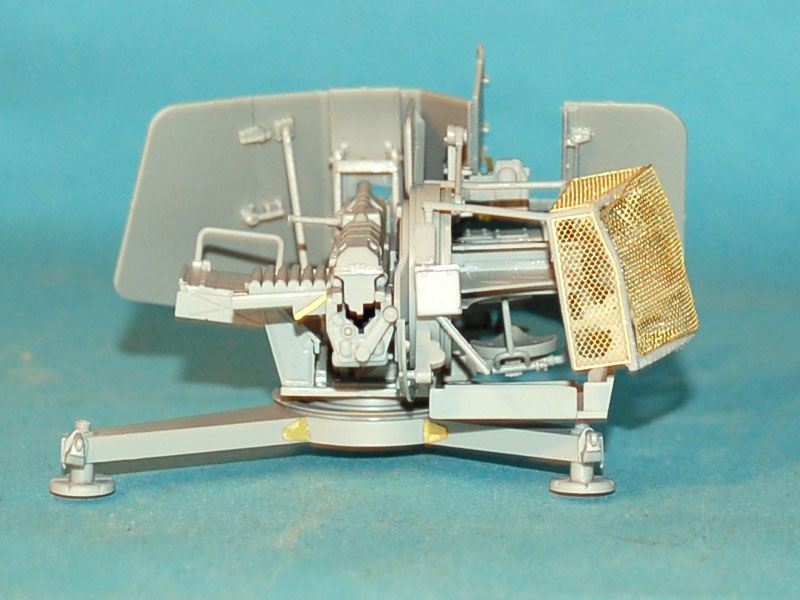
Step four is where everything comes together into a single unit and is where you get an idea of just how good this model is. At this stage you also attach the feeder mechanism, a clip of ammunition, and the travel lock. Correct location and orientation of part C47 would be hard if it was not for a small graphic in the bottom right hand side of the page showing it.
Stage two covers assembly of the base plate and is one of the stages where it is a single step, this stage consists of 16 parts and should not present any problems. All of the parts are easily located and cleaned due to very few connection points.
Stage three consists of four steps and four sub assemblies and I will cover this stage again as such.
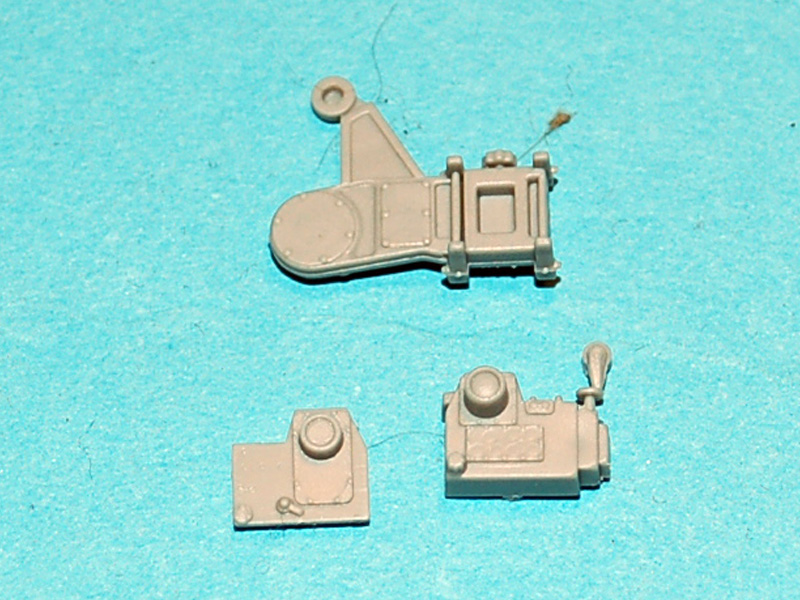
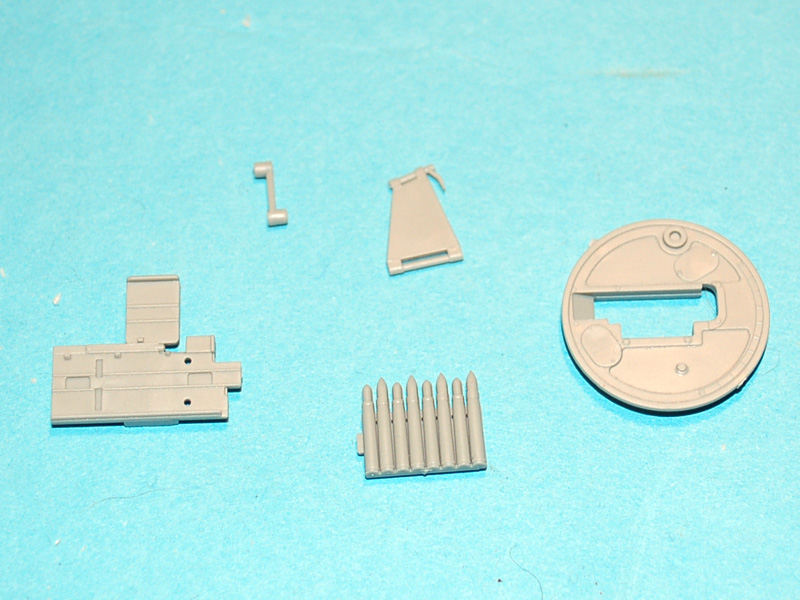
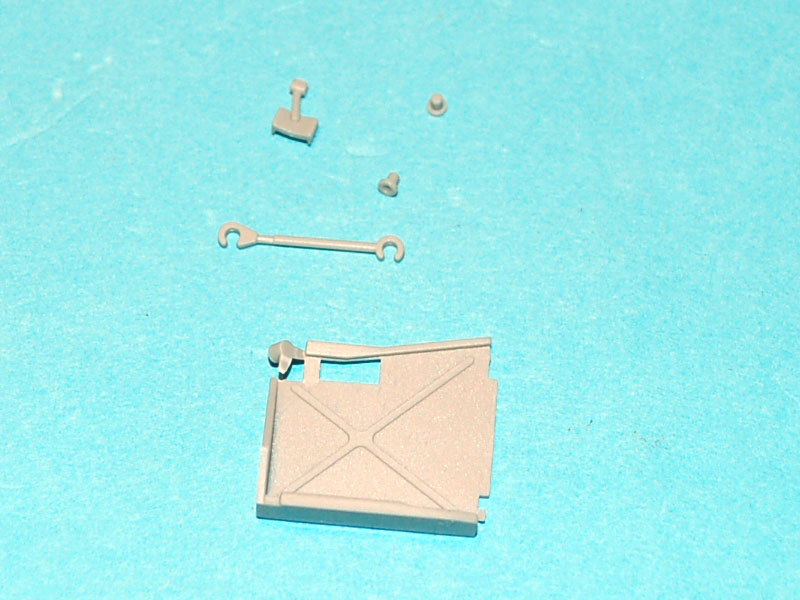
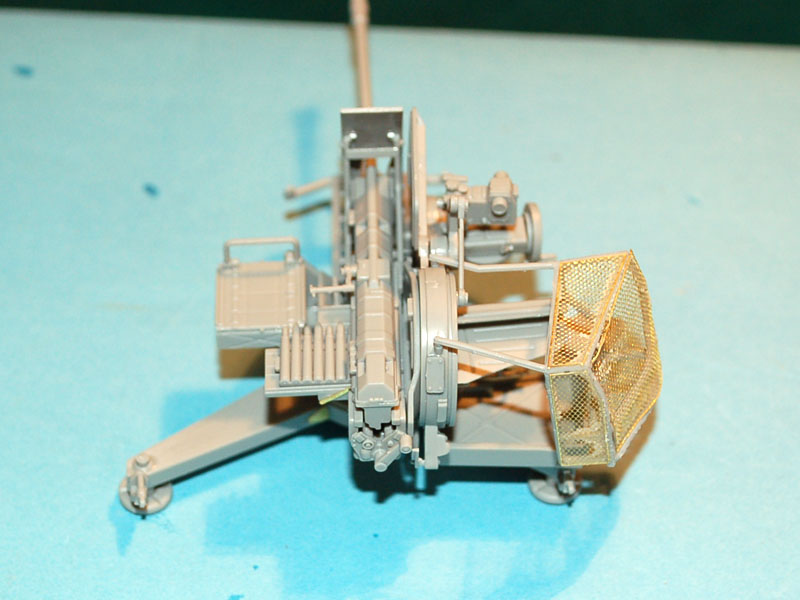
The first sub assembly (A) covers construction of the ammunition storage unit prior to being fed onto the feeder mechanism, and this consists of 8 parts. I suggest leaving parts C22 and 23 (mounting brackets) until you are ready to mount the sub assembly onto the gun body, this is not completely necessary but made it easier for me.
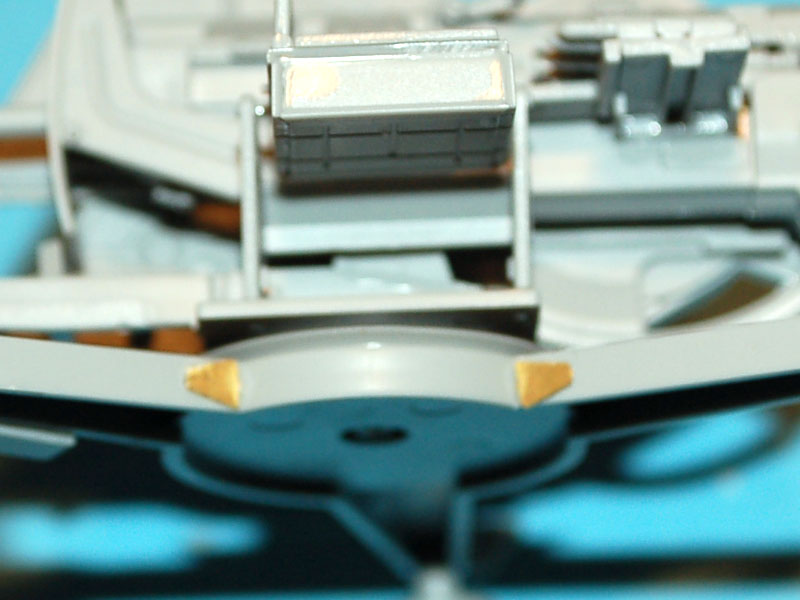
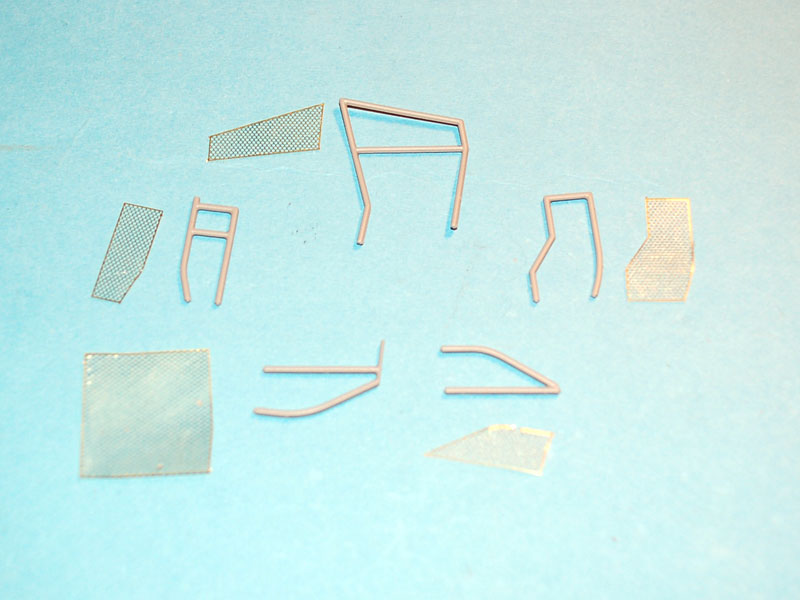
Step 1 involves mounting the gun assembly to the base plate, adding the ammunition storage unit with 3 racks of ammunition, and adding raised PE detail to both sides of each leg. The PE that is provided with this kit is exceptionally fine in terms of thickness (0.13mm), this makes it very easy to bend but also very easy to damage, especially the mesh which I found out to my cost). Again, all parts are easy to remove and clean, and should not present you with any issues.
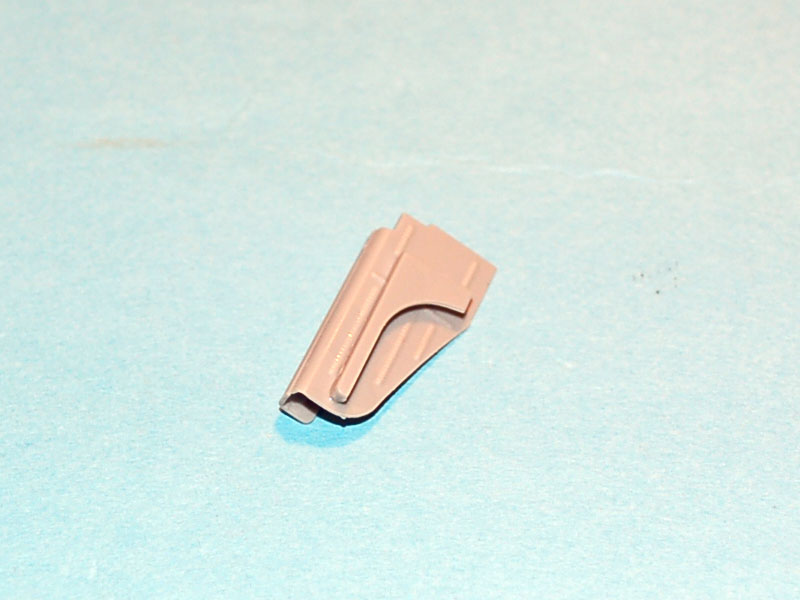
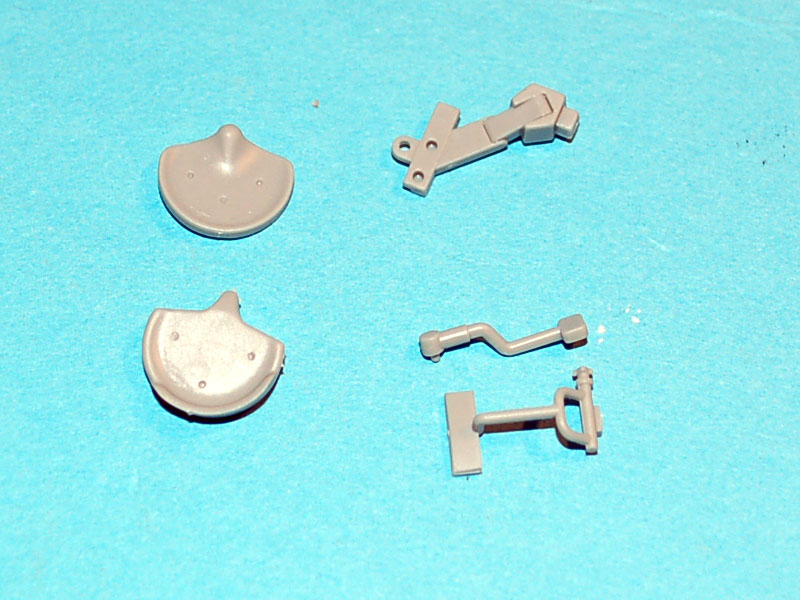
Sub assembly (B) consists of three parts and is the ejector chute for spent ammunition, the only issue with this assembly is that due to its finesse there are no locating lugs for parts N8 and 17 which make alignment difficult.
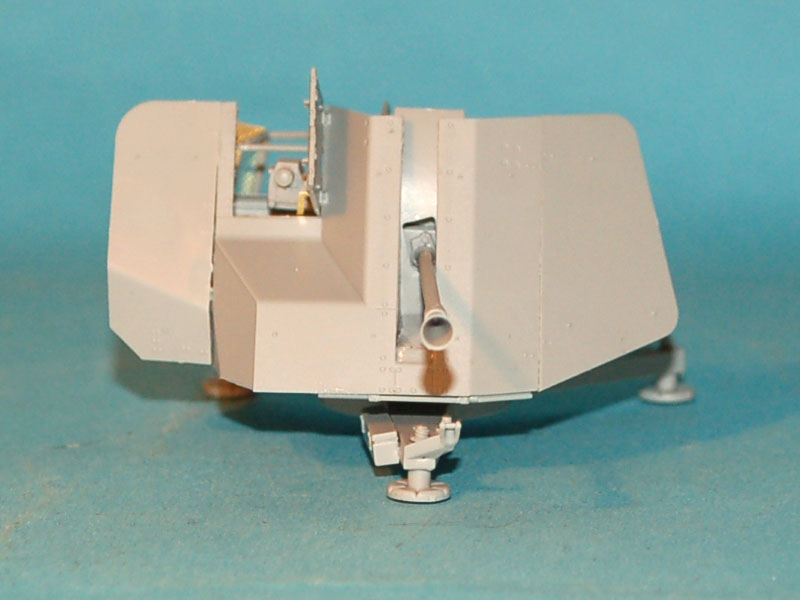
Step 2 involves attaching the ejector chute, spent cartridge tray, the control rod that keeps the sighting system aligned with the barrel, and what I believe is the firing actuator. There is only one problem with this step and that is the location of the spent cartridge tray as the instructions are not clear to me, even now I am not sure I have it correctly placed. The alignment rod is best attached after the lugs (C21x2) are attached and the glue allowed to cure before pressing the alignment rod over the lugs.
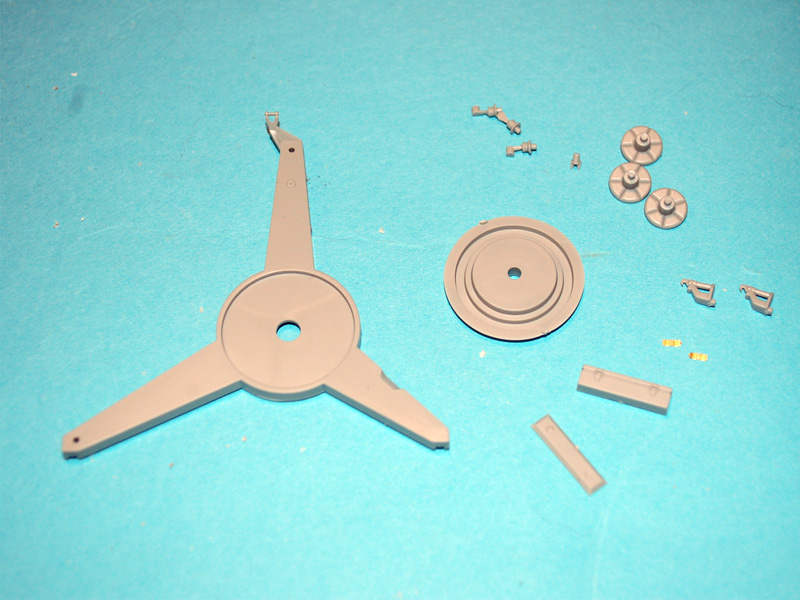
Sub assembly (C) is the elevation and rotation controls which are easily assembled, but be very careful with parts C14 and 15 (2 locking nuts) as if you drop these you will never find them.
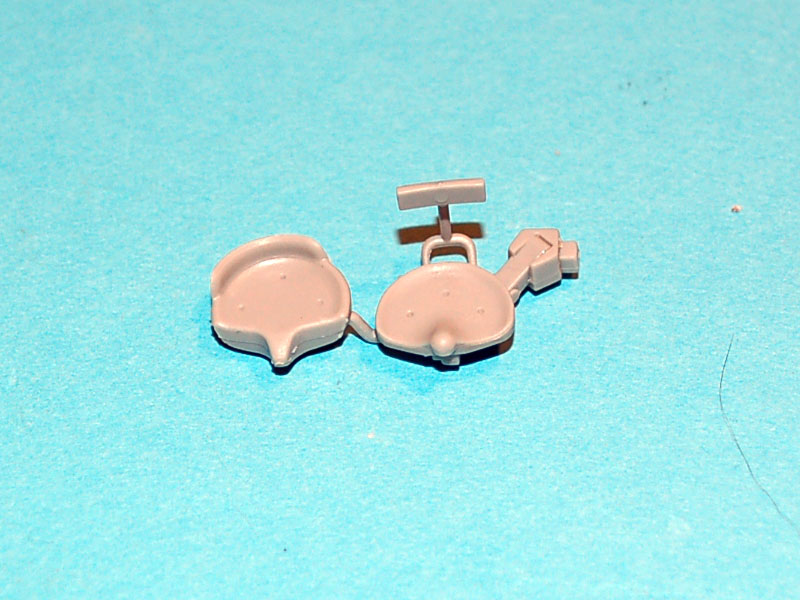
Sub assembly (D) is the seating position for the gunner, there is however a second seat which I believe is for the spotter. Assembly is easy and castings are again all first rate.
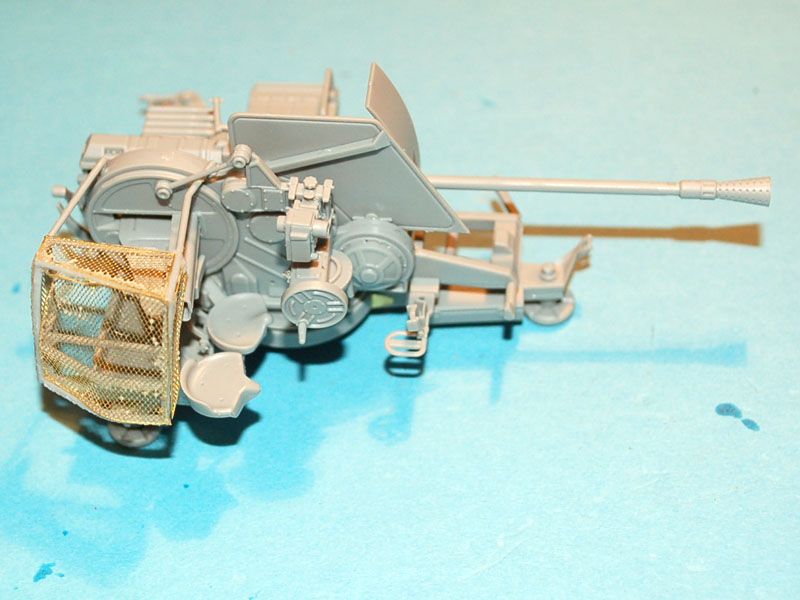
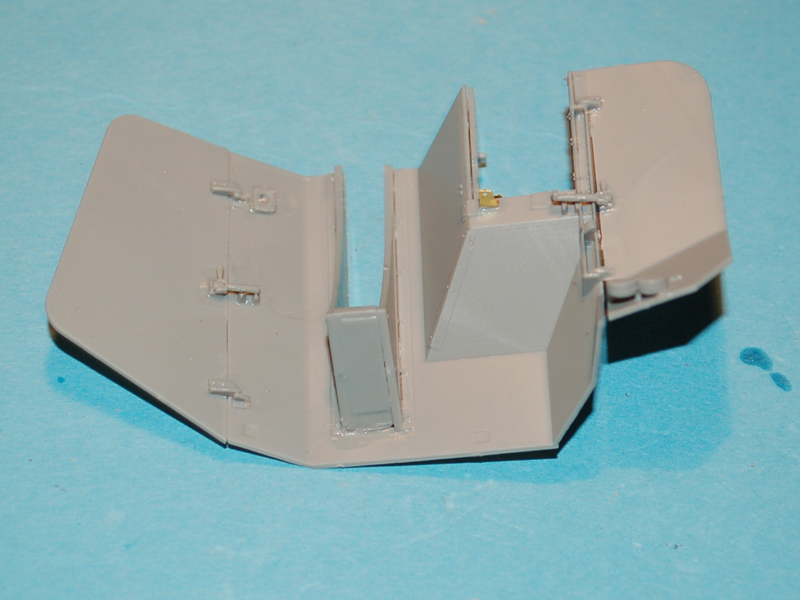
Step 3 covers assembly of the spent cartridge catching net. The six parts that make up the cage go together very well and easily. The top, bottom, and two side PE mesh fits very well, the front mesh however I tore as I placed it incorrectly and my efforts to correct my mistake resulted in me tearing the very fine mesh and it will need to be replaced.
Step 4 brings all the sub assemblies together and another bracket for the spent cartridge catching net. The only issue here is that the bracket is not clearly depicted as needing to be attached to the basket.
If you have decided to build the gun without its gun shield the model is finished and ready for painting.
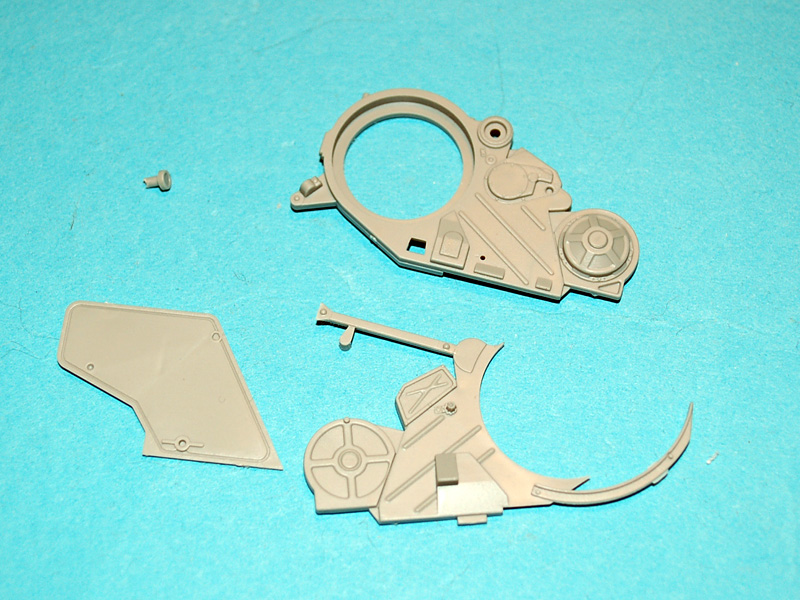
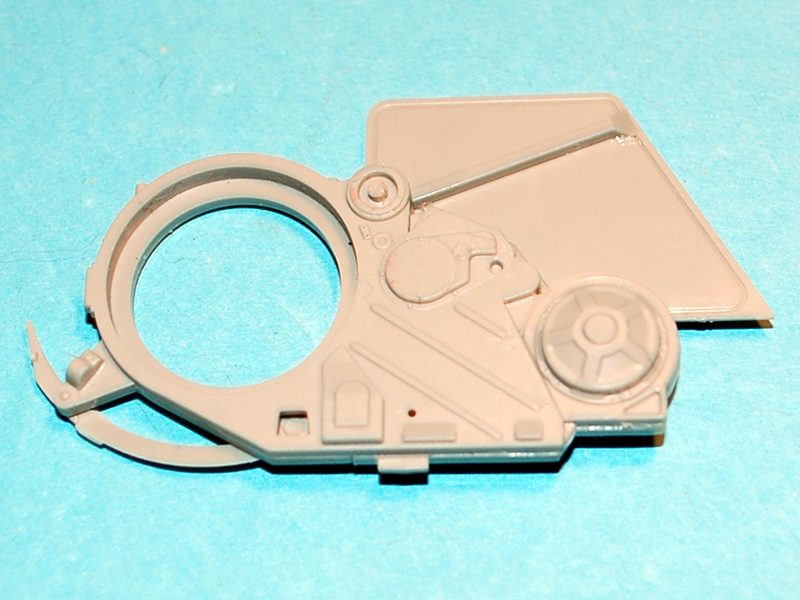
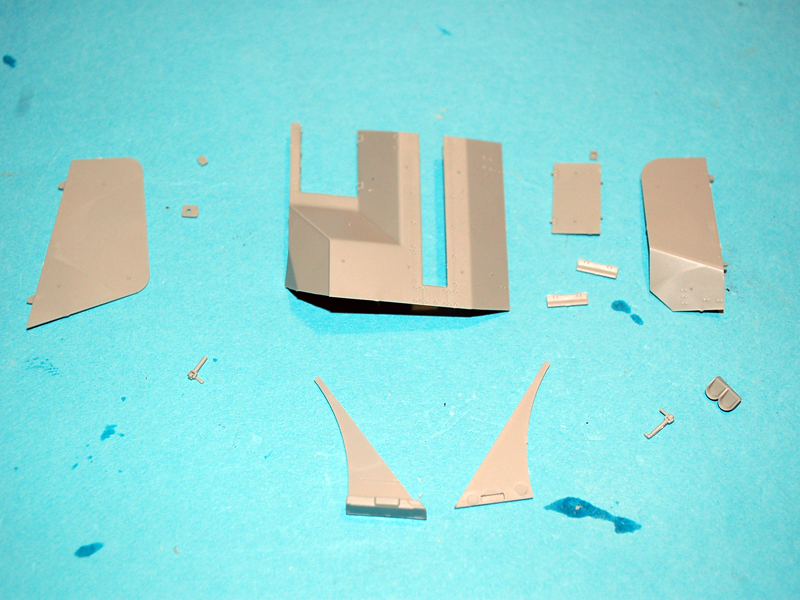
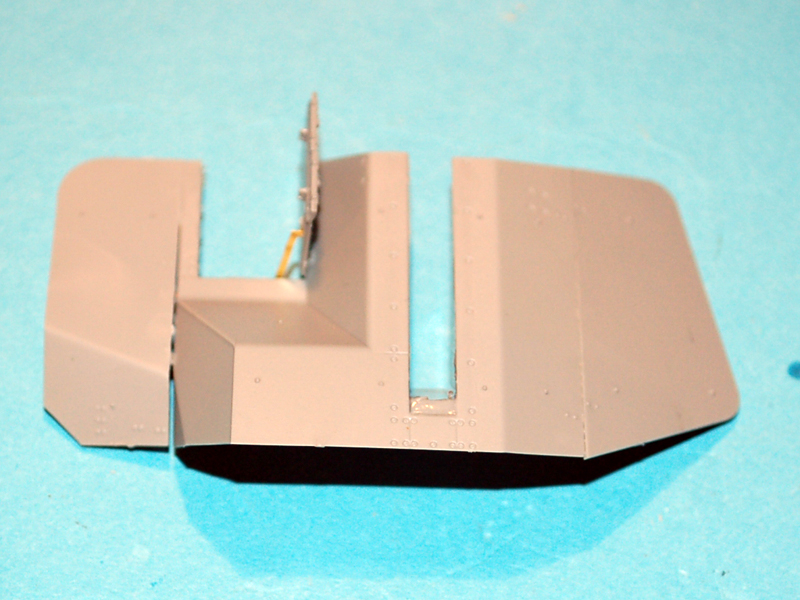
Stage four starts the construction of the gun shield, and I am afraid that Great Wall Hobby has made a few mistakes in this area. The gun shield part N4 is not identified during construction and this stage also calls for two PE parts (PE 13 and 14) which are not even listed in the contents. I believe that PE 14 is actually PE 8 and PE 13 must be PE 9 despite there being only a passing resemblance of the part. The lug at the bottom connection point of N13 needs to be thinned or removed in order to obtain a clean joint of parts before being attached to N4. The only other issue I encountered was how to correctly position the part identified as PE13, I believe the purpose of this part is to keep the door for the sighting equipment in an open position. The thickness of the gun shield, to me, seems reasonable at 0.62mm.
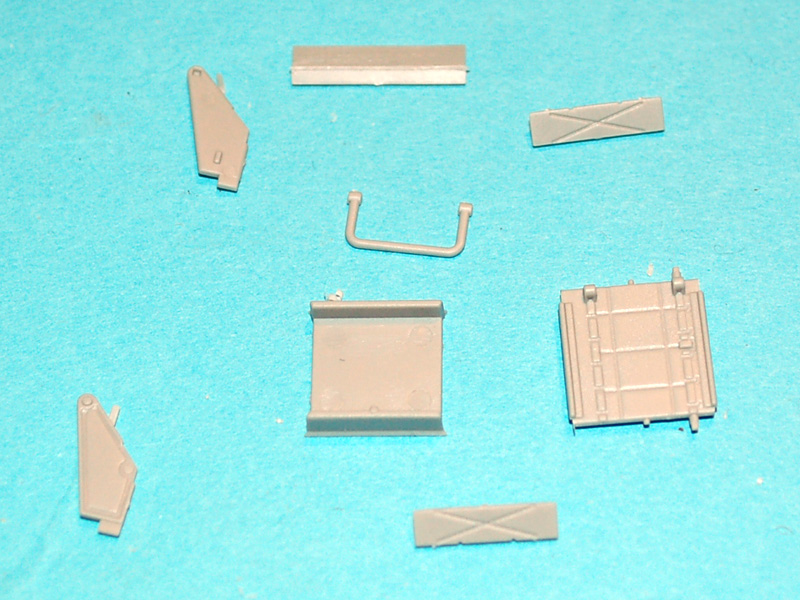
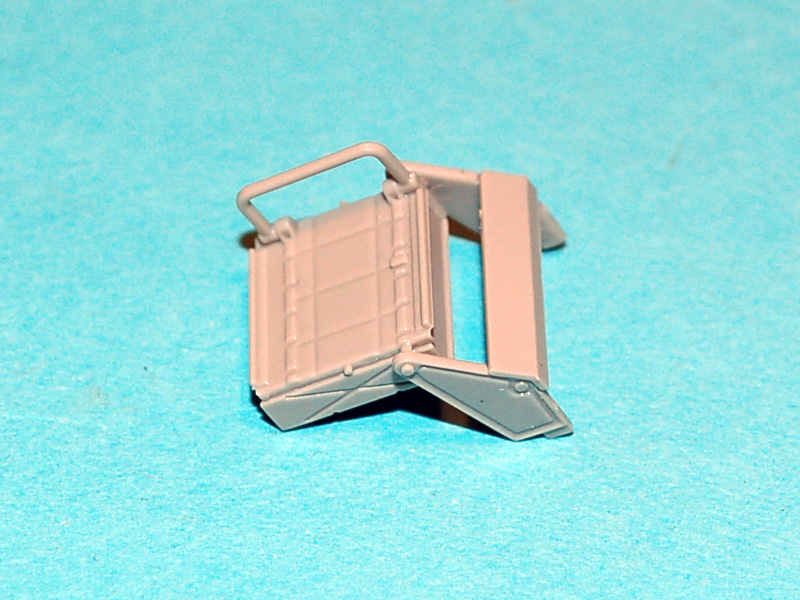
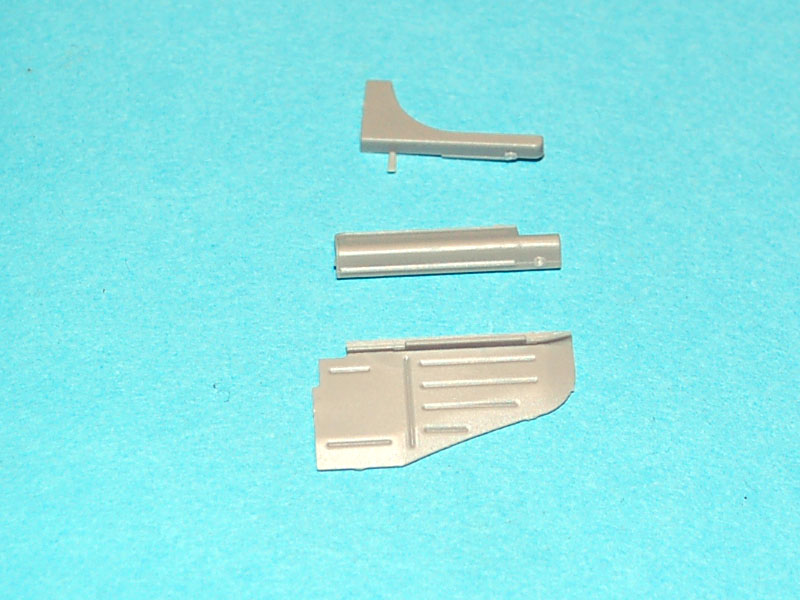
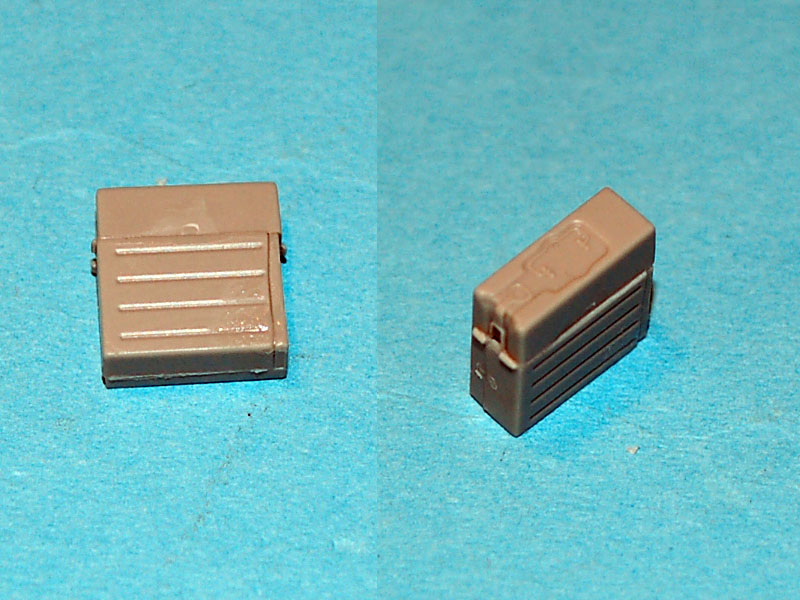
Stage five covers final construction and installation of the gun shield and a couple of ammunition boxes. You start by adding the left and right foldable wings of the shield which caused no problems now that gun shield assembly is added to the gun. This assembly is straight forward with the exception of part N15 which is not numbered on the sprue, this part I found all but impossible to attach due to the very limited amount of space. There are two ammunition boxes supplied with the model which are easy to assemble consisting of only 3 parts.
If you decided to show the gun with its shield in a firing position the model is ready for painting now.
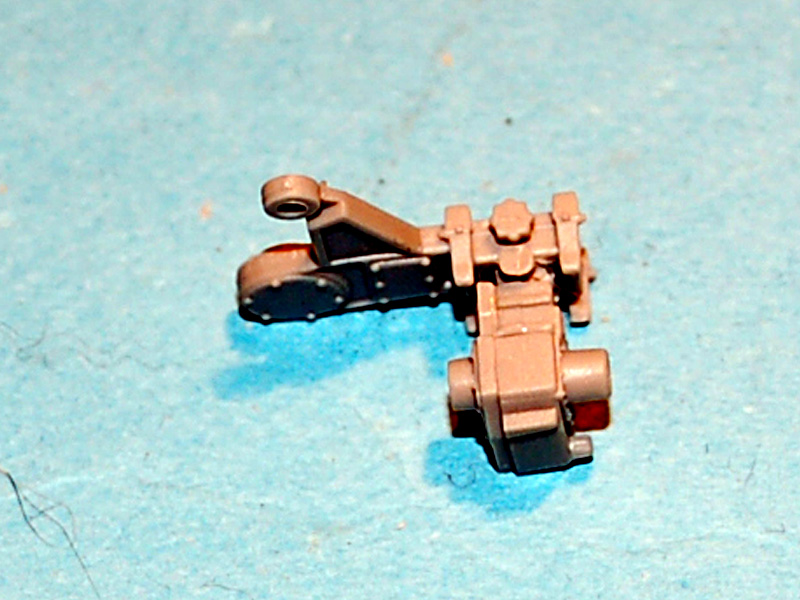
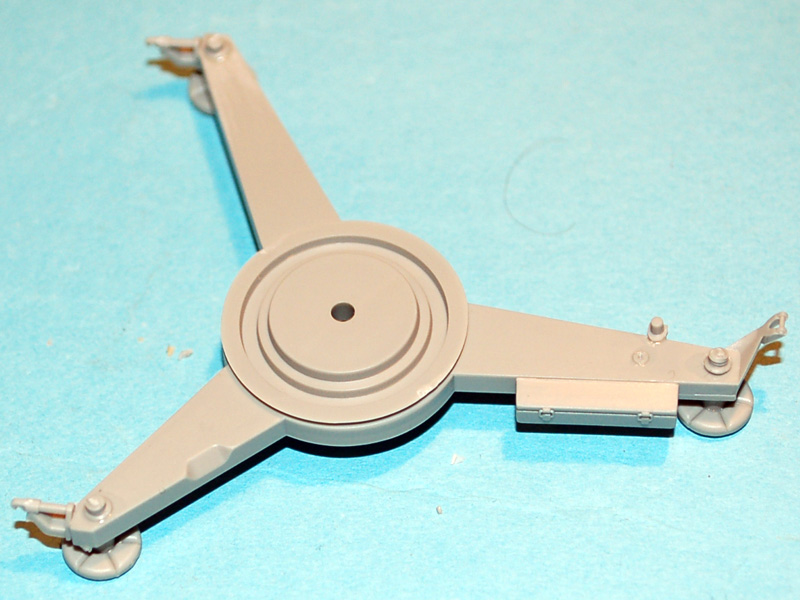
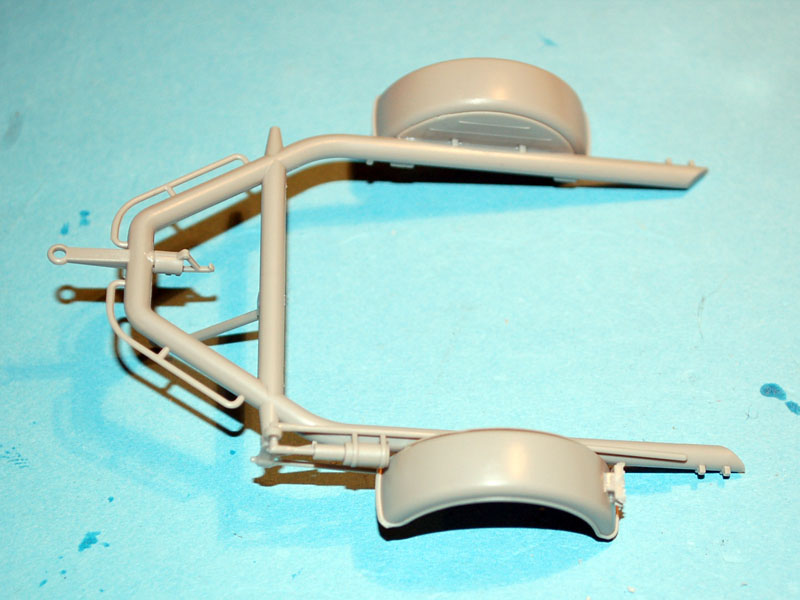
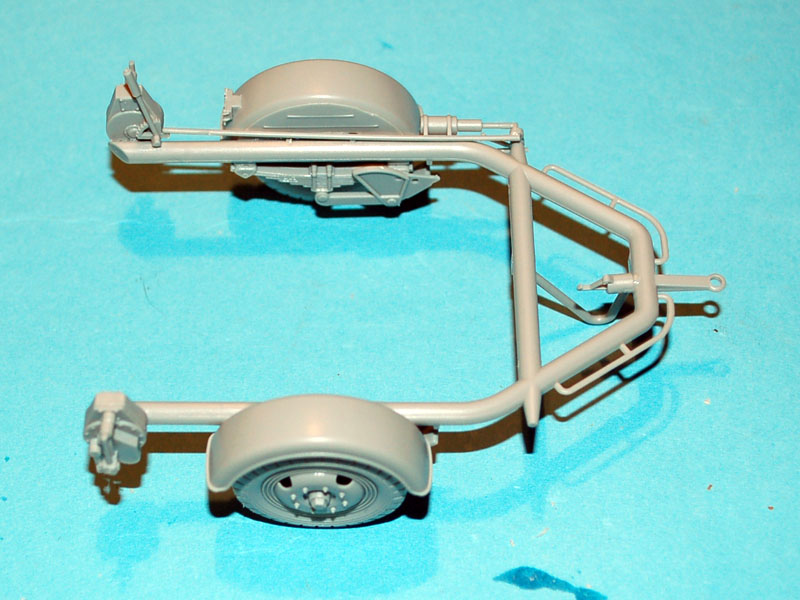
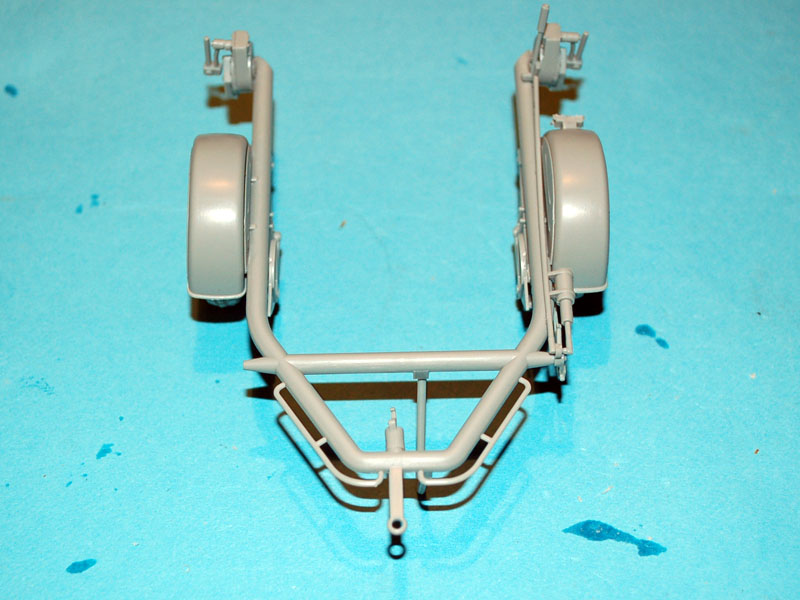
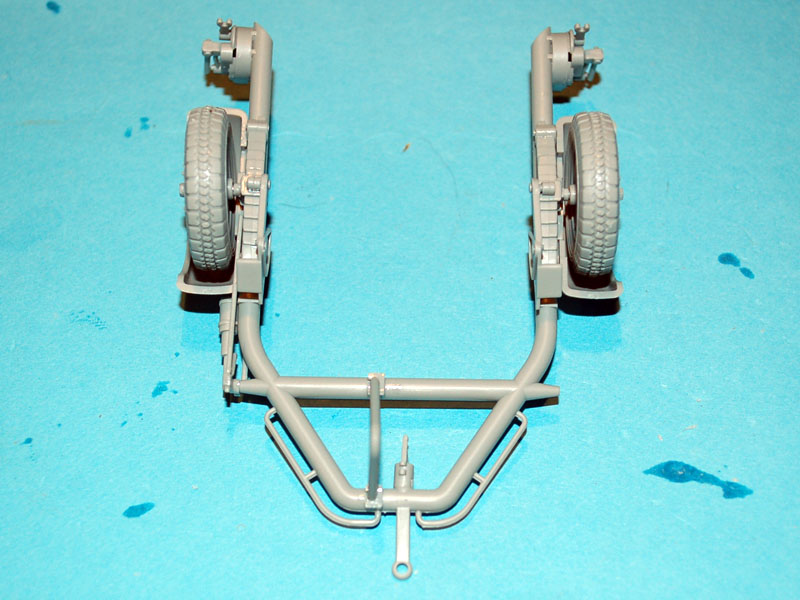
Sd.Ah 58 Trailer:
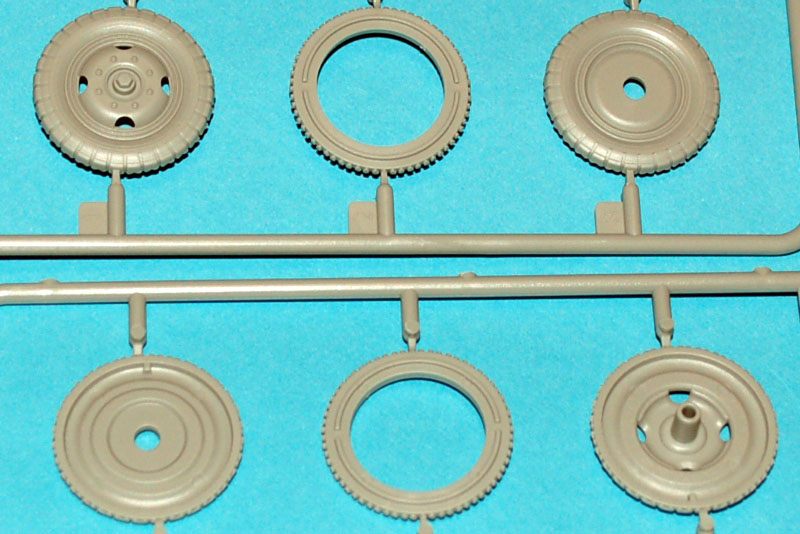
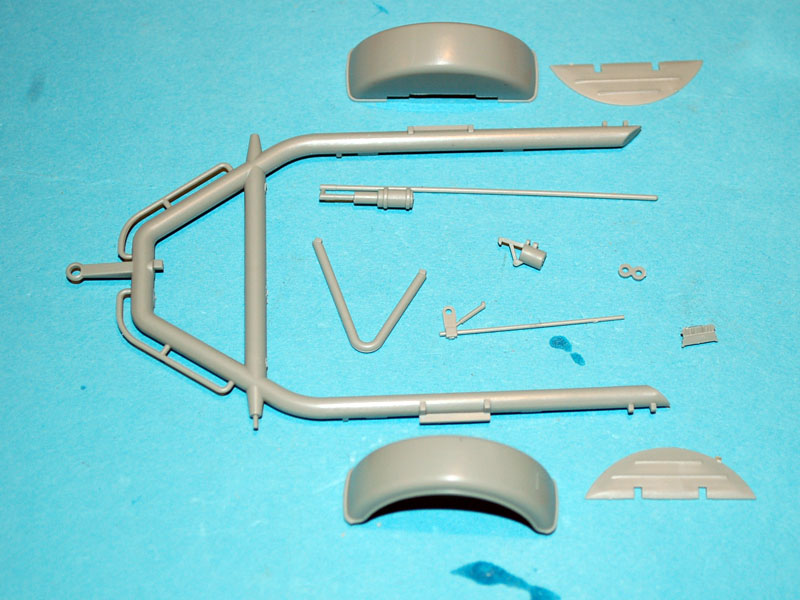
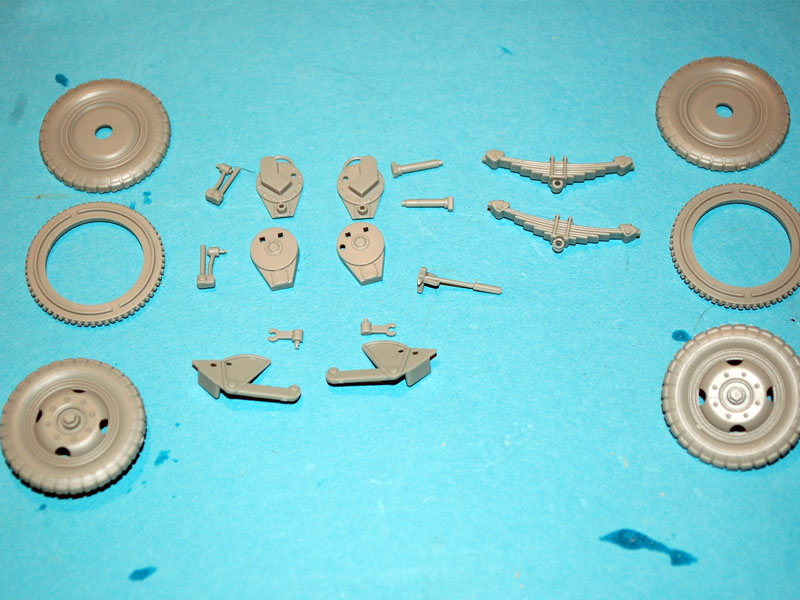
The trailer is assembled in two stages and really goes together very well. There is again very little to do in the way of clean up as the connection points are small in size and number. The wheels are a three piece assembly resulting in well detailed tyres and a realistic look to the tread. I cannot tell you how well the gun fits on the trailer, but I see no reason why it should not be very good.
Conclusion
This model is of a very high standard and from the images I have checked it appears accurate with the exception the gunners seat, as in the reference pictures I have it had three holes in it. Detail is all present judging by the reference images and the only insurmountable problem I encountered was the fault of myself placing some PE incorrectly. The instructions could do with a little work, mostly in terms of correct part location.
Great Wall Hobby have done a very good job in designing this model, and not just when it comes to the finished model. The effort they have put into the part layout and minimal connection points deserves a great deal of praise. The only improvement missing from the base kit which is left to improve it is a turned metal barrel, or more accurately the flash suppressor.
SUMMARY
Highs: A very well designed and laid out model which competitors will be pushed to better.Lows: There are a couple of errors in the instructions and one part that was not labeled on the sprue. Part location on the model could be better explained in the instructions.Verdict: An exceptional model at a reasonable price that will look equally as impressive either displayed towed or ready to fire. Very highly recommended.
Our Thanks to Airbrushes.com! This item was provided by them for the purpose of having it reviewed on this KitMaker Network site. If you would like your kit, book, or product reviewed, please contact us.
About Darren Baker (CMOT) FROM: ENGLAND - SOUTH WEST, UNITED KINGDOM
I have been building model kits since the early 70s starting with Airfix kits of mostly aircraft, then progressing to the point I am at now building predominantly armour kits from all countries and time periods. Living in the middle of Salisbury plain since the 70s, I have had lots of opportunitie...


Comments