The Jagdpanzer IV, Sd.Kfz. 162, was a tank destroyer based on the Panzer IV chassis that was built in three main variants. As one of the casemate style turret-less Jagdpanzer ("Hunting tank") designs, it was developed as a replacement and to augment the Sturmgeschütz III (StuG III).
The Jagdpanzer IV used the basic Panzer IV chassis, but the near vertical hull plates were replaced by sloped armor plates. The new superstructure had 80 mm thick sloped armor, which gave a much greater armor protection than vertical armor of 100 mm. Since the Jagdpanzer lacked a turret, many components relating to the Panzer IV's turret could be eliminated. To further make the manufacturing process as simple as possible, the superstructure was made up of large, interlocking plates which were welded together. These and other simplifications also resulted in a faster production rate and reduced maintenance requirements compared to a regular turreted tank.
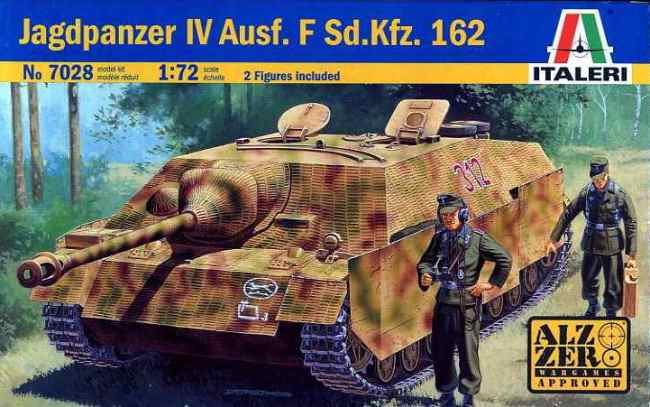
The subject of this review will be the 1/72 scale Italeri Jagdpanzer IV Ausf. F, kit #7028.
Contents
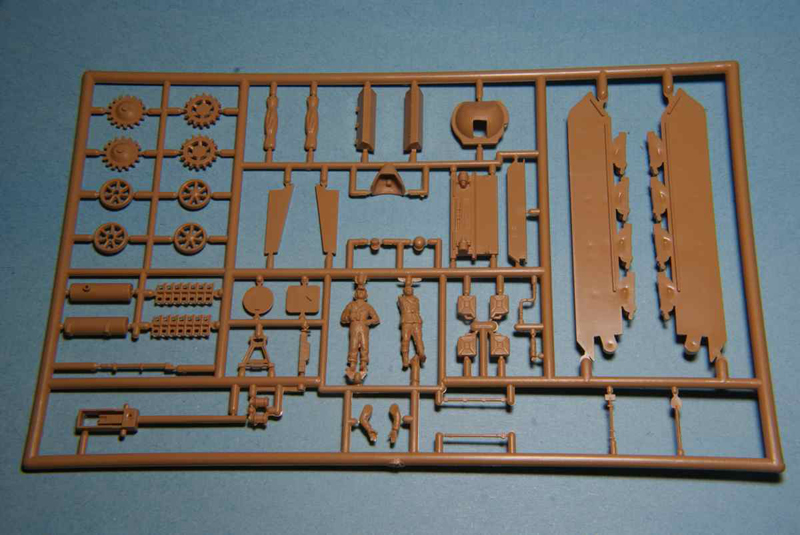
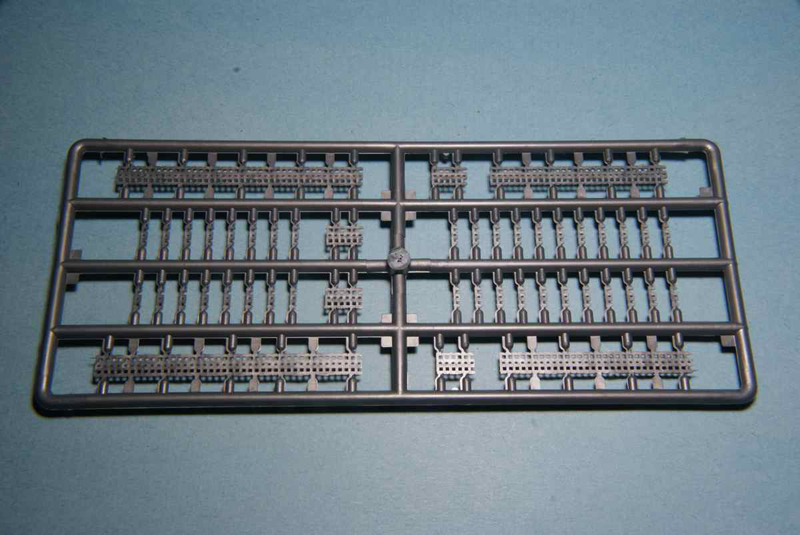
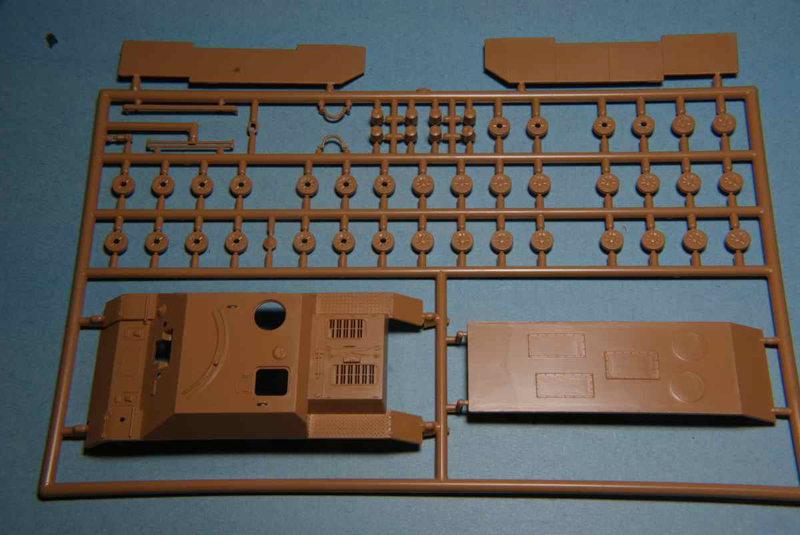
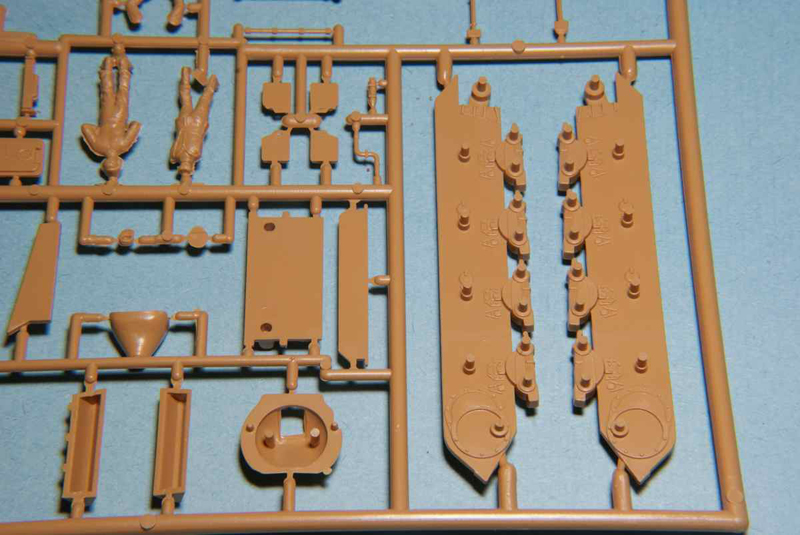
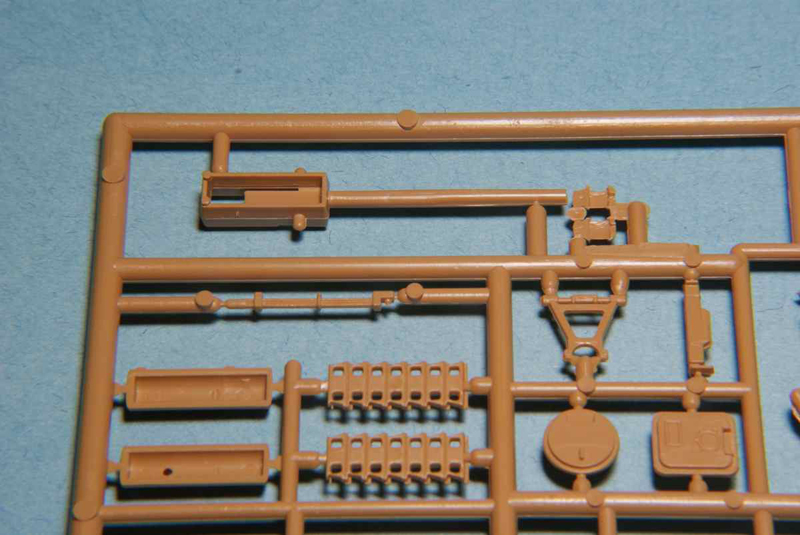
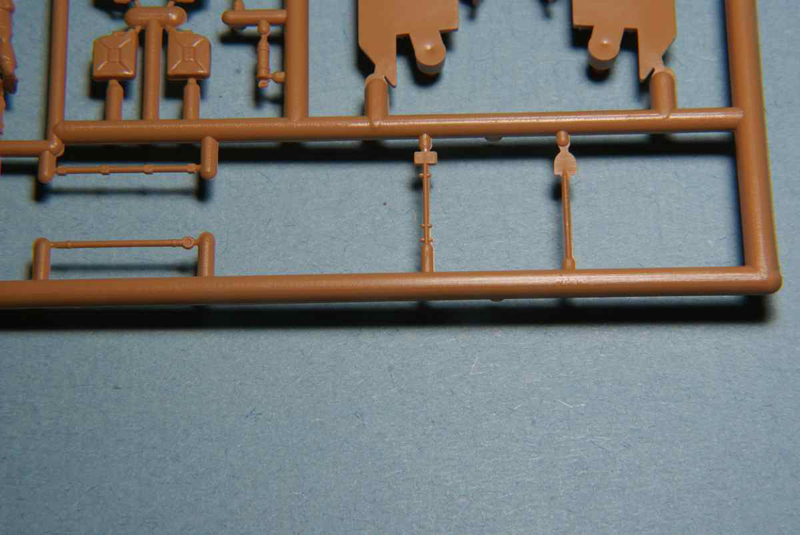
The kit is packaged in a side opening cardboard box with a multi coloured painting guide for three vehicles on its back. The box contains three kit sprues, two moulded in a light tan plastic and one (the track links) in a metallic grey colour. Sprue A contains 48 parts, sprue B has 55 and the C sprue (grey), 46 parts. Seven parts are marked as unused, but all but one might have a place to be used during the build.
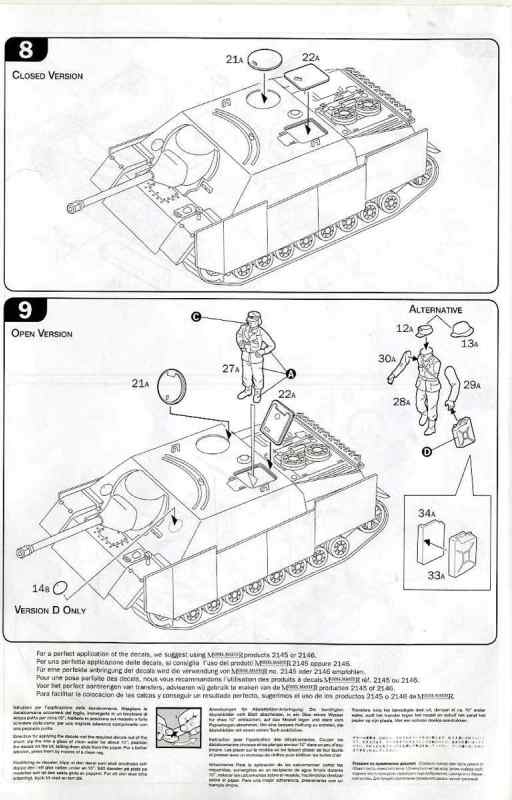
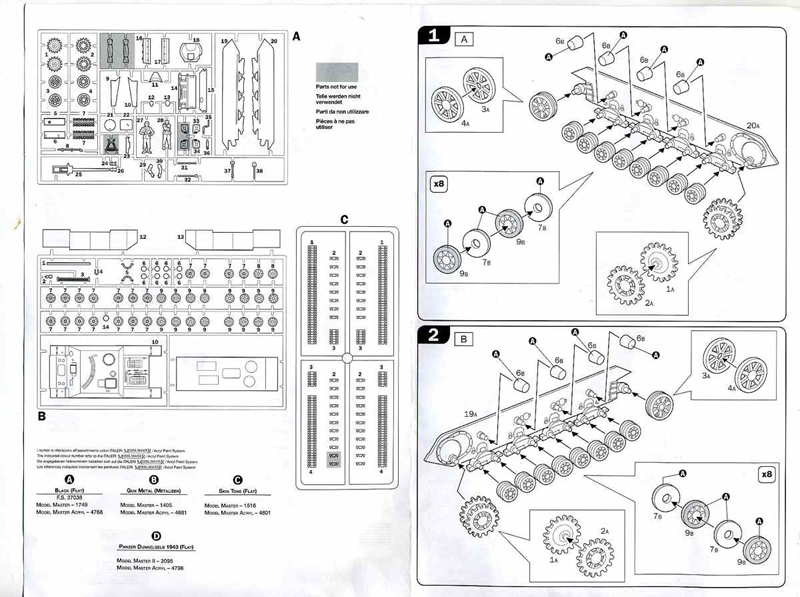
Also included is a 10 sided instruction guide with assembly instructions and a grayscale painting guide for four vehicles. The assembly instructions are in the form of exploded view drawings with arrows directing parts placement. Assembly comprises 9 steps with multiple parts being placed in each step.
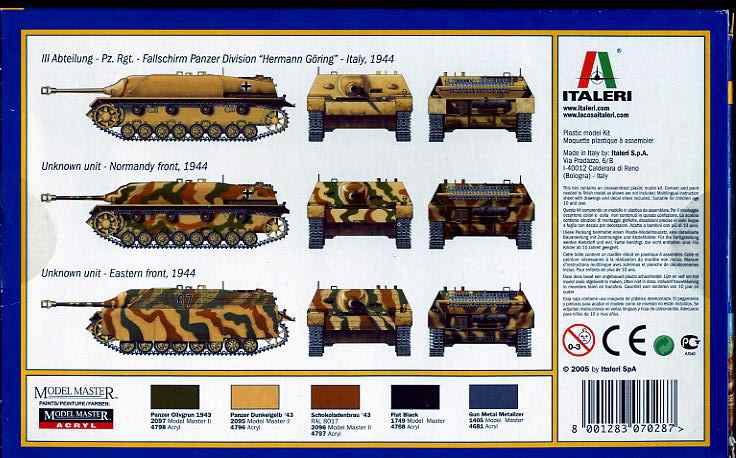
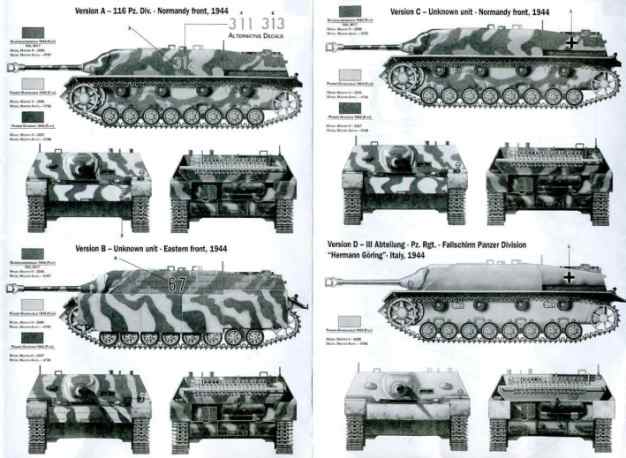
The finishing guide of the instructions shows four illustrations of vehicles. Three are in three colour camouflage schemes and one is a plain Dunkelgelb (sand) colour.
Water slide decals are provided for four different German Army units and are nicely detailed and in register. The decals are for:
116 Pz. Div. - Normandy front 1944
An unknown unit - Eastern front, 1944
An unknown unit - Normandy, 1944
III Abtellung - Pz. Rgt. - Fallschirm Panzer Division Herman Goring - Italy, 1944
Review
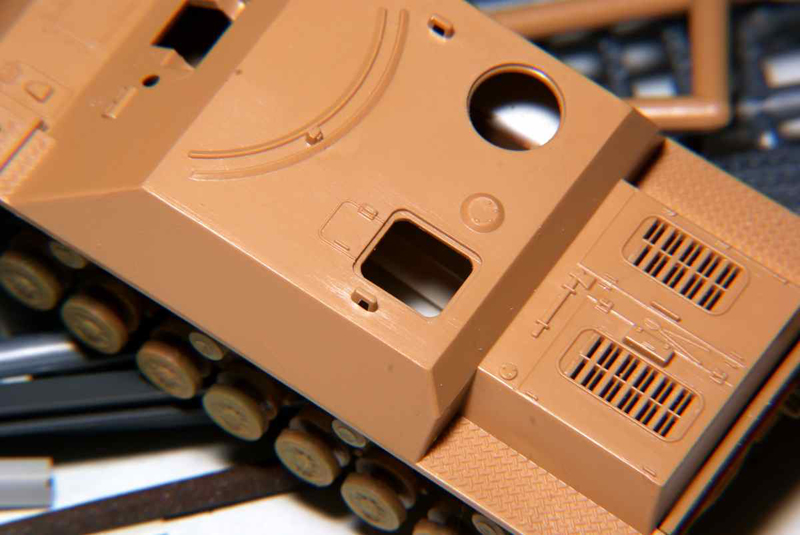
It was quite obvious that this is an older ESCI kit rereleased by Italeri. Having built this kit in its former incarnation, nothing appears to have changed as far as the main body and detail parts are concerned. As with the former kit, details are not the most pronounced and in some cases quite light. The one exception is the engine compartment louvers which are quite nicely represented. Unlike the older kit, Italeri has substituted a sprue of link and length tracks for the one piece rubber band type.
The sprues appear to be predominantly flash free and decently moulded. Mould seam lines were fairly light and ejector pin marks were few and in most cases limited to surfaces that will not be seen after construction. The new link and length tracks have acceptable outer detailing but lack any inner details and the guide horns are very undersized.
I foresaw few, if any, major flaws in the instructions and construction process. Care will have to be taken when assembling the drive sprockets and idler halves as they have no orientation locating tabs to help keep the teeth and/or spokes in alignment. I also had concerns that the necessary parts layout for assembling the tracks would prove incorrect. It has been my experience with several manufacturers that these individual track links have yet to work out as the instructions suggest.
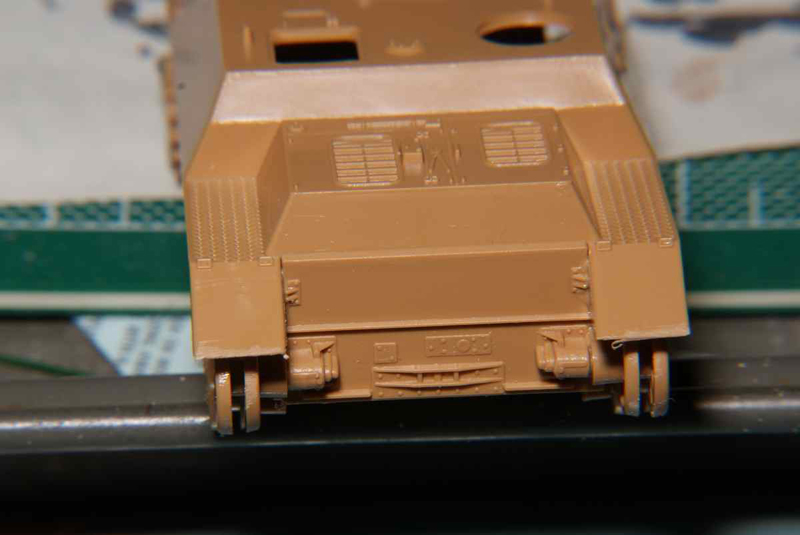
One very nice aspect, for such an old kit, is that all the tools are provided as individual pieces and not moulded on. The side skirts or Schürzen are moulded quite thin but would have been better represented with photo-etch alternatives. Unfortunately, the same cannot be said for the armor extensions of the superstructure over the engine compartment. These are fairly substantial and a purist may wish to replace them with a thinner alternative.
With all this said, it should be noted that this kit is marketed as Wargames Approved. As such, its not intended to be a museum quality representation of the subject.
Build Observations
I started the build with both an open mind and a curiosity to see how the old moulds had endured. The first two steps of the instructions involve assembling the running gear on their respective hull sides. Speaking of instructions, there are references to part numbers but no numbers appear on the sprues. You have to refer to a part numbering diagram of the sprues.
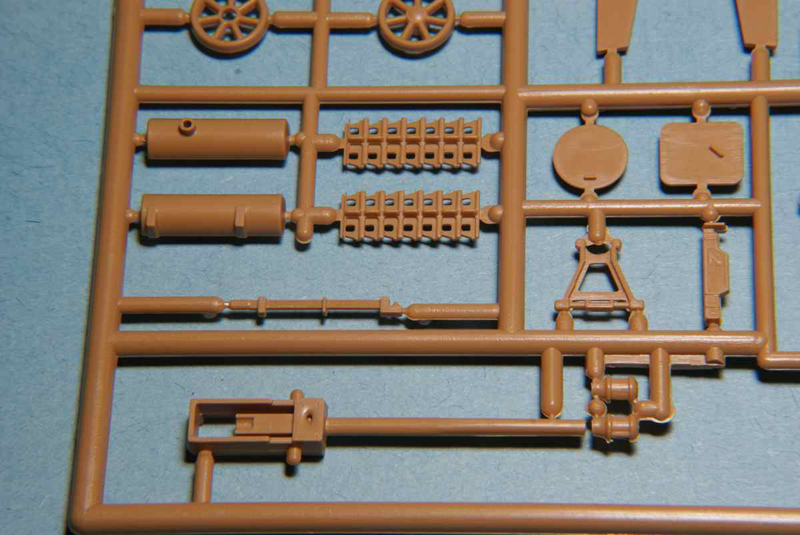
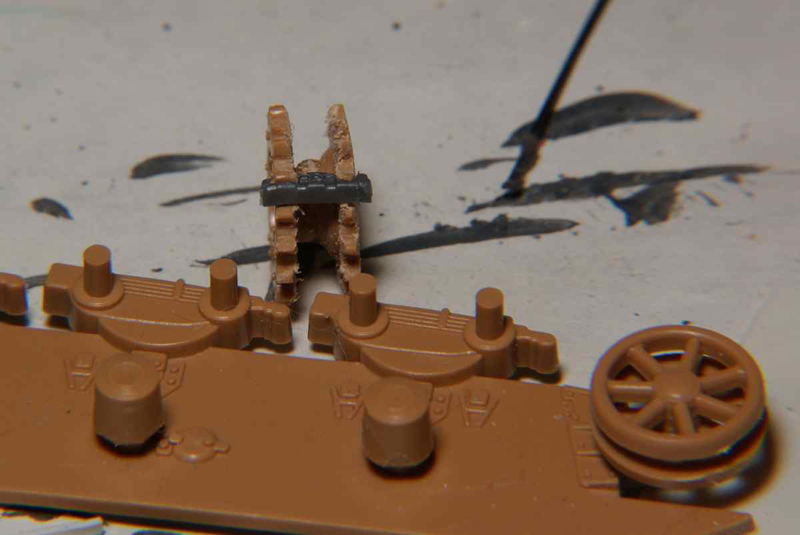
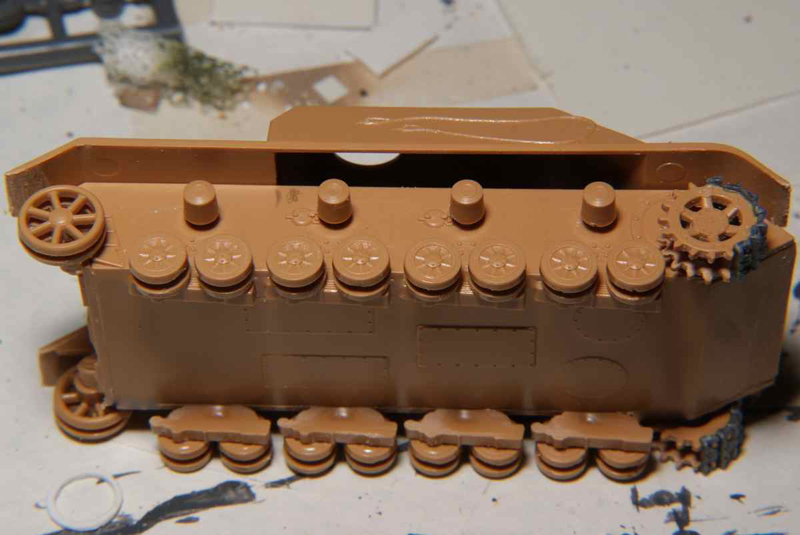
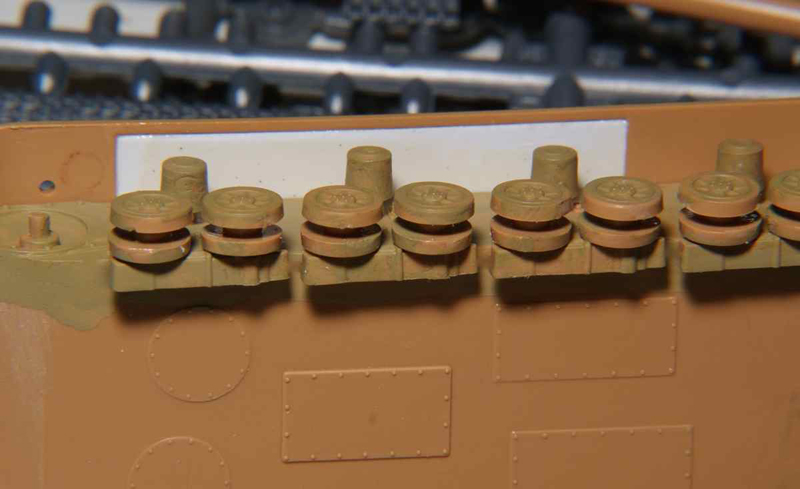
I started by attaching the return rollers to each side. The detail on these is very light and they are moulded as a single piece (rather than two separate wheels). It immediately became apparent to me that without a central opening the minimal guide horns on the tracks would not sit properly. The fit of the rollers on their locating pins or axles was extremely tight. Considerable pressure needed to be applied for them to sit flush. Once placed I felt that it was unnecessary to glue them.
The road wheels are two pieces and exhibited a similar tightness when assembling their two halves. Placing them on their respective pins or axles was marginally easier than the return rollers and considering that there are sixteen pairs the process went quite quickly. Once affixed, I turned my attention to the drive sprockets and idlers.
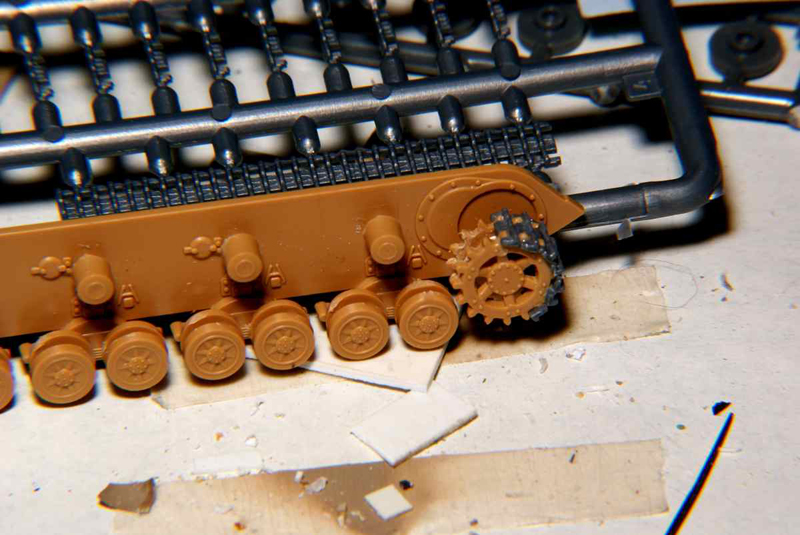
As mentioned earlier, I had to take care to make sure the teeth and spokes aligned between both halves of their respective pieces. It was also at this point that I decided to see how the track links would interact with the teeth of the sprockets. Not surprisingly, either the teeth are too large or the openings in the track too small. Using needle files I thinned nine pairs of teeth on each of the sprockets. Using track pieces as a gauge, I continued thinning until I was satisfied that the fit was appropriate.
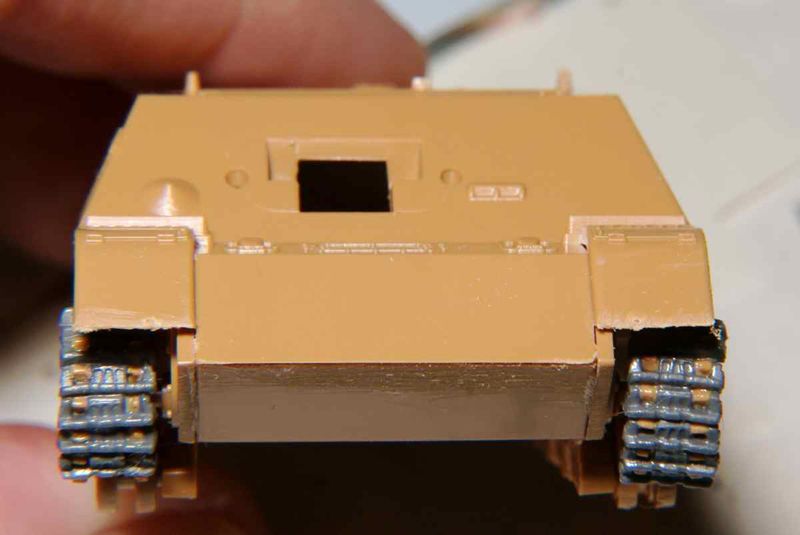
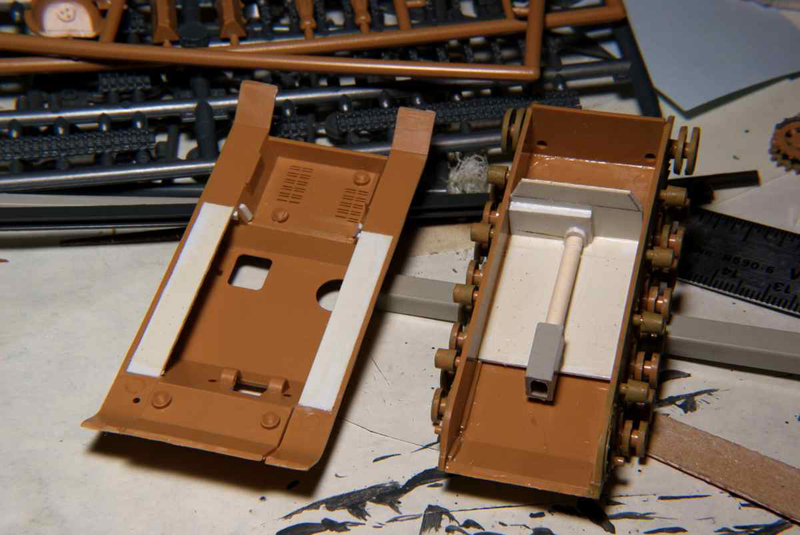
Step three involved attaching all the tracks and then assembling the hull bottom, two sides and rear plate to form the completed hull tub. I started with the tracks and that proved to be an act of patience and perseverance. From previous experience I knew that the fit would be better if I filed the connecting ends of each link while still on the sprue. I followed the instructions and put eight links around each sprocket. Once I had the links around each sprocket I decided to join all the hull pieces. There were a few really huge sprue attachment points to deal with but the fit wasn't too bad, although I did have to deal with some slight warping of the hull floor and sides.
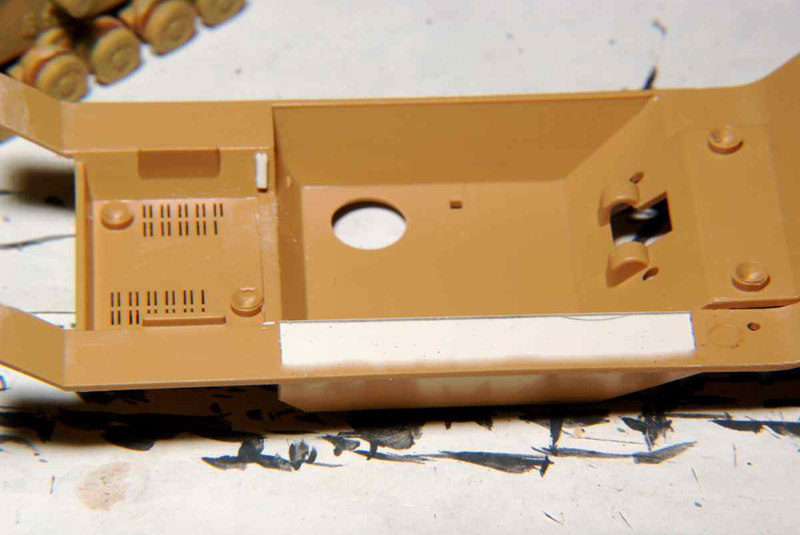
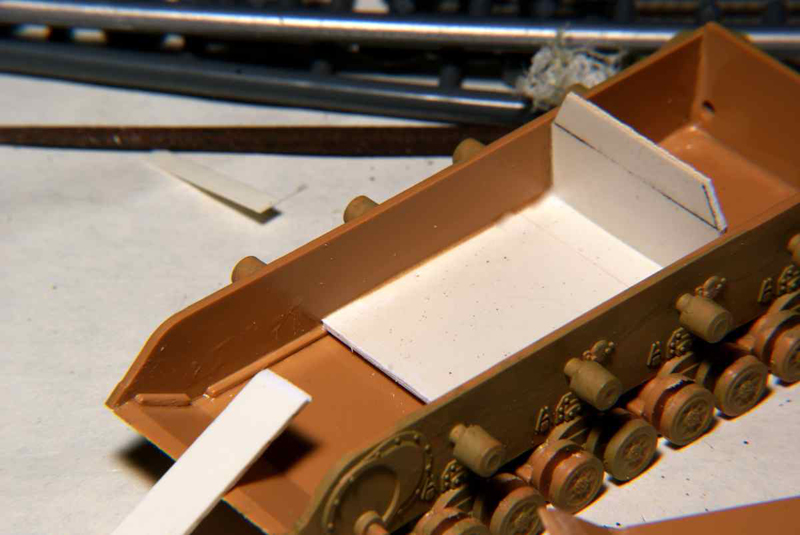
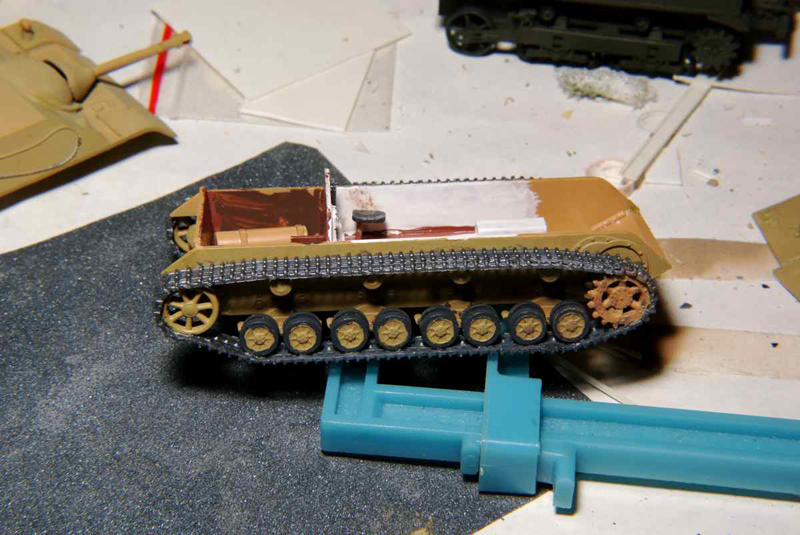
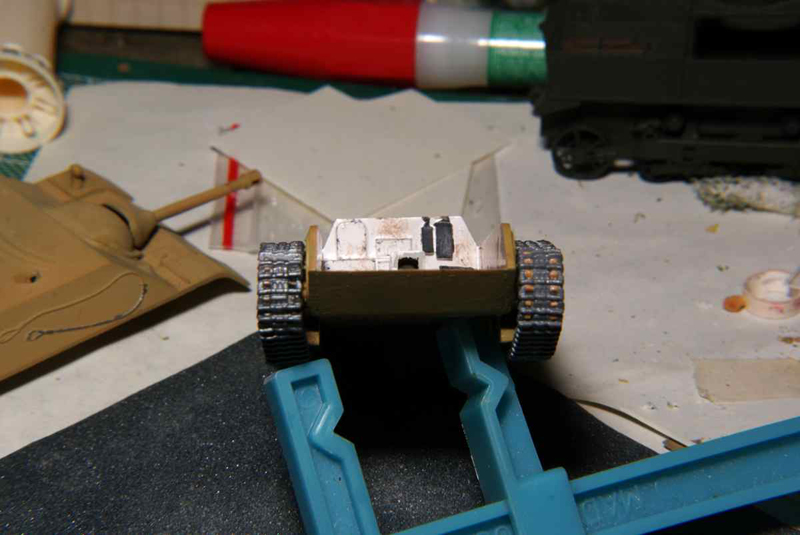
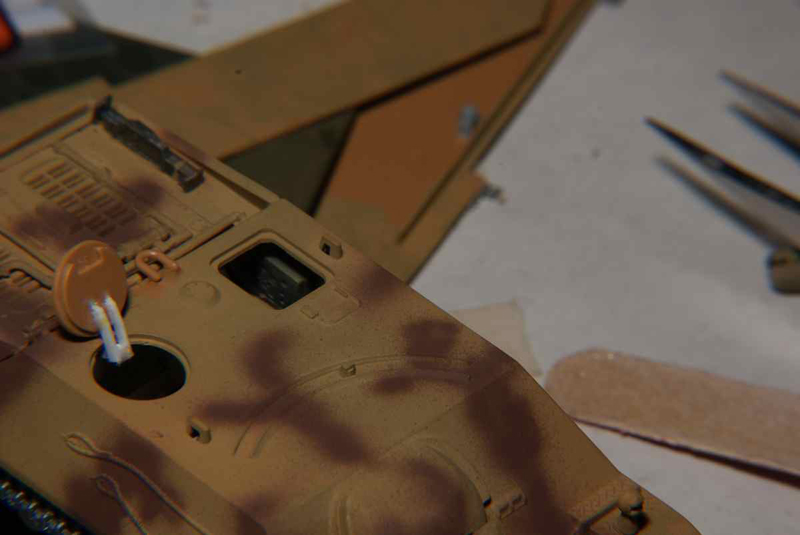
As I wanted to leave the hatches open, I decided that Id have to do something about the missing fender sections in the fighting compartment. It was obvious that light would show through even with the side skirts on. Construction of the regular kit parts was put on hold while I dealt with the situation. I found some very nice pictures of a JPz-IV interior and used them as a model for a simplified interior. First I had to get the area with the missing fender taken care of. This point was accomplished by cutting appropriate pieces of flat styrene sheet and attaching them to the open areas. After this I next decided to start on the interior firewall and a floor. Again I used sheet styrene and cut the pieces to fit. As the view through the hatches will still be rather restricted, I decided to extend the floor to only two-thirds the interior length. This was followed by a few details added from my references. A crude transfer case, fuel tank and the drive shaft tunnel were added. I used Evergreen tubing and preformed pieces for these. After a few more subtle detail pieces were added I was happy with the representation and after painting the interior, returned to finish the tracks.
As is usual with these type of tracks, the instructions were not quite correct when it came to positioning the individual links. While I did use eight links on the idlers the positioning of the other pieces varied. Not only that, but each side required one link less than was called for. There is a certain amount of uncertainty when using these type of tracks and I have seen the same kit use various combinations of pieces depending on the modeller. One will just have to take their time and see what will work for them.
After my little detours I returned to the instructions and began step #4 and #5 of the instructions. These steps comprise the construction of the gun and mantlet and the adding of a few detail pieces to the upper hull. The worst thing was the gun muzzle break as it came in two longitudinal pieces with no locating pins or tabs. Add to that the fact that it also had no mounting mechanism to the barrel other than a flat piece to a flat piece. The step also called for the attachment of the side skirts but to facilitate painting, I left them for later.
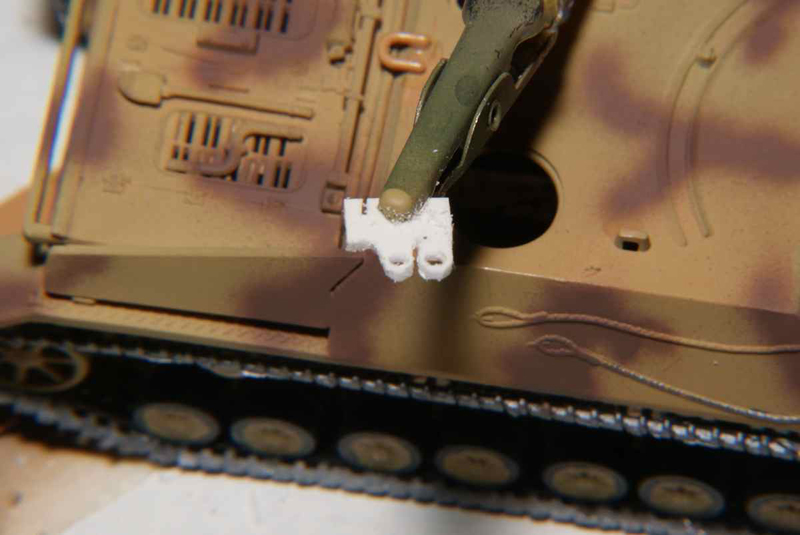
Step #6 and #7 continue the addition of external hull pieces to the kit. This went without incident, although I did leave off the spare road wheels to make painting easier. It was also at this stage that I added a few missing small detail pieces. Reference photos showed that the front glacis plate had prominent towing eyes mounted on it. I fashioned some out of scrap styrene and attached them. I also noted from pictures that the muffler has two prominent bands around it, securing it to the rear. These were added as well as a small box to the left of the muffler.
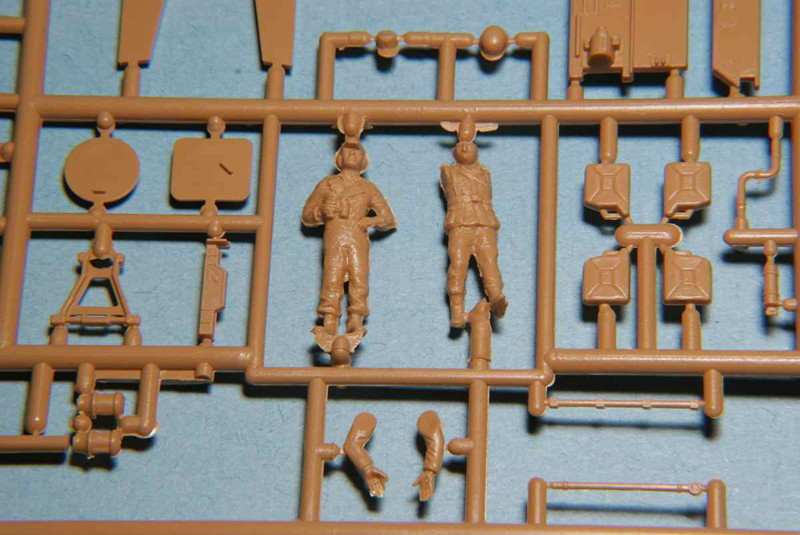
The final assembly steps are to attach the hatches and assemble and place the crew figures. Since the hatches have no prominent attachment mechanism and I wanted to leave them open, I made a few modifications to them using very thin Evergreen precut styrene strips. With the exception of the skirts, the hatches were glued and the upper and lower body were joined and assembly was mostly complete.
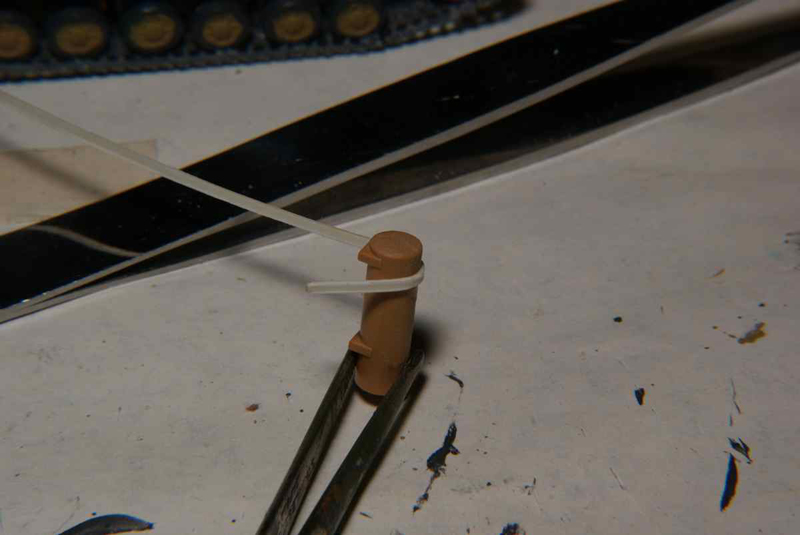
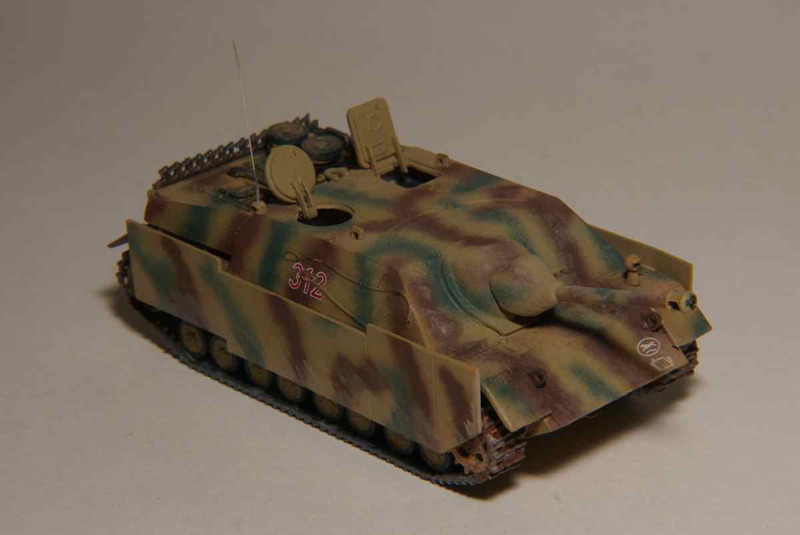
After some preliminary painting I attached the two pair of spare road wheels to their mounting frame and then to the rear engine deck. One should note that there are no holes or locating marks to show where the frames attach. I had to rely on pictures that I had of similar vehicles for the positioning. At this point I also attached an antenna to a scratch built mount just behind the loaders hatch. The mount which can be seen in pictures was conspicuously absent from the kit.
The final parts of assembly were the placing of the spare tracks into the rack at the hull rear.
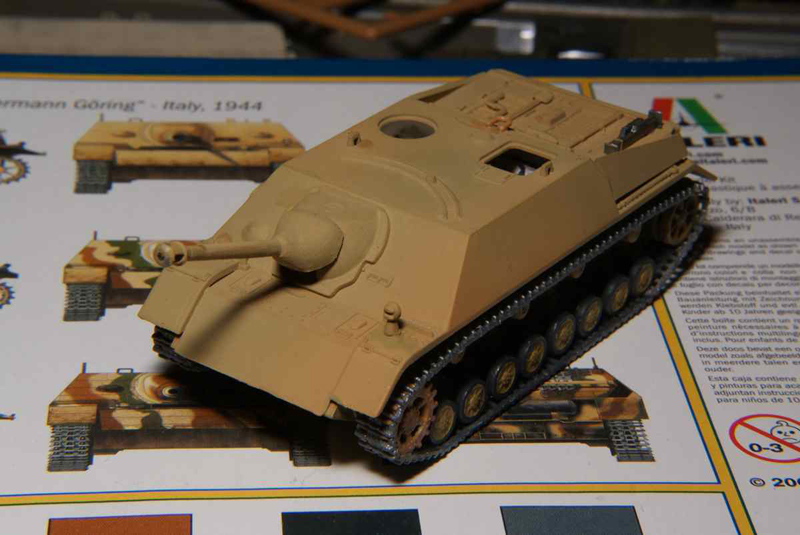
Finishing
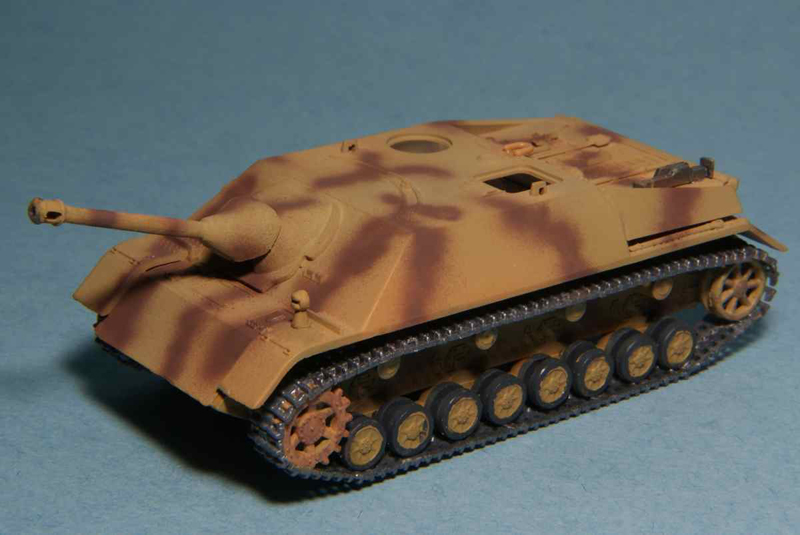
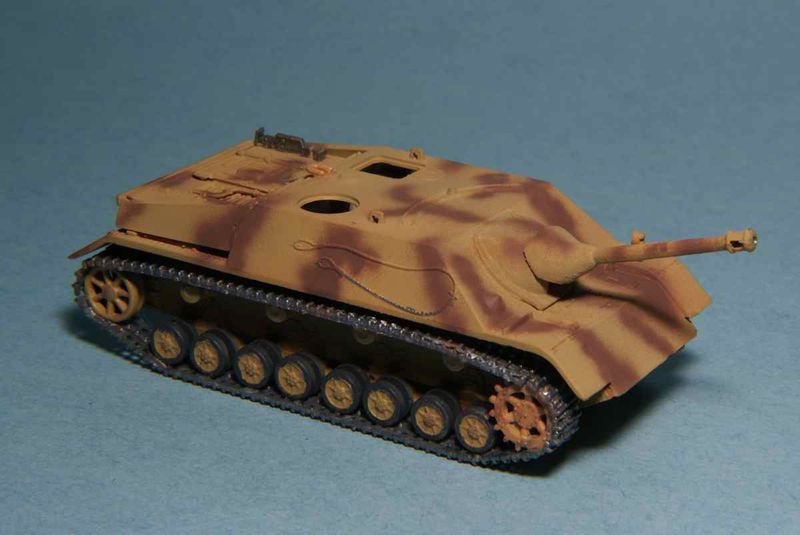
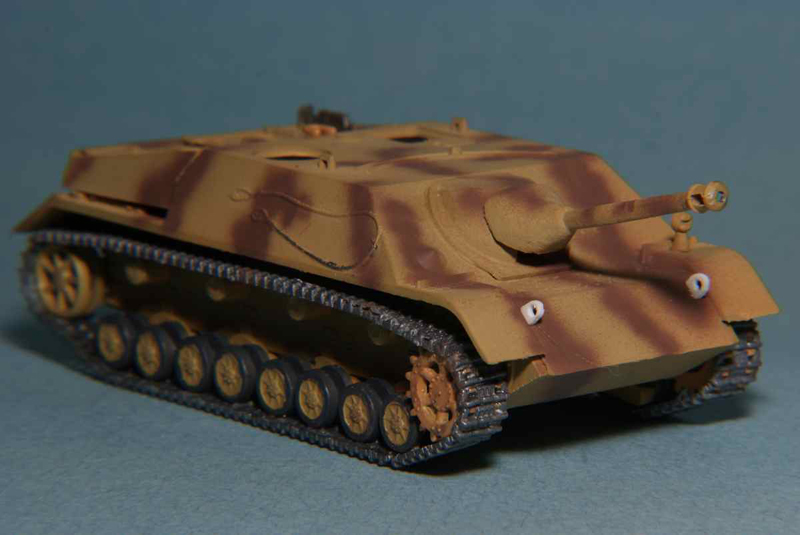
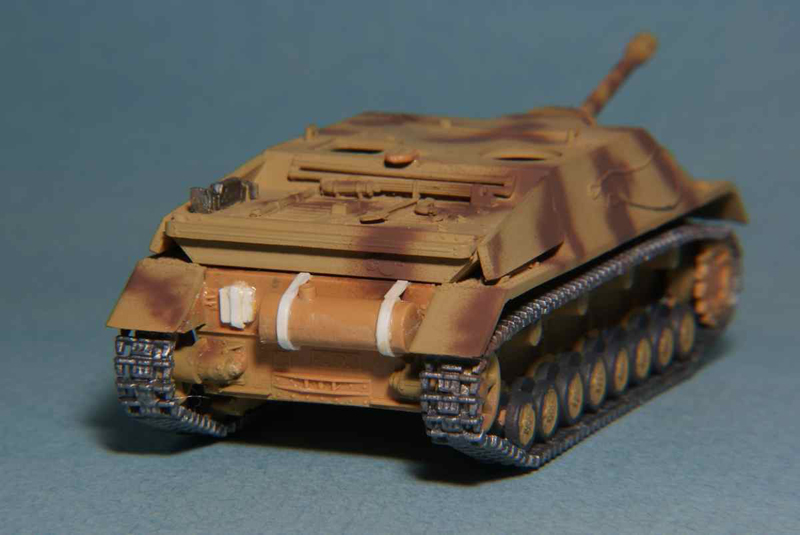
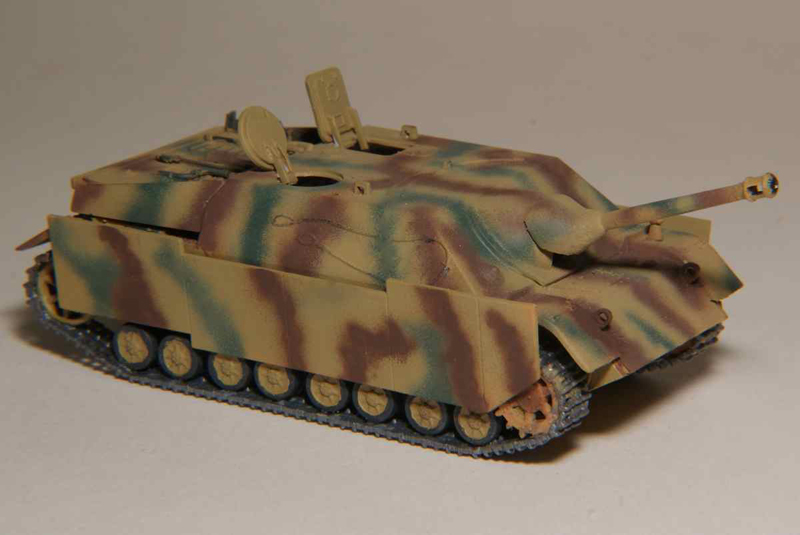
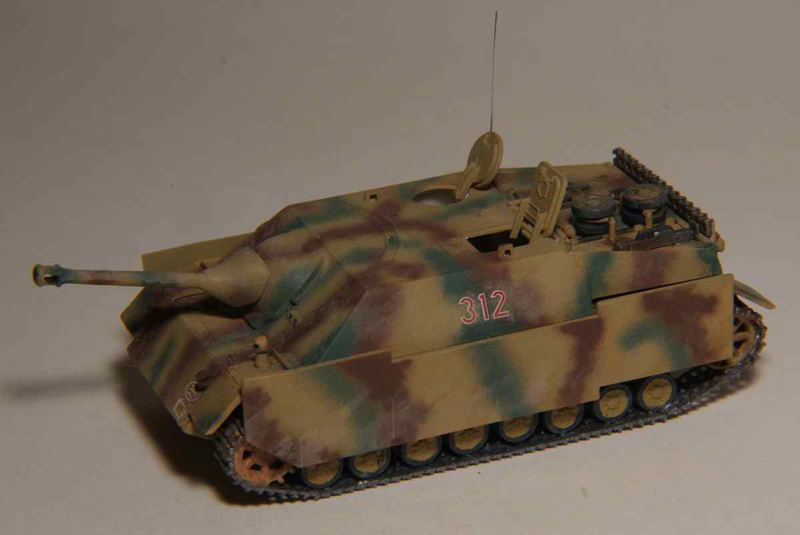
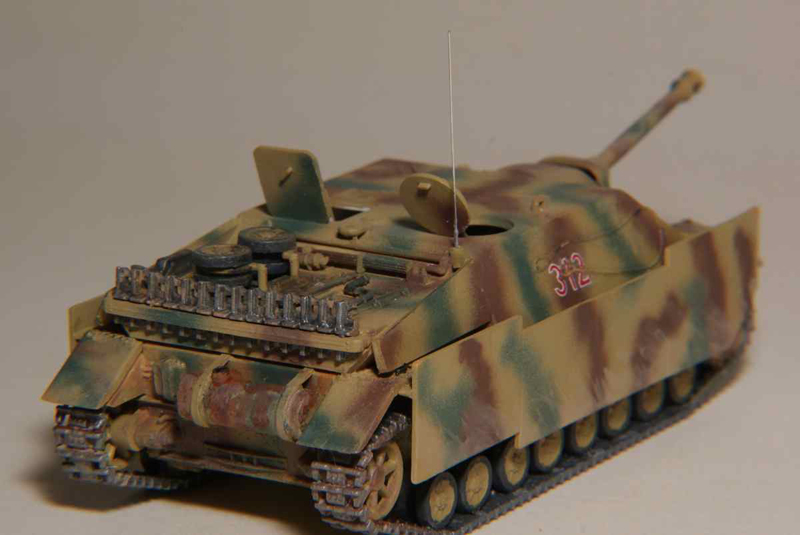
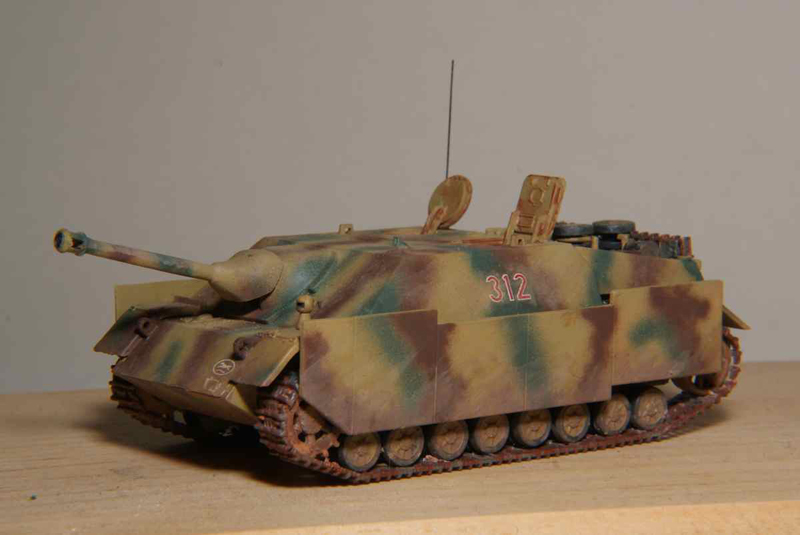
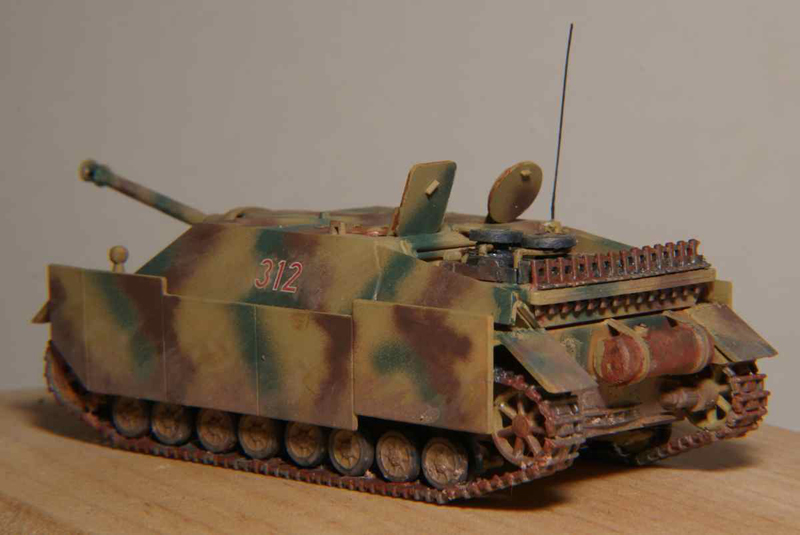
I chose to make this vehicle as that from the 166 Pz. Div. in Normandy. The finished model was painted with acrylic paints using Tamiya and Model Master brands. The base colour was Tamiya Dark Yellow (XF-60) and this was later over-sprayed with Model Master Acryl Schockladnbraun (4797) and Panzer Olivgrun 43 (4798). Each of these colours was lightened with flat white to help achieve colour scale effect.
Following the camouflage colouring, various colours were used to pick out details (tools, road wheel rubber etc). A coat of Future acrylic coating was sprayed over the model and when dry enough, the decals were applied. After all was dry, a final coat of Future was applied to seal the decals. After weathering the entire model received several coats of Model Master Flat Clear Acryl (4636) to dull the glossiness.
Conclusion
While hardy a state of the art modern kit, these old moulds seemed to have not aged too badly. The link and length tracks are an improvement over the previous plain and thick rubber band tracks and the mostly individual tools were an advance for the original kit. Assembly is fairly straight forward and parts fit quite acceptable. This is a perfect kit for those just staring out or returning to the hobby after an absence. There is room for improvement and the basic kit could be an interesting choice for even moderate skilled builders to use as a base to improve or learn new techniques.
SUMMARY
Highs: Overall good fit and has good possibilities as a base for enhancement.Lows: Link and length tracks with somewhat poor fit and lack of inner details. Some parts too thick.Verdict: Not perfect, but a great kit for those new to the hobby or interested in wargaming pieces.
I've been building models since about age 10 with the occasional hiatus due to real life events. First armour model was a 1/76 Airfix Tiger I and was followed by a 1/72 Revell F4U Corsair. I've built primarily 1/76 and 1/72 armour and aircraft but occasionally have tinkered in other larger scales....
Thanks for the compliment Kirk. I have "run into" a number of people recently that either desire to or are returning to the hobby after a long absence. The first question that many ask is if I can recommend a good "starter" kit. At least in my immediate area, Italeri kits seem to have a large presence. I've built a number of ESCI kits in the past and wanted to see how these reincarnations held up. Might I just suggest that you try to find some reviews of the kits before you decide on one to purchase. Some, like this one are not too bad but I have heard horror stories about others being anything but.
Oh, one point I failed to mention in the review was that despite the box art, the model does not display any Zimeritt. It's not really a big issue as the first JPz did not have it applied and after I believe mid 1944 the last batch also did not have it.
Cheers,
Jan
Matan, thanks for the comment and yes, compared to other L&L tracks, the kit ones leave a lot to be desired. With that said, the original vinyl tracks are several times worse. Here's some pictures of the original ESCI tracks.
It's no wonder I never finished the first one I built. However, I do believe that MACO are soon to offer replacement Pz-IV tracks and there a few other after market makers. Henk of Holland has a preview of the MACO offering.
Cheers,
Jan
Excellent review, Jan
You've provided a clear, acurate description of the model, even though the ESCI/Italeri Jagdpanzer IV is a bit rough.
The L & L tracks Italeri provided are poor compared to todays standards, at least they are better than the original rubberband tracks ESCI produced.
Thanks Jeff, as a positive comment always has the ability to keep me carrying on with doing reviews. While rough in certain ways, the basic model has some serious potential for someone wishing to experiment and learn new skills or techniques. I experimented during the build with trying to replicate Zimeritt with Squadron putty on strips of sheet styrene but it proved less than acceptable. One interesting note, the fit of the upper body to the hull was extremely good and secure. A real masochist could have replicated an entire interior and had it viewable due to the way in which the two parts fit so well.
Cheers,
Jan
Informative and intense review, Jan. The interior made with simple plastic pieces really is enlightening. Sneaky too, as you usually do a blog in the Braille Scale area. I'll put this kit down on my list of potential possibilities.
Regards,
Aj
Thanks AJ but not all my reviews are accompanied by a blog. Besides, about 98% of the build does appear in the build review. I'll post some finished pictures in the Braille Forum as soon as I can.
Cheers,
Jan


Comments