introduction
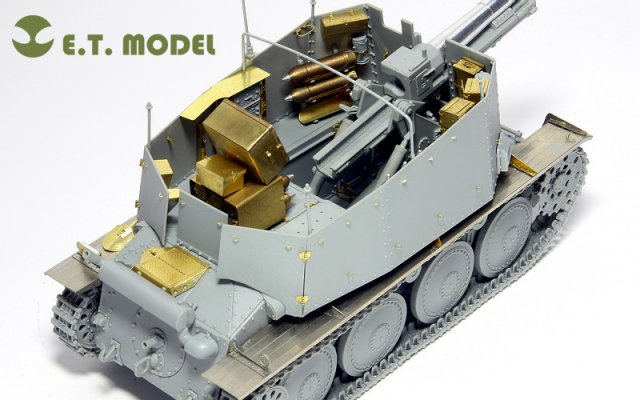
E.T. Model out of China is a fairly new producer of photo etch, resin upgrade sets and accessories for 1/35 and 1/72 scales. The PE set up for review here is designed for Dragons Sd.Kfz. 138/1 Geschutzwagen 38 H fur s.I.G. 33/1 Grille, kit #6470, which is
reviewed here on Armorama by Bill Plunk. The DML kit contains a fair amount of PE already and the styrene kit seems to be well detailed, so lets see what this upgrade set will do to enhance it.
contents
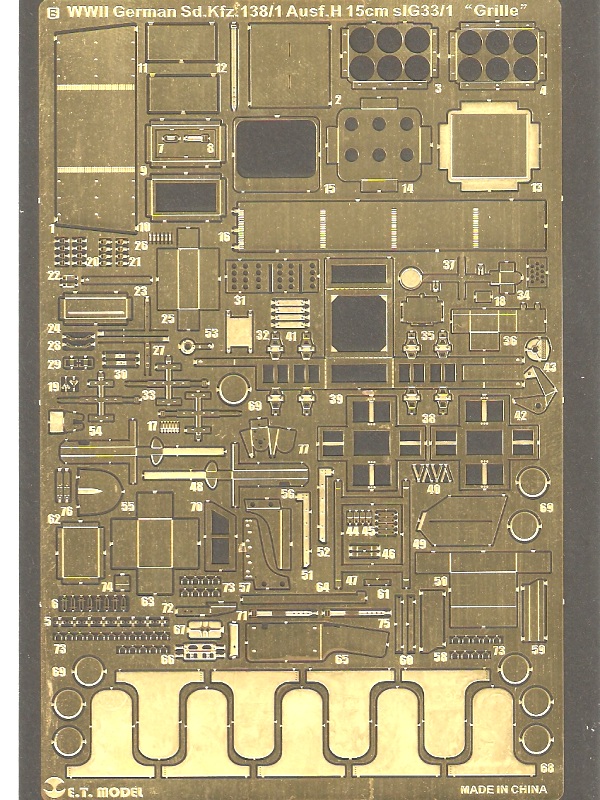
The set contains four PE frets taped to a card backer along with a single sided sheet of instructions, all packed in a plastic bag stapled to a header. All arrived safely to my door, so this typical type of packaging for PE seems to work well. The largest fret measures approx. 145mm x 95mm with the smallest a mere 23mm x 20mm. No additional items are included such as wire or ABS rod, these will need to be obtained by the modeler as the instructions call for them to be used during construction. The fenders are also not included, although a couple of fender brackets are. The fenders are available as a separate item (EA 35002) for around 10 bucks.
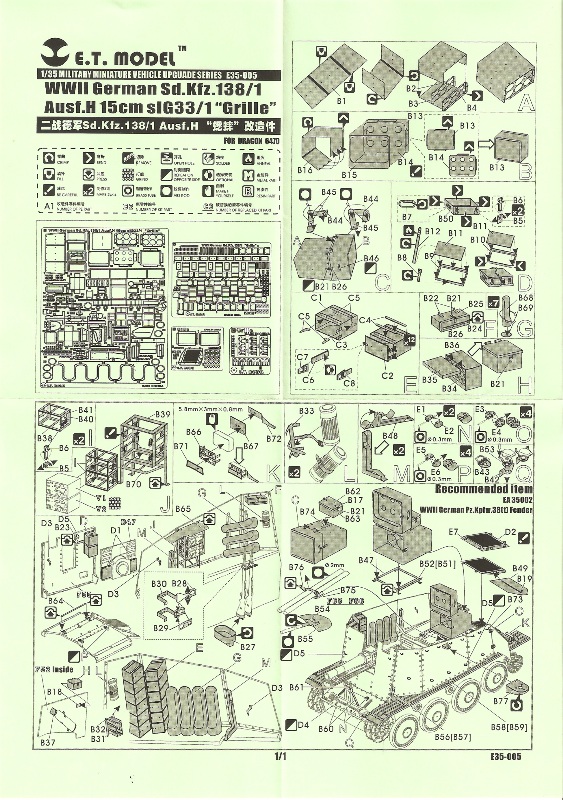
The instructions for the entire set are contained on one page, with the build sequence using about 75% of that. Its broken down into sub-assemblies for the most part and quite busy with poor views of assembly and placement on some items. I believe this was one of E.T. Models first sets, so I hope they have improved on this area.
the set
Fret B is the largest of the bunch and contains an all around assortment of parts. Among the most notable are the large shell box which dominates the rear of the casemate and topped off with the smaller box set at an angle. The bracket to set this smaller box at the proper tilt is center mounted in the set, which I believe this would be more correct having two legs placed at the edges. Other boxes are provided that mount around the casemate walls, including the flare box (?) that can be set with the lid open to show off the inner detail.
The radio rack looks to be a thing of beauty and a huge improvement over the styrene counterpart. Shell holders will need to be curved into shape and they appear to have an overlap on the front to provide a stronger and easier join with either adhesive or solder, far better than trying to get a butt joint to hold. E.T. Model provides nine of these, with seven being needed. No straps are included for the shell holders that I can see, but four are included with the DML kit that may work leaving three to scrounge up or scratch.
A couple of duplicate parts from the DML kit are the rain shield, which is sized and shaped the same although the E.T. Model one depicts the fasteners. The vision block holder is also included in both kits with the E.T. Model one looking more correct on the size of the holes.
There is quite a bit more on this fret to add miscellaneous detail from front to back.
Fret C is dedicated to the charge boxes, and holds 16 of them which once again leaves extras. Each box is constructed of 8 or 9 pieces and can be set with the doors open or closed, and have interior detail. Youll need to provide your own charges if you wish to show them in place.
Fret D replaces the DML engine screen with one with a finer mesh, which also appears to be more correct than the original kit part, along with the air diverters (?) for the inner firewall and two sizes of loops for the outer surfaces.
Fret E is the baby of the set, providing the 10 working hinges for the rear armor plates, transmission hatch and engine hatches. Small bolt heads are on this fret to add to the engine screen on fret D.
in use
Photo Etch is pretty in the package, but how it handles is the true test. Bill Plunk shared an excellent
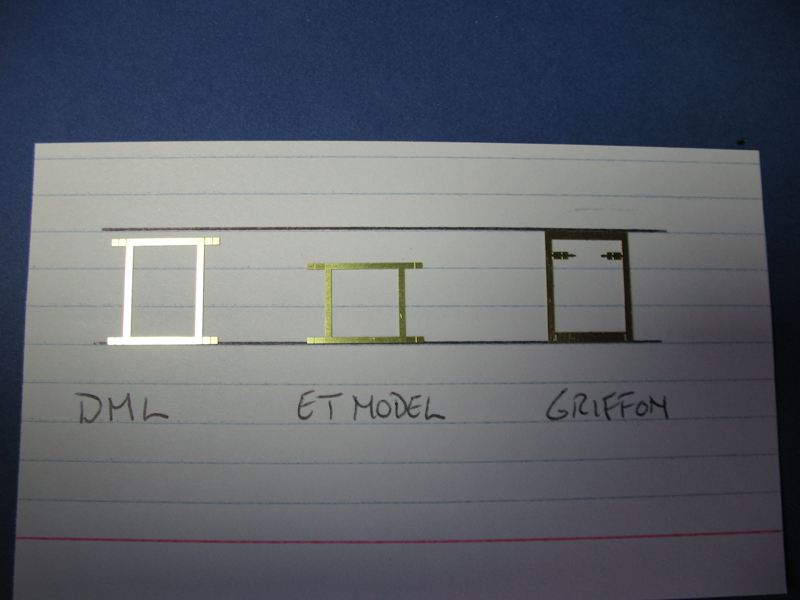
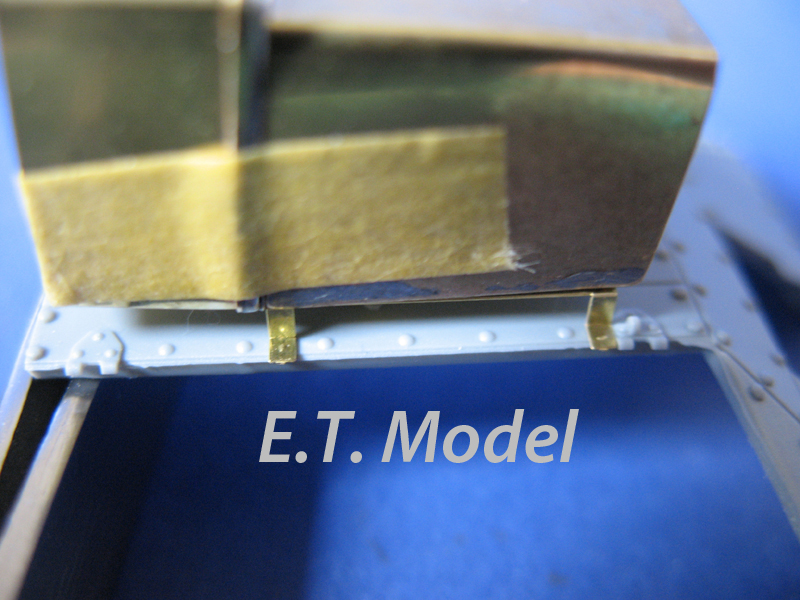
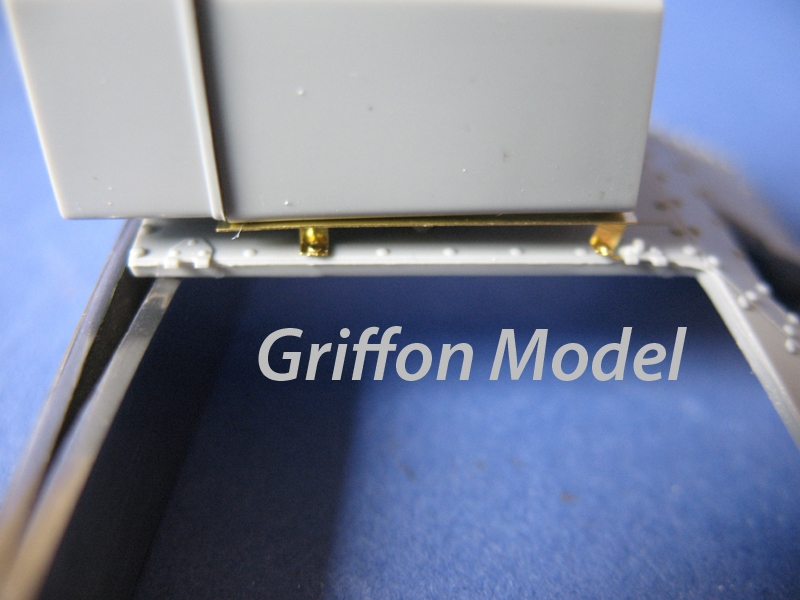
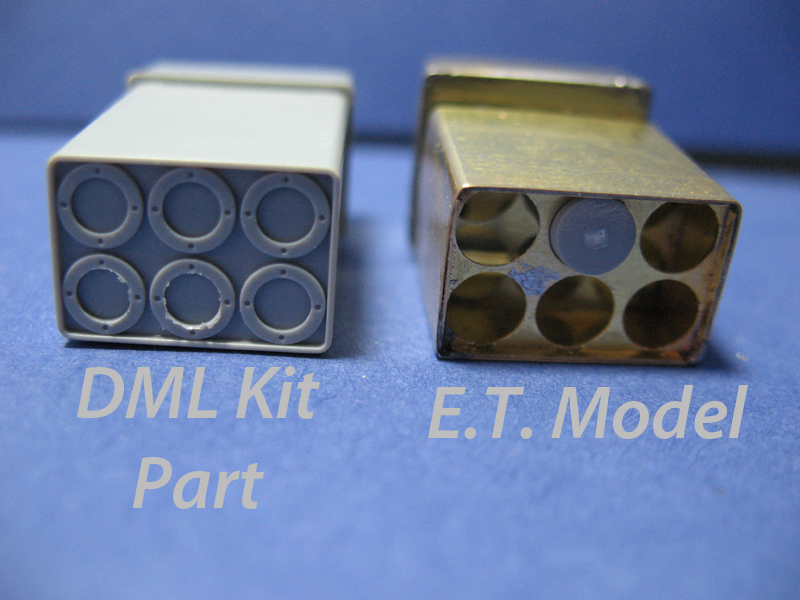
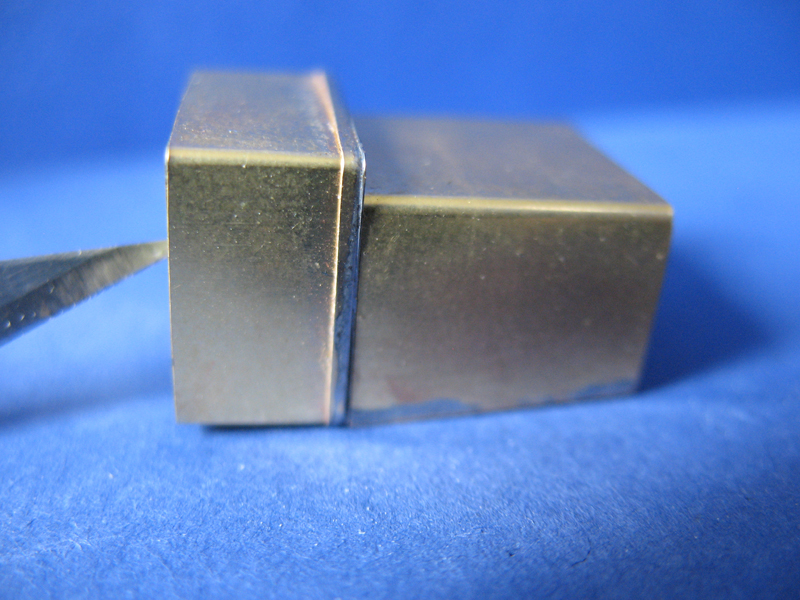
Build log of the DML kit this is designed for with us on Armorama, and one of the faults he noted was with the size and placement of the large shell box. And since that is also the first item to be constructed following the instructions, I thought Id give it a try. First was comparing the support frame, of which I included Griffon Model in the mix which uses the DML styrene shell box. As you can see in the images, all three differ not only in length, but in the location of the front feet. The E.T. Model one is pretty much spot on in size and location.
Building the box presented a few very small challenges. The instructions call for crimping the bends, which in reality means providing a radius bend. E.T. Model etches a series of short lines perpendicular to the bend which helps achieve a smooth curve. To achieve the radius I clamped a steel rod, (drill bit would work just fine) with a slightly smaller diameter than I wanted my bend to be, in my Bug. One of the bends is at the very edge of the piece and this method worked well holding it down. Not having any luck with adhesive on this, everything got soldered, which for a piece this size would be a good option to use. The hinges and handles didnt get installed yet as I just wanted to quickly check construction and the size.
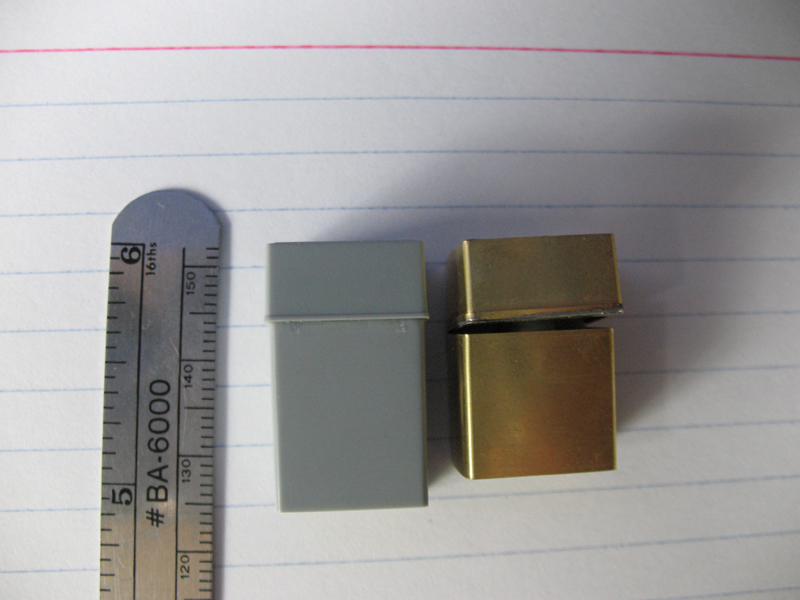
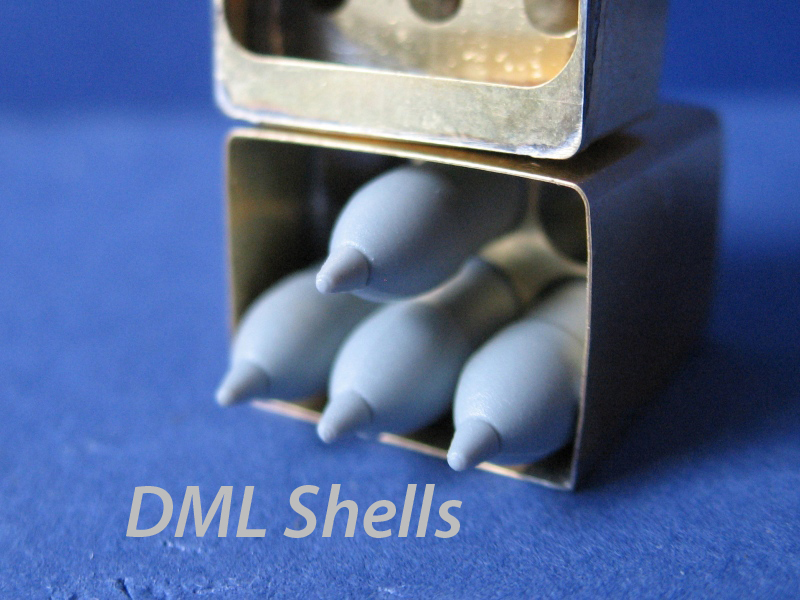
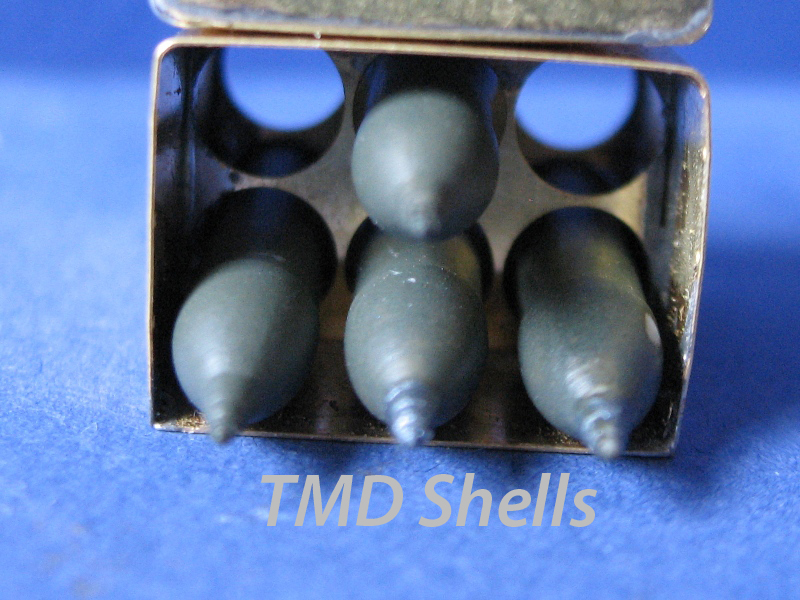
As the images show, there is a big difference between the Dragon styrene part and the E.T. Model piece. Judging by the few reference photos I have of this area, E.T. Model did an excellent job on correcting not only the total length, but also the ratio between the box and lid and the height of the lid. The Dragon shells (four included in the kit) fit well into the box, the TMD shells are a loose fit.
conclusion
E.T. Model seems to have given some thought on what to include in this set to work hand in hand with the DML PE. Instead of just replacing it all, they corrected some areas that needed to be and added enough enhancements to bring the Dragon kit to a higher level. Price wise I find this set very reasonable. Availability is another factor to consider, and for a fairly new company they have a good variety of vendors. All in all, this is a very nice set that Im looking forward to using.
Cost ranged from $18.32 to $21.31 at three vendors that I checked.
References:
MBI Marder III and Grille by
Francev and Kliment
Panzers 35(t) and 38(t) by
Spielberger
German Military Vehicles by
Doyle
PanzerKampfwagen 38(t) by
Gander


Comments