Introduction
Over the past 18 months, weve been treated to the Half-Track Wars between Dragon and Trumpeter as each company released multiple versions of the German Sd.Kfz.7 Prime Mover and its variants. The base vehicle saw over 12,000 units produced through 1944, and carried at least two major AA guns: the 2cm
Flakvierling 38 (quad) and two versions of the 3.7cm single barrel AA gun. An entire range of AM photo etch has been released by several manufacturers, including Griffon Models, for the Dragon Sd.Kfz.7/1 2cm
Flakvierling 38 (quad), though little has been marketed for the Sd.Kfz.7/2. This set for the quads gun shields is no different, and offers a middle solution between OOB and Griffons full gun upgrade (GRM-L35A056) at roughly half the price.
the kit
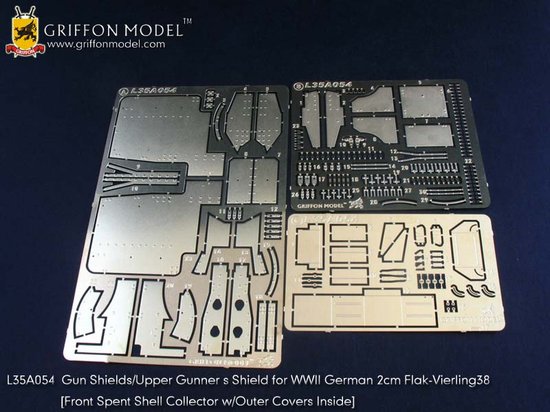
The set comes with three frets of PE for the shields, supports, etc., strands of copper wire for making hinges, larger links of wire for fabricating attachment points, plus instructions, and is packaged in the usual attractive Griffon plastic bag container with photo illustrations.
the review
Dragons Smart Kit of the Sd.Kfz.7/1 has styrene shields which are reasonably to-scale. However, no current styrene technology can rival metal for thinness, nor do the DML shields even approach the level of detailing in these metal versions. Not only do they include tiny eye-hooks, latches and handles simply omitted from the plastic kit, but the brass has different thicknesses depending on whether the part is for a shield, a bracket, etc.
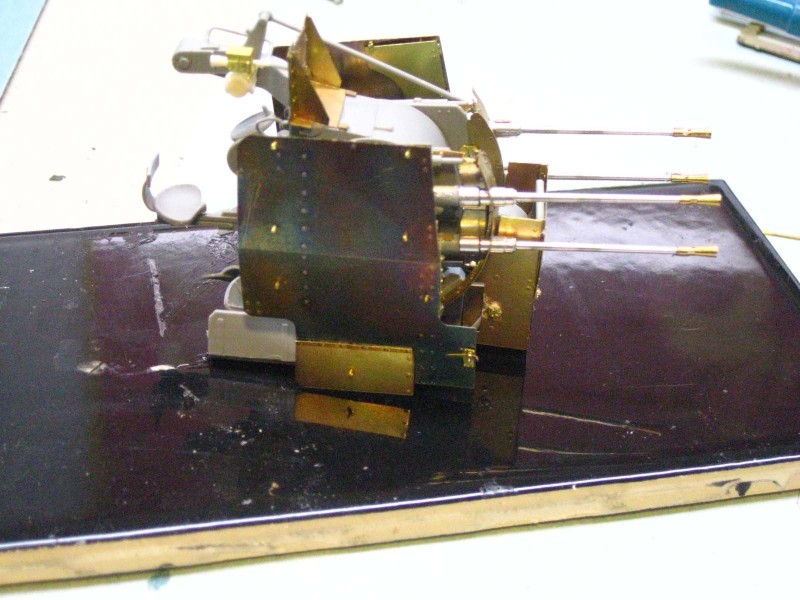
And as a Smart Kit, some details on the shields and their attachment points are simplified, including hinges and the cover for the gun sight. The FlaK 38 employed a system of shields that started on the outside with large, stationary baffles intended to protect the gunners from ground-based small arms fire, while the paired barrels of the quad array each had a thin sheet of armor that would elevate with the gun. These inner shields were mounted at three points with a sophisticated (and complicated) system that set them off from the gun mount on somewhat delicate points.
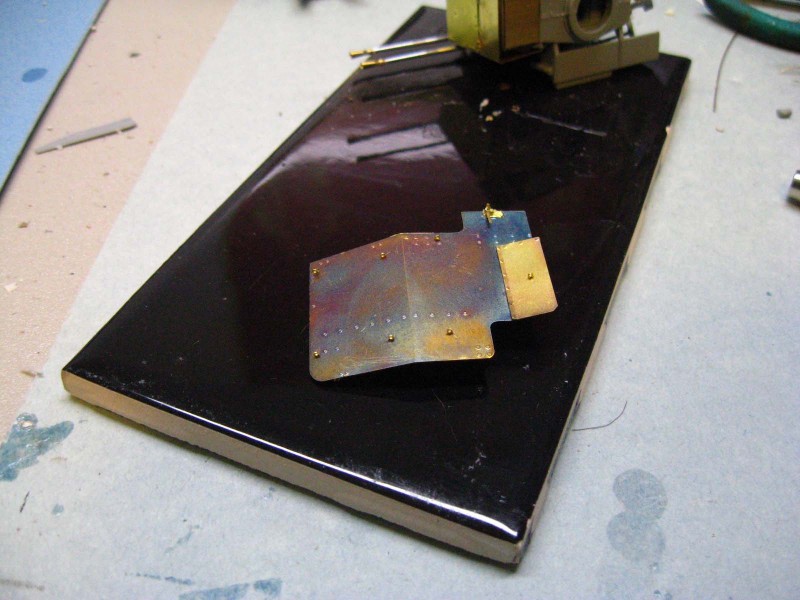
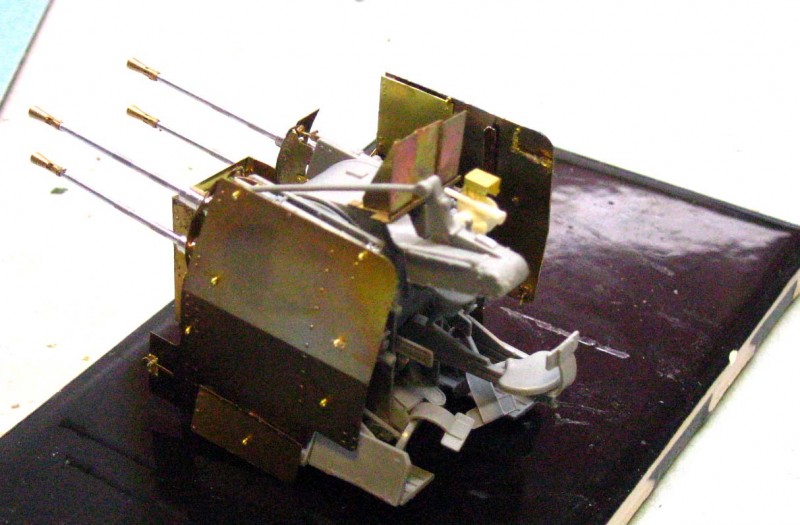
The set is definitely NOT for the inexperienced photo etch modeler, those with unsteady hands, nor the faint-hearted. But the results are worth the effort (see photos at right). The curved inner shields that attach to the body of the quad base have no forming mold nor other easy means for shaping them (I used the styrene kit parts as a crude shaping template). The three attachment points are not marked on the inner shields, so getting them fitted to the kit parts required a lot of time and patience. Like many German armaments systems, the FlaK
Vierling quad has elegant features that made it complex and labor-intensive to make, and this complexity is reflected in the PE set aiming to recreate it.
The instructions seem rushed, as if Griffon Model wanted to get
all these sets on the market quickly. For example, there is an annoying error in the instructions covering the brackets attaching the curved shields pierced by the barrels, which are clearly derived from the sheet for the larger set, since they refer to PE frets that are not included in this one. I was able to figure out that the referenced parts had been mislabeled, and checked it against the complete set which I also will be reviewing. But this oversight could cause a moment of panic unless you have some good references or dont mind puzzling through the problem.
There is also nothing in the instructions explaining that all the holes in the main shield are for eye-hooks that face outward on the shield front, and are secured by brass rings from the inside. The drawings show only one such eye-hook being installed, when in fact there are seven per shield.
Conclusion
With all the PE sets for the Sd.Kfz.7/1, this one would be at the lower end of my recommendations, unless money is no object. The
kit gun sight (the less-common FlaKVisier 20 instead of the
FlaKVisier 40) needs upgrading much more than the shields (see my review
here), and
the gun's quad barrels are not really complete without Griffons
four-pack upgrade set (reviewed by me
here).
Overall, the Dragon Sd.Kfz.7/1 is already among the more-expensive kits on the market in 1/35th scale, and doesnt really cry out for upgrading the shields.
Still... once I finished the project (results pictured at right), I was glad I'd done it, and will attempt to marry the larger upgrade to the Trumpeter Sd.Kfz.7/1 I am building (
click here to see a build log using this item).
Thanks to Dragon USA for providing this and other PE upgrades for review.


Comments