One company of M4A2 Sherman medium tanks was assigned to the 2nd Marine Division for Operation Galvanic from the I Marine Amphibious Corps. In total, 14 tanks deployed from Noumea in early November 1943, on board the new dock landing ship Ashland (LSD 1). Each 34-ton, diesel-powered Sherman featured a gyro-stablized 75mm gun and three machine guns. The Shermans joined Wave 5 of the ship-to-shore assault. The tanks negotiated the gauntlet of Japanese fire without incident, but five were lost when they plunged into unseen shell craters in the turbid water. Ashore, the Marines' lack of operating experience with medium tanks proved costly to the survivors. Local commanders simply ordered the vehicles inland to attack targets of opportunity unsupported. All but two were soon knocked out of action.
The Dragon kit number 7305 M4A2 Tarawa Sherman represents one of these deployed tanks.
Contents
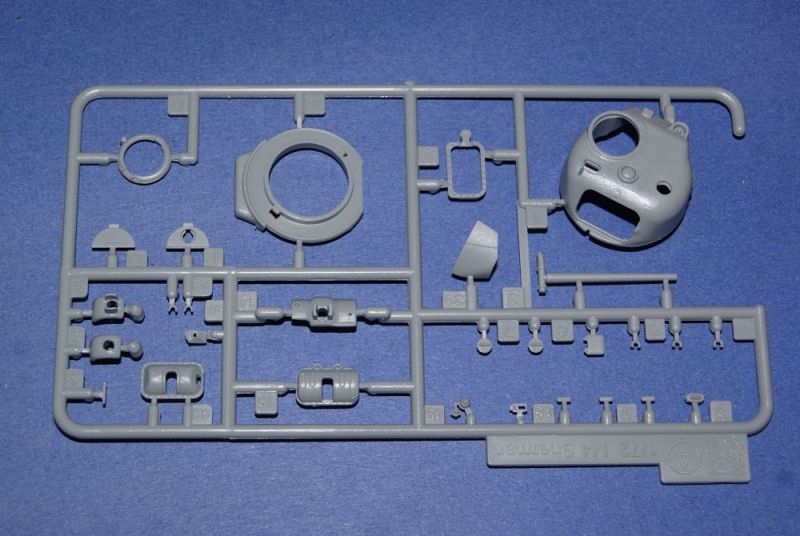
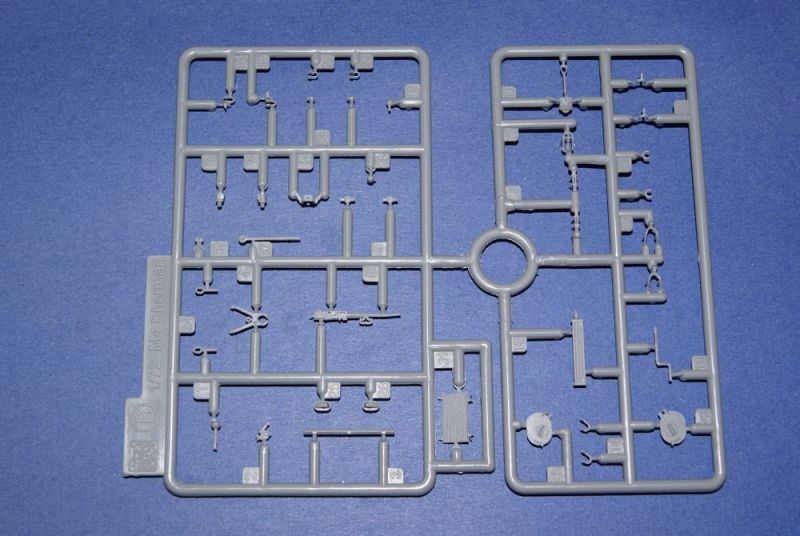
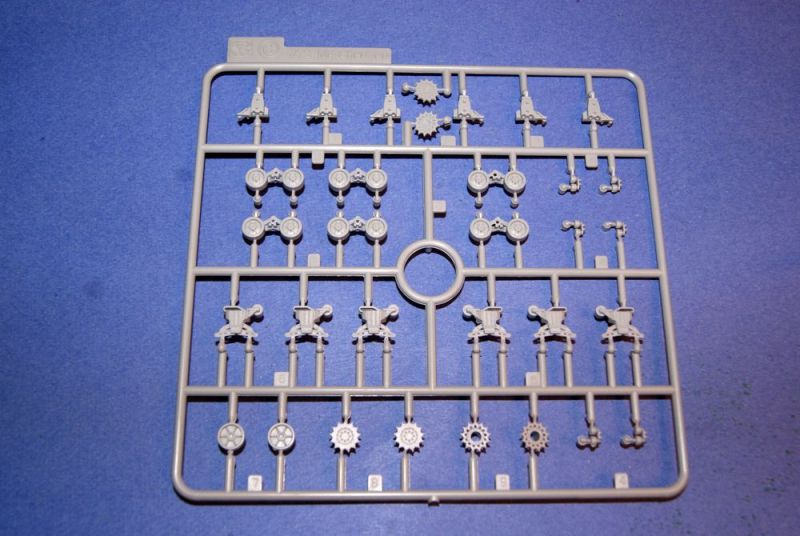
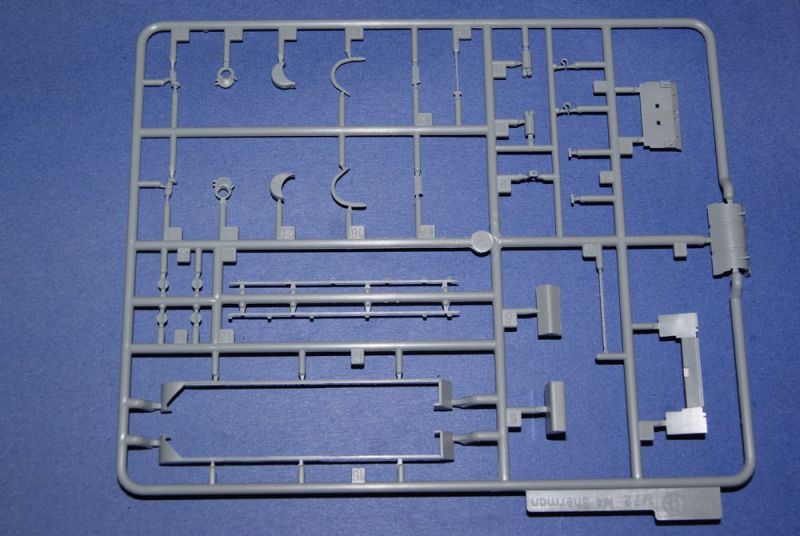
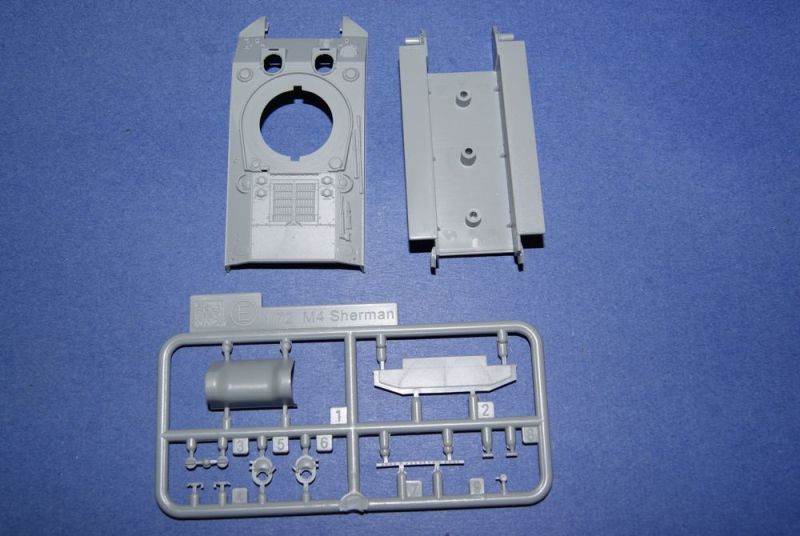
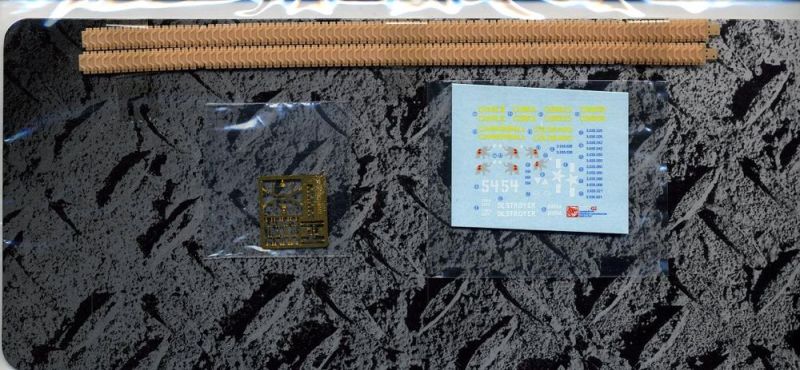
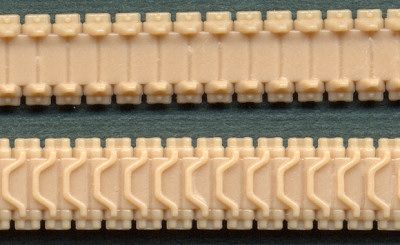
The kit contains five sprues of parts moulded in typical Dragon grey styrene. A total of 127 parts are located on these sprues, but only 91 are actually used for the Tarawa Sherman. Also included are separately bagged upper and lower hulls, a pair of DS-100 tracks, a small 14 piece PE fret and a sheet of Cartograph decals. The decals are provided for seven different vehicles, six from company C of the I Marine Amphibious Corps, tank battalion and one from company D.
Review
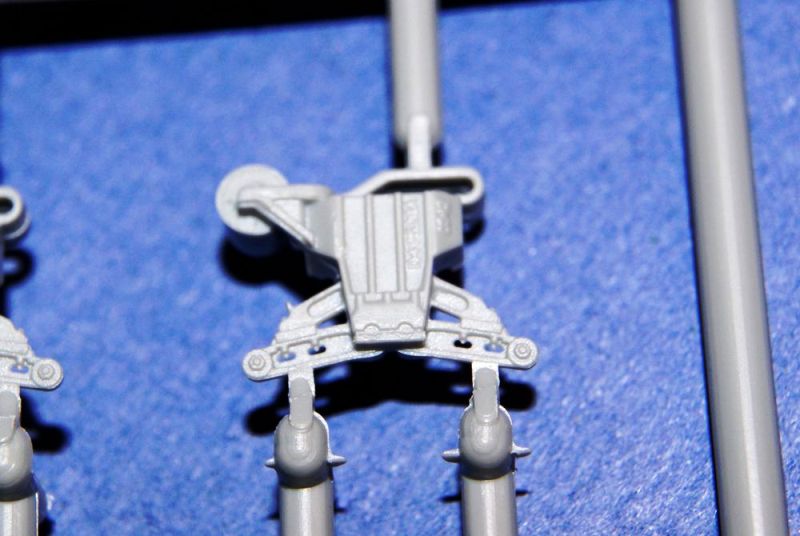
As with other Armor Pro kits you will not be disappointed when you open the box. The detail on some of the parts is approaching the level of being breath taking. An example of this is the casting like textures on the main bogie components even to the point of having the cast part or serial numbers present. The turret and other components also have appropriate textures imparted to them during the moulding process.
For the most part, ejector pin marks are limited and appear in locations that will not be seen after assembly. Flash is minimal and seam lines from the moulding process are generally light. The odd finer parts exhibited some warping that can easily be rectified by submersion in hot water followed by some minor bending. In some cases the attachment points (gates) for some of the smaller parts are a little on the thick side. These parts will require a fair amount of care when removing them from the sprue.
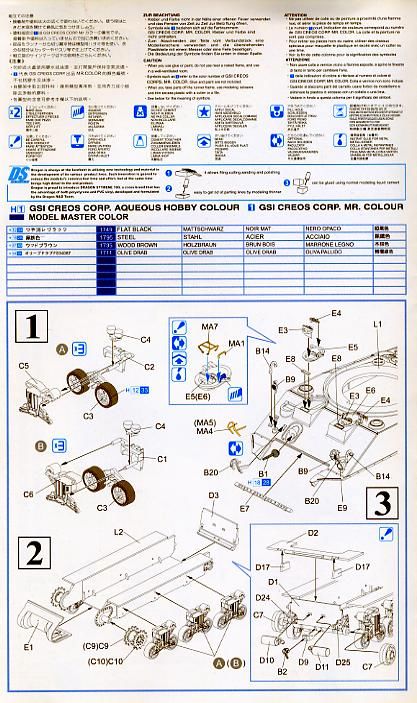
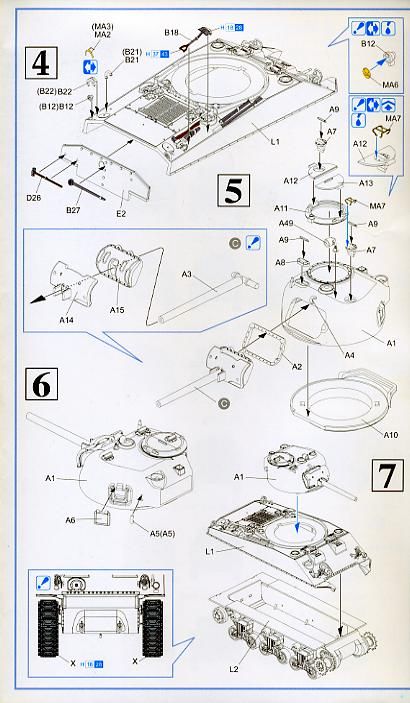
The instructions are typical of recent dragon kits, with exploded view drawings and arrows showing parts placement.
Construction is broken down into seven steps as follows:
Step 1 involves the assembly of the six main bogie units involving four parts for each.
Step 2 is attaching the completed bogies to the lower hull, adding the drive sprockets, rear idlers, transmission housing and rear lower hull plate.
Step 3 has numerous small parts added to the upper hull front and the lower hull rear. These include but are not limited to headlights, headlight guards, hull hatches and their components as well as towing eyes and other detail pieces.
Step 4 adds further hull detail pieces such as tools and tail lights.
Step 5 is the construction of the turret and begins with the lower and upper turret pieces being joined. Details such as the main hatch components, periscopes and the like are also added.
Step 6 comprises adding the final detail pieces to the turret.
Step 7 involves the attachment of the tracks to the suspension, placement of the turret on the hull and gluing the upper and lower hull together.
Conclusion
Having built a previous Dragon Sherman I cannot foresee any major difficulties in constructing this kit. I have read that some Dragon M4A2 kits have some fit issues when assembling the VVSS suspension components, but nothing stood out from examining the spues. This appears to be a very serviceable kit and will be an interesting addition to any small scale builders collection.
SUMMARY
Highs: Very nicely moulded kit with considerable detail considering the scale.Lows: Some of the smaller parts have excessively thick sprue gates that will require a fair amount of care when cutting them off. A few thinner parts were slightly warped.Verdict: Except for the diminutive size of some parts, this kit should build into a nicely detailed representation of an M4A2 deployed on Tarawa. A modeller with moderate skill should have little problem with this kit.
I've been building models since about age 10 with the occasional hiatus due to real life events. First armour model was a 1/76 Airfix Tiger I and was followed by a 1/72 Revell F4U Corsair. I've built primarily 1/76 and 1/72 armour and aircraft but occasionally have tinkered in other larger scales....
thanks for the review, enjoyed reading it. to tell the truth, i'm not a fan of 1:72 scale, not since the revell nashorn disaster anyway. but, having built dragon's m1a2 (or was it a1?) in 1:72, i was really impressed at how fun the build was, so I may venture to that scale someday, and reviews like that sure helps me with picking the models for it.
Glad that you guys liked the review. I've only done 1/72 kits since my return to the hobby and a Dragon Sherman was my first build. The parts count and detail of that kit really impressed me and this kit is no different. I have started building this kit so I can see a built article in the future. In my review I mention that some other reviewers have mentioned that there are fit issues with the main VVSS bogie components. Sadly this has proven to be the case with this kit. The two main upper halves of the suspension component do not mesh well and will require filling with putty and sanding.
In the picture above you can see what I mean. The right most assembly has been pretty much cleaned up but you can see the putty required on the other two.
Cheers,
Jan
Matan, with great, great care and a 5X power visor. Seriously, the kit provides you a choice of either using PE or plastic versions of the same parts. These include the various lifting rings, periscope guards, headlight and taillight guards and hatch handles. You can see the plastic pieces I used in my first M4 build.
The Tarawa Sherman has similar options.
Cheers,
Jan


Comments