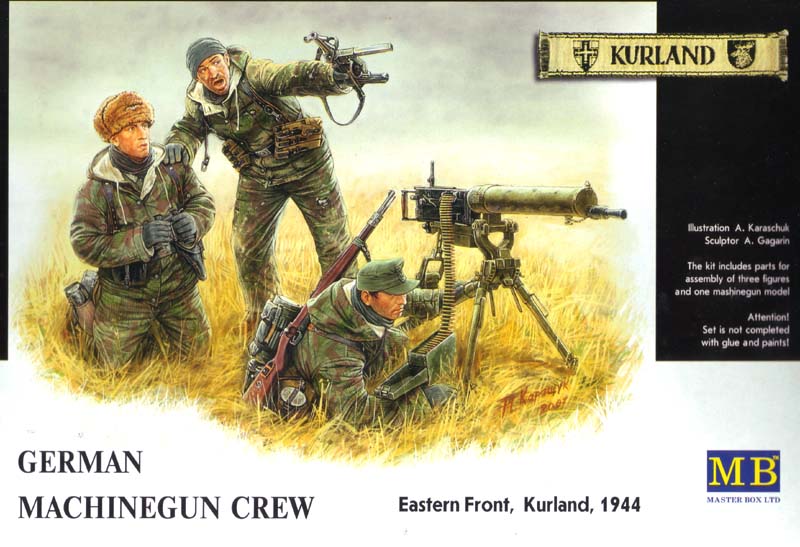
On the boxart is a patch visible with the name Kurland on it centred between two shields. One shows a cross the other the head of a moose or a sort of deer. What is Kurland exactly? Around the middle of October 1944 around 500.000 soldiers (32 German divisions and 20.000 of the Latvian 19th Division of the Waffen SS) were cut off from the rest of the German army on the Kurland Peninsula of Latvia. On the south and the east the Russians on the west and north the Baltic sea. It became know as Kurzemes Katls (the Kurland Kettle) for the Latvians but for the germans it became known as Festung Kurland. The men that were trapped on the Kurland Peninsula formed a defense line to keep out the Russians and they managed this line, despite numerous huge battles of advancing Russians, till the capitulation of Germany at the end of the war never surrendering.
The Box
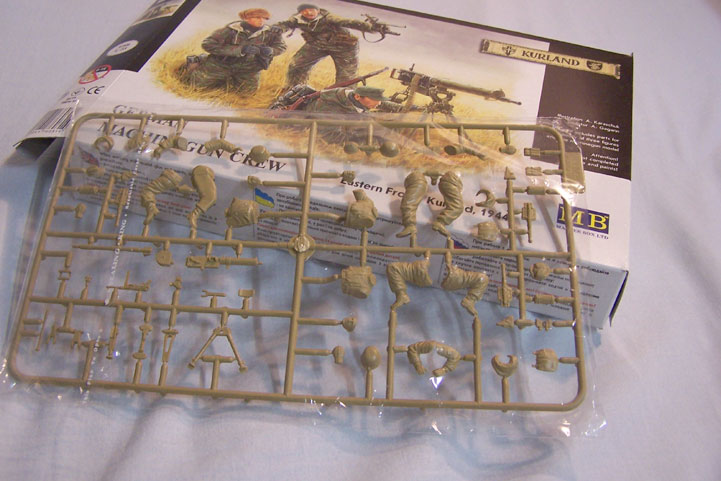
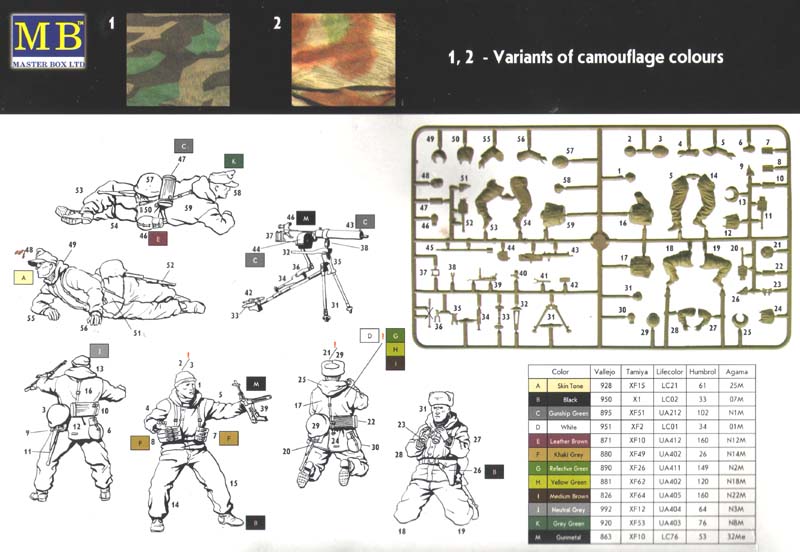
The kit comes in a box approximately 25 cm wide, 17,5 cm high and 3,5 deep with opening sides. On the front there is presented a wonderfull boxart with which MasterBox already gathered some fame. Showing 3 men and a Machine gun. One guy who is lying on the ground to normally help feeding the ammobelt in the Machinegun. The operator of the gun sitting on his knees with a binocular looking in the direction of a guy who is pointing with his MP40. The back shows the sprue inside the box and the assembly instruction by having diagrams of the three assembled figures and the machine guns and numbers corresponding to a piece from the sprue, Also it shows the paintnumbers you need according to Masterbox and a nice thing is that it shows a couple of popular paint brands too ( Vallejo, Tamiya, Lifecolor, Humbrol and Agama) Another nice thing is that Master box printed two patches of the camo fabric of which the uniforms are made.
The contents
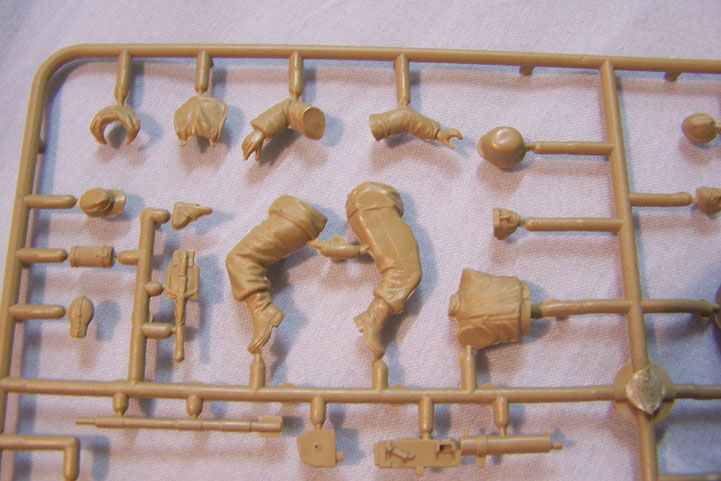
Inside the box you will find 1 sprue in a beige (light brown) colored plastic with 61 parts of which one part (a sort of rod) is not used. The parts are for the 3 figures with equipment and the Machine gun. I will do a write up of each section of the figures (legs, arms, equipment etc etc.).
The parts:
Here I will only describe the detail or other things that I could find Yes there was a molding line on all the parts but since all the plastic figure manufacturers have the same problem I dont see it as something really worth mentioning but okay.. Yes the figures have mold lines which are easily scraped off with an Exacto. On to the parts.
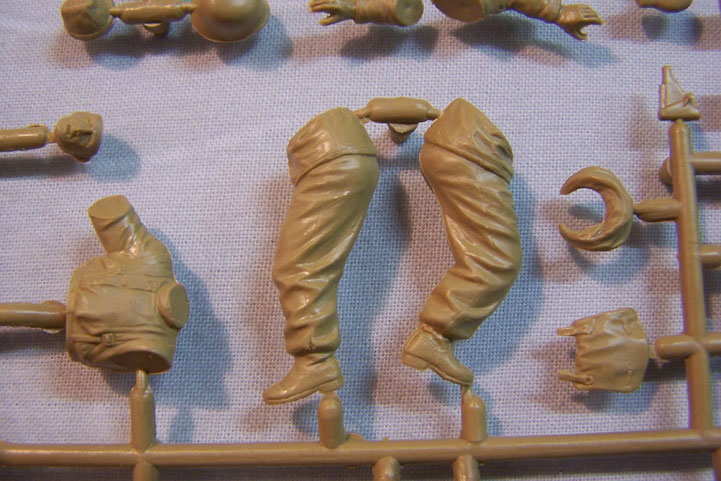
Legs and boots The boots are nicely sculpted with nice details on the leatherwork with good lines and such also the folding of the leather along the ankle area is well done. The sculptor tried to add the nails under the soles that are visible with the lying figure and the kneeling figure sadly this detail did not come out very strong in the molding process but it is visible. The legs are very well done on all three figures and all show some really neat sculpted folds which gives the trousers a really active feel. Also this will be very nice to paint.
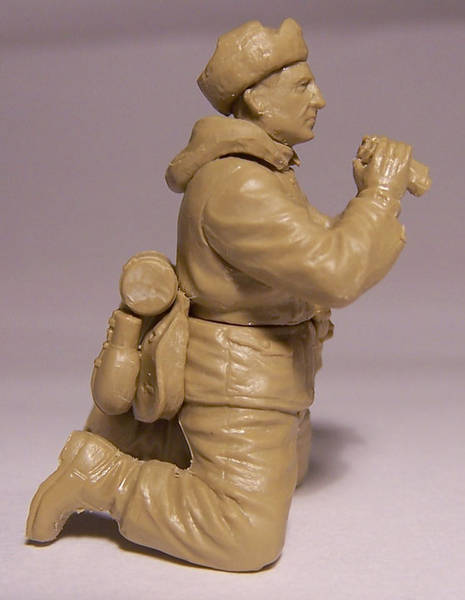
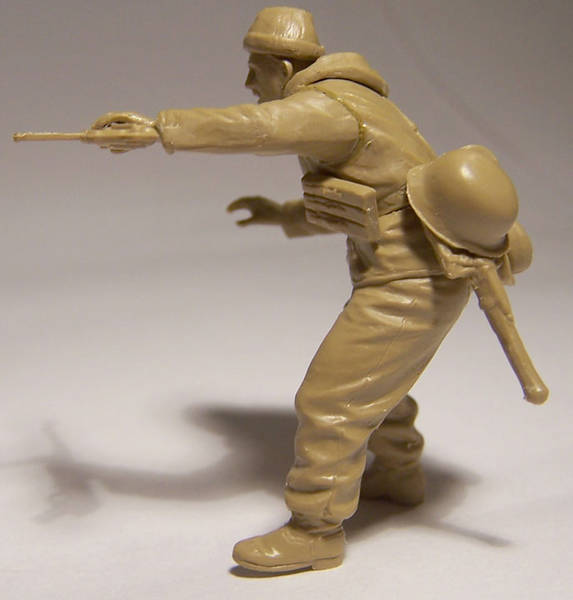
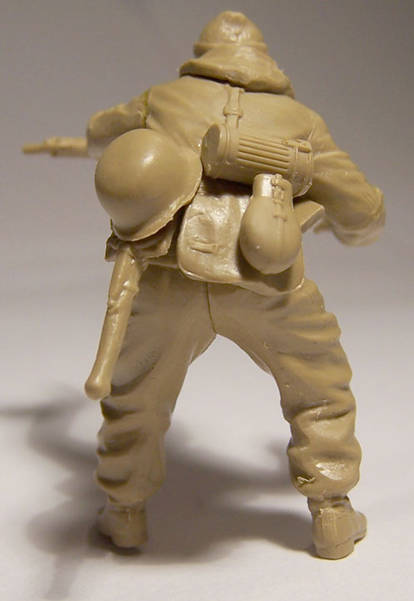
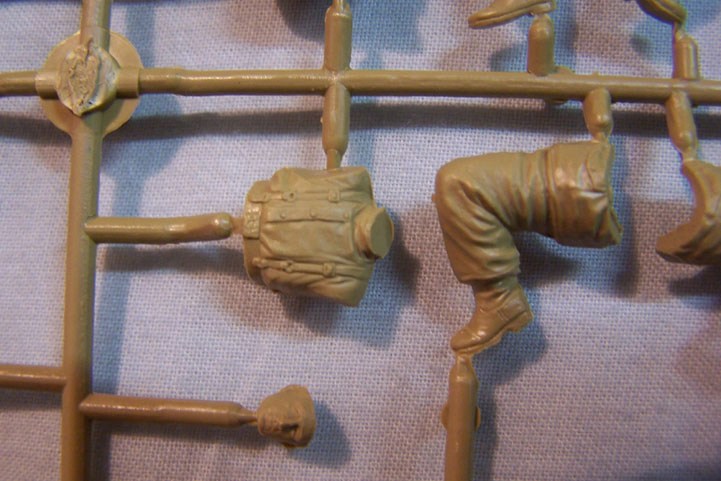
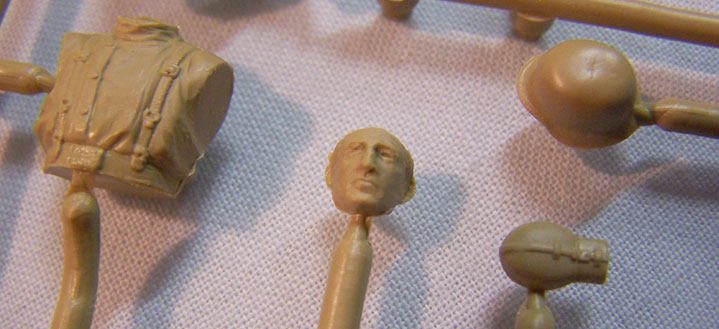
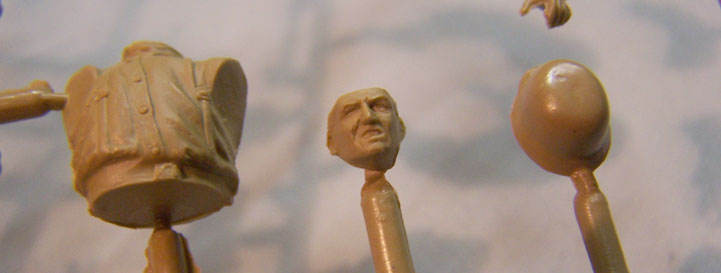
Torso The torso comes in two parts. The upperbody and the hoody and is quite a nice presentation of the padded tarn parka which was very popular among the German troops during the Russia campaign. On the lying figure and the kneeling figure the straps on the chest from the Y strap is very crisply done. Sadly this detail is not so crisp on the standing figure and you have to do a good job to get this detail out with painting. The buttons on the parka are also quite sharp and on the correct place of the Tarn parka Just a bit of centre to the right arm. The hoods for all three figures are nice and all the figures have their own sculpted hoods. Which I think is very good. There is another thing which I found extremely clever and something I havent seen too much on injection molded figures. It was something that I noticed when I was photographing the sprues and that is thet on the inside of the hoody (the area you glue to the figures back) had two indentations which were exactly where the shoulder bands of the Y straps are on the back of the figure. So basically you glue the hoody on the back and it slots perfectly on the Y straps making it fit snugly on the parka.
Arms and hands: The arms are just as the legs nicely sculpted by mister Gagarin and with nice folds they show the flexible nature of the fabric. The hands are all nice and not oversized and they show good detail.
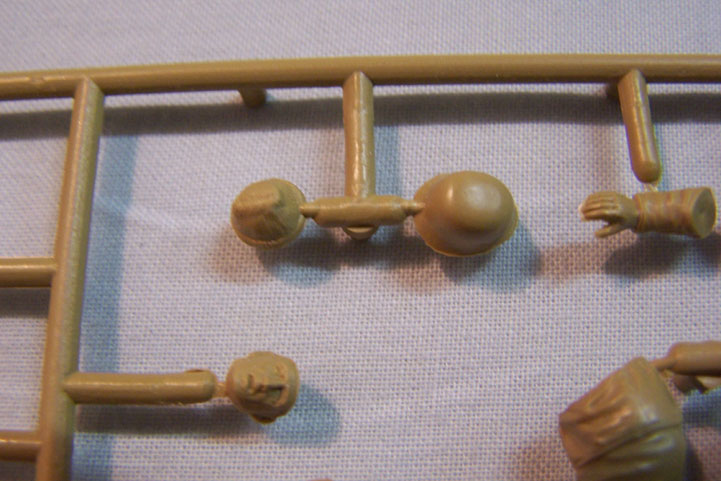
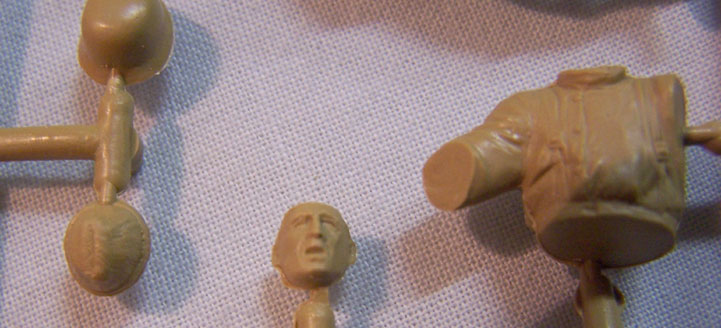
Heads: The Heads are sculpted specially for each figure so no use of stock heads was done by Master Box.. each figure its own head and own expression. And my point of view is that the expressions of the figures in this kit are very well done and show some good detail.
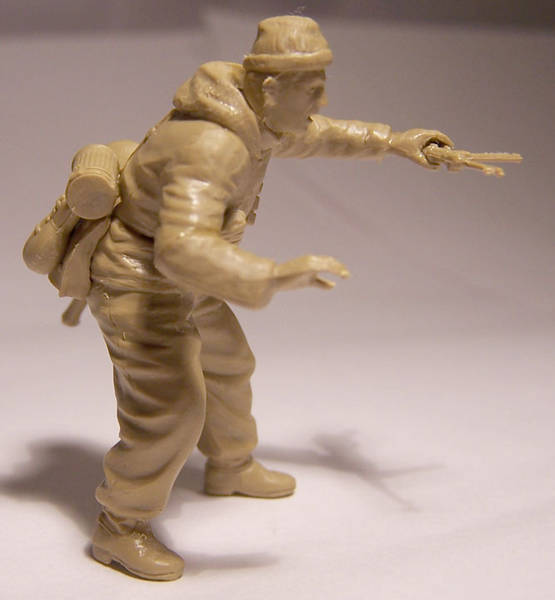
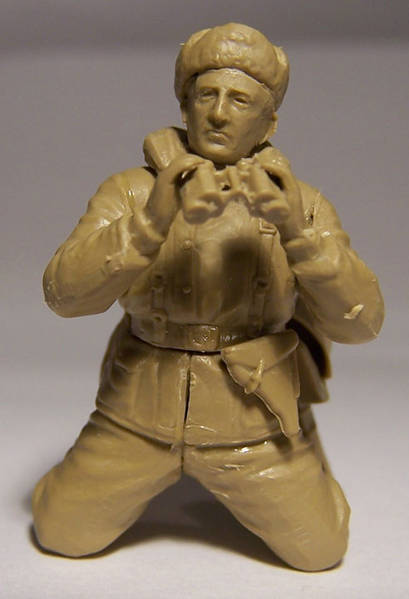
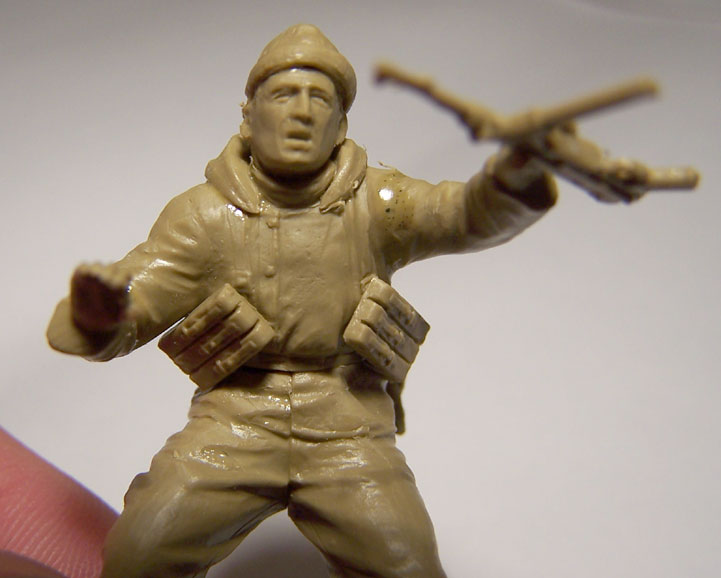
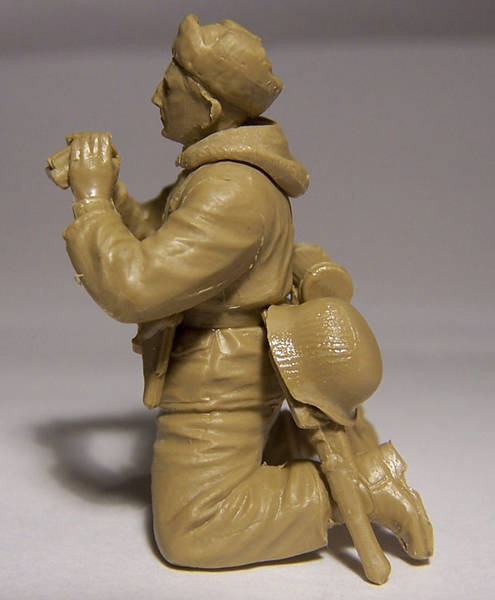
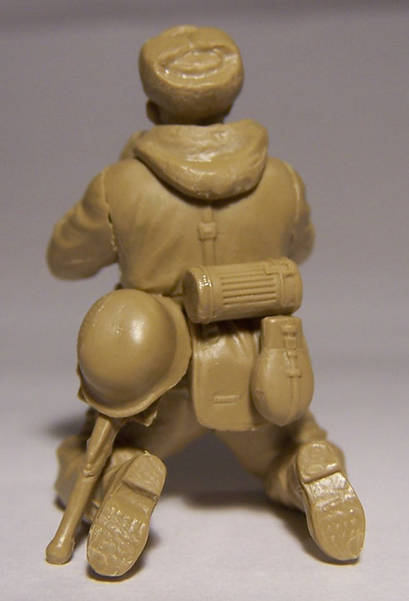
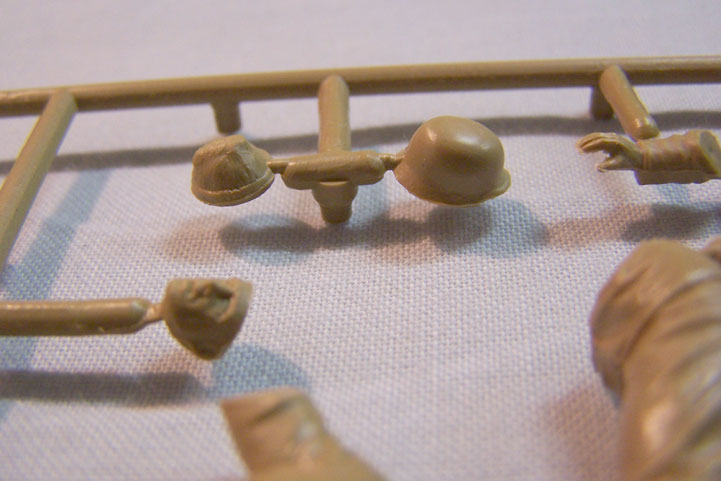
Headgear Each figure in this set has just as on the boxart shows a different type of headgear. The guy lying on the ground is wearing a fieldcap, the kneeling guy wears a fur winterhat and the standing guy wears a woollen beany. The field cap is very nice and has very good details. The guy with the beany idemt ditto with nice wool texture. The fur hat is sadly lacking some detail. The fur is nice but not that strong and the embroidered eagle which normally is in front of the hats is nothing more then a little dent without any further detail. Each figure also has a helmet which they carry on the back strapped to the Y strap.
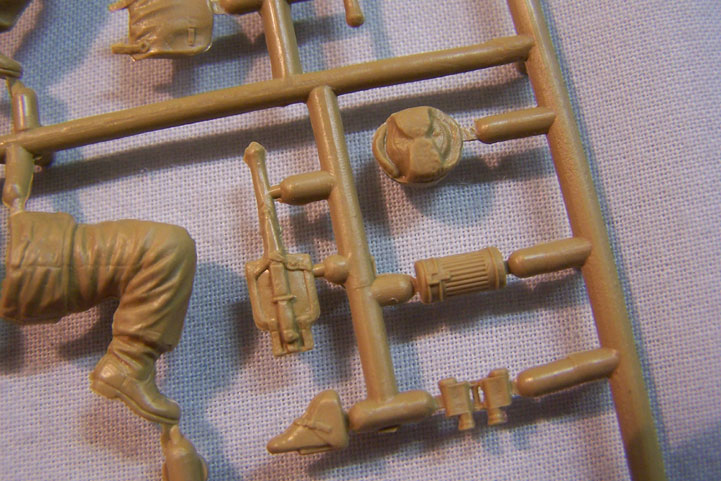
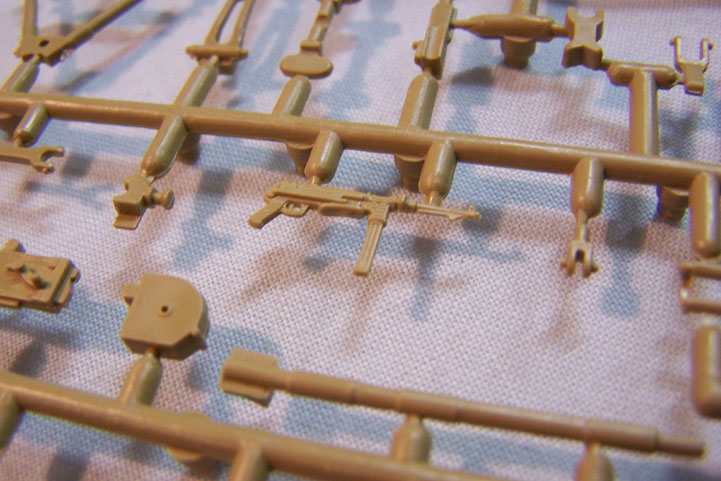
Personal gear and personal weapons: The personal gear shows again a multitude of stuff carried around by the German soldier during ww2. Gasmask canisters, breadbags, canteens, the shovel and a holster for presumably a Luger or some similar handgun. The gasmask canister, the Holster the shovel and the canteen are for all three figures the same and are very good in detail. Except for the gasmask canister which shows also the gas cape or Zeltbahn strapped to it a detail that is not visible on the gasmask canisters or on the sprue. The clever bit here is in the breadbags which are specially made for each figure, Not one is the same. And again the backs of them as you glue them to the figure are sculpted in such a way that it follows exactly the contours of the bottom side of the Parka and it really gives the feel that it is stuffed with something heavy and is really pressing in the fabric of the parka again really clever thinking often with injection molded breadbags you have that it seems like the bag is drenched in starch and put on the figure as stiff as they something are. The commander with the fur hat on has a binocular which is quite nicely made as is the MP40 and the ammo pouches for that weapon with the standing guy.
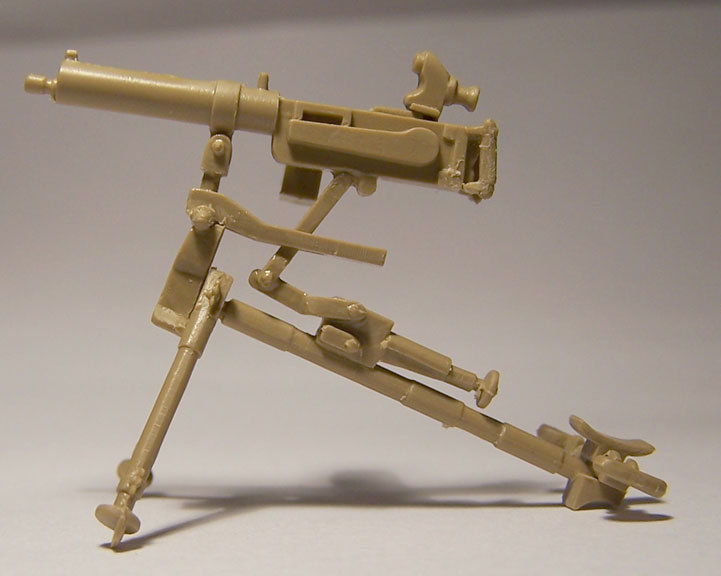
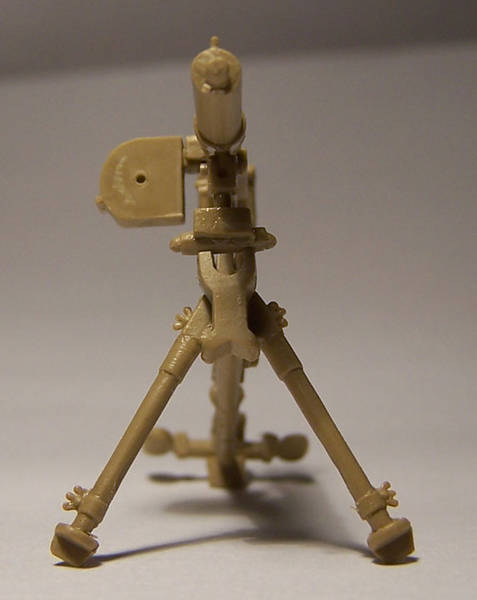
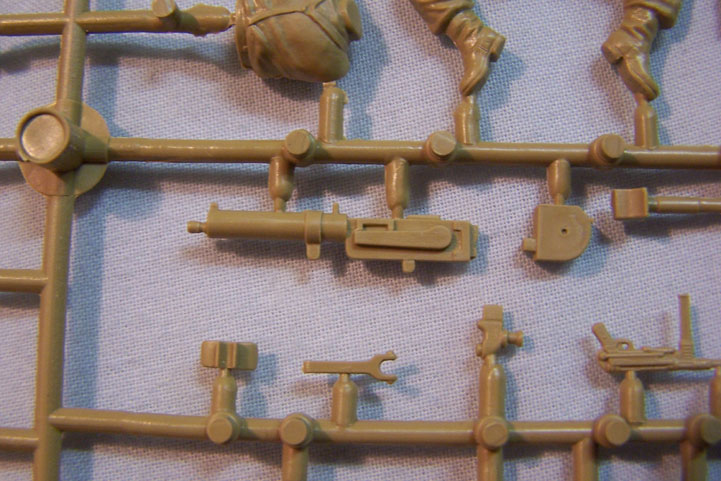
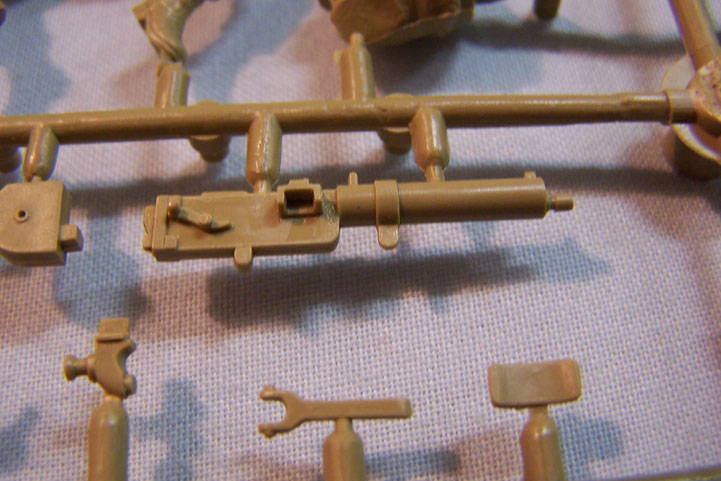
MG 08 and not a Browning as I have heard other people often mistakenly called this machinegun. The MG08 has its roots in WW1 as the gun was first produced in 1915. How exactly this gun ends up in 1944. If I had to make a guess I think they equipped foreign troops with this weapon. The gun itself is nice and the details are good. You will have to drill the barrel out a bit as that detail is not included. The gun is also not as on the boxart belt fed from a ammocrate but drumfed. The tripod is sadly not as detailed as the rest of the kit and is a really simplified version of what you see on the boxart. It looks nice but a lot of detail is not added. Also the whole lifting mechanism is a bit of a riddle for me as when I assembled it everything went right up till the little arm just under the ammodrum which actually does not attach to anything. I glued it to the underside during my assembly.
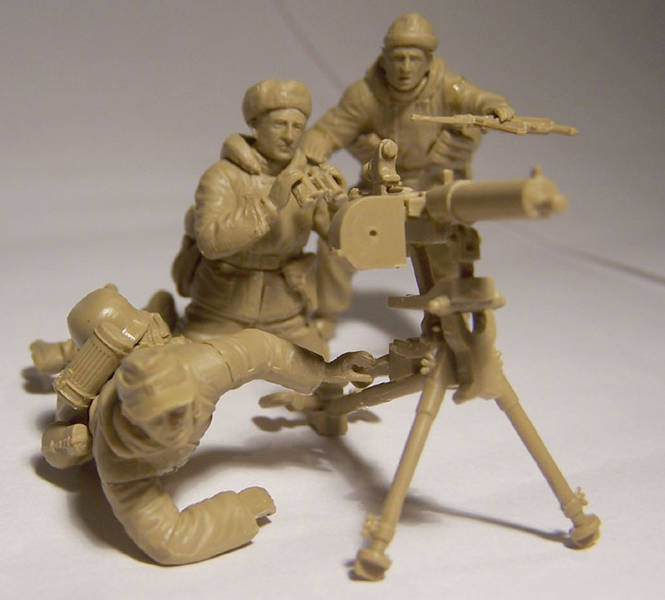
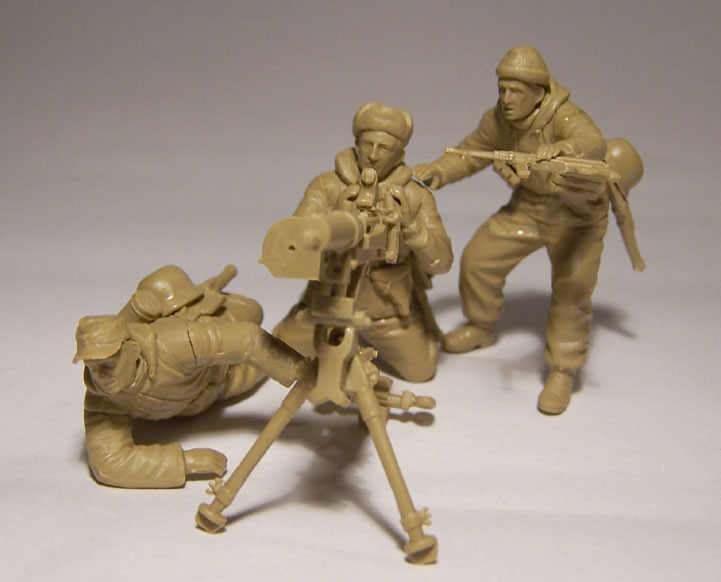
Assembly: The figures went together okay No real problems were encountered. Some filling is required but only on places where you expect that to happen. So where you glue the legs together, where you glue the torso on the legs, the arms. Etc. etc. Often with the Masterbox figures, the headgear (rather than the helmets) are sometimes difficult to fit. The lying guy has a fieldcap but in this case the cap fitted the head very well. That was absolutely not always the case (See the German Tankhunters review I did some weeks ago). The guy with the beany has a head which is a tad to big for the Beany or otherwise around the beany might be a bit too small for the head. It is doable bit there is a chance you will have to do some filling. The fur hat fits pretty good. With the figures no real problems. The MG 08 is also quite straight forward although it was a bit tricky to get this tri pod together with this last piece which is connected to nothing as it goes through another part and attaches to the gun and on the other side it attaches to some hinging system on the tri pod. Specially for this review I have assembled the figures but I only cleaned them and due to the use of a bit too much super thin cement from Tamiya there are some spots here and there... a bit of sanding with the fiberglass pen and you won't see a bit... and look past the huge fingerprint on the kneeling guys helmet.
Final verdict
Looking back at this set of figures I have to say that masterbox did a terrific job certainly on the figures. They have certainly raised themselves to a higher level. The subject is very original and the interaction between the figures is very well done and convincing. And exactly as depicted on the boxart. Another nice thing is that these figures are not only limited to the Kurland period. These Parkas were very popular during the whole Russia campaign which also means you are not limited to the two camo schemes (splinterpattern) but actually to almost all the camo types used by the Germans during WW2 except for Italian camo as the parkas were never issued. Good detail good sculpting make this to a nice set which can be put into a diorama but is also very good as a standalone vignette.
SUMMARY
Highs: Extremely nice sculpted figures with a good interaction. Although basic it is nice to see some other MG then the MG42. Also a clever thing were the indentations in the back of the bread bags and the Hoody's of the parka'sLows: Quite a rudimentary tripod for the machine gun... and the bad fitting headgear.Verdict: Despite the lows given above I still think it is a good set. Very versatile too, you an give it an unlimited amount of camo patterns. And it makes an interesting project.
Our Thanks to Master Box Ltd.! This item was provided by them for the purpose of having it reviewed on this KitMaker Network site. If you would like your kit, book, or product reviewed, please contact us.
About Robert Blokker (FAUST) FROM: NOORD-HOLLAND, NETHERLANDS
Started modelling when I was about 7 or 8 years old had a little break in between (school, girls partying) and eventually returned when finding this site in 2002. Main interest WW2 German army, wheeled vehicles and radio and communication troops or every other thing that manages to catch my interest...
Interesting review on this new kit from MB.In his review Robert wonders at the use of an MG08.My father told me that when he was 'drafted' into the Latvian army(there were regular army units,not just Legion troops fighting for the Axis) there was a shortage of modern type weapons,and they were thus issued weapons from old store piles,late 43 to early 44.As the war progressed they gradually recieved equipment that we expect to see being used by Wehrmacht troops.HTH.
Dave.
Ola Dave
Thanks for that addition... It was information I couldn't find in my books and also the internet was not really clear about this..> Somehow it makes sense.
With friendly greetz
Robert Blokker


Comments