The subject of this review is a tank that has been debated about and written about on many occassions. With the latest info available in Panzer Tracts 5-4 by T. Jentz and H.L. Doyle, a lot of detailed information about this tank has been gathered.
Applying that information to this kit shows a great step forward from previous attempts to kit the Panther Ausführung F. So what do you get in the box? Suffice to say, A LOT! Cyber Hobby have chosen to give the option to build either a prototype or a production vehicle. Now, I can hear many say "Production vehicle"? Perhaps an explanation is in order...
History of the Panther Ausführung F
At the end of the Second World War, development of the Panther Neue Art as it was called, had progressed to the point it was ready for production. A project that had ibegun in 1942, when the German army realized that the then introduced Panther Ausf. D had some design deficiencies. One of the biggest problems was the turret, and more specific, the turret front.
The turret presented 2 major problems, the first being that it was too wide making it an easy to hit target, the second being that the curved mantlet presented a shot-trap deflecting incoming rounds into the fighting compartment.
A solution to the latter problem had been found in the addition of a chin as seen on the late war Panther Ausf. G. The problem of the turret front required a completely newly designed turret...
Already during the aborted Panther II program, a "Turm mit schmale Blende" (Turret with narrow mantlet) was part of the requirements. Although no turret had ever been completed for the Panther II, and designs did not even result in a final turret design, it is the first indication that a new turret was being developed.
After the Panther-II was cancelled, much of it's improvements were carried over to the Panther, and with the Panther Ausf. G, the "entzwickelte wanne" or de-wedged hull was introduced, along with a new engine deck.
The work on the new turret was still underway. Daimler Benz became responsible for this in the Spring 1944. Their design, which became known as the Schmalturm, presented a turret with increased armour protection while being 100 Kg lighter, a narrow turretfront without shottrap and better fume extraction. This turret together with a re-designed Panther hull became known as the Panther Ausführung F...
The kit
As stated earlier, Cyber Hobby presents a 2-in-1 kit giving the option of a prototype or production vehicle.
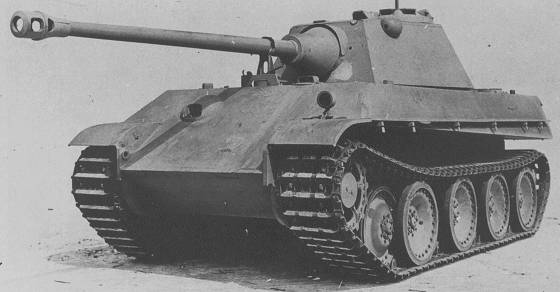
Now, this is where things get a little bit complicated. Photographs exist of 2 Versuchs Schmalturme mounted on regular Panther-G chassis: Schmalturm prototypes:
The first Versuchs Schmalturm differs very much from the production Schmalturm. This means it is nearly impossible to build this particular vehicle from this box. This turret had a different roof which extended to the turret sides, a different mantlet and had a different cupola hatch hinge. It is further unique in that it has a loader's periscope in the turret roof. It is not undoable, but would require extensive scratchbuilding to model this prototype.
The second Versuchs Schmalturm is all but a complete production Schmalturm. It lacks the debris guard over the gunmantlet, nor does it have the D-loops or Lost-erkennungs tafeln (poison gas panels). This version is buildable from the kit, with one catch, the Panther-G chassis used had a coat of Zimmerit.
Panther Ausführung F production
Many consider the Panther Ausführung F as a paper Panzer, a tank that didnt exist as it was designed. However, the Panther-F had left the drawing boards and was being built. Pictures of the Daimler Benz production line after it was captured shows 9 Panther-F hulls mixed between Ausf. G hulls. Add to this statements by MNH officials who told their interrogators that Daimler Benz had delivered Ausf. F chassis but fitted with Ausf. G turrets. These officials also testified that the chassis had steel rimmed, rubber cushioned wheels mounted in staggered pairs.
Which brings me to the kit on review:
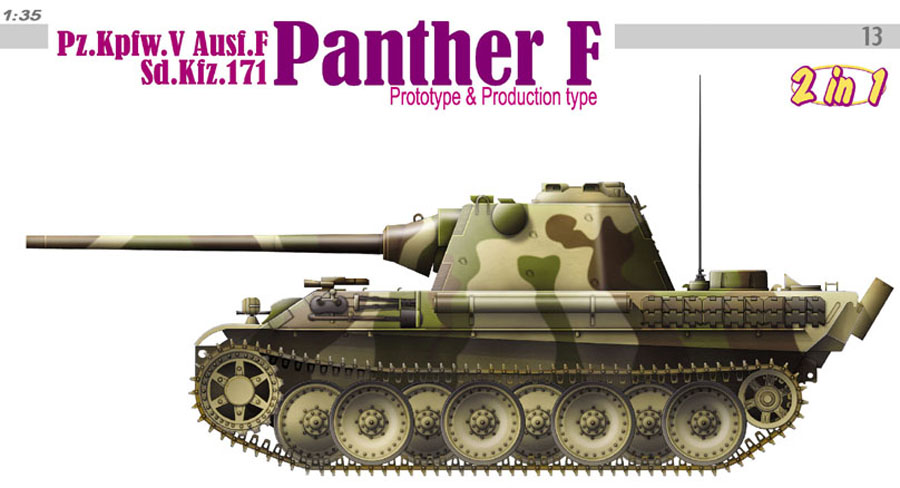
The Cyber Hobby Panther F 2-in-1 kit
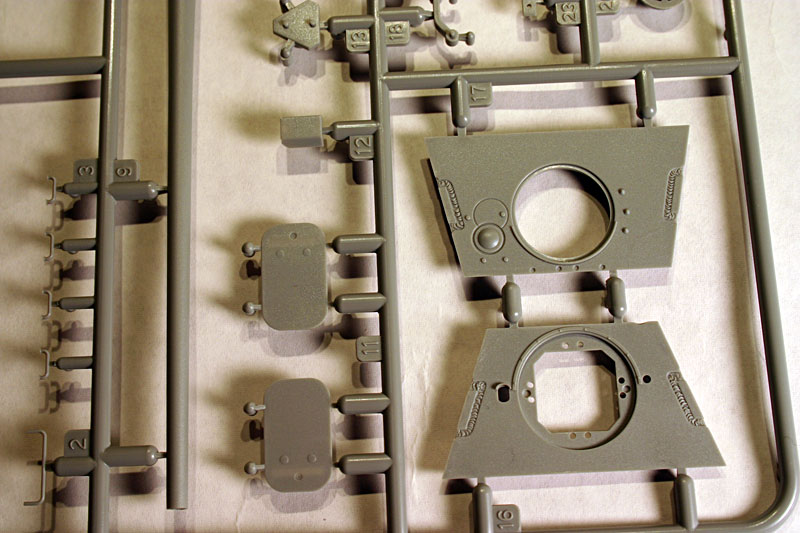
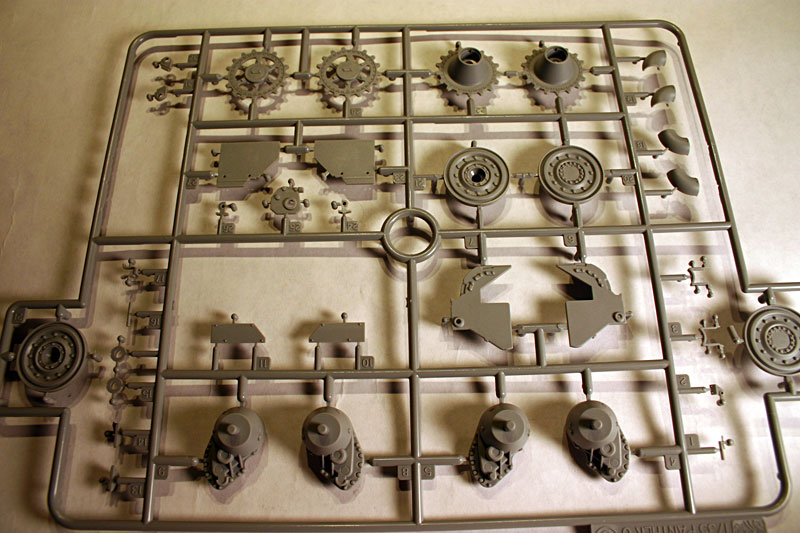
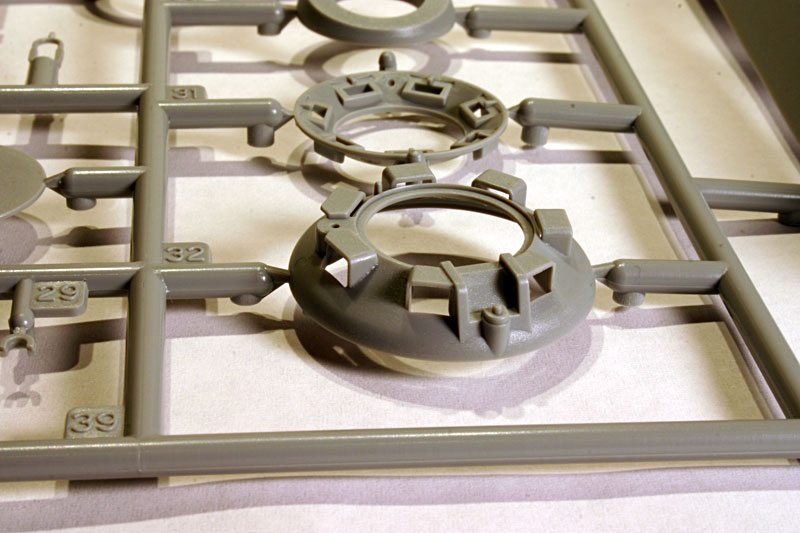
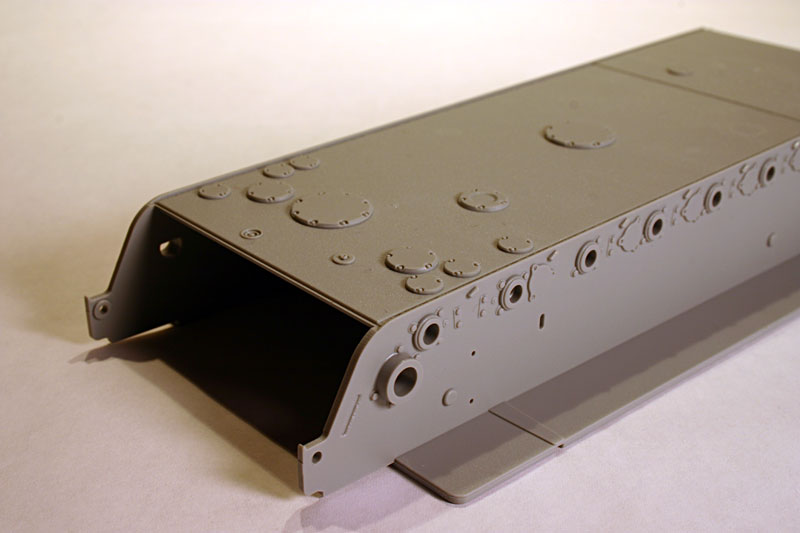
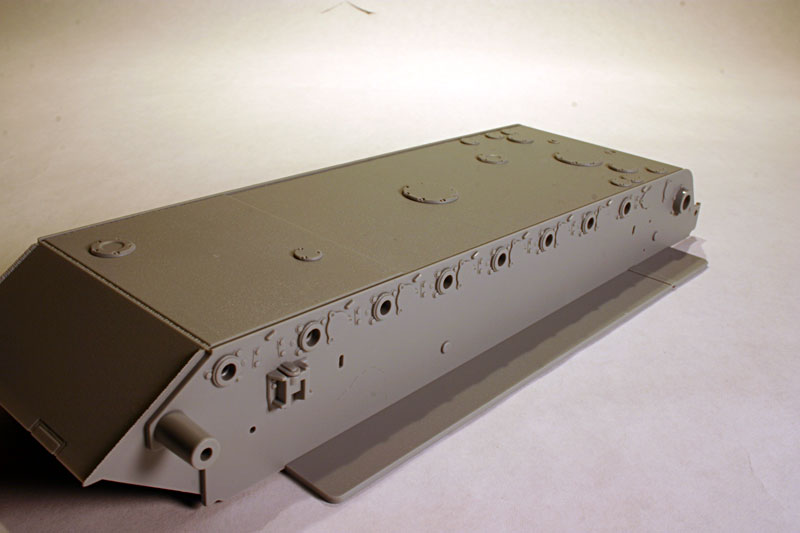
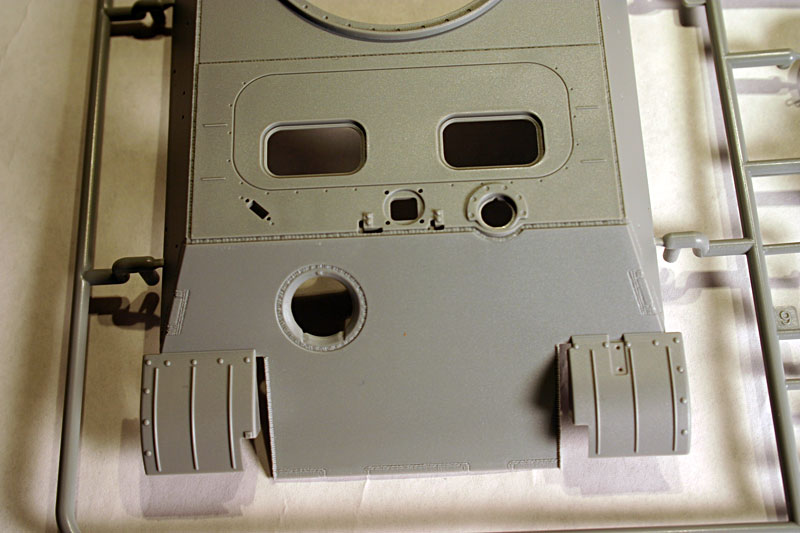
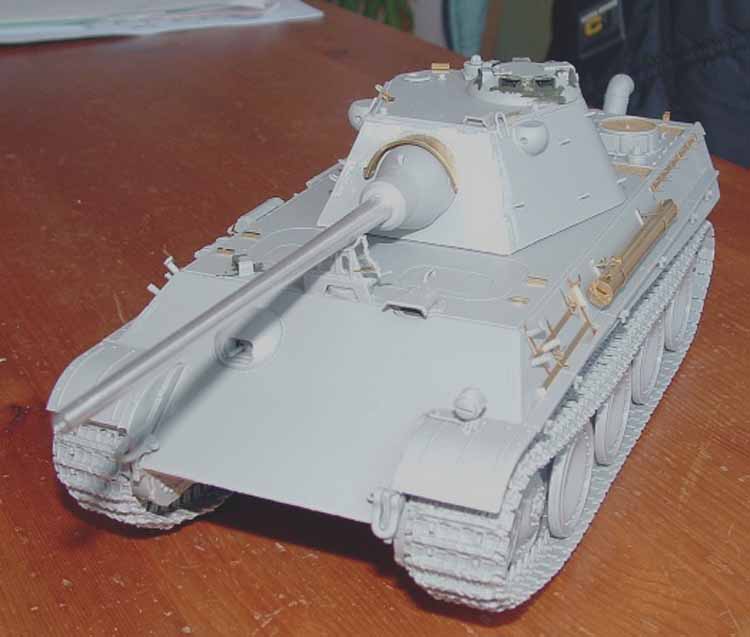
The kit uses many parts from the DML kit 6268, Dragons Smart kit of the late Panther-G. With the option of the prototype, a complete Ausf. G chassis can be built. The production variant differs in a number of points. Cyber Hobby have chosen to include the new armor interlocks. Further, the hull features the extended thicker front roof, as well as the lift-and-slide hatches. Although no information about the design of these hatches exists, Cyber Hobby has chosen to model the hatches after the regular Ausf. G hatches. This is a defendable choice, as the kit demonstrates gives the option to have the hatches be workable.
Apart from these differences, the remainder of the hull is identical to the Ausf. G hull.
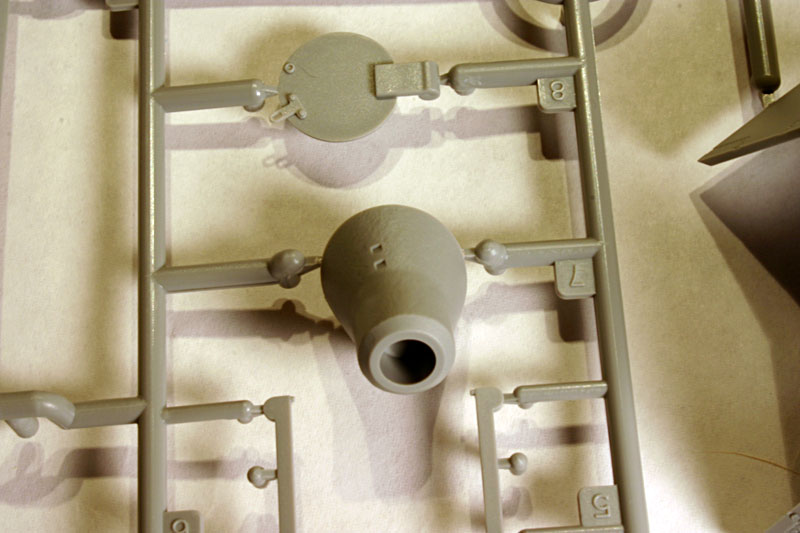
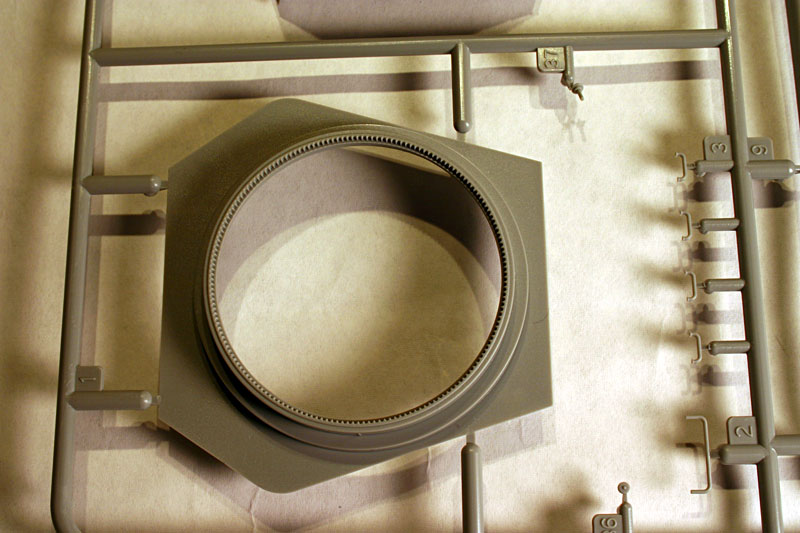
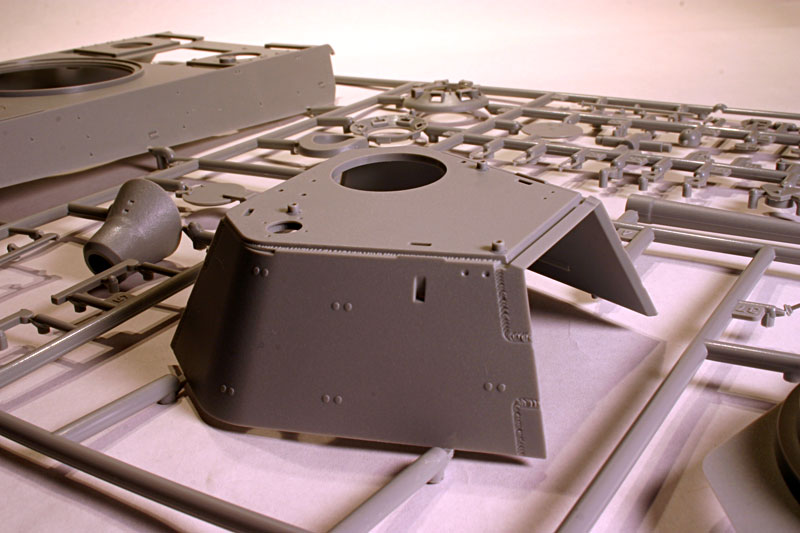
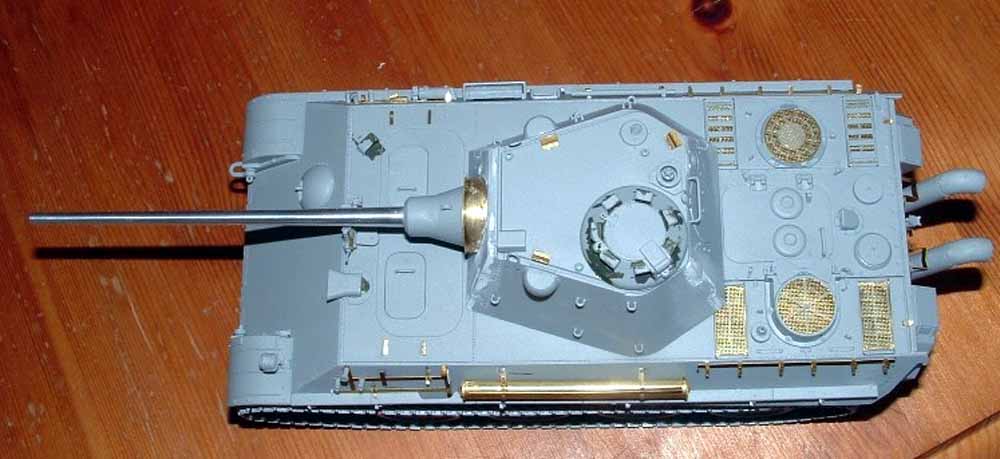
Now, on to the most interesting bit, the Schmalturm. Comparing the Schmalturm in the kit to drawings in Panzer Tracts 5-4 and/or Panther, the quest for combat supremacy, shows that the turret is spot on dead accurate. A big improvement over Dragons earlier attempt at the Ausf. F.
The details included are superb, as we have come to expect from Dragon. Again, slide molding is used to the best. The turret is broken down into a roof with the sides and separate bottom, front and rear. Unfortunately, these parts are without actual connecting points. Dry fitting the parts didnt give a positive lock to indicate they were in the right place. More on this later...
The turret is without any interior parts, no breech, nothing.
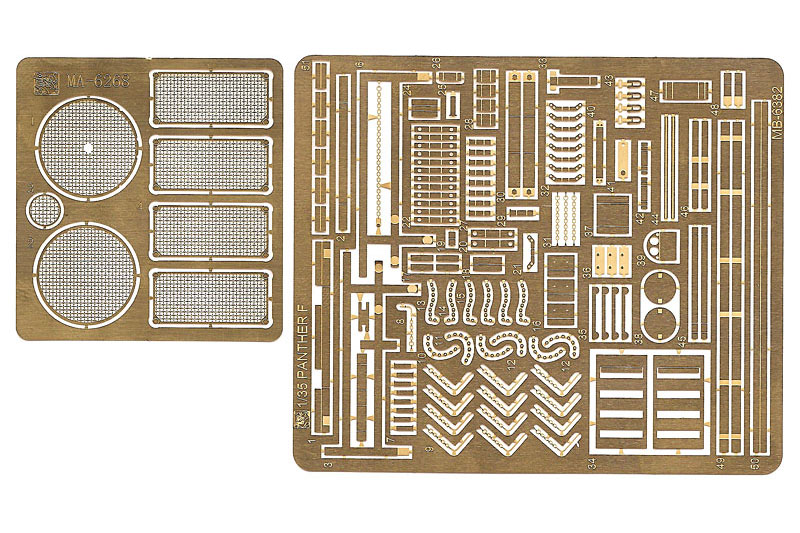
Next to the plastic parts the box also holds the Cyber Hobby Ausf. G upgrade set. This replaces plastic parts like the round container, poison gas panels etc. Also in etched brass is the debris guard over the gun mantlet, pre-formed. Curiously, the Schürzen are not included in this kit.
Also present in the box is a piece of sizable PE that is not references in the instructions. I think this is an alternative lower hull front.
Building the chassis
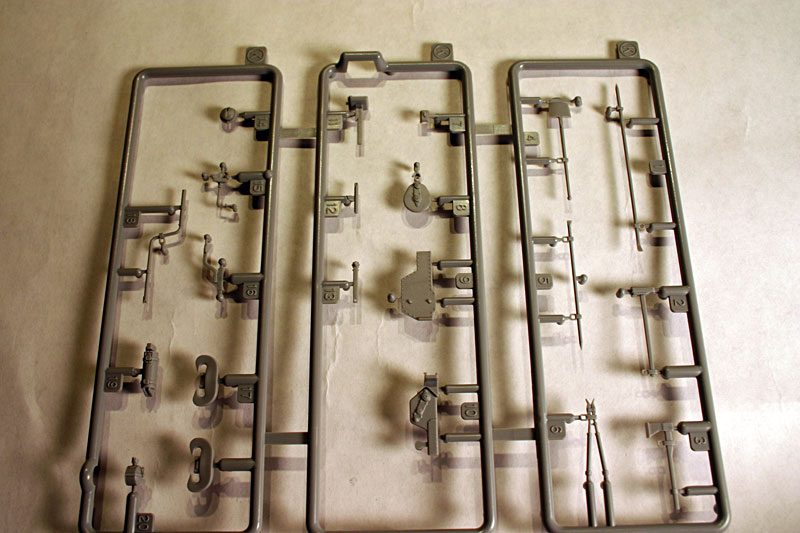
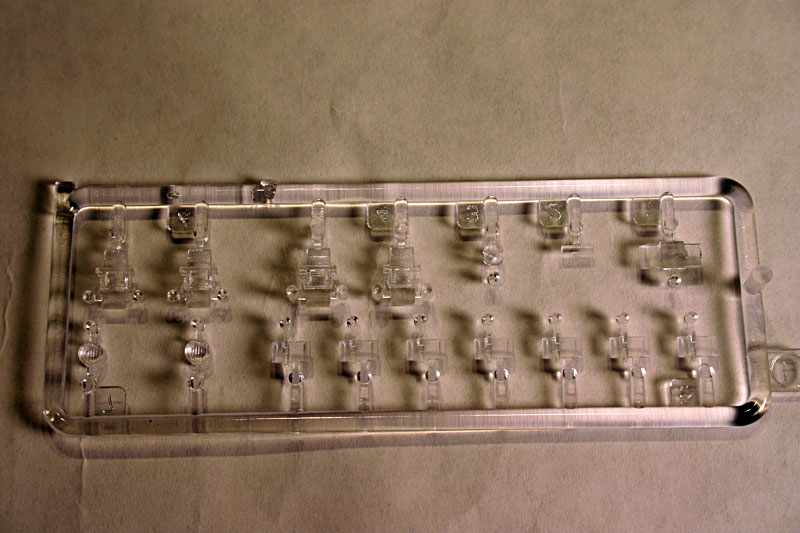
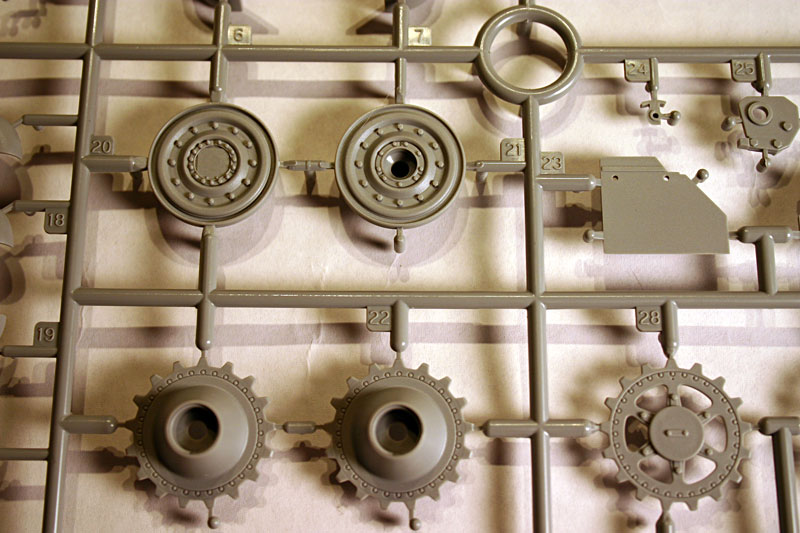
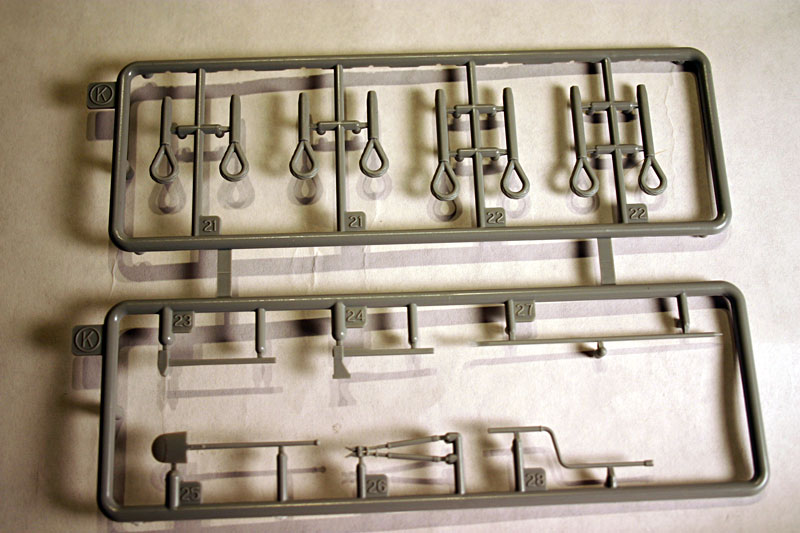
Having become used to building DML kits I can only say, this kit builds faster. As DML has perfected their molding, the parts breakdown is clever and detail included per part is excellent, minimizing their number. However, I couldnt help but feel puzzled by the locations chosen on parts where they connect to the sprues. In a few cases, it needed care to cut parts without damaging them. One very odd one is the rear convoy light, which is in clear plastic, but has the connection placed along the length instead of on one or both of the ends.
I will not go into much detail concerning the chassis as this has been covered in other reviews of the Panther-G smart kit. I will give some of my thoughts.
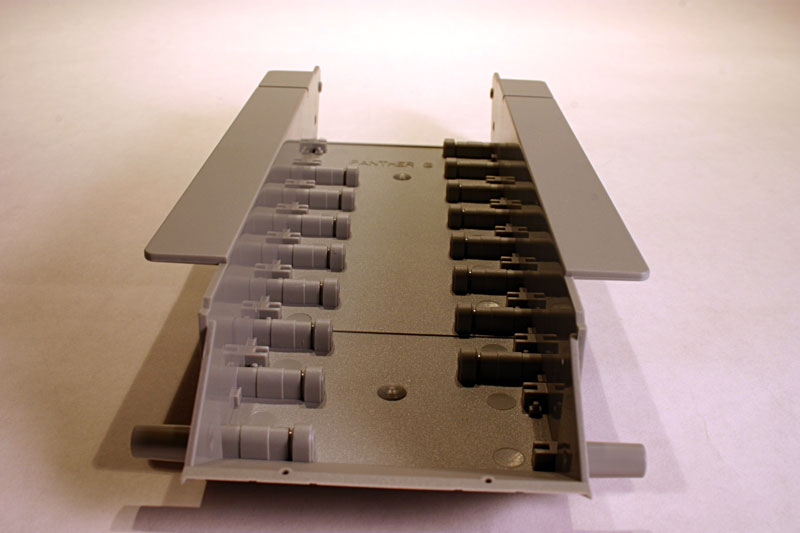
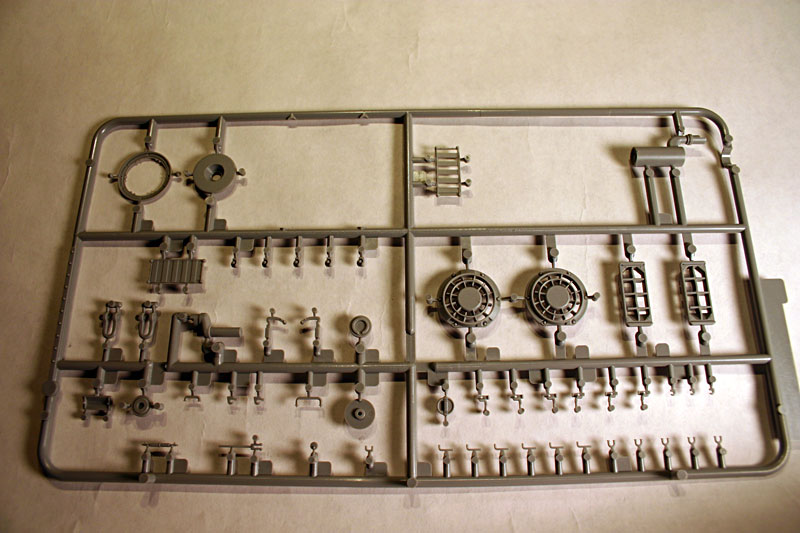
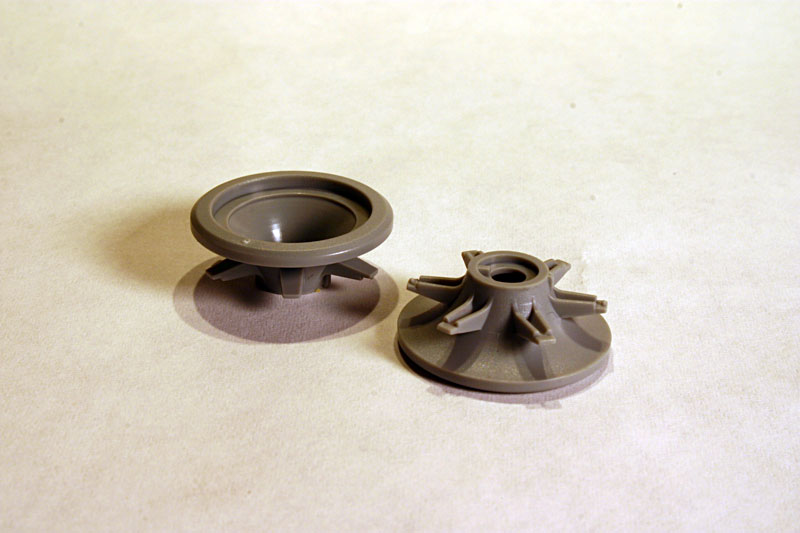
Much of the detail incorporated in the hull, literally, will remain hidden. Im talking about the torsion bars and the cooling system and fans. The torsion bars are close to perfect compared to pictures, but without further interior detail, its not worth showing. Also, once the hull is closed up, little can be seen through the hatches. Same applies to the rear detail of the fans and cooling, nothing can be seen once the PE-gratings are in place.
The PE-set has been reviewed by Brian Balkwill, and he has given me some hints during my build of this kit. He told me the construction of the tube was not easy, and that he ruined it and used the kitparts instead. My experience with the rack was similar, I lost part of the PE and replaced it with plastic strip.
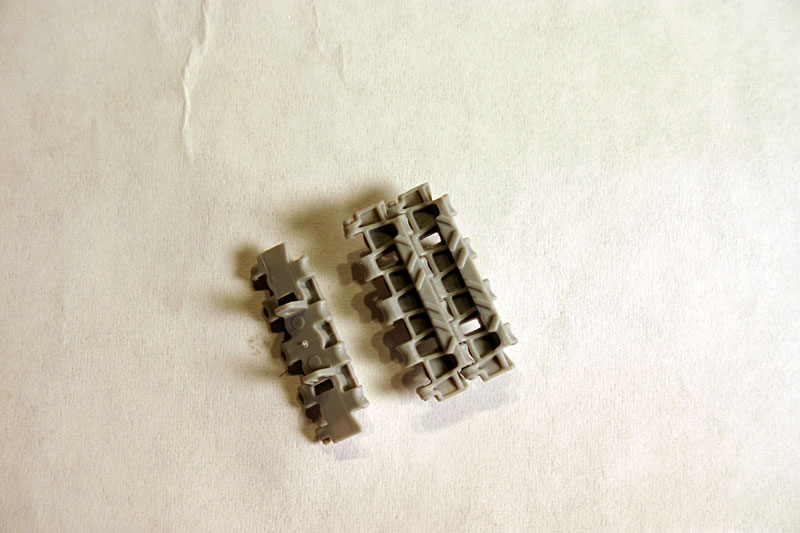
I ran into the same problems he stated concerning the track hangers. Neither the magic tracks, nor Modelkasten or Friulmodelismo track links could be fitted and have a pin inserted. I therefore chose to represent the tank without spare tracks.
I also experienced the unforgiving nature of the PE, as once you fold, folding back will break the part. The rack for the jack block was lost this way. The kit parts were used instead.
The driver and radio operator hatches as said can be installed to be workable. One warning, although they slide in and out, they can also easily be dislocated and either drop into the hull or onto the ground.
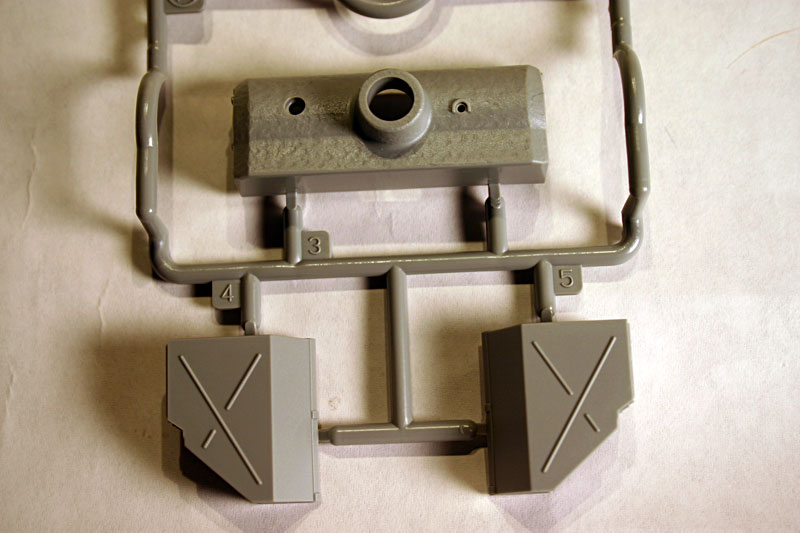
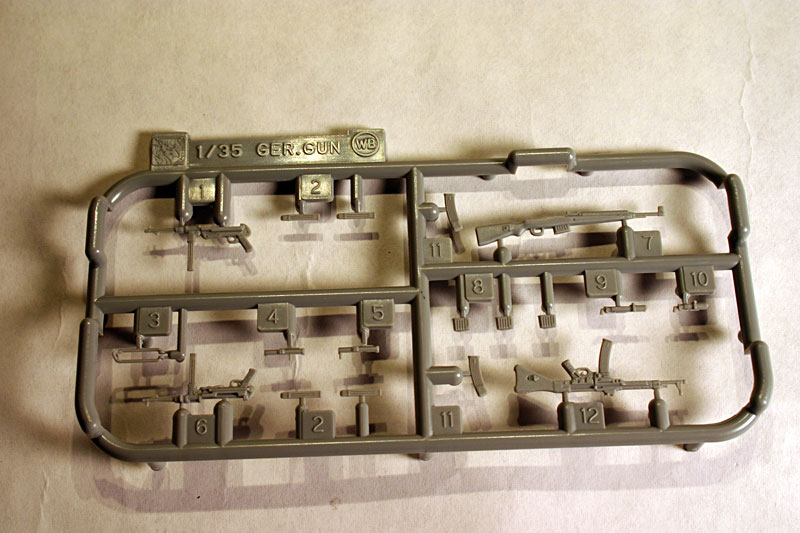
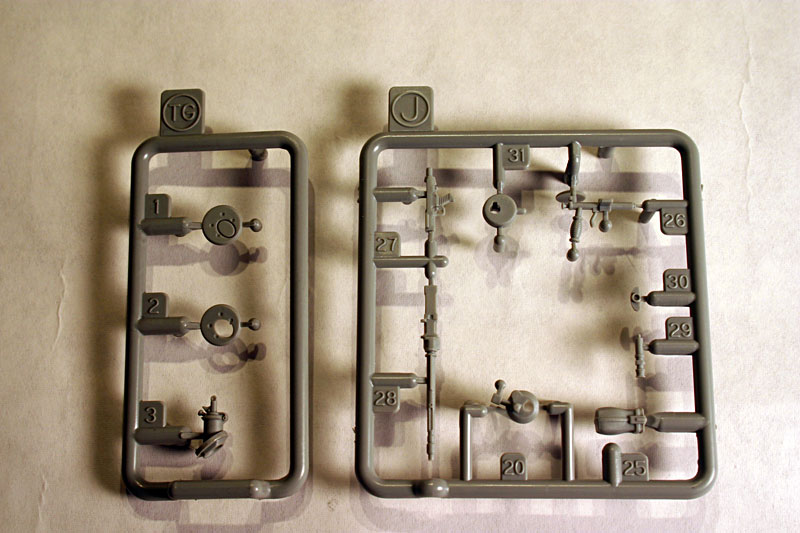
I didnt use the MP-44 from the set of Generation 2 weapons included. Since the hatches would be left mainly closed, I figured I could use this beautiful piece of plastic better outside the tank. The Kügelblende has the extended barrel fitted, no need for the MP-44 at all.
Apart from these points, the rest of the chassis builds identical to the Panther-G
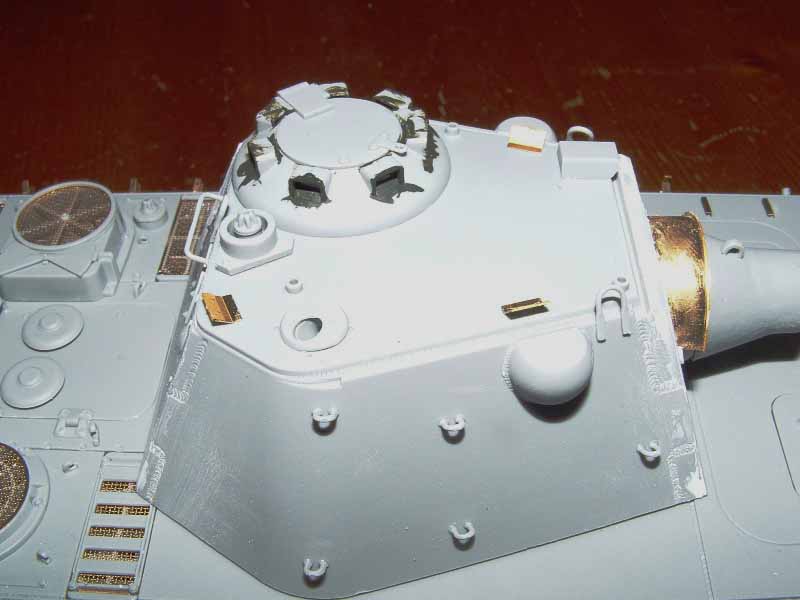
Building the Schmalturm
Ill admit that the first part of my build was the turret. The Panther-F has been a subject of great interest for me ever since I first read about it in Spielbergers Panther und seine Abarten.
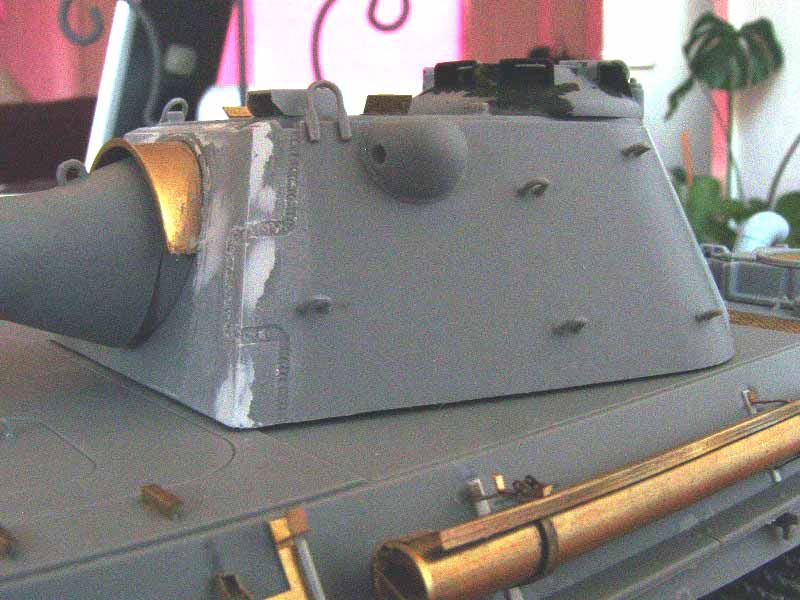
This kit gives perhaps the definitive Schmalturm. I havent found anything wrong. I needed to make 1 correction as I built the kit as a production vehicle. The opening for the periscope in the turret front had to be filled, as the telescopic sight was used instead. A simple fix.
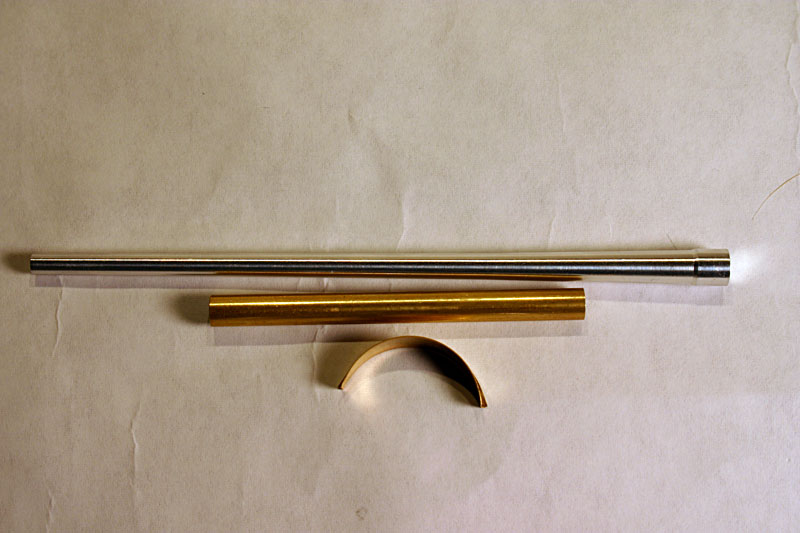
The aluminum gun barrel simply drops into the mantlet with a drop of CA glue securing a strong bond. Once the whole barrel and mantlet assembly is complete, the pre-formed debris guard can be fitted. I found that this needed some further bending. Annealing the part makes it easier to bend without distorting the shape. The pivot assembly inside the turret is a simple design, but it does the job, providing a stable gun at various angles of elevation.
The rear is also a simple build, the hatch can be left workable, and no difficulties were experienced with other parts. The turret shell was improved with the PE poison gas panels, an opened Nahverteidigungswaffe installed, the cupola built and antenna base added. The clear periscopes were pre-painted, with the covers painted Oliv Grün. These will be masked once the tank is being painted.Time to join it all together. At this point, the problems arose.
As I said earlier, there is no positive lock to the turret parts. All turret parts have beveled edges that do not butt up to each other. The actual area of contact thusly is limited. The turret bottom doesnt line up with the actual underside of the turret, but is placed further up inside the turret. It also doesnt add much support for the front or rear. Unfortunately I ended up with gaps where the front and rear met the turret sides and roof. These needed filling and sanding down.
Conclusion
So, what do I think of this kit? Based on the information available, this is THE definitive kit of the Panther Ausführung F.
Yes, there are some issues with some of the parts, especially the included PE-set, but those are minor when set off against the whole kit. The already impressive molding of the Smart Panther has been combined with a new turret giving the builder an impressive representation of what might have been.
Is it historically accurate? We may never know. Perhaps the running gear is completely wrong, but we just dont know.
If you want to build a dead-accurate vehicle, stick to the second Versuchs Schmalturm Prototype. Leave of the debris guard, D-loops and poison gas panels, and add Zimmerit to the Ausf. G hull and you nail it.
Production vehicle. Well, yeah, it is an exact match of what is drawn in Panzer Tracts 5-4. Taking that as the benchmark, this kit scores full points.
The kit is a joy to build, there is no area that taxes ones skills to its limits, although tool clasps will always remain a nerve-wracking task to complete. Ive not yet added tools or cables, as the kit is not yet painted. I will show the painted vehicle at a later date, sporting a perhaps unexpected camouflage scheme.
As this is a Cyber Hobby offering, I cant really say you should get this kit, since it can no longer be ordered via Cyber Hobby. It has already surfaced on eBay demanding high prices. Those who wish to build this kit either have to fork out the cash, or hope that DML will eventually re-release their Cyber Hobby kits into regular retail. Perhaps without the PE, but a set from Lion Roar, Voyager, Aber or Eduard will take care of that.
That said, I can also say: Thoroughly recommended for German armor builders and Panther enthusiasts in particular.
To end I want to thank both Jim Starkweather and Jim Rae for providing me with this kit and giving me the chance to build and review it. Also thanks to Brian Balkwil for his advice on the PE and painting.
SUMMARY
Highs: An interesting subject, now rendered in the best possible way making this the definitive kit of the Panther F.Lows: The turretparts don't really give a positive connection to each other, which can leave gaps. The included Ausf. G upgrade set has some problems.Verdict: A thoroughly recommended kit, based on the excellent Panther G smart kit, giving both the casual modeller as the German armour enthousiast a great subject to build
Our Thanks to Cyber-Hobby.com! This item was provided by them for the purpose of having it reviewed on this KitMaker Network site. If you would like your kit, book, or product reviewed, please contact us.
About Herbert Ackermans (H_Ackermans) FROM: GELDERLAND, NETHERLANDS
I'm a 34 year old Dutchman, currently living in Ammerzoden, Gelderland. My main interest is German armour from WW-2, and specifically Panther and Tiger and their variants. And I count every nut and rivet!
Herbert, a very nice review. I have already printed it and tucked it into the box of this kit for when it hits my workbench. I can't wait to see your with paint on it.
Some of the photos from D-B illustrate a Panther hull or two in welding jigs, so it's possible to see the bottom of the hulls. Are there any of these photos in color? Are they the greenish-grey color you describe?
I seem to remember reading somewhere that some Panther hull bottoms were left in a red primer.
On another note, I'd hope that someone would come up with a Panther F interior aftermarket kit, but that's probably unlikely as the C-H Panther F is a limited edition kit and secondly, a lot of the interior details, particularly regarding the Schmalturm, are probably unknown anyway...
Great review with lots of great historical information helping the builder to produce an accurate vehicle.
Thanks for the time and effort that obviously went into this review.
Now I am at a loss about the Octopus camouflage But I am very interested. Could somebody please fill me in
EDIT: I found a post here at the forum where a King Tiger has been made in the octopus pattern. Apparently a hard edged green and dark yellow King Tiger with dark green "rings" over the dark yellow. Did I get that right?
The pictures of the Panther hulls in jigs are not from DB, but are from DHHV, which built the hulls from armour plate before shipping these to DB or other factories for final assembly. I don't know of color pics from DHHV, but the pictures I refer to are from the DB line.
That's new to me, but it could've happened.
The hull interior is identical (-ish...) to that of an Ausf. G. The only difference between the 2 is that the F hull has a thicker and further extended front hull roof, and the sliding hatches. Other that that, they are the same.
The Schmalturm wreck at Bovington, is that completely gutted inside?
In Spielberger's Panther und seine Abarten are pictures of the KwK 44 75mm gun showing the gun trunnions and mounting.
The kit comes with p/e ones as well. The kit tracks fit it, but the pins wont be able to go on, on the otherhand, using the p/e racks along with some Friul spare links, they fit perfect and the pins will go in as well.
The kit comes with p/e ones as well. The kit tracks fit it, but the pins wont be able to go on, on the otherhand, using the p/e racks along with some Friul spare links, they fit perfect and the pins will go in as well. [/quote]
Not my experience, I have a set of FM tracks for the Panther-G Smart kit and the Premium late Panther-A, and I couldn't see the bottom hole of the trackhanger when using those links, I tried the link both ways, chevrons up and down.
Might look into that again, there's sure to be some FM links left after these 2 kits are finished.
I have an unused set of Modelkasten late Panther tracks I was thinking of using for this. We'll see if I can work something out and get some spare tracks to fit somehow...
I'll let you all know how it works out, but I'll warn, I'm a very slow model builder...


Comments