Aftermarket giant Eduard treats us to a pleasant experience with its release of photoetch intended for the Tamiya 1/48 scale Panzerkampfwagen III Ausf L (Kit no. 32524).
contents
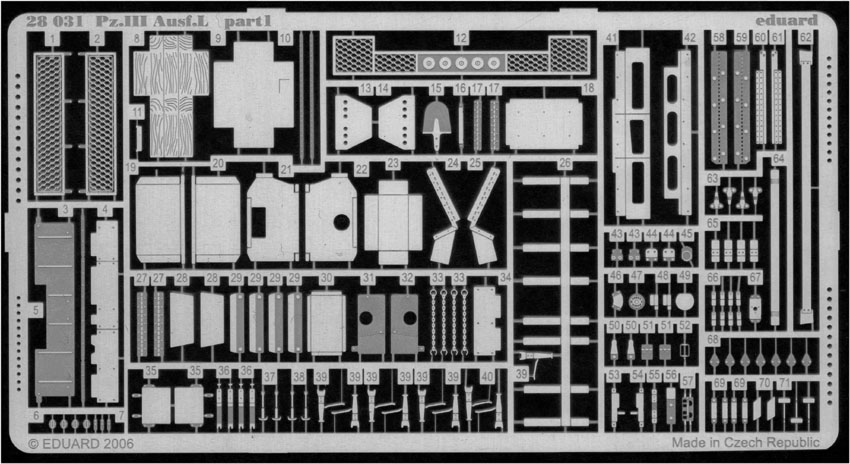
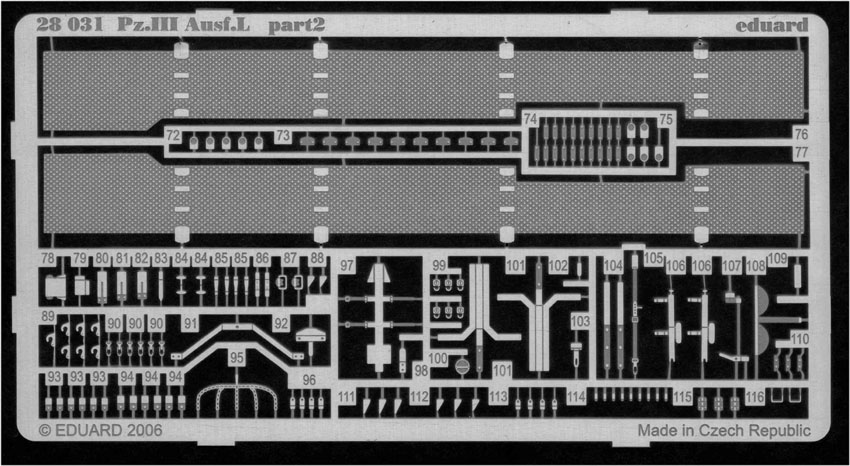
This particular offering consists of two metal frets one 68mm x 128mm (roughly 2.75in. x 5in.), and the second 52mm x 107mm (2.25in. x 4.25). Pressed between a pair of cardboard protectors, the frets are accompanied in the clear plastic envelope by no less than seven pages of instructions printed on four 210mm x 295mm paper pages.
In my opinion, you can have the most complete and well-produced set of photoetch in existence, but without thorough and, especially, easy-to-follow instructions, some modelers will not get the full benefit of the product. In this case, Eduard comes to the rescue with instructional artwork that is both complete and neatly arranged on each multi-colored page.
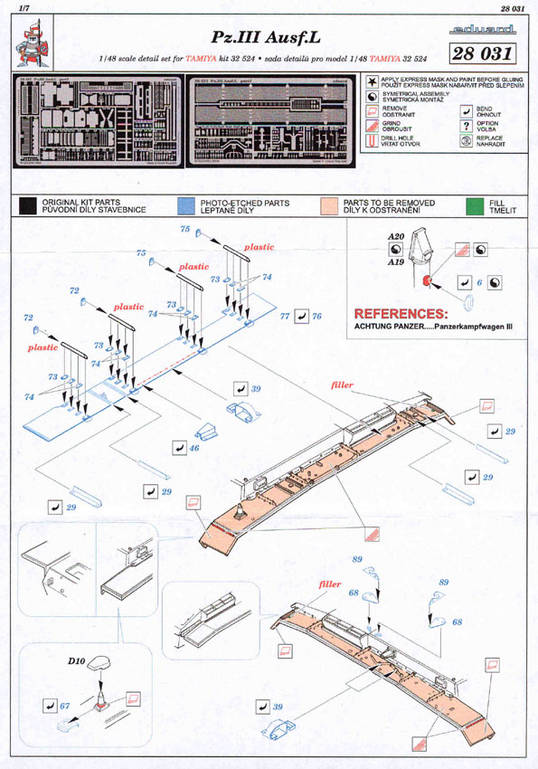
Once you understand the code key the instructions are a breeze to follow. Original kit parts are identified as bold, black lines while Eduards metal replacement components are drawn as ghost-like blue images. No confusion there! Kit details that require removal are displayed in very prominent orange.
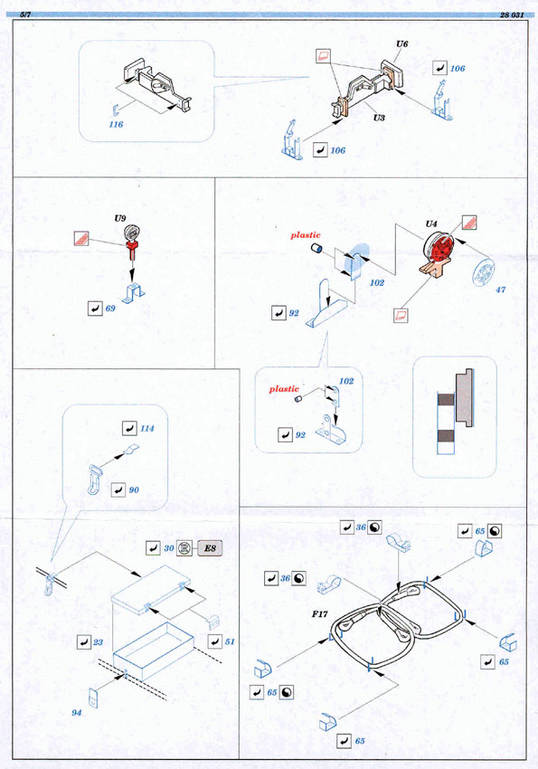
Removal of the molded-on detail located on the kit fenders takes center stage on page one. Once accomplished, Eduard asks you to simply graft a pair of well-designed treadplates to each and detail accordingly. Quick and painless! One trap for the ham-fisted among us could be the miniscule tool clamps. More on those later.
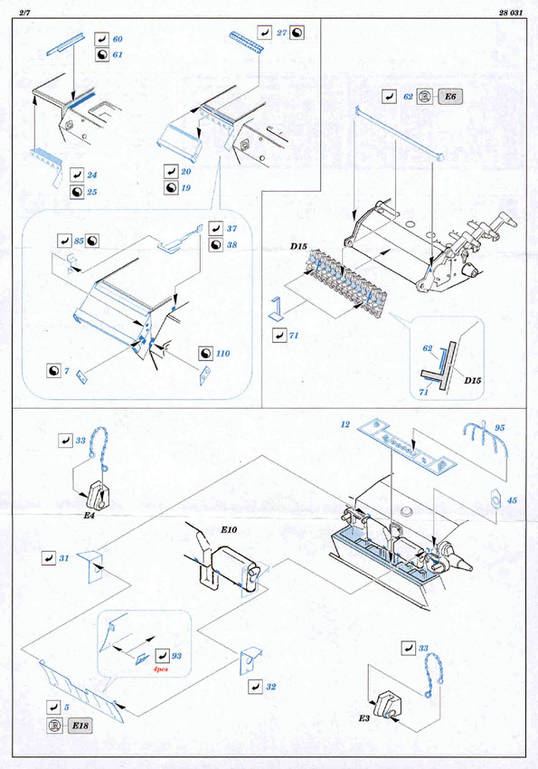
The second page of instructions deals with the installation of the front fenders. While this assembly sequence is quite involved, the etched parts are real gems and the extra work should pay dividends later. The spare track rack, located on the lower front hull, is also addressed. Please note the rack must be installed in conjunction with the spare track and the example shown on the instruction sheet is drawn upside down!
The final half of page two is devoted to the details on the lower rear hull. Installation of the intake air deflector plate unique to the late ausf J and L versions is defined. Also included are intake mesh, muffler brackets and a handful of small chains for the tow pins and smoke candles. These chains look a tad over scale on the fret, but heck, we are dealing with 1/48 scale and they should look okay when painted.
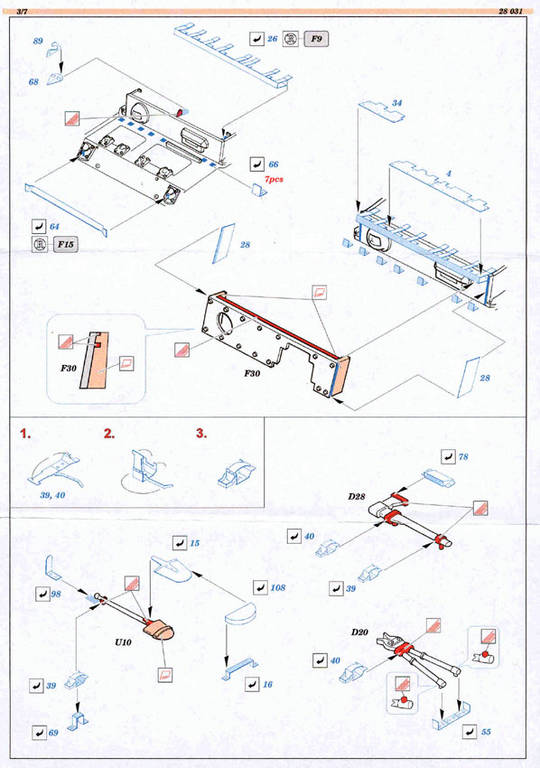
Peculiar to the ausf L variant was a 20mm plate of spaced armor bolted to the front superstructure. The modeler simply follows the directions on page three to modify and install the kit armor. Eduard furnishes everything you need to accurately portray this feature. A really nice set of photos and drawings of this arrangement can be found in Achtung Panzer - Panzerkampfwagen III, which, coincidentally, the manufacturer identifies as a reference for this set.
This page also instructs the modeler how to construct the really neat little tool clamps I mentioned earlier. A seemingly simple one-piece affair, these gems will require no less than four individual bends to create a detail just over 1mm in length! Eduard supplies nine of these beauties. I didnt count how many would be needed for this model, but knowing me, Ill no doubt require a few more.
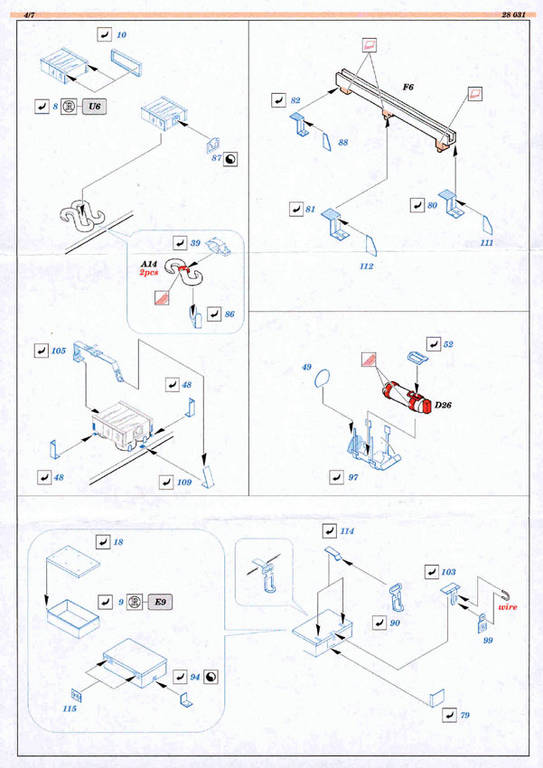
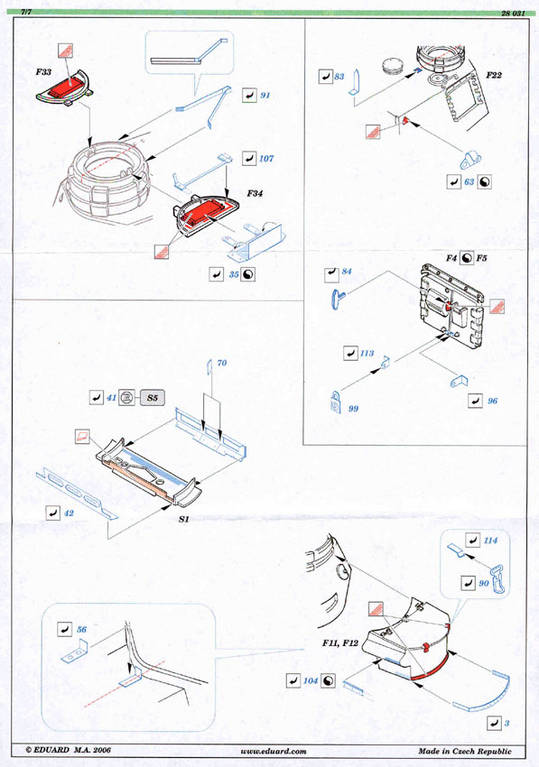
A photo etch jack block and brackets are included in this set. Though I appreciate the attempt at wood grain, this detail will be better served by modifying the kit block or replacing it with a piece of basswood. The bands and retainer strap look really nice, though.
Other details found on page four are standards for the aerial trough, fire extinguisher bracket and a tool box with all the necessary accoutrements. Wheres my No. 10 Optivisor?
If you thought the tool clamps were tricky, wait until you get a glimpse of the jack brackets! You dont really get a blow-by-blow description of how to bend the one-piece bracket, but careful review of the artwork should be explanation enough.
Eduard does a magnificent job replicating each tool clamp and hasp, but unfortunately guidance to locate the particular details onto the fenders is somewhat lacking. Im assuming a modeler will have to rely on their own reference material, or perhaps use the kit as an example, for proper layout of these details.
The turret also gets a bit of attention with new head pads for each side of the commanders hatch, anti-aircraft machine gun mount and side hatch details. The rear-mounted stowage bin receives new clamps and support straps, while the main gun mantlet is embellished with photoetch spaced armor.
in conclusion
All-in-all I certainly recommend this set to enhance your Panzer III L. I will put this product to the ultimate test by incorporating it into a full build review in the near future.
SUMMARY
Another excellent set of photo etched parts to ad to latest creation. Eduards clear, concise instructions should allow you to easily install everything necessary to bring your model up to show standard.
Our Thanks to Eduard! This item was provided by them for the purpose of having it reviewed on this KitMaker Network site. If you would like your kit, book, or product reviewed, please contact us.
About Mike Kirchoff (drumthumper) FROM: KANSAS, UNITED STATES
Modeling for more than 35 years, I have many diverse areas of interest. Presently, those areas include WW2 Soviet and German armor and figures. I also design master patterns with my company Signature Models and have had the honor of working with some of the premier resin manufacturers in the world. ...


Comments