The Panzerkampfwagen IV (Pz.Kpfw.IV), commonly known as the Panzer IV was a staple in the German armed forces during WWII and was the most widely produced German tank ever with roughly 9000 units built. It first entered service in 1939 and was used throughout the war seeing numerous upgrades and modifications during its service life. The Ausf. D version was one of the early variants and the last of the pre-series before production scaled up with the introduction of the Ausf. E. Only 240 Ausf. D variants built, the last of them being completed in 1940.
Dragons Pz.Kpfw.IV Ausf. D (Kit #6873) released in early 2017 is the first of their Platz line models intended to be a much more simplified to assemble when compared to a standard Dragon kit due to the significant reduction in parts. The Platz series is very reminiscent of what you would expect out of Tamiya kit, minimal piece count without sacrificing on detail on quality.
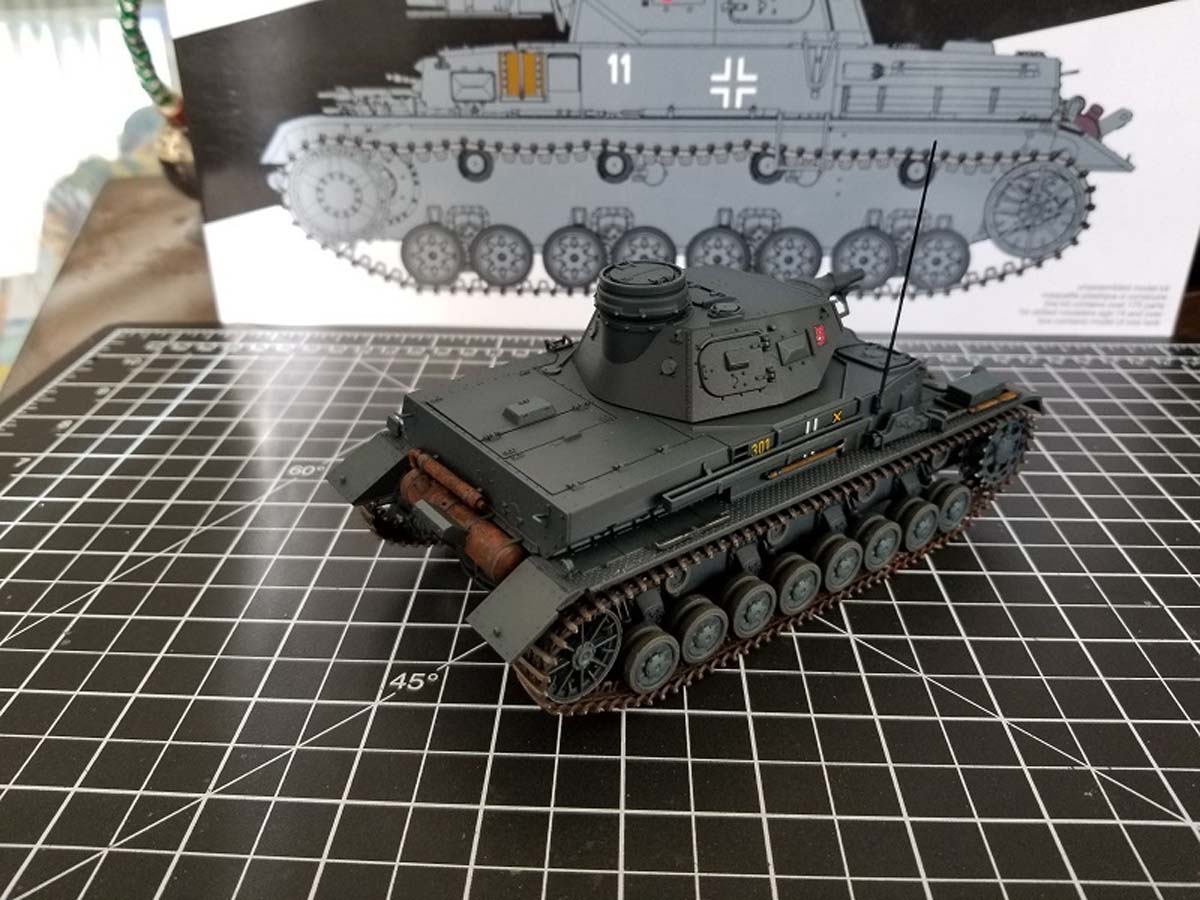
Inside The Box
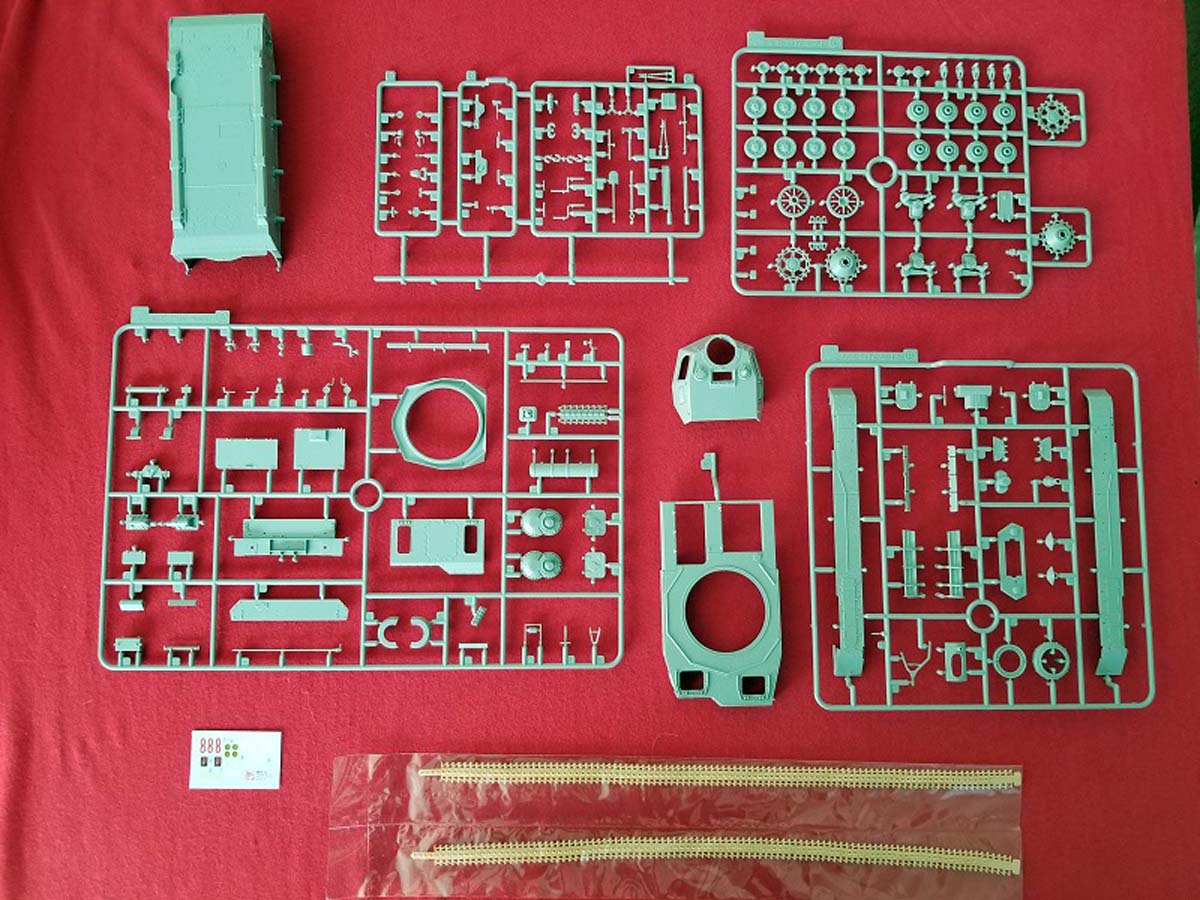
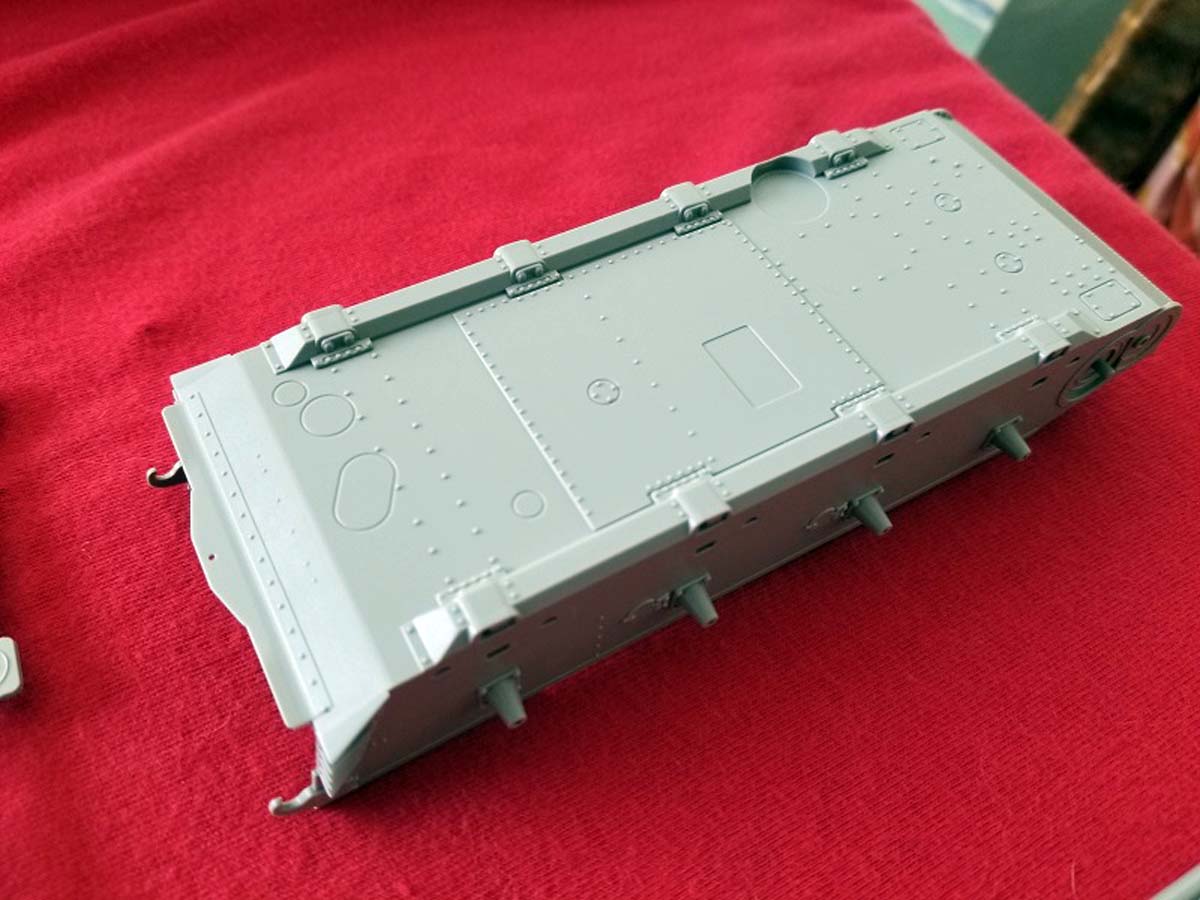
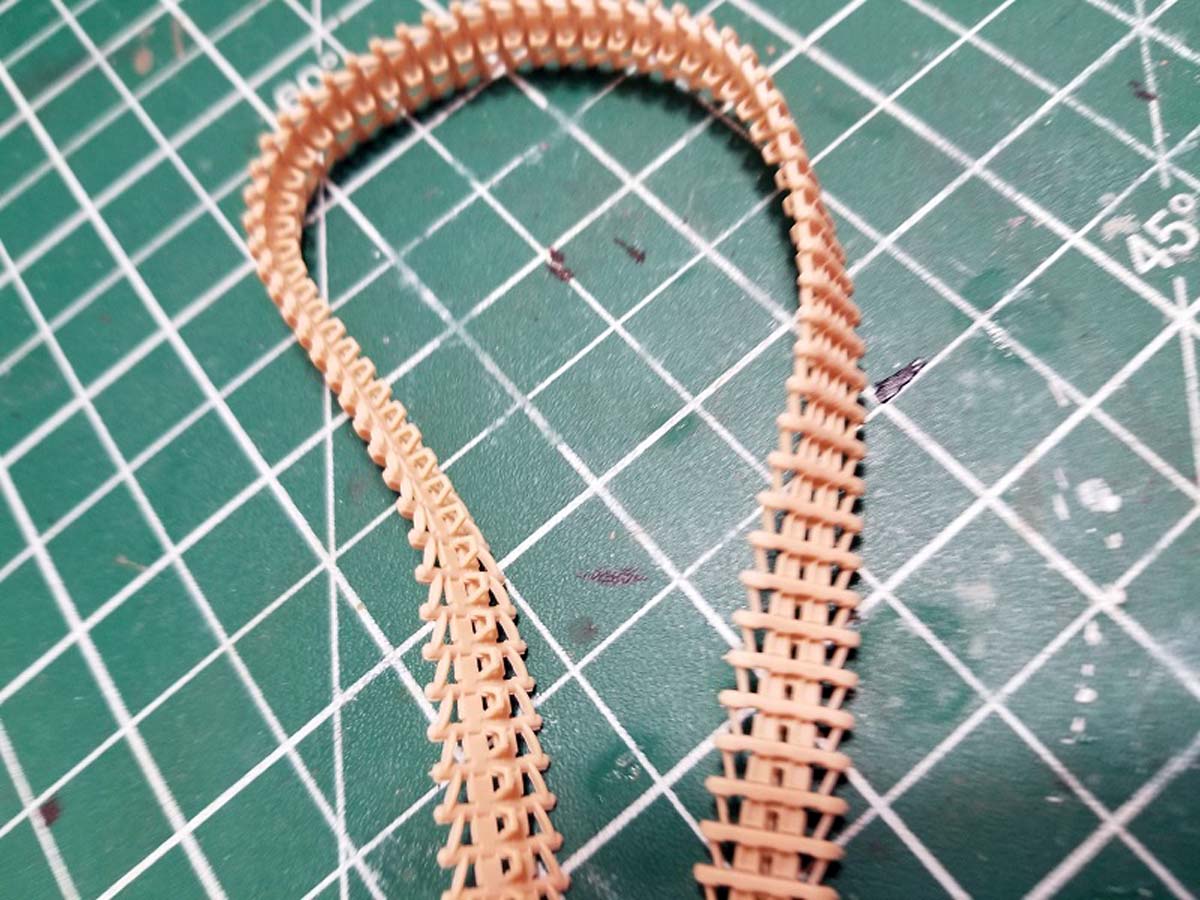
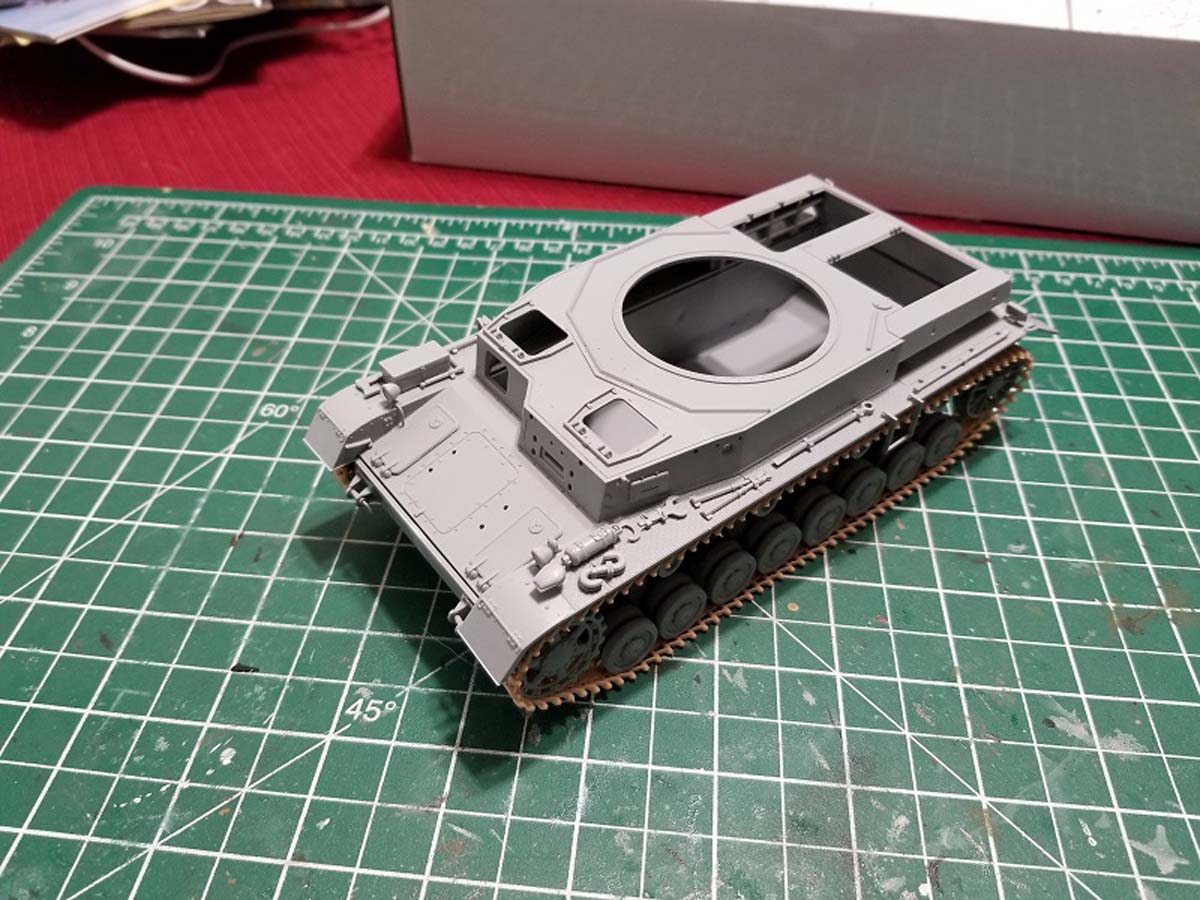
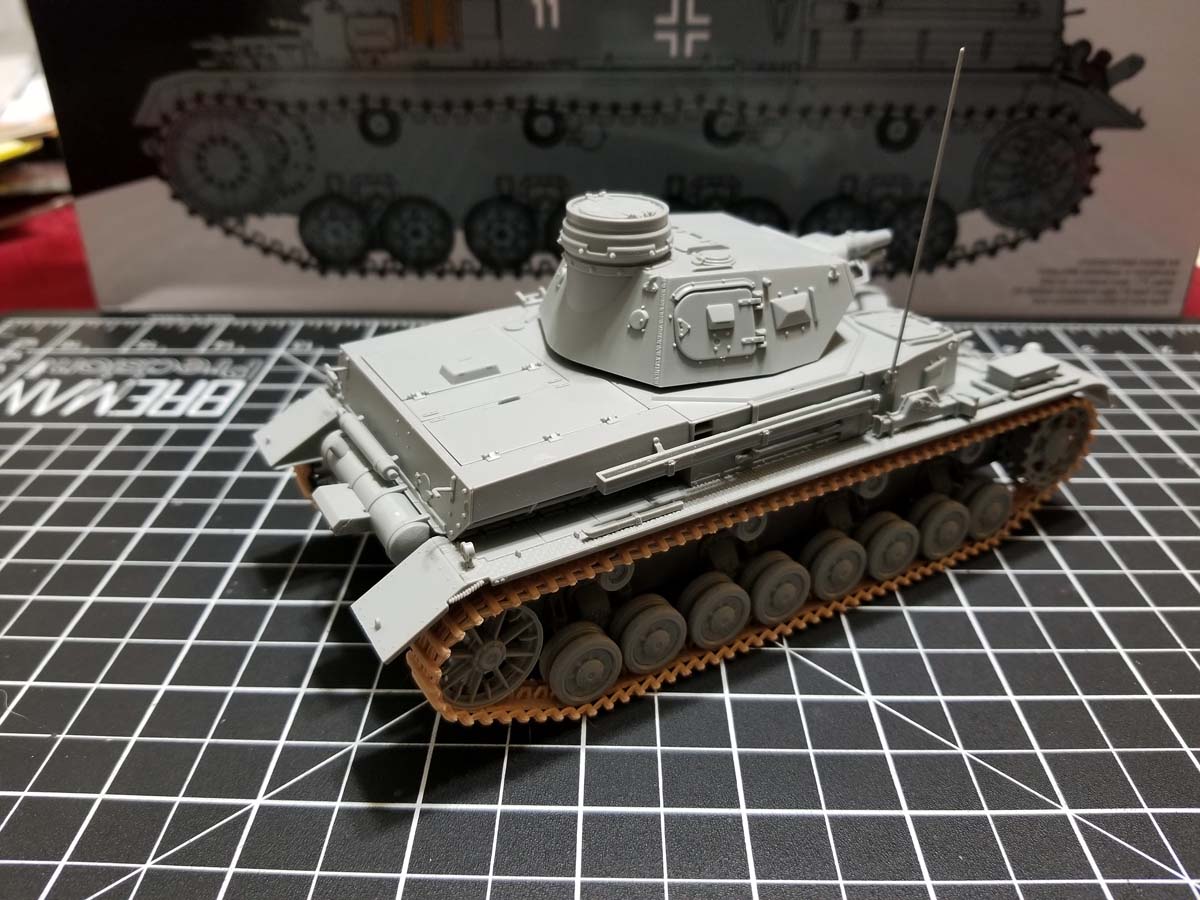
The kit comes in a white box with a simple profile sketch of a Panzer IV and the Platz logo in the top left next to Dragon one. Inside the box there are 5 sprues molded in grey styrene, a bathtub style lower hull, a single piece turret, a single piece upper hull, DS tracks, and decal sheet.
Sprue A x1 (turret ring, engine deck covers)
Sprue B x1 (fenders, cupola)
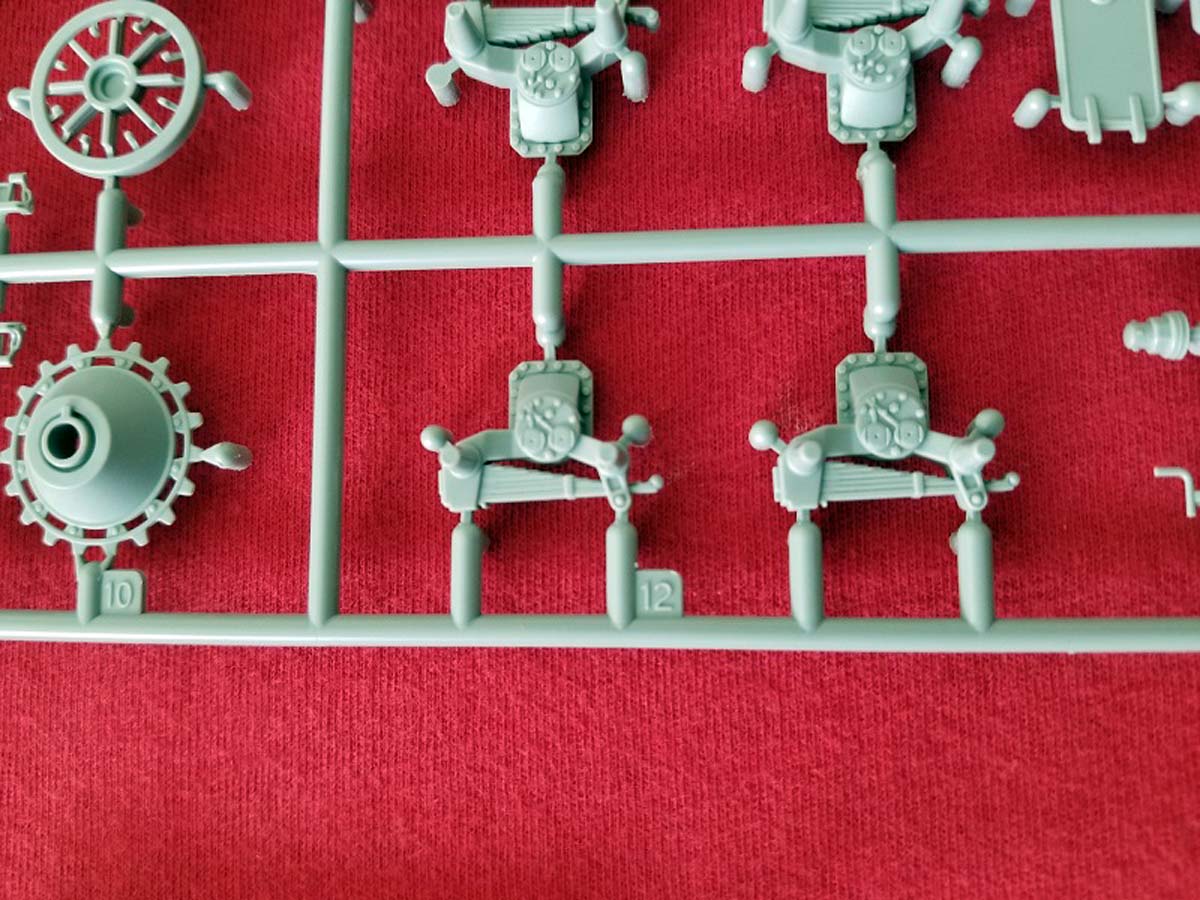
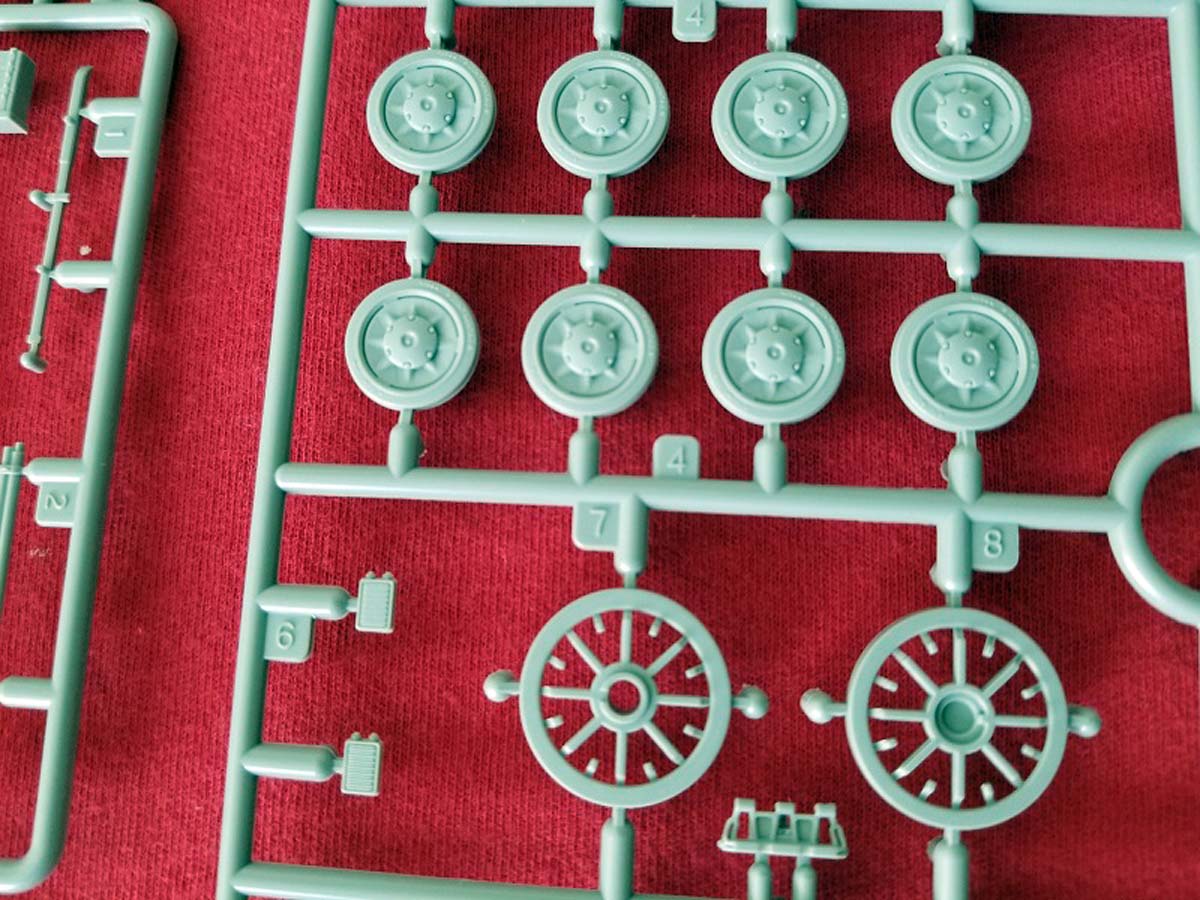
Sprue C x2 (road wheels, suspension bogeys)
Sprue H x1 (pioneer tools)
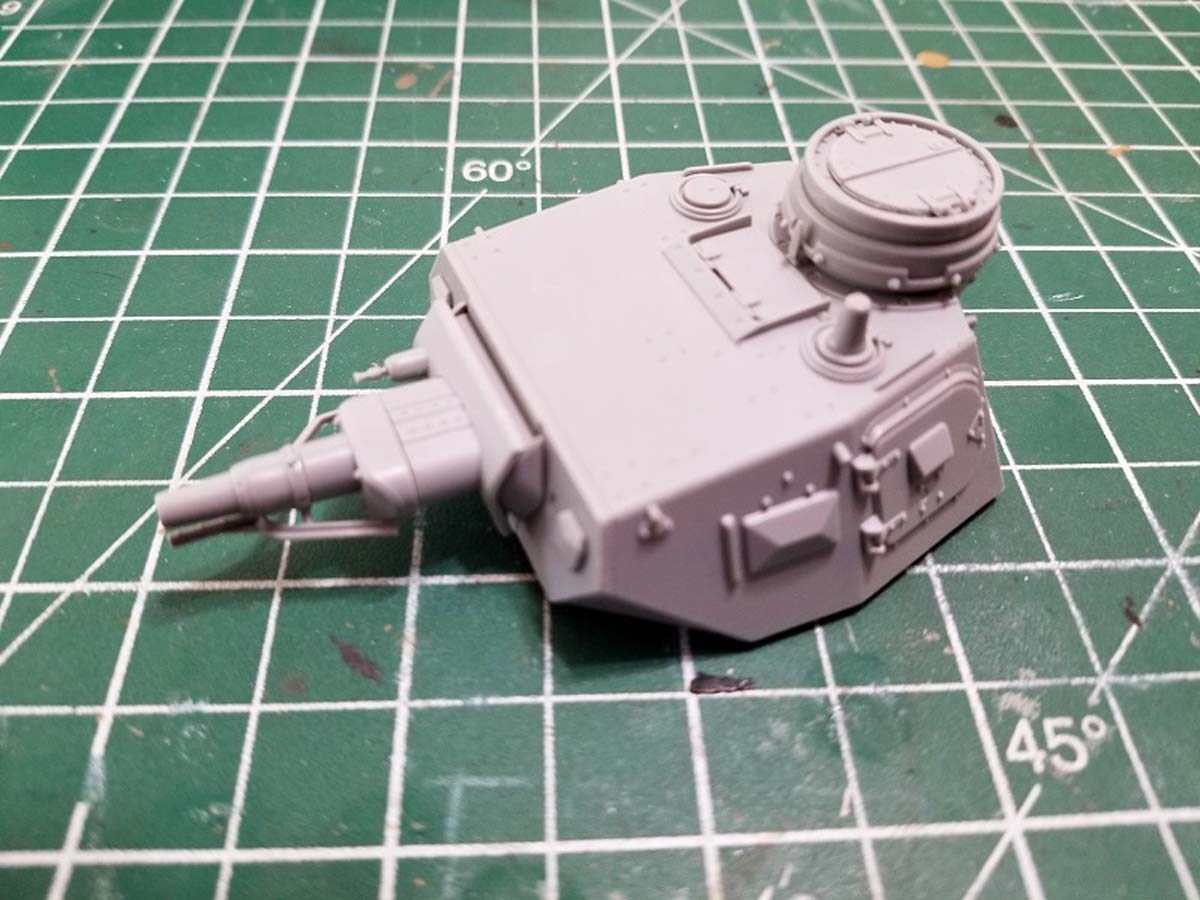
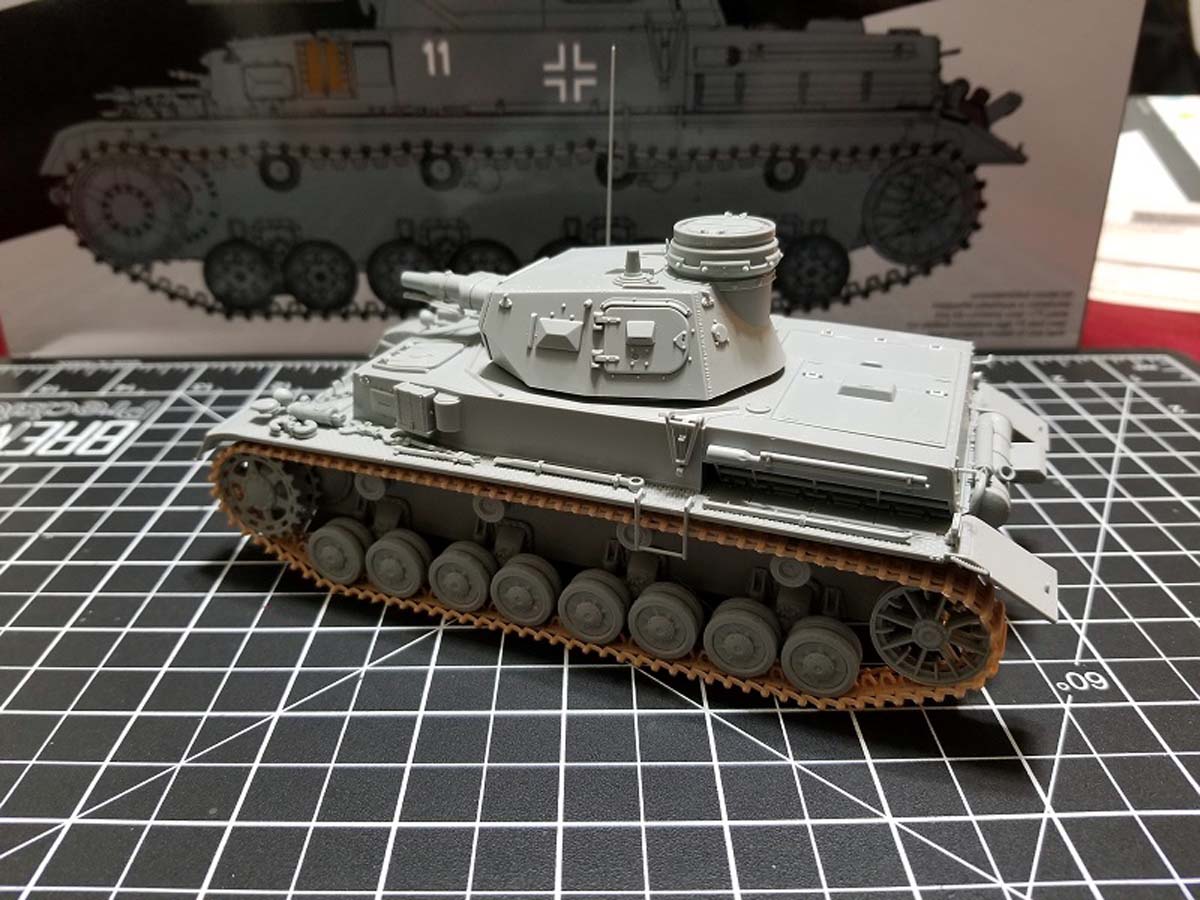
The kit does not include any clear parts or photo etch and all the sprues appear to be new molds to for this release and not recycled on from earlier Dragon models. The mold quality on the parts is superb, Dragon has taken full advantage of sliding molding and turned what once use to be complex multi piece assemblies into single piece parts. The turret in particular is perfect example of this change in molding approach, the bolt detail and welding are stunning.
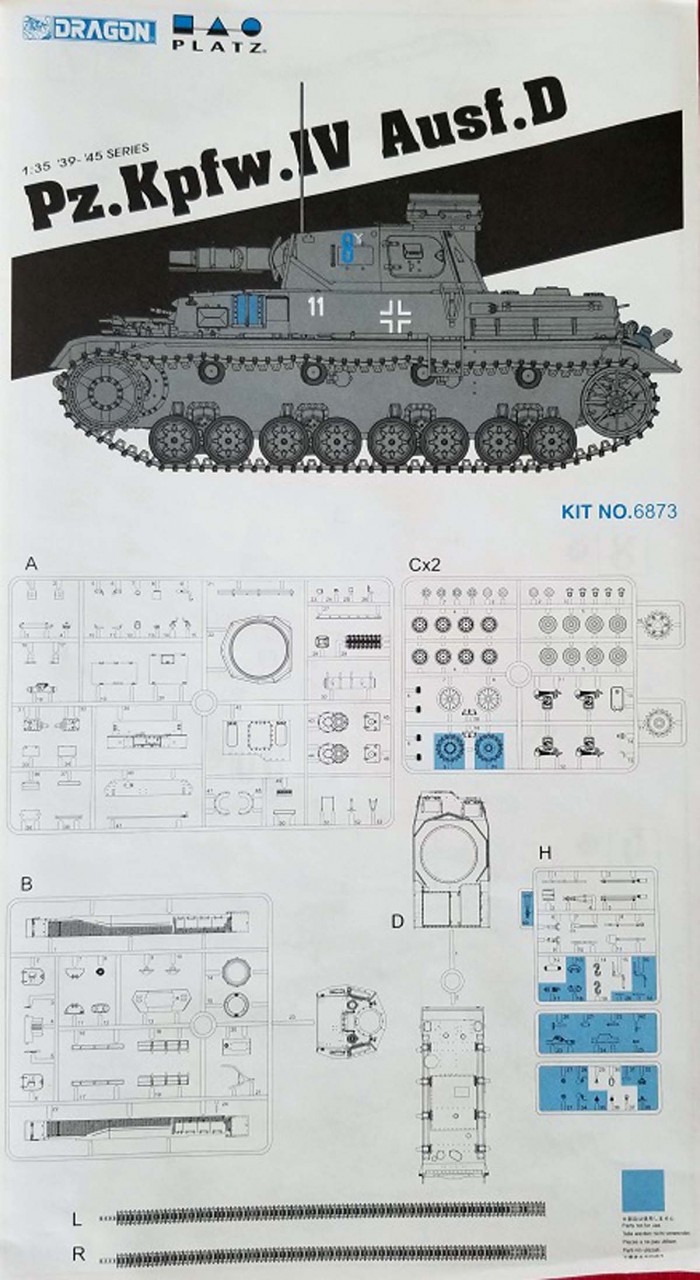
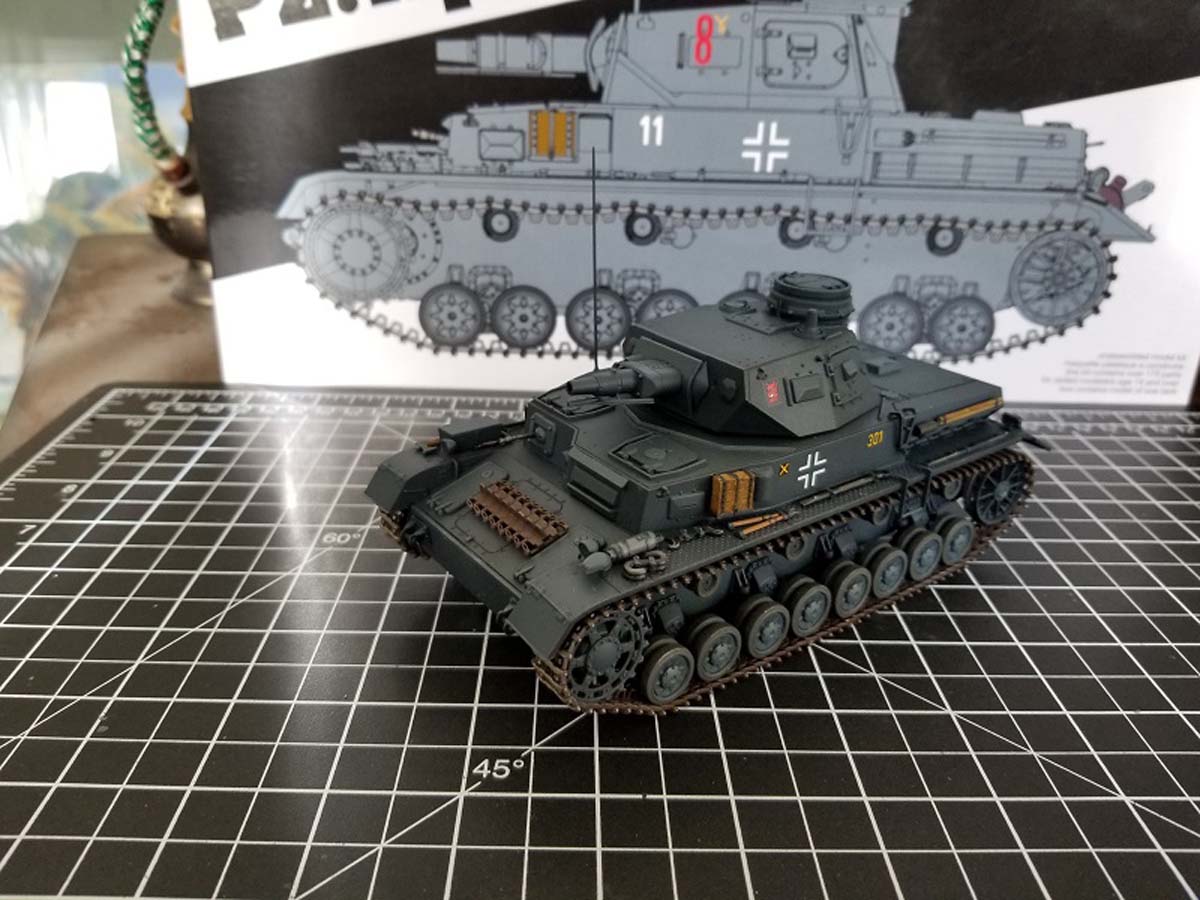
The build sheet and instructions follow the standard Dragon format and the illustrations are easy to follow. All in all there are only 12 steps to complete the model from start to finish. There are 2 marking options in this kit and they both use the German grey camo scheme:
Pz.Rgt 10 8.Pz.Div, Balkans 1941 (German Grey with balkenkreuz makings)
3./Pz.Rgt 31 5.Pz.Div, Balkans 1941 (German Grey with balkenkreuz makings)
The Build
Step 1
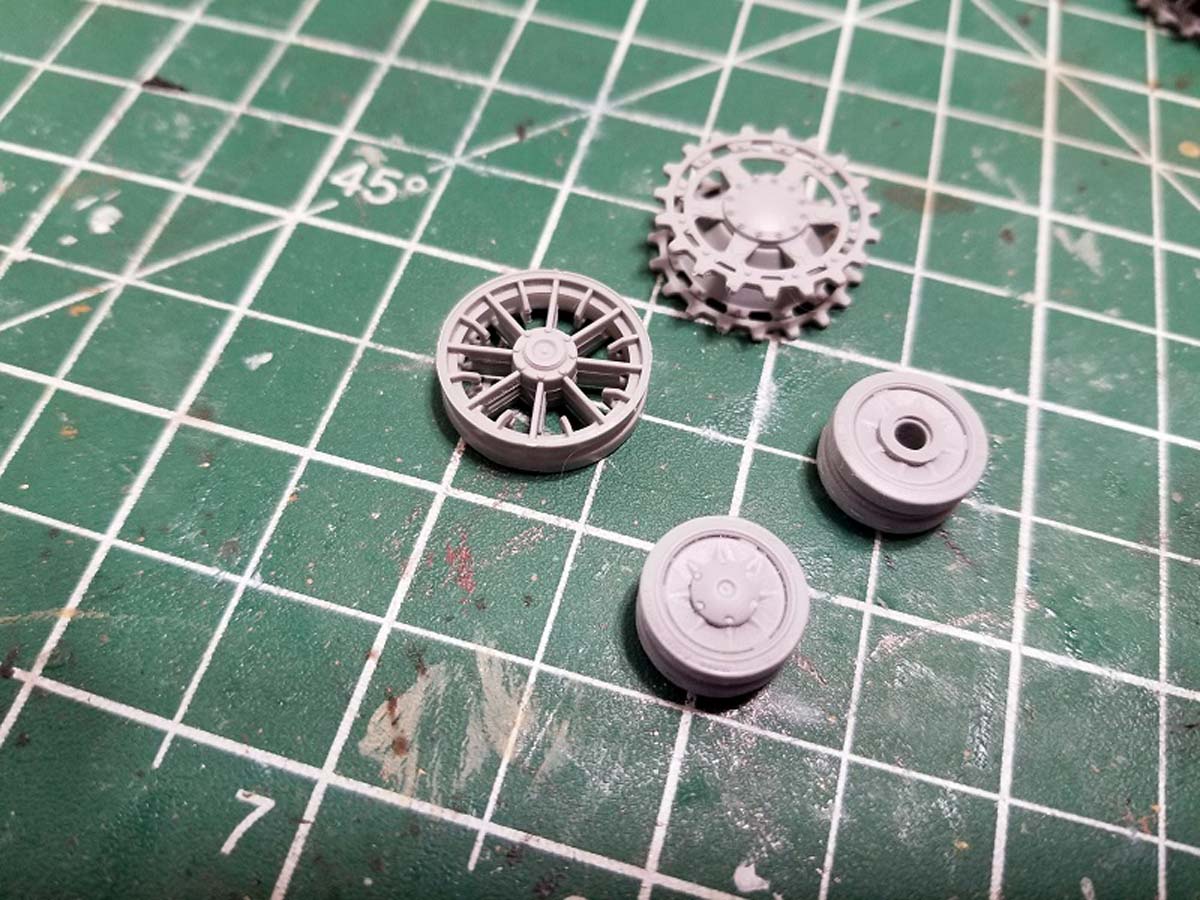
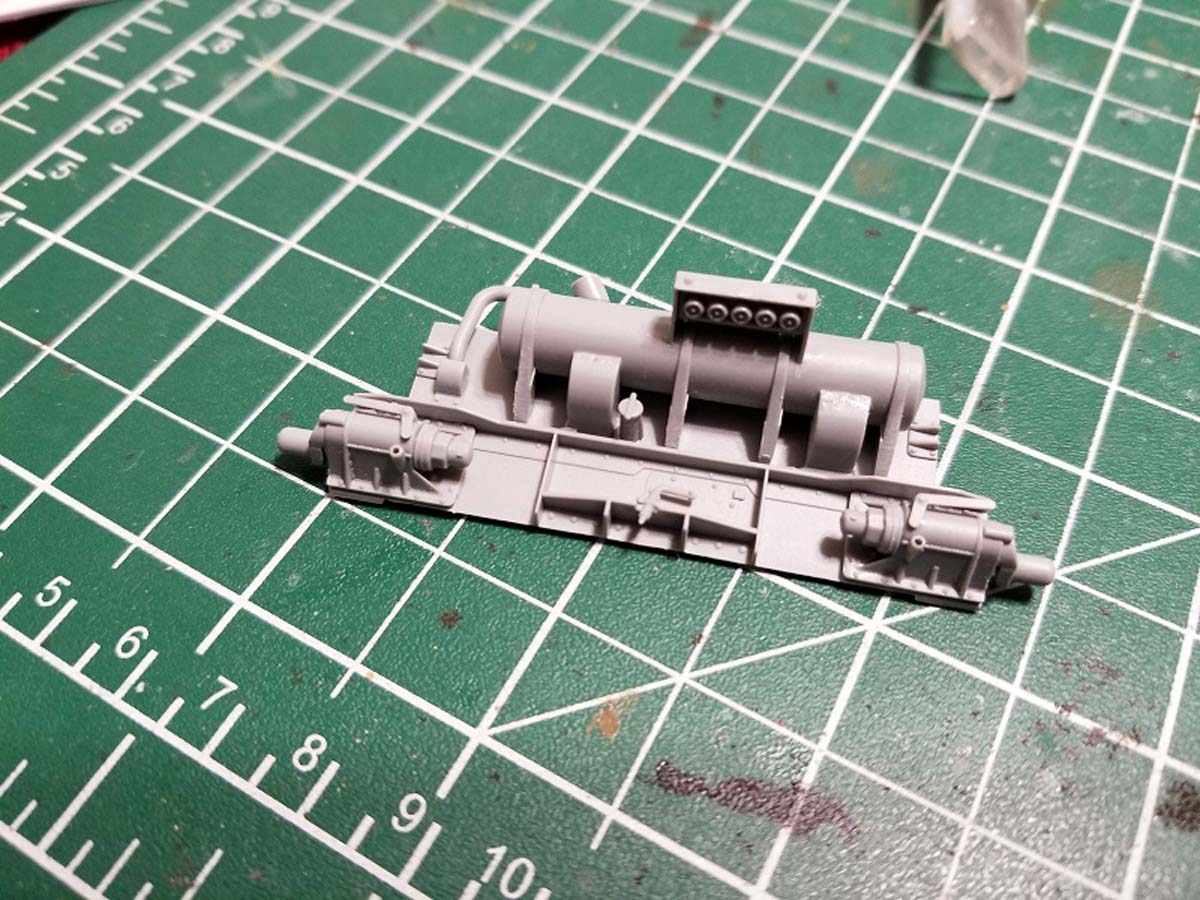
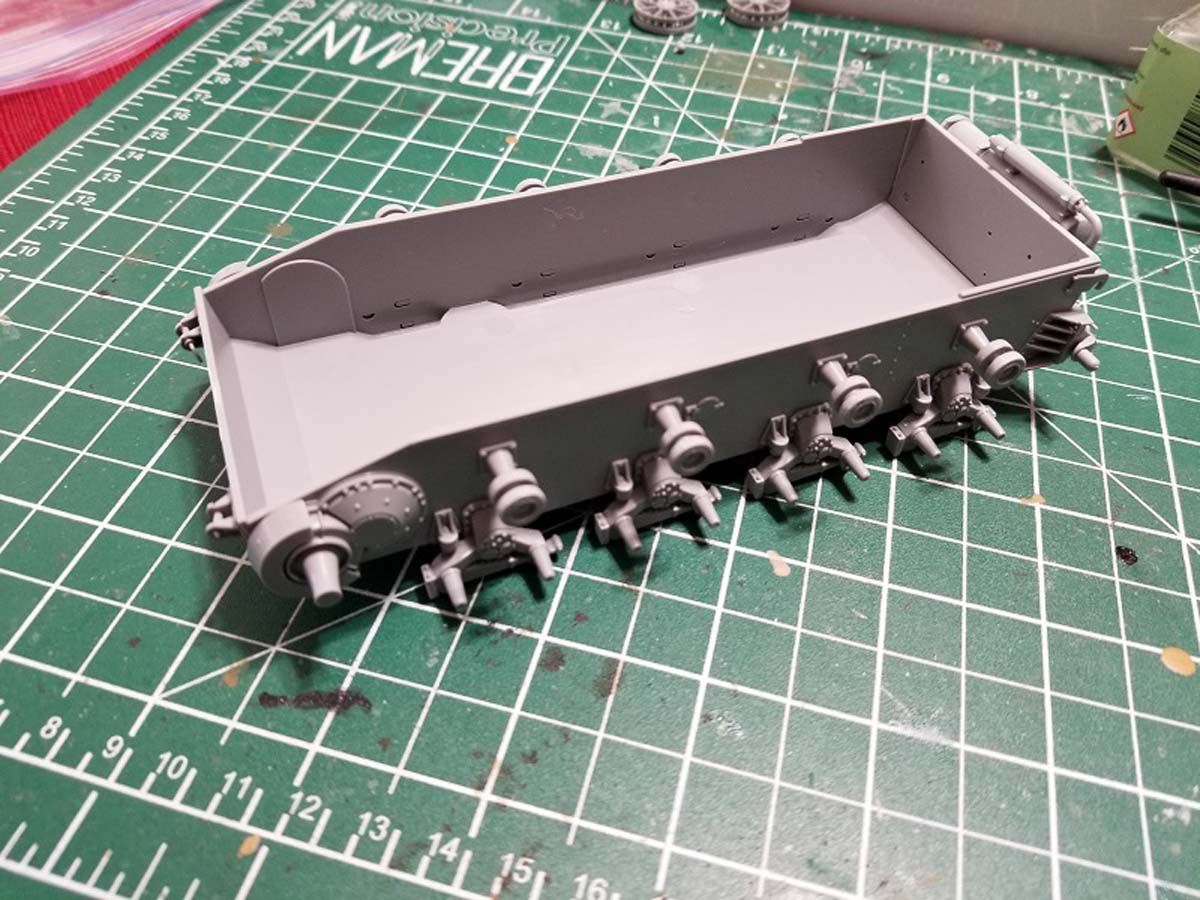
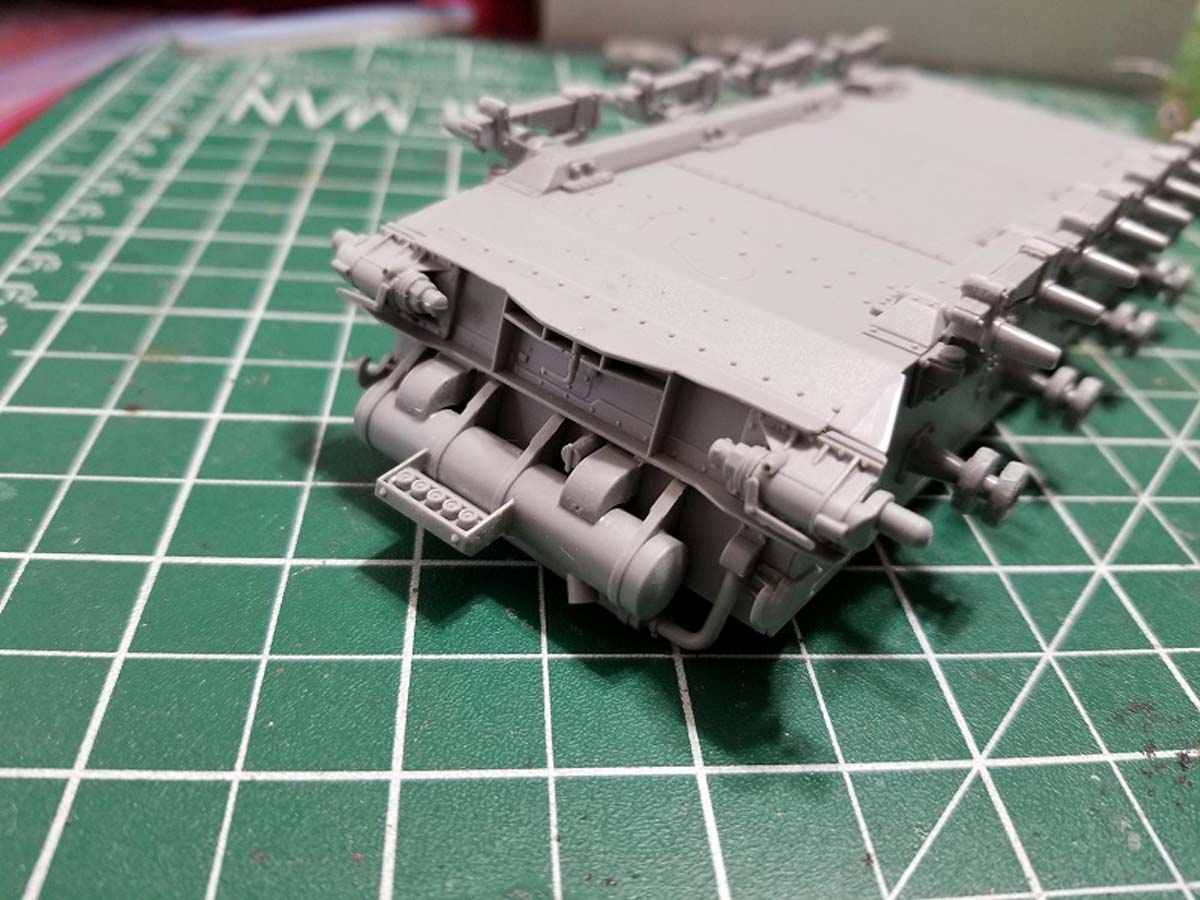
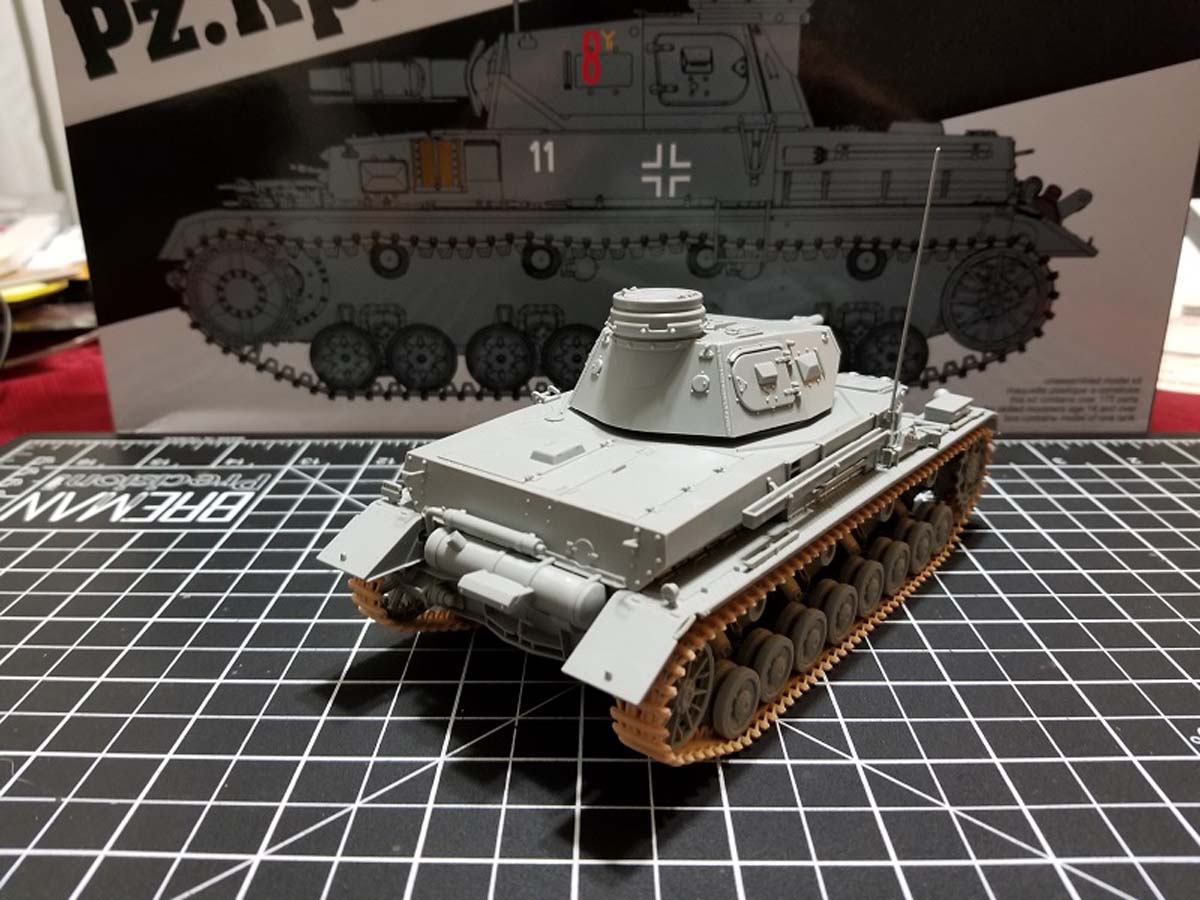
As with most models the build begins with the assembly of the road wheels and other parts of the running gear. The road wheels, drive sprocket, and idler wheel with each consist of two halves and have good mold detail on each sides. The road wheels had seam running down the middle on both halves that required some filled down which ended up being the most time consuming part of the entire assembly. The suspension bogeys are molded in parts which required very minimal effort to put together and road wheels press fitted nicely to them. The second part of step 1 consisted of assembling the rear hull wall along with all its attachments which consisted of 18 parts in total (a considerable reduction in parts when compared to other Dragon Panzer IVs). The finished rear wall comes out looking great, dragon did a very good job in simplifying this step of the build especially on the exhaust system.
Steps 2 & 3
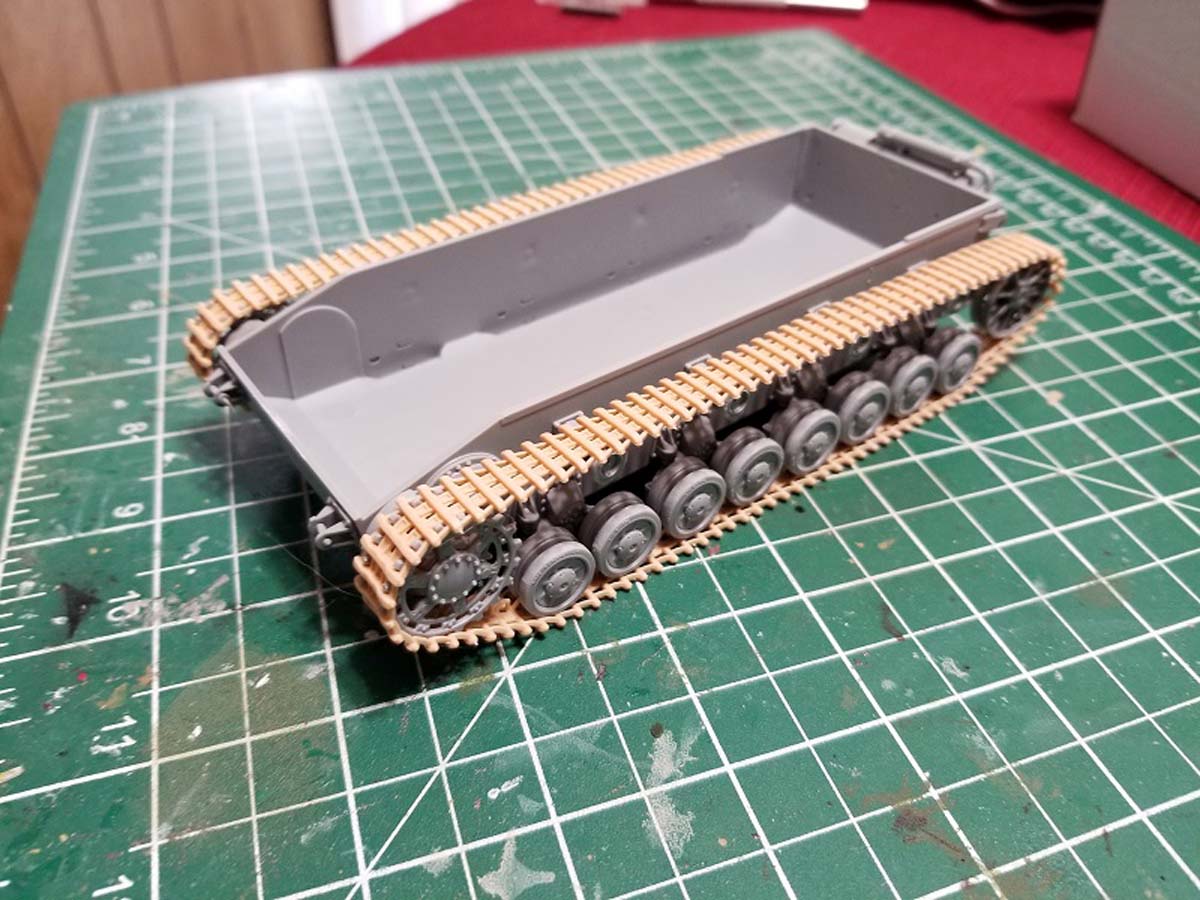
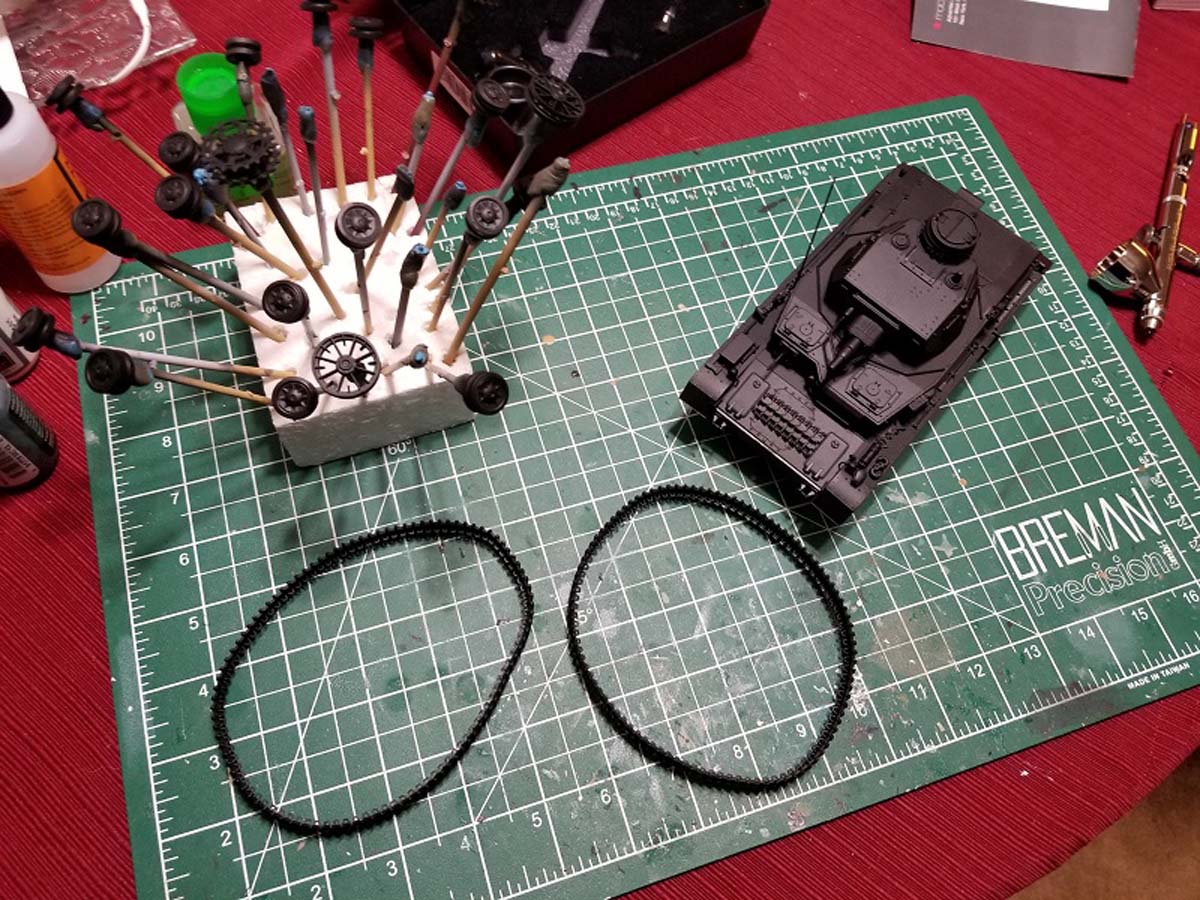
The second step is pretty easy, here they have assembling the return rollers which also consist of two halves and also attaching the final drive and rear wall the lower hull. Step 3 has you attaching the rest of the running gear parts from step 1 to the hull. I ended up also attaching the DS tracks at this point in the build even though it wasnt called out on the build.
Steps 4 and 5
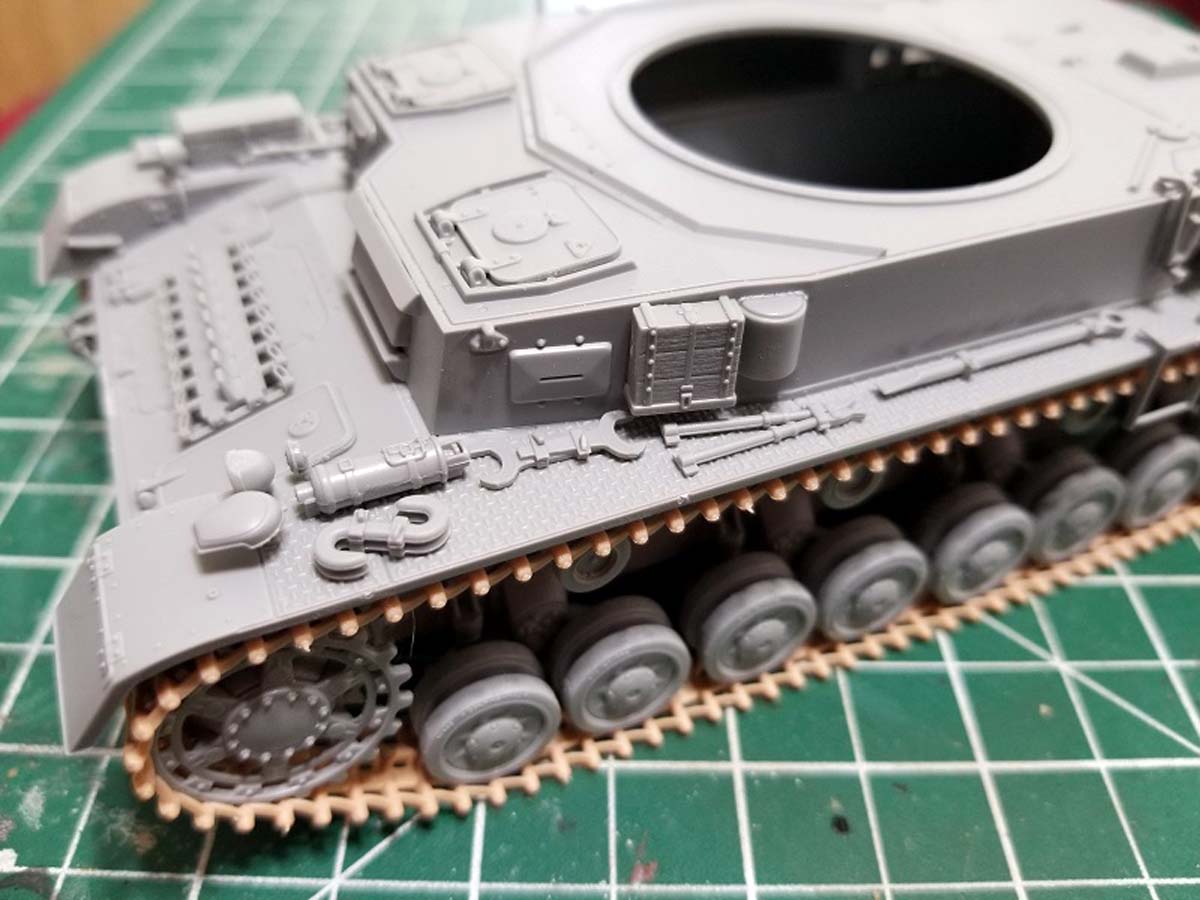
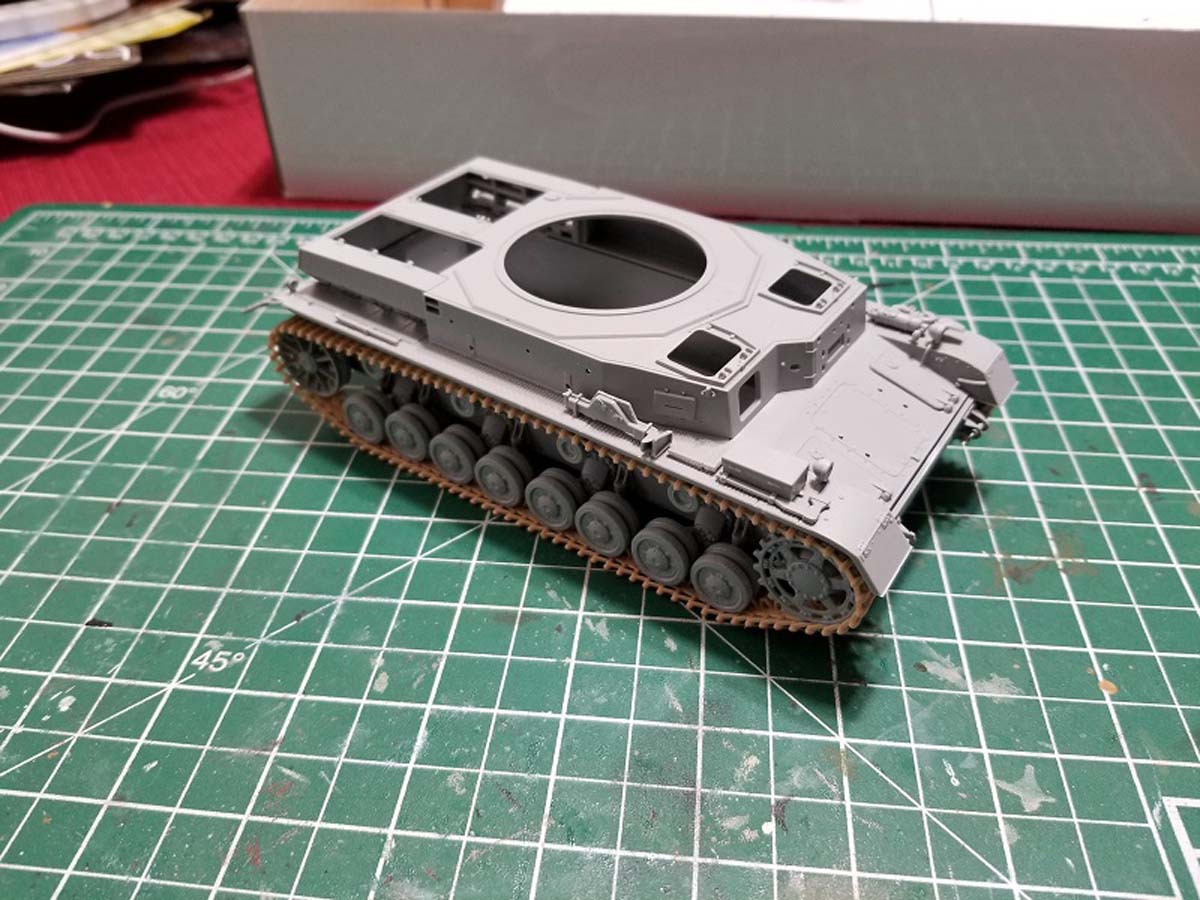
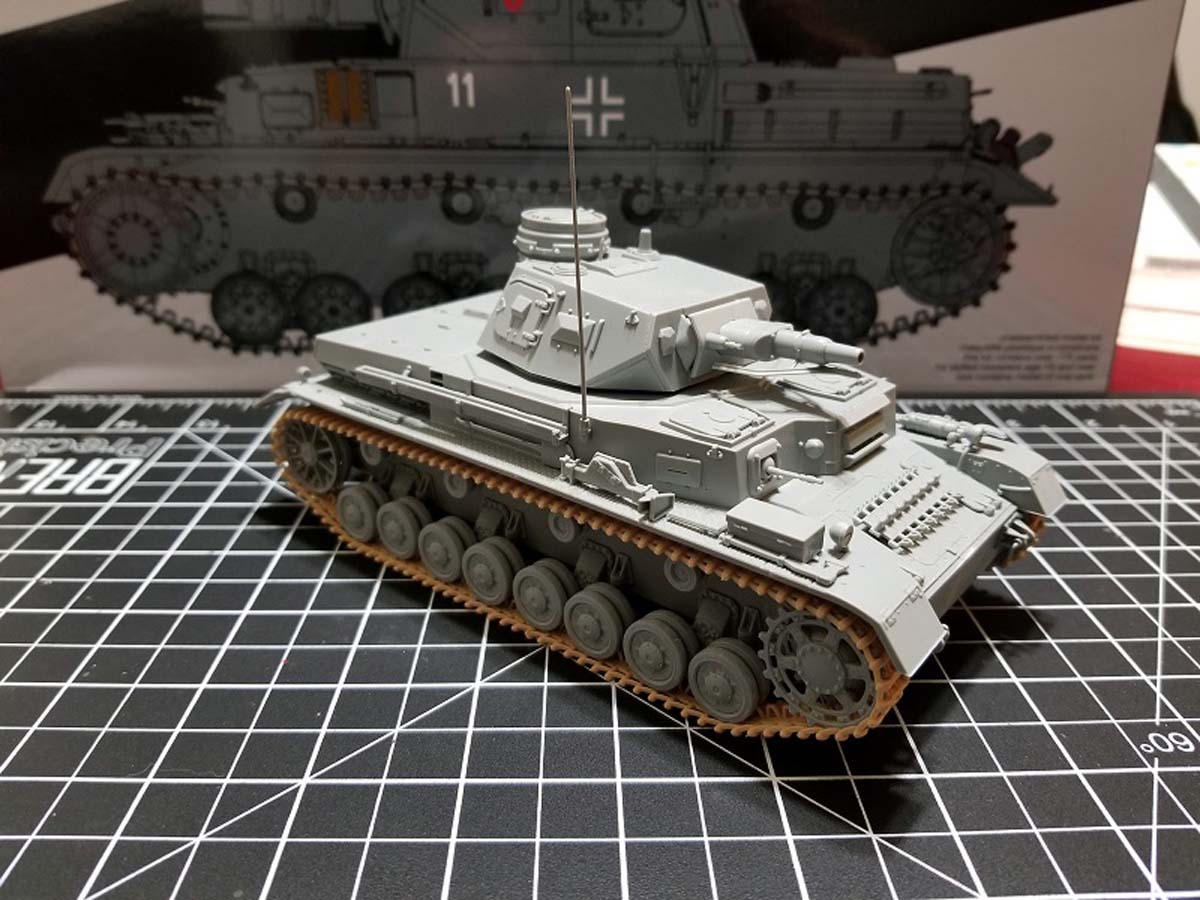
Steps 4 and 5 have you assembling the side fenders and all their tools that get mounted on them. The fenders are molded out of a single piece with very nice diamond plate textured pattern. The fender details are molded on both the top and bottom of the piece, a nice touch by dragon. The holes for all the tools that go on the fenders were pre-drilled except for the blackout light on the right fender and a tool box on the left fender, they did however have markings on the bottom of the fender to show where the holes go. The pioneer tools are look very basic and lack the clamp detail you see in other dragon models.
Steps 6 & 7
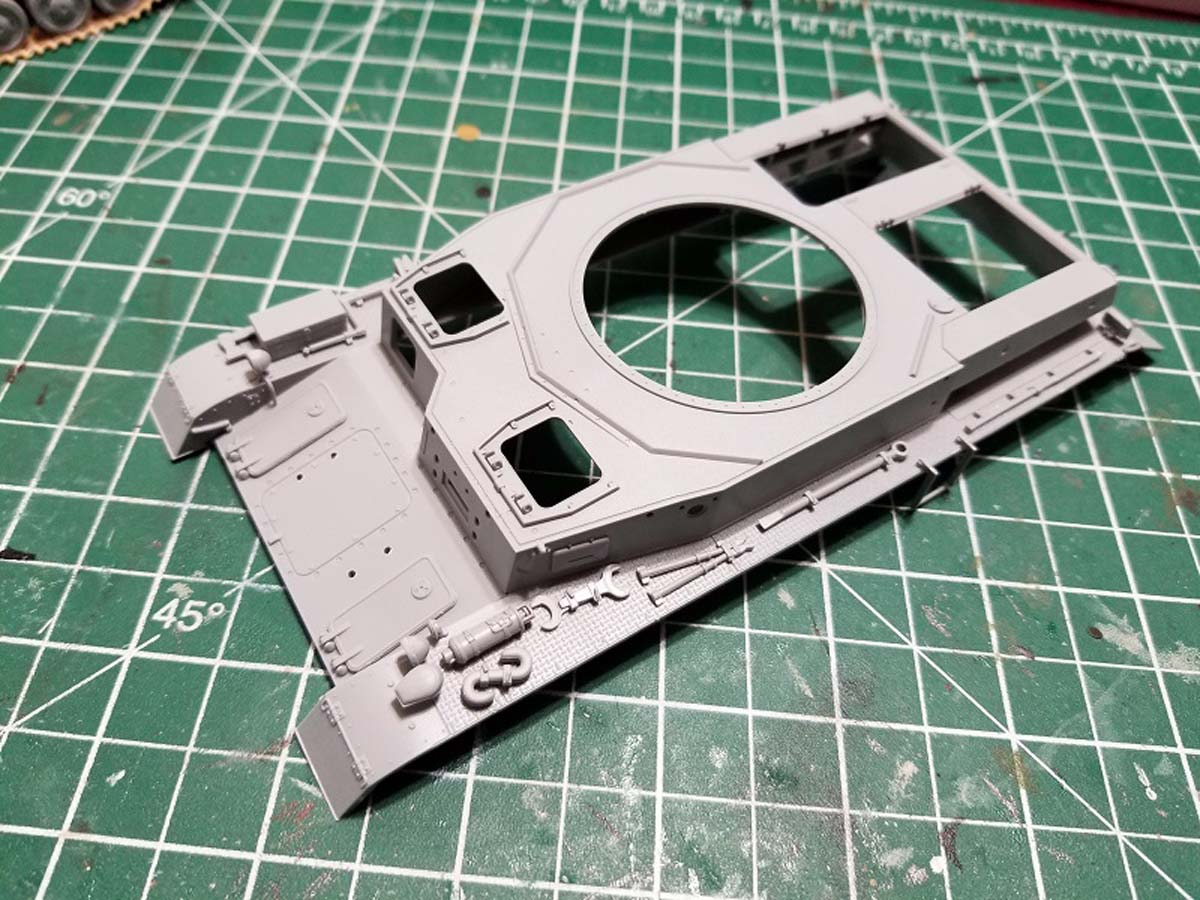
Steps 6 and 7 have you assembling the rest of the upper hull and glacis plate. The detail on these parts is very good and there are just a few hatches and panels that get attached here. The grab handles on the rear engine covers are bit of letdown, they are molded as part of the panel and are not hollowed out. I did not see the need to cut corners here and molding the handles separately doesnt increase part count much and would have given the model a cleaner look. Once all the parts were assembled I veered off the build instructions and decided to attach all the parts from steps 4 through 7 a single upper piece to make it easier for painting. However, doing it this way makes attaching the upper hull to the lower hull a bit tricky because of the exhaust pipe stick out the rear hull. In the end I decided I wasnt going to paint the upper and lower hulls separately and opted to glue them together.
Steps 8-10
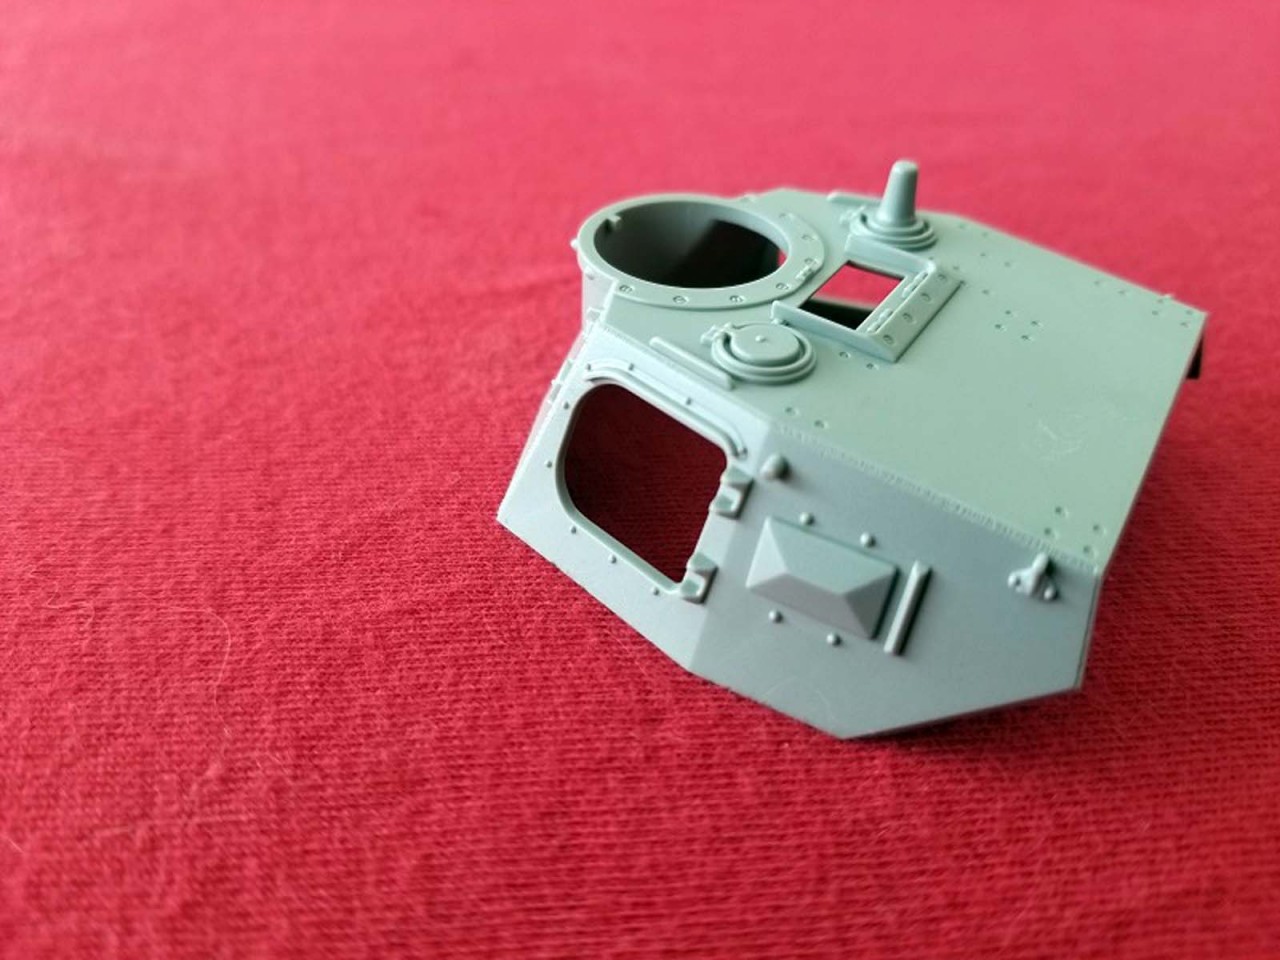
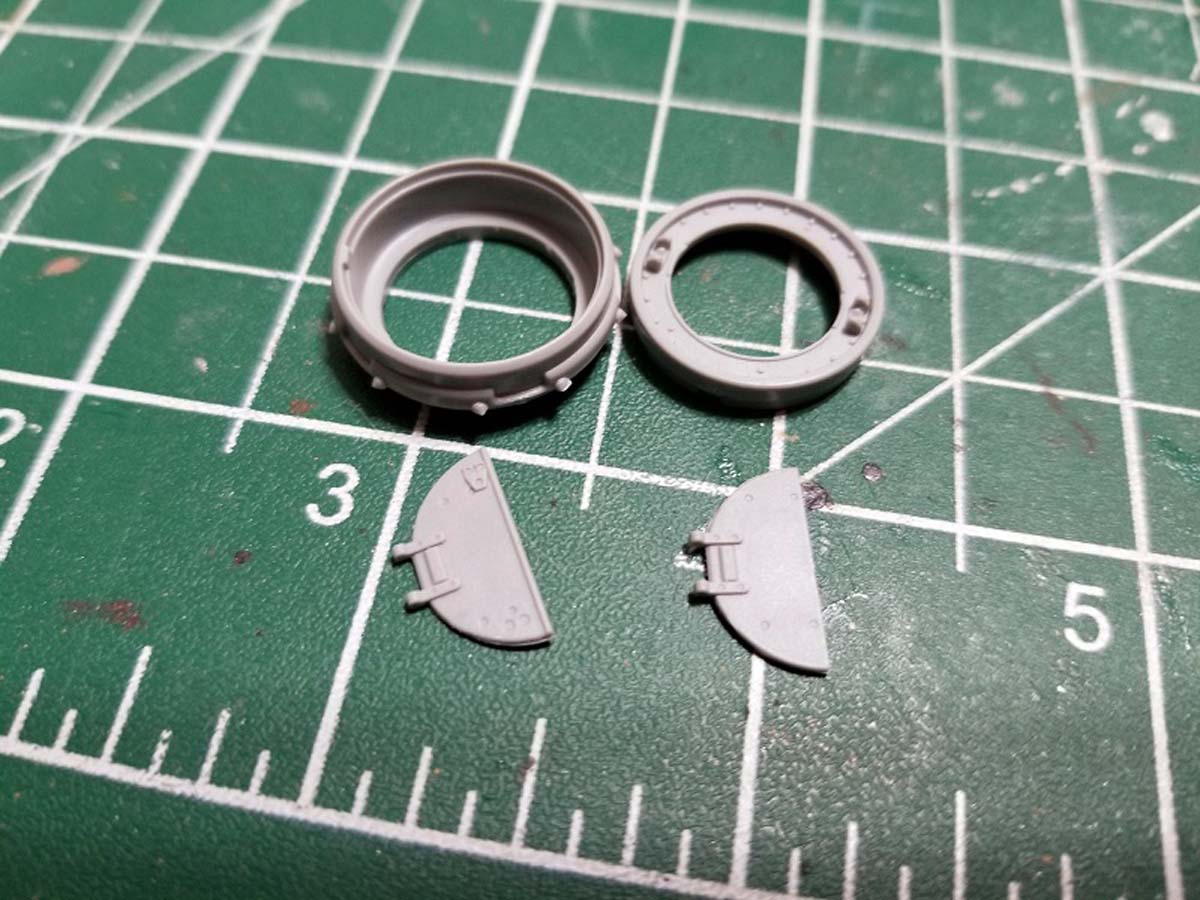
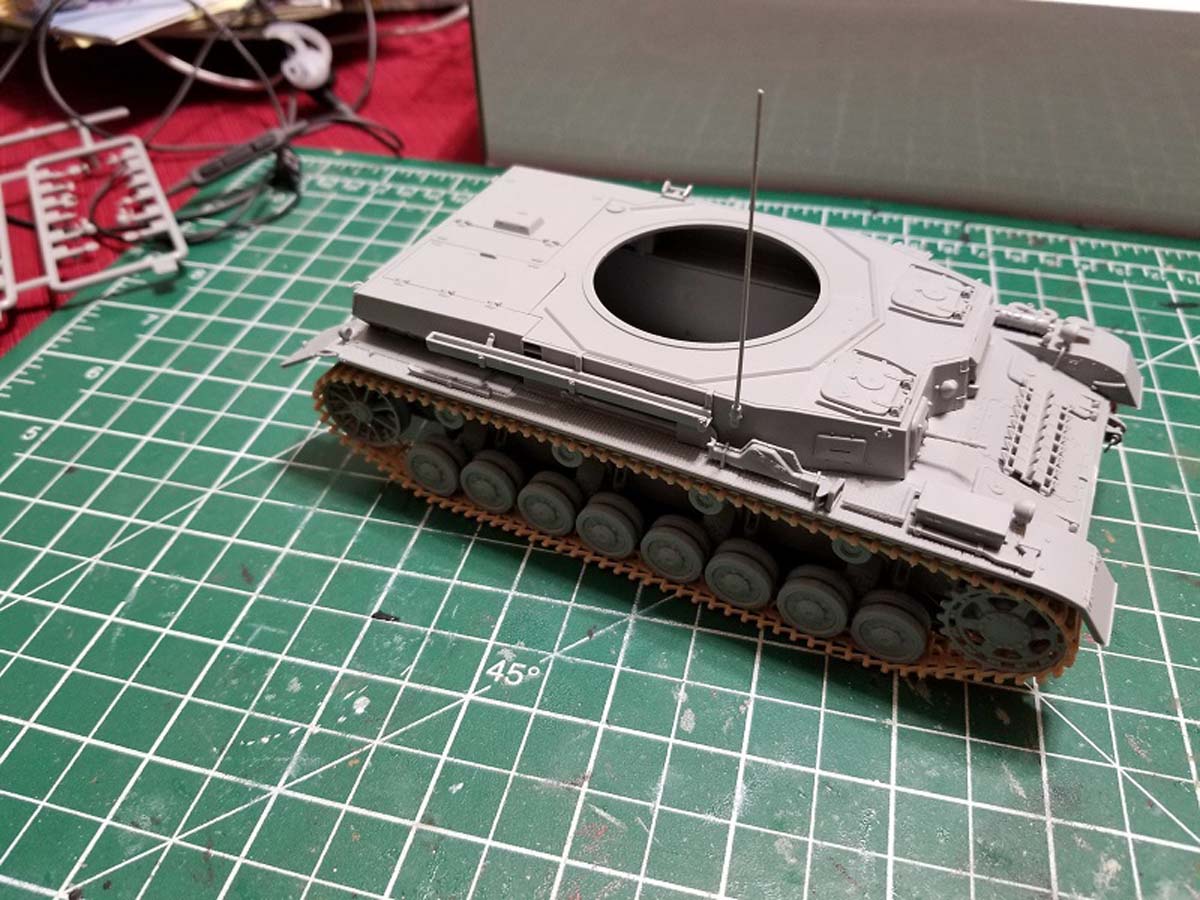
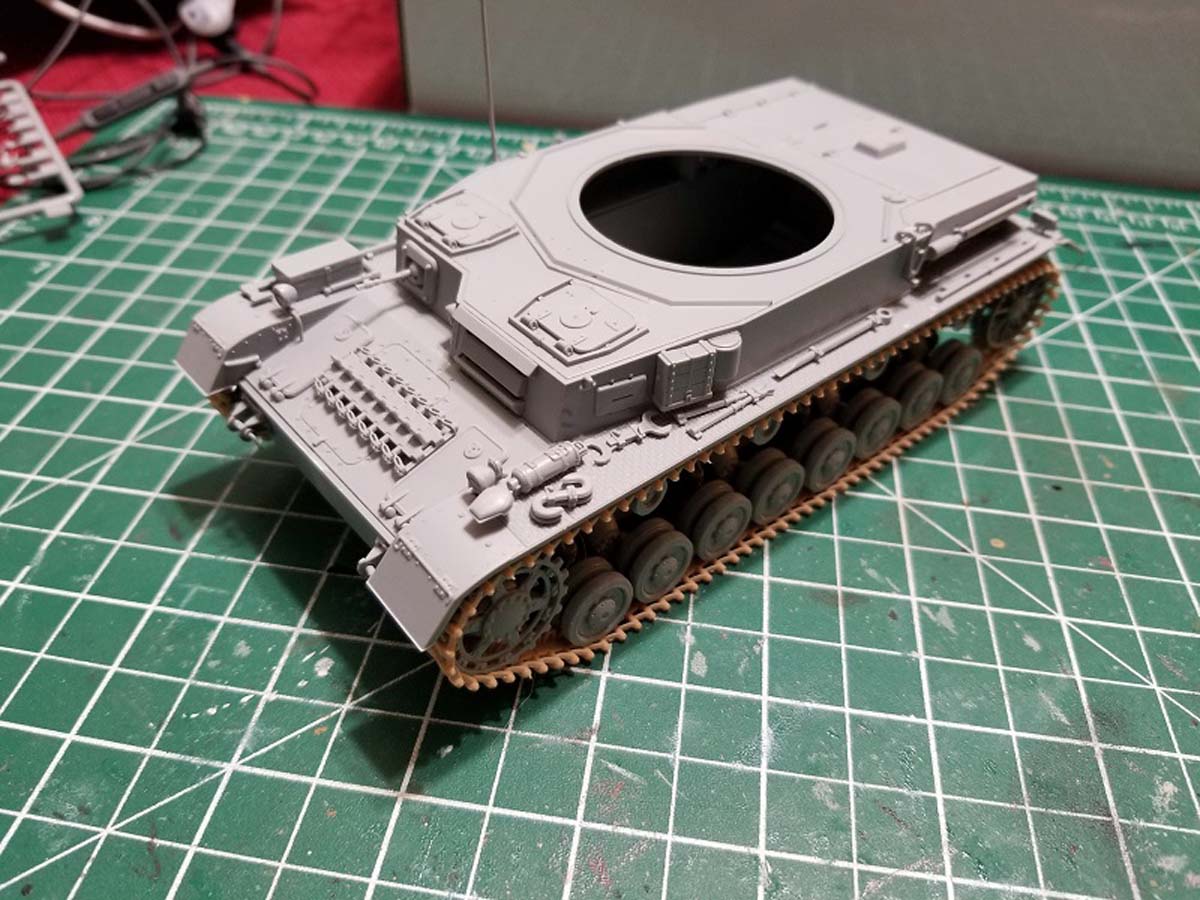
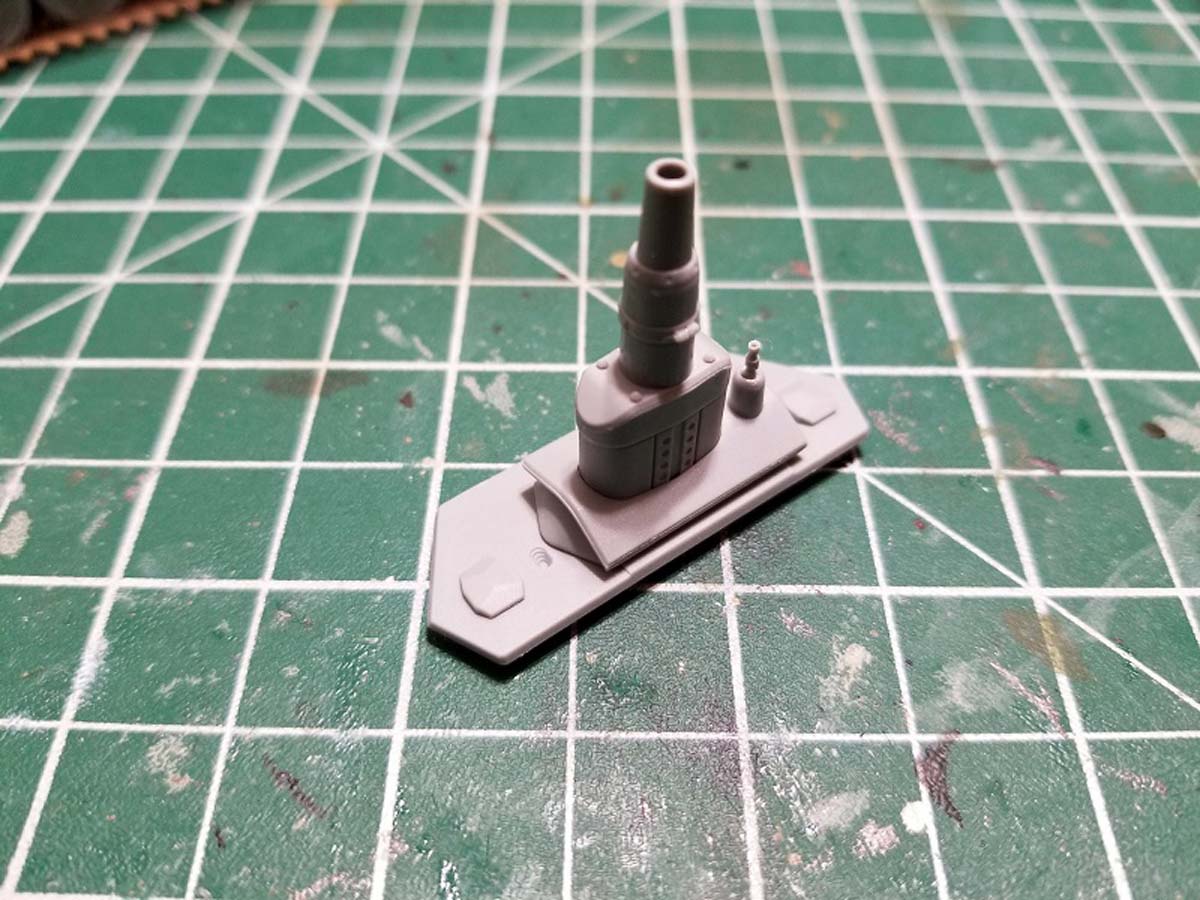
Step 8 has you assembling the gun and mantlet together. The short barreled 7.5cm gun is molded out a single piece and the gun barrel has some nice rifling detail. The mantlet can be built to move up and down but I opted to glue it straight. In step 9 you assemble the turret doors and commanders cupola to the single piece molded turret. I was most impressed with the detail on the turret and the crew doors which were all single pieces. The doors have great detail even on the inside in case you opt to have them open but chose to the have them closed since there is no detail inside the turret. The commanders cupola is also overly simplified to reduce piece cunt and comes out looking decent enough. Step 10 has you assembling the gun mantlet from step 8 to the turret along with the turret ring.
Steps 11 & 12
At this point I had already completed the build because I had incorporated the instructions here on the earlier steps. However, if you followed the build sheet you have assembled the side fenders, tracks, glacis plat in step 11 and the upper hull piece and turret in step 12.
Conclusion
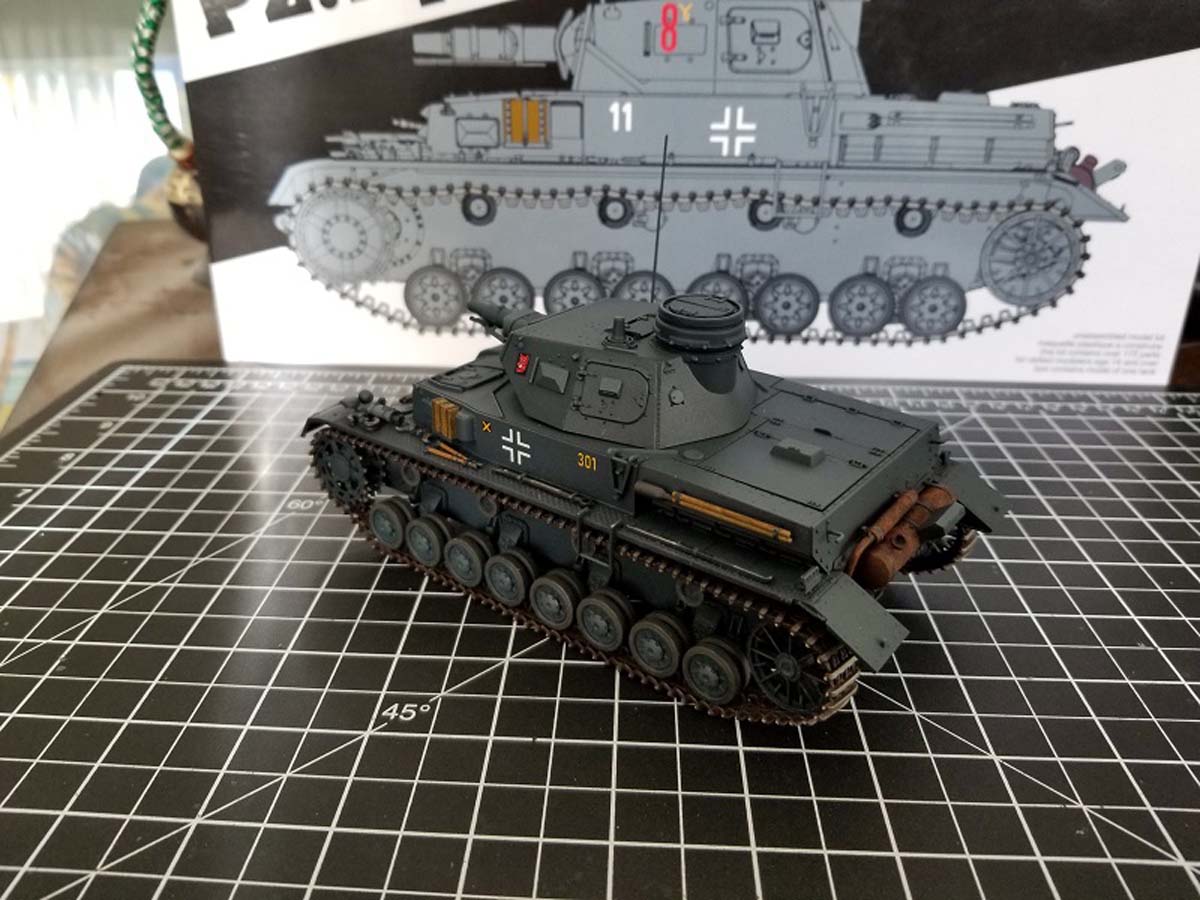
Overall I really enjoyed building this model. It was fast, it was easy, there were no fit issues and the mold quality is excellent. You are obviously not going to get the same level of detail you get in its 700 piece counterpart but you still end up with quality model. My only complaints about this model are the DS tracks which I am not a big fan and a few minor details that were a bit too overly simplified. I think this kit nails what it set out to accomplish and I am very excited for more Platz line models.
SUMMARY
Highs: Great fit, low piece count, and great detail.Lows: Some overly simplified parts and DS tracks.Verdict: A fun and quick build that is great for beginners or experienced modelers looking for an easy project.
Our Thanks to Dragon Models! This item was provided by them for the purpose of having it reviewed on this KitMaker Network site. If you would like your kit, book, or product reviewed, please contact us.
Wasn't meant that way and I apologize as I did not mean to belittle or demean; I was honestly confused as to why you'd prefer one over the other and want a decal set so badly that you'd buy a kit that you think so little about merely for the decals. Besides, I think I speak for all of us in saying that we'd all look rather unusual & ridiculous dressed in sailor suits! Okay, Joseph over there might be able to pull it off, but most of us are just not appealing that way...
I'm guessing that he never came back. Too bad as I think he was well on his way to overcoming his deep-seated fears of Dragon kits, if only for a moment. And yes, his opinion was worth listening to. Except for the sailor suit stuff. Too weird that...
That barely scratches the surface of the weird aspects of Japanese pop culture.[/quote]
Some kind of obsession with VERY young girls with VERY long legs in VERY short skirts. Kinky much??
I don't like counting rivets. That's why I go with Dragon's SmartKit and 39-45 series. It may be overwhelming for some, but the corrections are usually negligible. I probably use Scalemate's way too much.
P.S. What is wrong with my girl dressing up in an exotic sailor costume?
I built this kit last summer for a IPMS review. I really liked the quality of the fit and the easy of building. The only thing I did not like was the way the turret just snapped onto the hull.


.jpg)


Comments