German Bundeswehr Service
The M47 G is the early German service M47, which is the main production version, with the addition of German specific parts. Ive chose the G version as Ive always had an interest in Bundeswehr armor. You can also build an early German usage M47 without the addition of the G parts.
Germany received a little more than a thousand of the 8,500 M47s that were produced. Production was at either the Detroit Tank Arsenal or American Locomotive Company (Alco). There are some difference that seem to be related to where the tanks were produced that I will mention later.
The M47 was the first main battle tank, Kampfpanzer (KPz) in the post WWII German Army that was formed in 1956. It initially served in the Bundeswehr Panzerbataillone (PzBtl) till it was replaced by the M48 and was later used in the Panzerjägertruppe. The M47 was also by a BundesGrenzSchutz (BGS) unit that was later folded into the Bundeswehr.
The M47s delivered to Germany were from US stock and configured and painted as such. They were later repainted in RAL 6014 Gelboliv. About the same time, the markings were standardized and this is when the Iron Cross began to appear on the M47. Less known is when the vehicle modifications were made. These include:
Mounting of the convoy light (leitkreuz)
Mounting of smoke launchers (nebelwurfbecher)
Mounting of rain gutter
Driver position moved to right side (radio operator removed from crew)
Rear light modifications and mounting reflectors
Contents
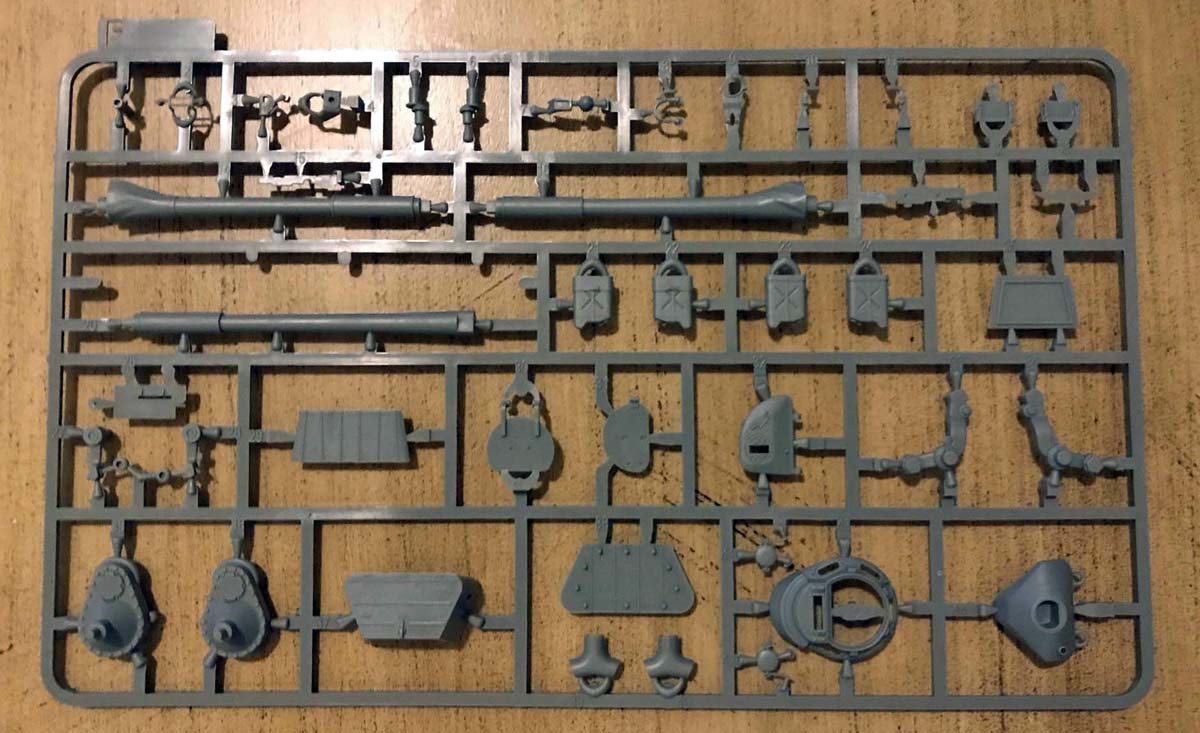
Opening the box, the gray plastic looks good and not brittle. Overall cast texture looks good on turret and hull. Some casting marks are molded in as well. Many fine detail parts are included. One concern is the sprue attachments look a bit thick for certain parts. The clear sprue for lights and periscopes is a welcome sight.
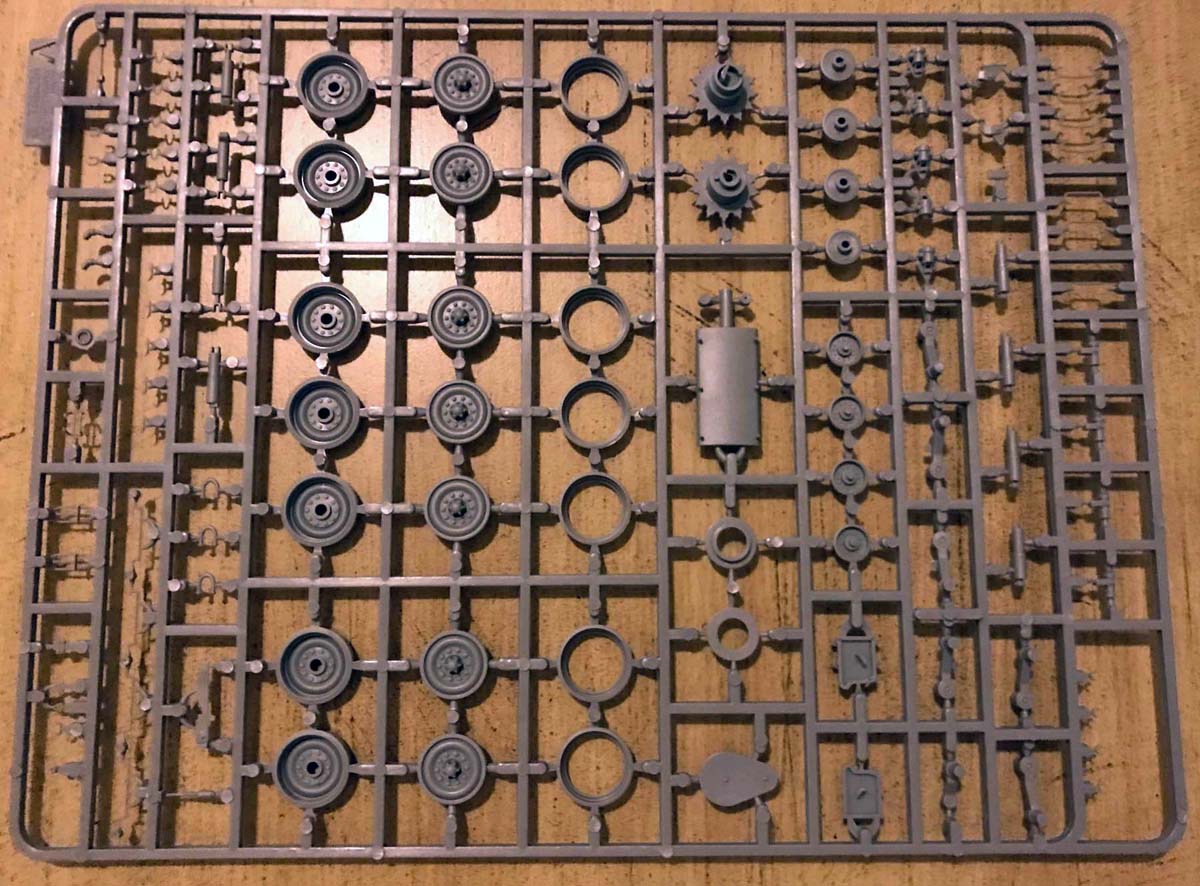
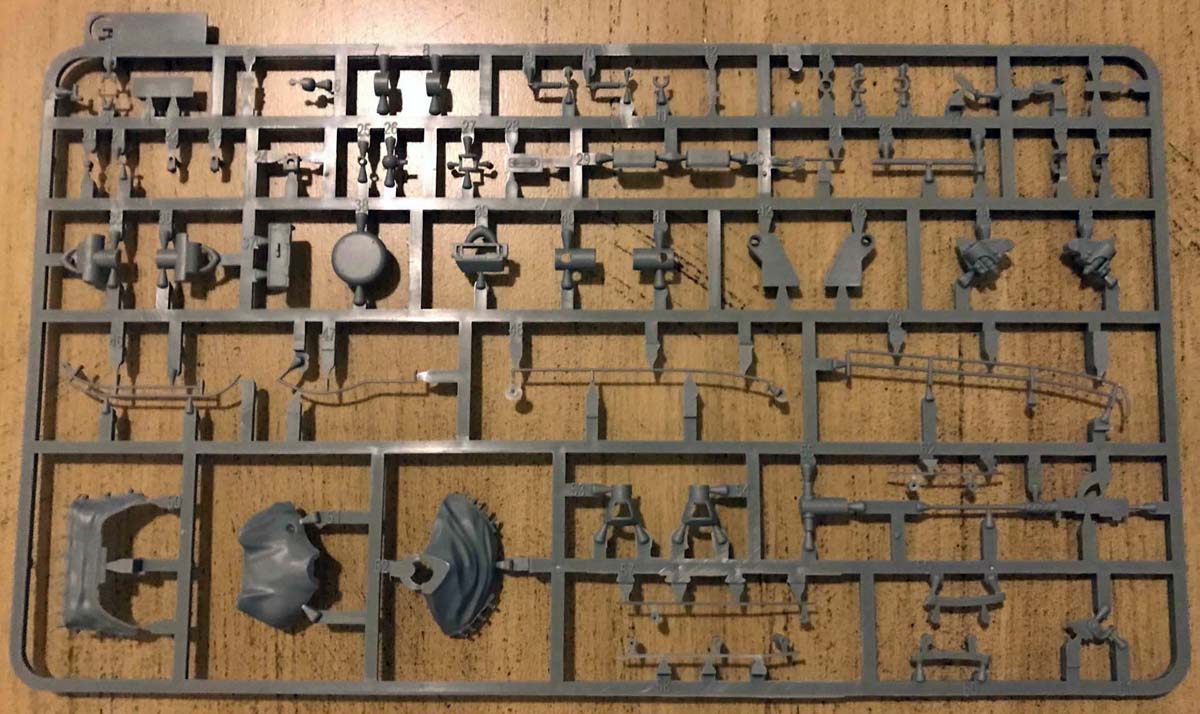
2 x A sprues with road wheels/arms and turret/hull detail parts
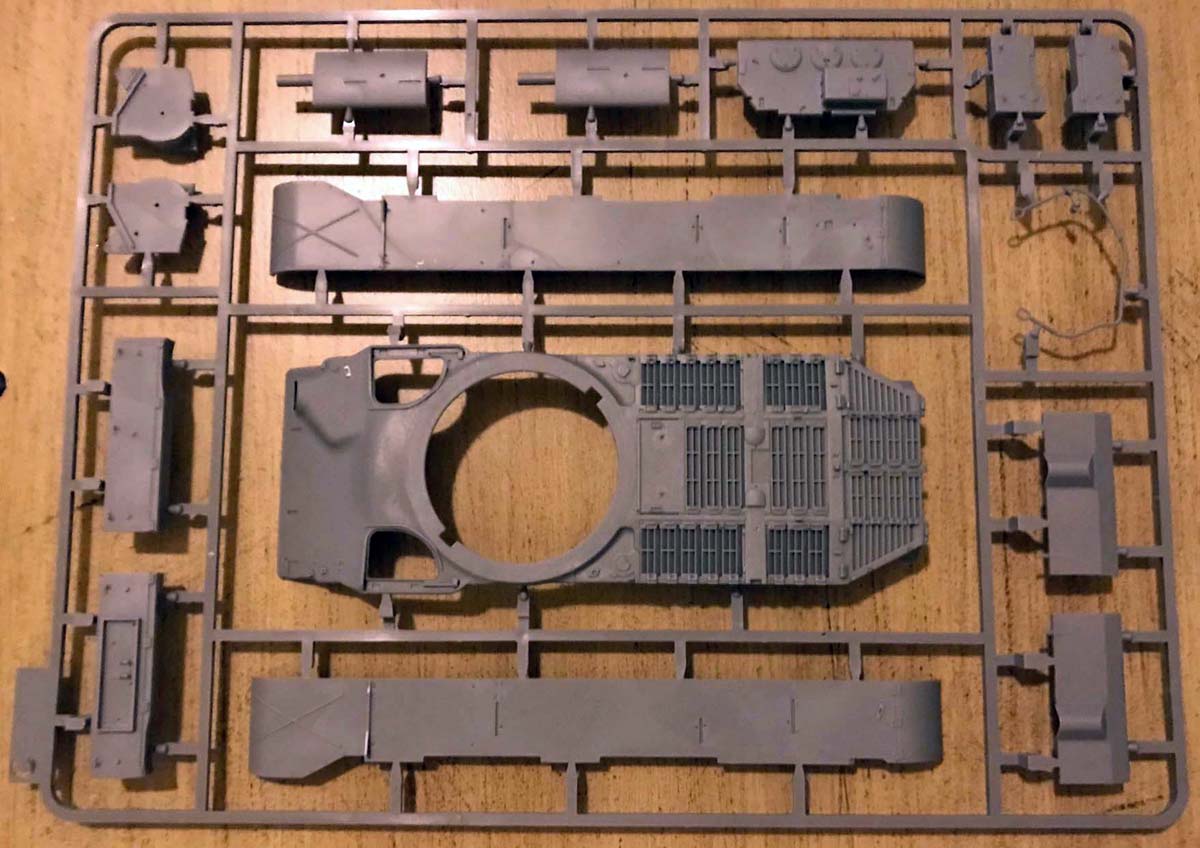
C sprue with upper hull and fenders
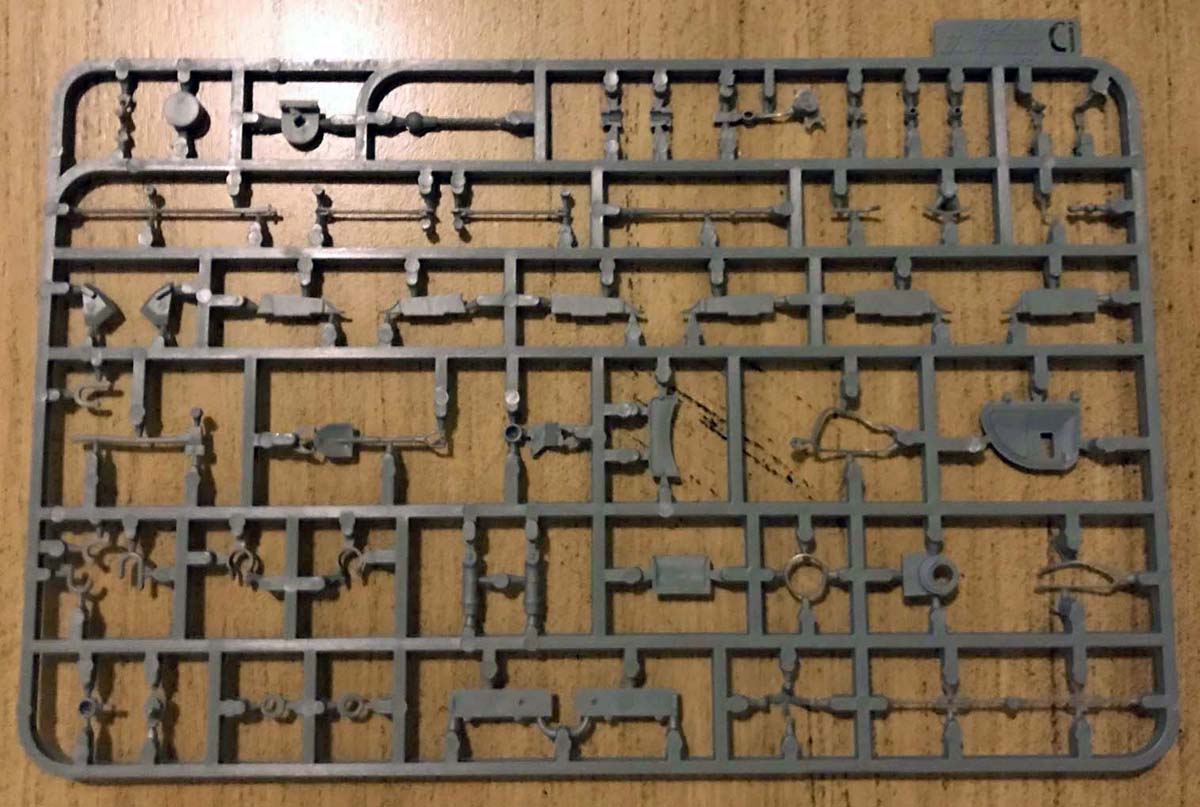
D sprue is pioneer tools and other hull/fender detail parts
F sprue is main gun and other turret parts
G sprue is mantlet cover and other turret detail
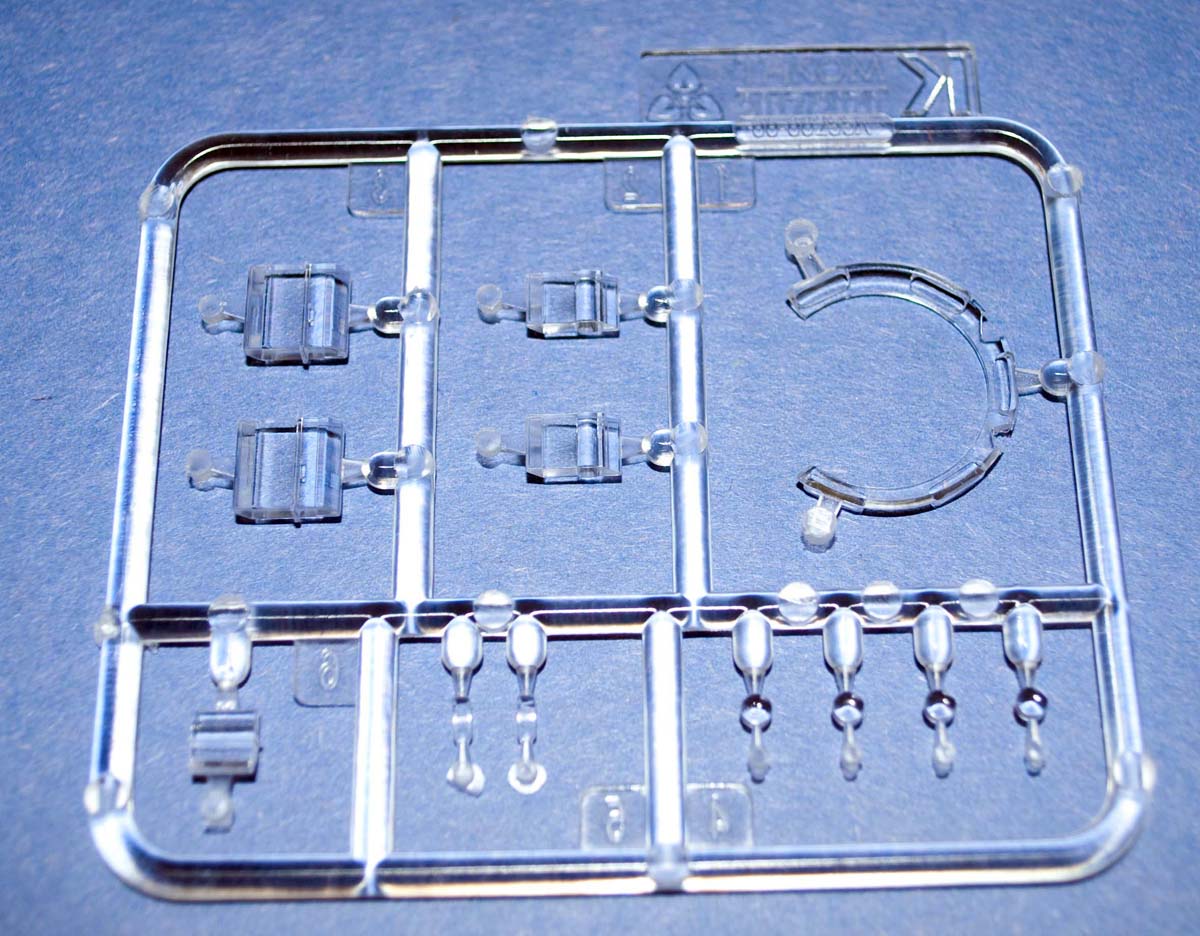
K sprue is the clear periscopes, headlights and optics
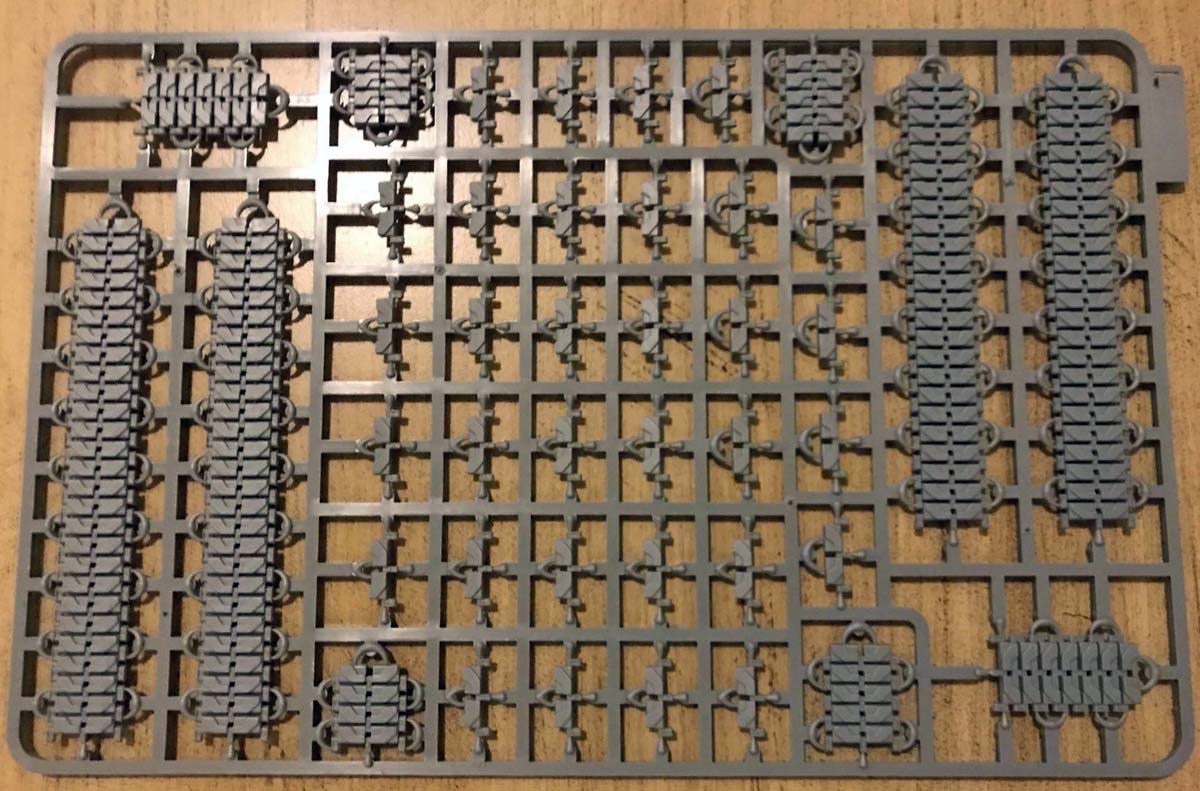
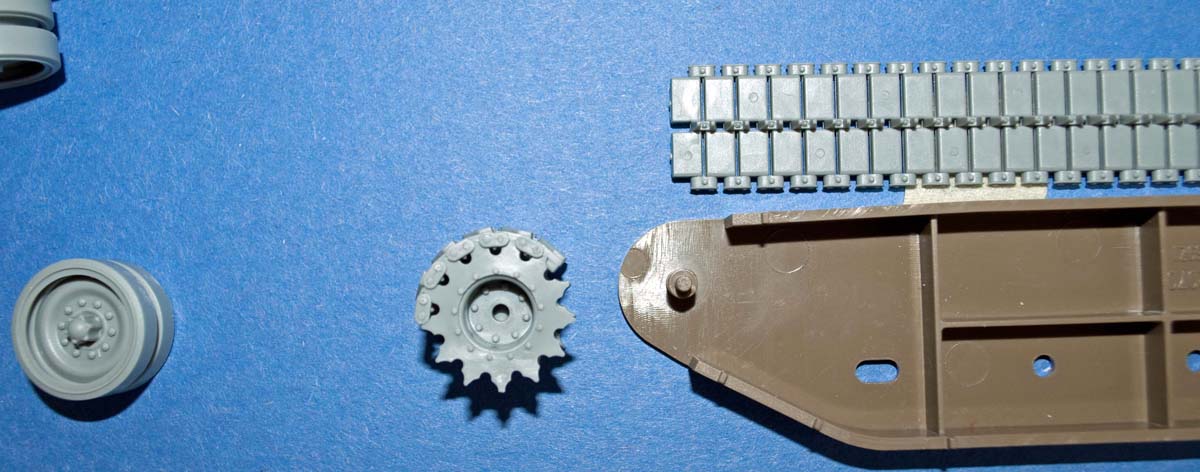
L sprue is the link and length tracks.
Lower hull
Turret top and bottom
Left and right track assembly jigs
The instructions are in nice booklet with good illustrations but there is no text for the assembly illustrations. Decals and painting guide for 6 different vehicles.
The decal and paint options are:
1. M 47 Early Production Detroit Tank Arsenal, USA 1951
2. M47G, Western Germany, 1960s
3. Battle of Assal Uttar on September 10th, 1965 (Indo-Pakistani War)
4. M47 South Korean Army, 1980s
5. M47 Jordanian Army, (6 Days War, 1967)
6. M47 Croatian, Bosnia-Herzegovina 1993
The Build
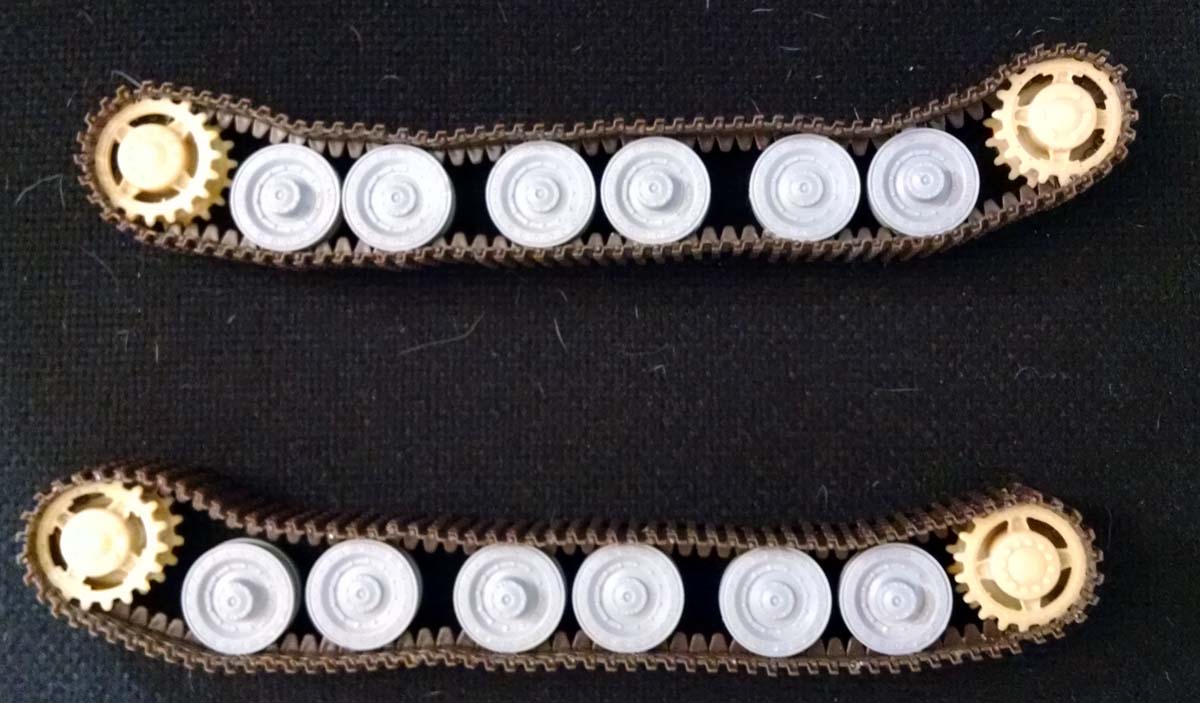
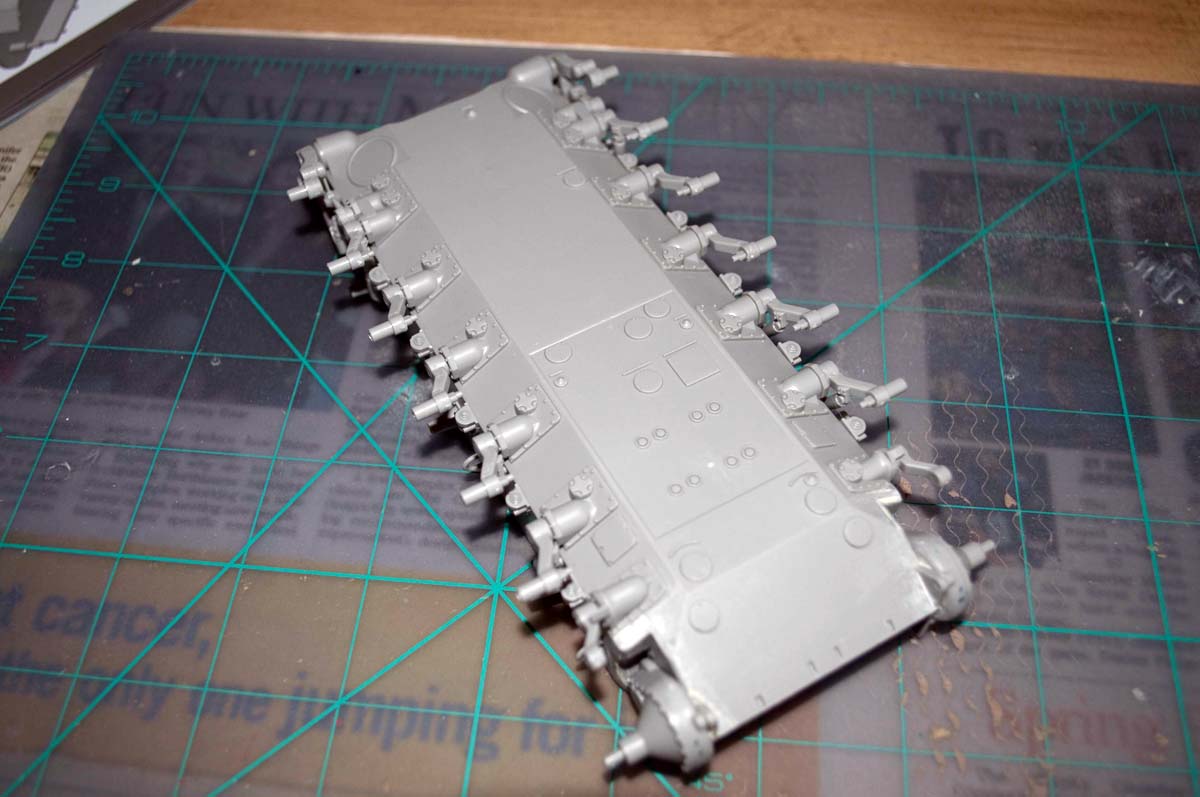
Running gear and track assembly
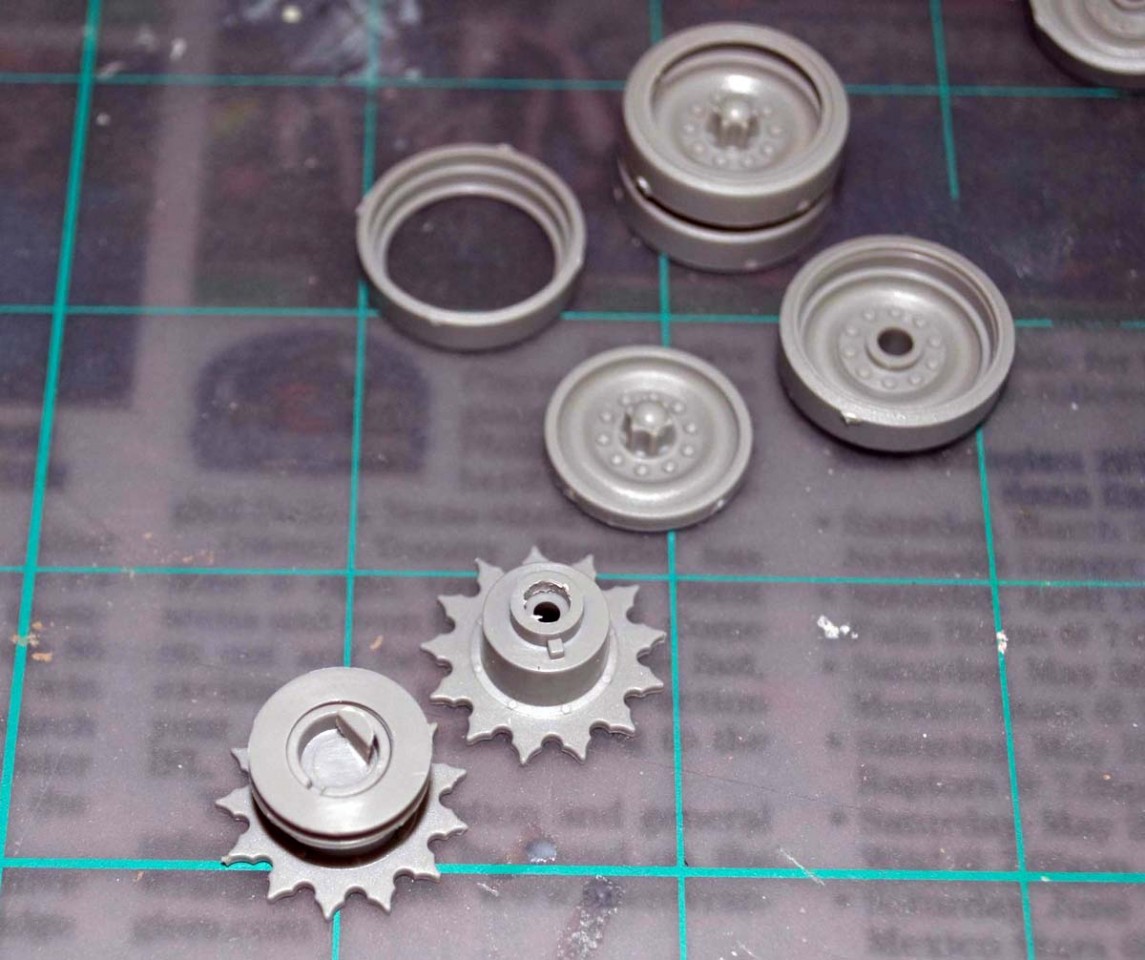
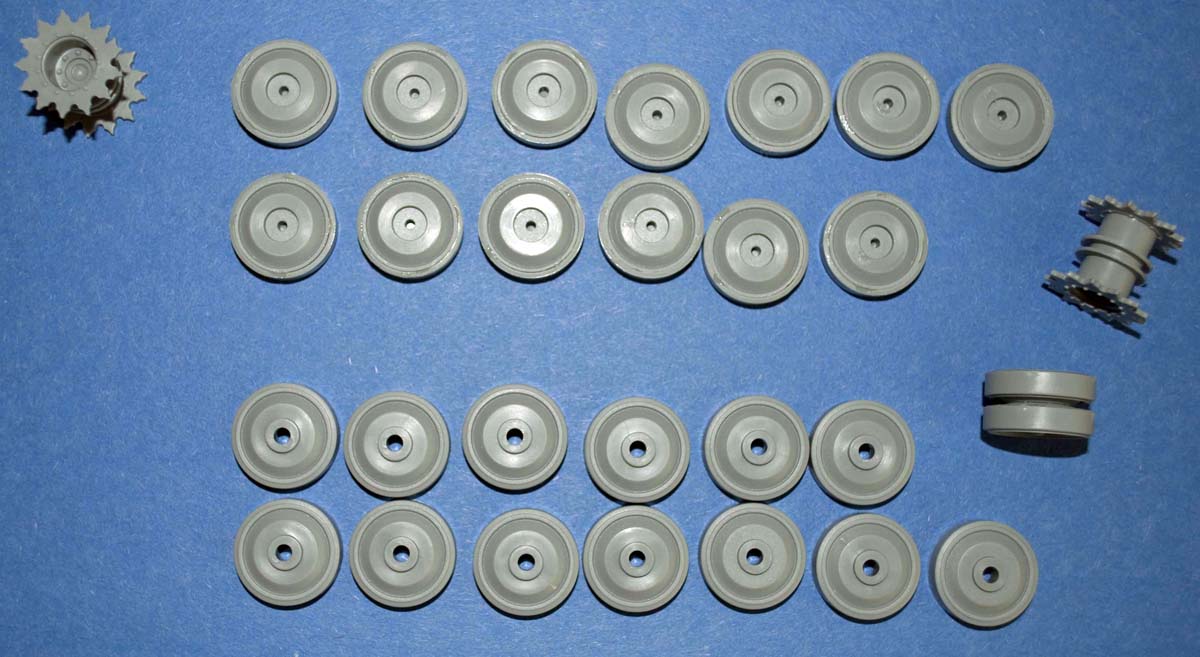
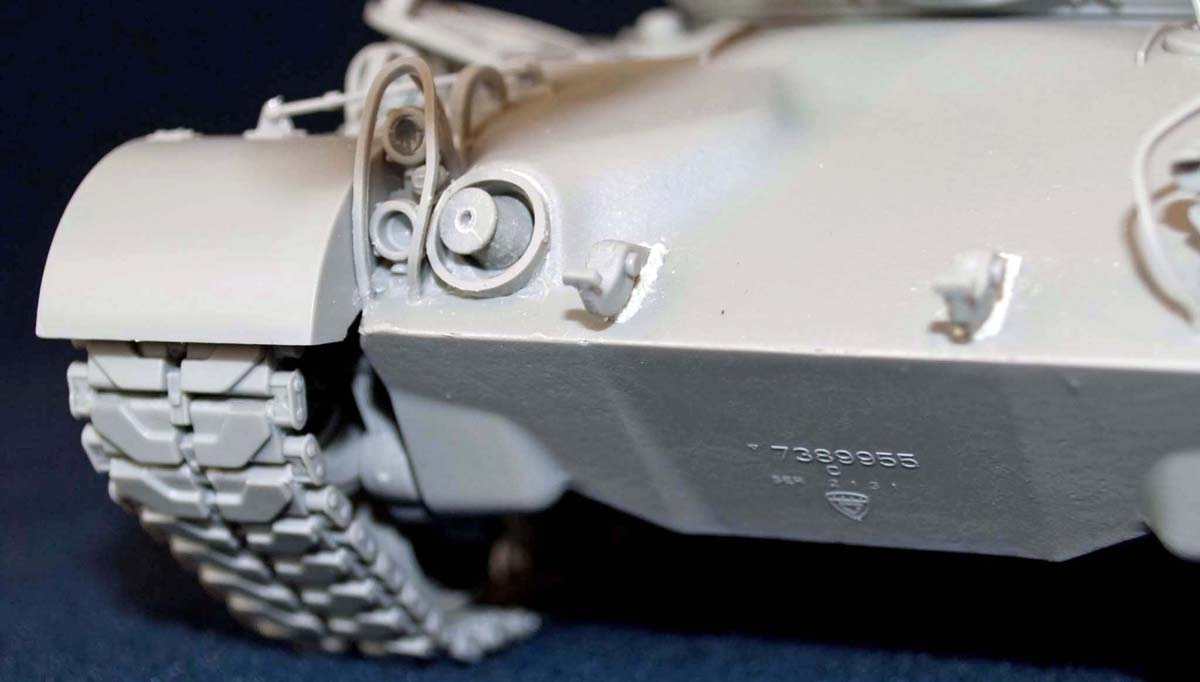
Nice casting detail on lower hull. Running gear assembly and mounting were easy with the only trick bit being the forward most arms. Here is the first part where lack of text & sequence instructions can keep you from cleaning up fit easily. Assemble the two final drives parts (A29 & F36 and A29 & F35) and fix seams before gluing to hull. F36 and F35 should not have a seam as A29 is really two pieces on the real thing. Final drive drain plugs are missing detail and the final drive bolts on the hull bracket are flush instead of out slightly. Reference photos also show safety wire attaching two bolts.
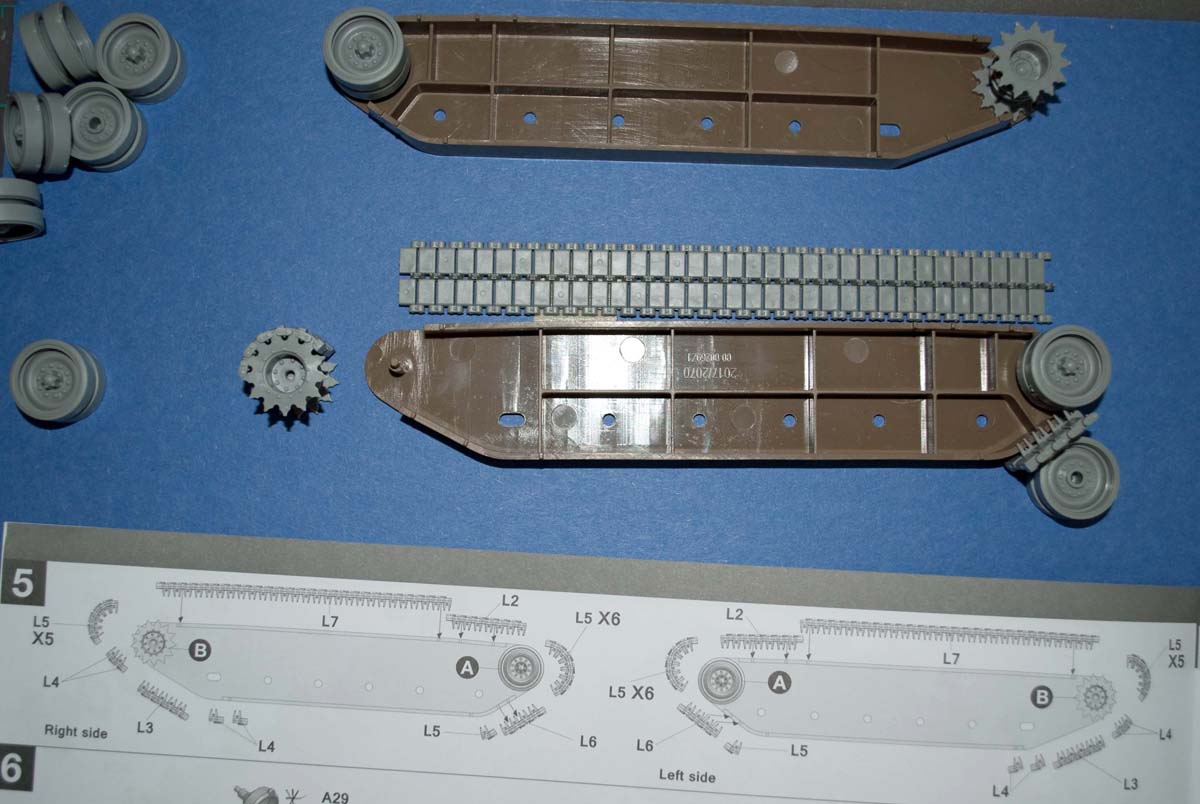
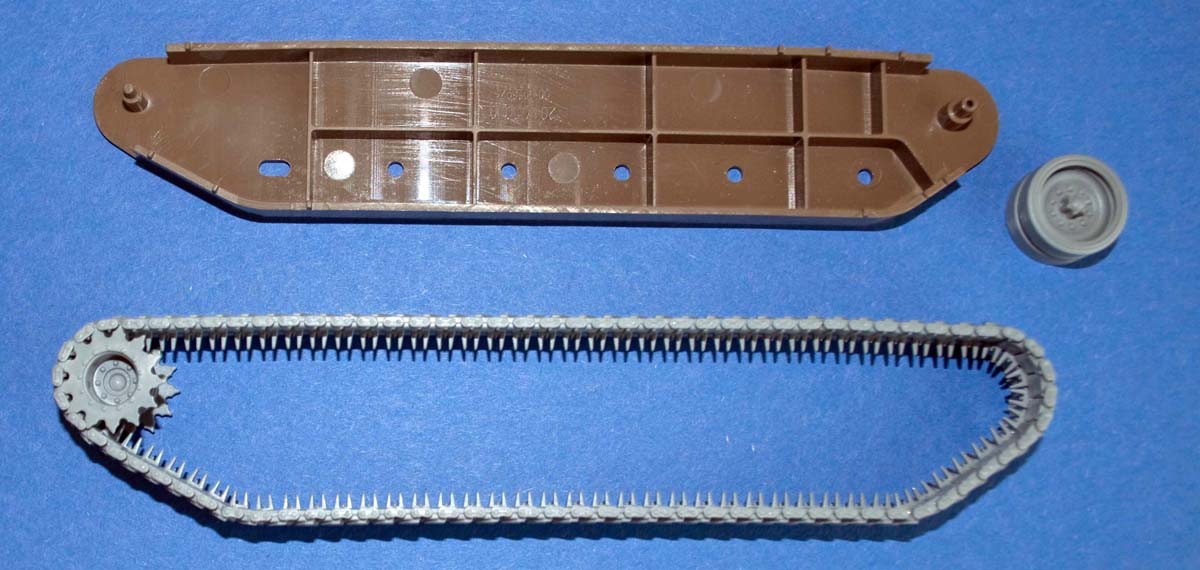
Link and length track assembly went fine using the provided guide. For going around the idler wheel you have to guess at the gap so it helps to take that section and form on the sprocket and then move back to the idler wheel. Ejector pin marks on track inside was cleaned up fairly easily with sanding stick.
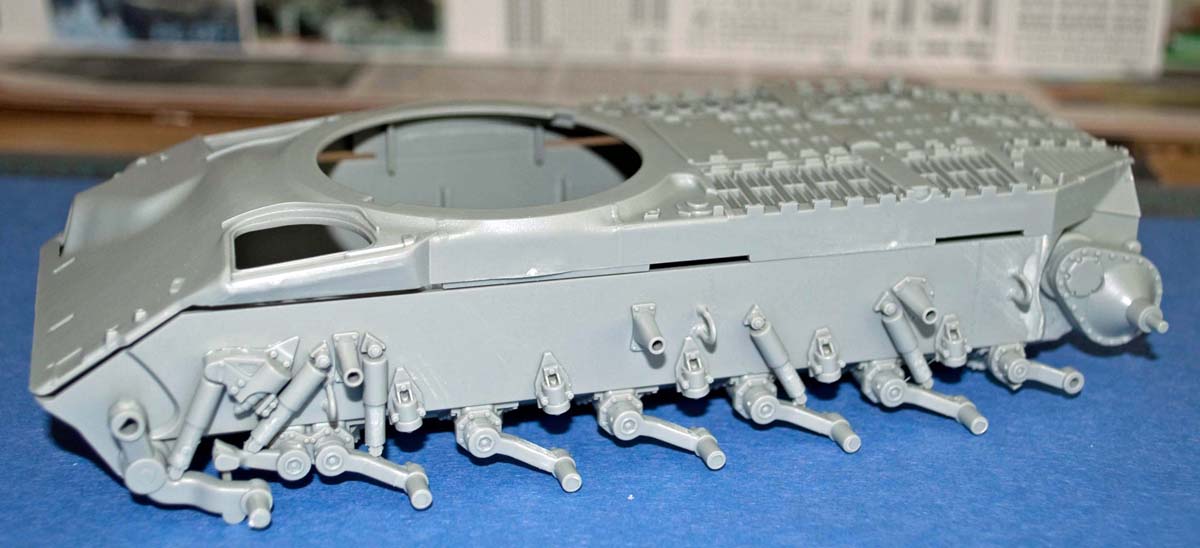
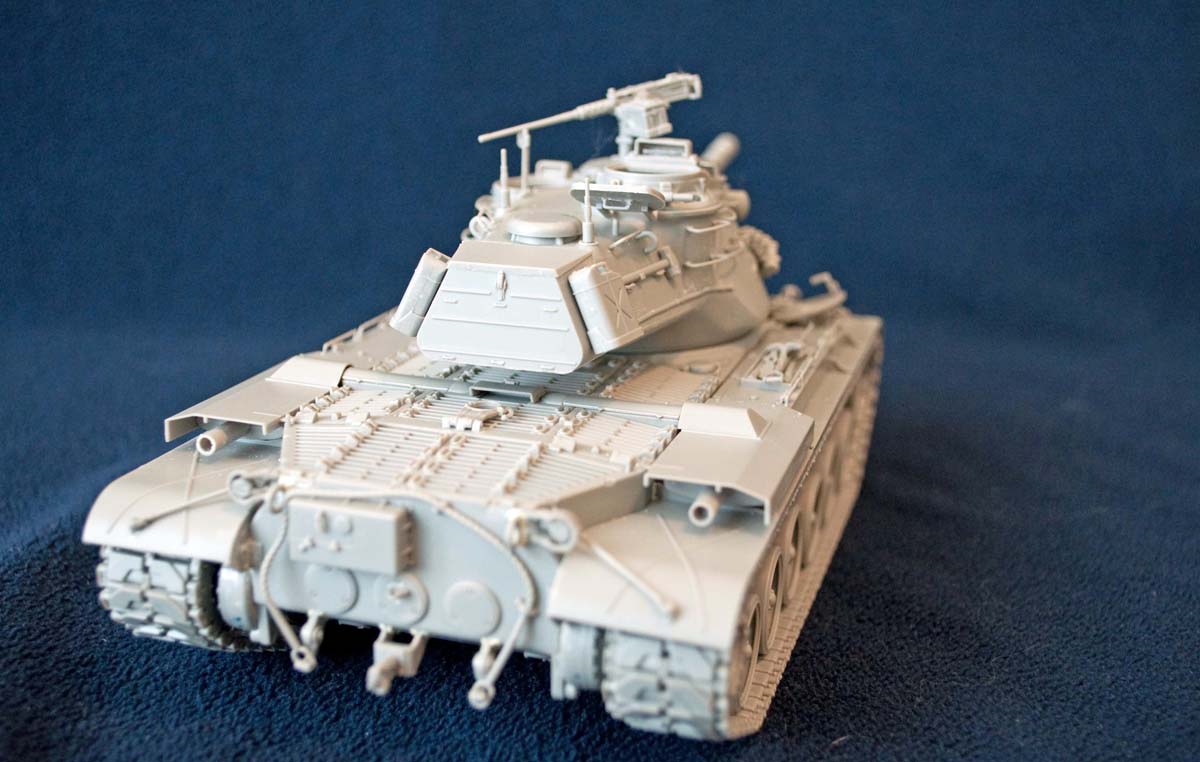
Upper hull detail and mating to lower hull
Here the instructions have you glue several details parts to the top hull section before mounting to the lower hull. I had already dry fitted the lower and upper hull pieces and knew that I would have to rubber band them together while the dried. So I only mounted the bow mg which is glued from the inside. Still managed to break off the bow mg barrel which is fine because pictures show the three options; mg mounted, mg unmounted or mg rain cover in placed. Assembling the main hull first makes it much easier in my opinion. You can also mount the rear hull plate at this time but might consider rounding the left and right sides except for the bracket. This matches the look of reference photos.
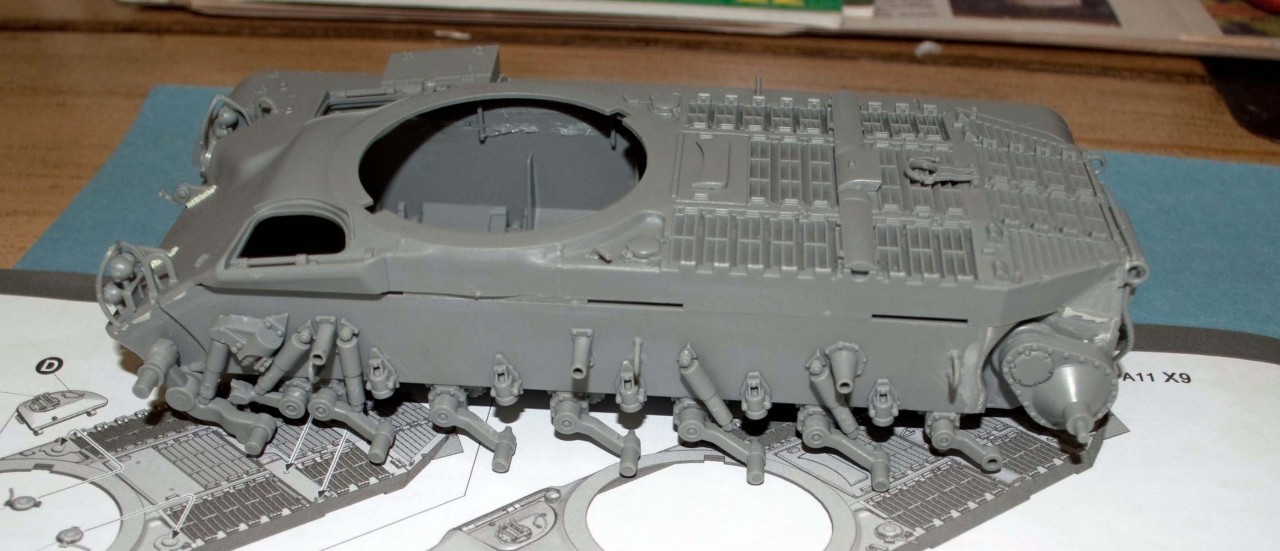
The rounded or squared front lifting hooks (8-2) seem to be related to difference in manufacturer but both are seen on German M47s. I added weld seams to tow hook mounts and rear lifting hooks as there is no weld detail. The light guard assembly is a big tricky and fragile but the fenders will hold in the outside edges when mounted. Driver and radio operator hatches are not workable which is no big issue but the insides have ejector pin marks on non-flat areas so a pain to clean up.
Additionally, you might want to leave off F41 and F42 until the fenders are on because the fuel filler cap locking pin sticks out past the hull and is easily broken. The molded position of the pin doesnt seem to match reference pictures Ive seen so replacing with wire is an option. I would also recommend leaving off D11 until the very end as it is fragile and easily dislodged. I lost mine after gluing it back on for the second time.
A11 is the most fragile part of all the sprues. I was only able to cut off without breaking by backstopping the inside of the part with a toothpick. Still managed to break some while sanding so I will replace all with wire.
The convoy light is seen on some vehicles without the G parts and also several photos show just the L shaped mounting bracket without the rest of the light fixture.
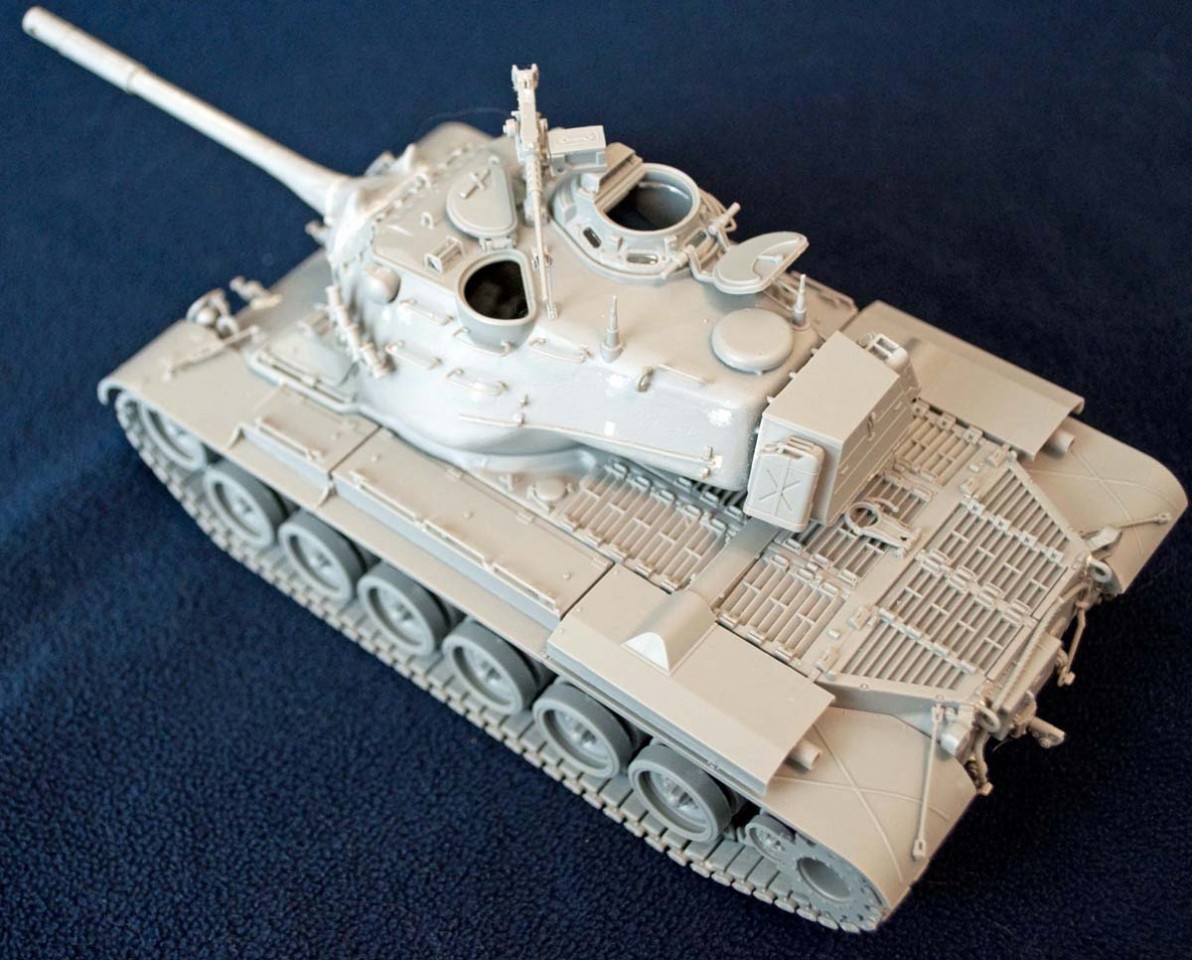
Fenders
I test fitted the fenders and had to shave and sand a little bit of the hull side to get a good fit. I disagree with the instructions in gluing everything to the fender and then mounting to the hull. I wanted to make sure the braces had a good fit so I mounted to the hull and then put in the braces and let dry after checking the fit was square. The front most brace can do with a little weld detail. The others are hidden behind the stowage boxes. The rest of the fender parts went on easy and you can add some extra glue on the back of the stowage boxes if you want to strength the hold on the hull. Take care when you add the rear lights to orient them correctly based on photos. The only tough fit here was D24 and D25 which are a vertical part of the fender that is attached to a bracket on the rear hull piece. I put it in place after mounting the fenders and I had to hold for a while until it bonded and still had to fill in some gaps.
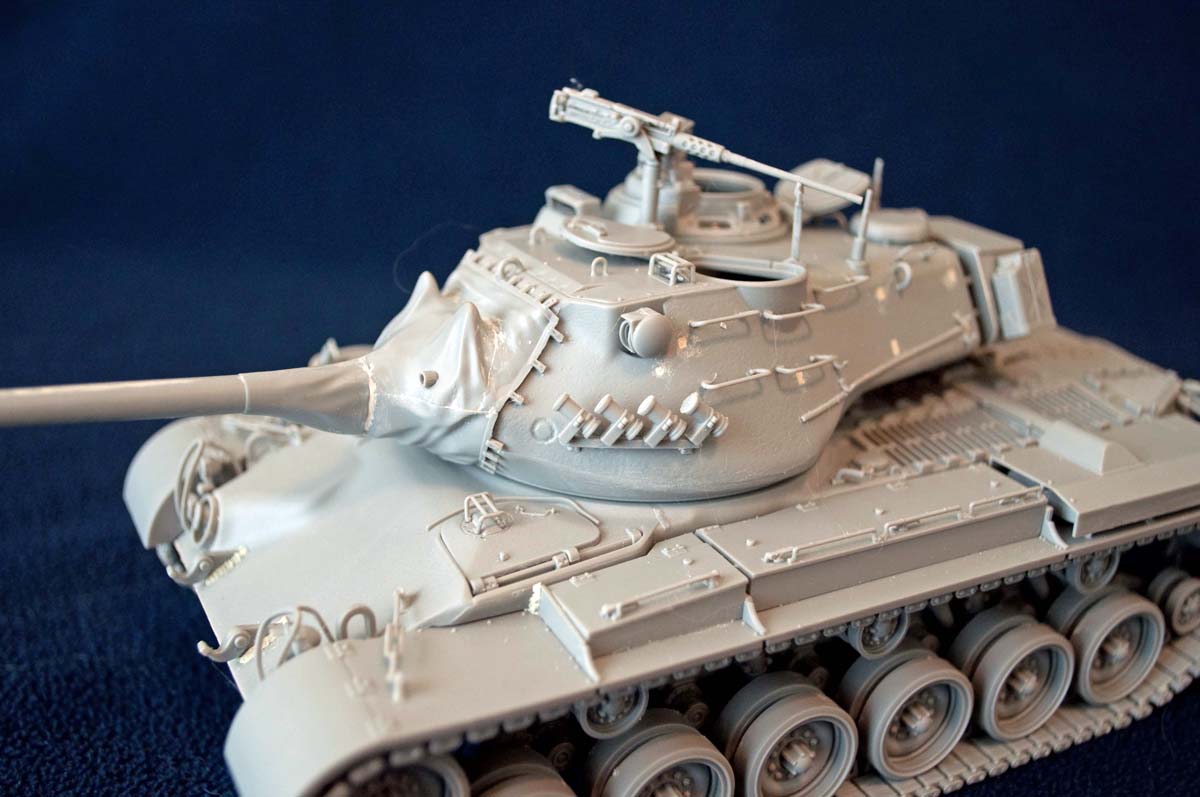
Turret:
Another sequence concern here. The instructions would have you mount several detail parts and then attach turret top and bottom and then after more detail parts you mount the mantlet. This is fine if you are using the covered mantlet parts but if you then you have to shave off some brackets on the turret front and then get the mantlet parts to fit.
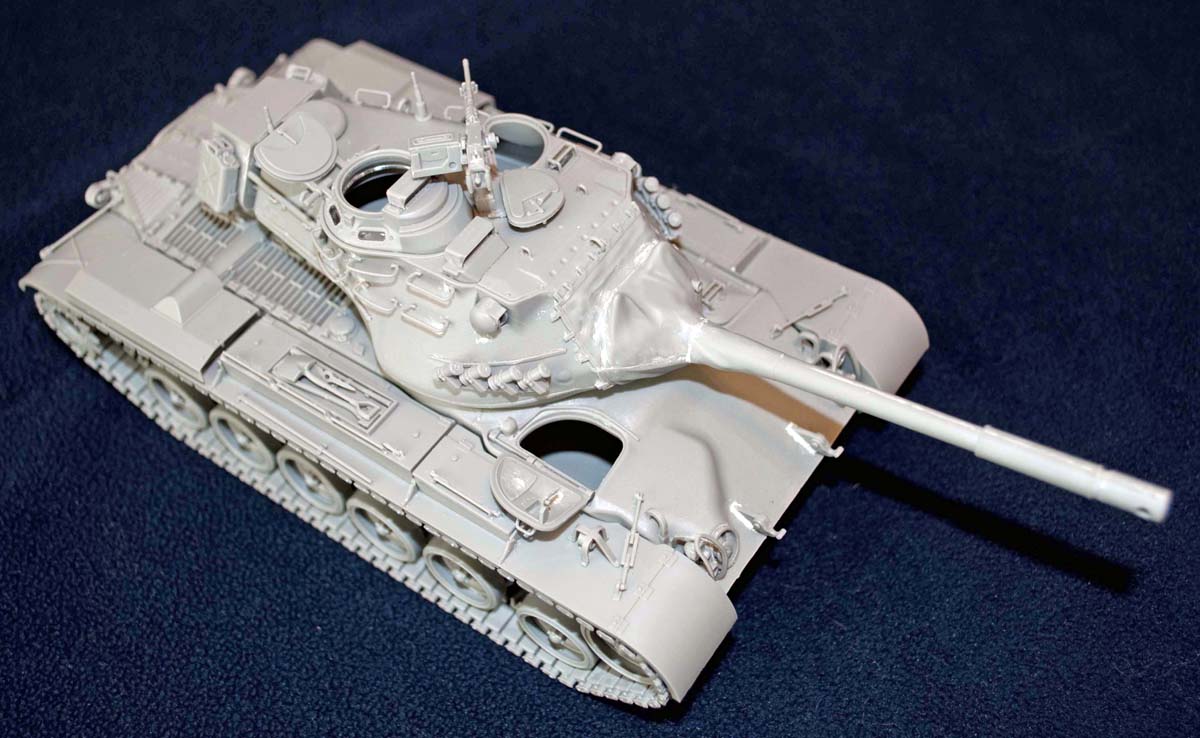
I went with the covered mantlet and its got several pieces to assemble before its glued to the turret. Position of the mantlet on the turret is a bit fuzzy but the shaved off mounts will guide you. Some gaps to fill after mount the mantlet and I used rubber bands to get a good mount which opened some seams. The look of a canvas mantlet is close but you might consider adding some folds with workable putty. I would have preferred a single piece barrel with the covered mantlet and you could attempt with other barrel provided if you are up for the putty work required.
The rest of the turret details goes on easy till the easy when you have to worry about knocking off the tiny bits. The clear periscopes are great but will require some fine masking work later. Nice casting number details on the large periscope covers. I have noticed from pictures that some early M47s were delivered with wire guards over the large periscopes but there are no parts for this.
Its a mystery why the main body of the .50 caliber mg is in two pieces. Fit and detail of the .50 cal mg is the weakest part of the kit. You will have to massage the pintle pieces if you want to have the mg using the crutch (G31). Also not too sure if the ammo can is a good fit for later time periods. Also, when mounting the stand, the flat bolt shaft side should be oriented on the side of the square base between the commanders and loaders hatches.
The commanders hatch is the only workable hatch and it looks good but when opened it should lay flatter but the hinges hit the turret too early. Fixing this would take some work on the hinge arms and the mount to the commanders cupola but I skipped this. If you carefully bend the hinge arms so the inside angle is slightly past 90 degrees then you will get a slightly better look. Luckily the fit of the arms to the commanders cupola isnt too definite so there is some wiggle room.
There are two options for side rails here. I used the simple loops as they appear to be more prevalent. Also the instructions are incorrect in having loops, which I think were intended for bore brush staff sections, on both sides of the turret. Regarding turret detail, this is what I have observed from photographs:
Option 1 sledge hammer mounted as shown and staff section loops only on turret right side
Option 2 sledge hammer mounted with head at turret rear and staff section loops only on left side of turret.
This holds true regardless of if the smoke launchers are mounted. Option 2 might have some correlation to the squared front lifting hooks.
Summary
I found the kit overall to be easy to work with. This is mostly due to the quality of the plastic. Cast texture overall is good in my opinion. Several small detail parts to be careful with and its here where the somewhat thick sprue attachments are troublesome but the detail included is great. The kit builds out great without any PE needed. The .50 is the only weak spot. Lack of text in the instructions is challenging but easily fixed with a bit of planning. As for any shortcoming in regards to a late service Bundeswehr M47, I can empathize because there is a definite shortage of comprehensive reference material and museum/display pieces are not all accurate. Id gladly build another as either an early service Bundeswehr or one of the other countries in the decal sheet.
References
Tankograd #5002 The Early Years of the Modern German Army
Fahrzeug Profile #22 Die Panzertuppe der Bundeswehr 1956-2003
Fahrzeug Profile #12 Panzerjäger des Deutschen Heeres 1916 bis 1996
Waffen-Arsenal Band 124 Panzerjäger der Bundeswehr
TM 9-718A - 90mm Gun Tank M47 Patton Technical Manual
www.primeportal.net
http://www.panzerbaer.de/
http://www.panzer-modell.de/
https://panzergrenadierbrigade17.de/gallery/
https://panzerbrigade18.de/gallery/
http://www.beim-alten-bgs.de
http://www.hartziel.de/_typen/m47.htm
SUMMARY
Highs: Plastic easy to work with. Great detail overall and good effort on casting and weld detail. Clear periscope & light parts.Lows: Lack of text in instructions can be challenging. .50 caliber mg is weak.Verdict: Good build at a decent price and with 6 decal & paint options.
Our Thanks to Squadron Products! This item was provided by them for the purpose of having it reviewed on this KitMaker Network site. If you would like your kit, book, or product reviewed, please contact us.
About Paul Truhe (ptruhe) FROM: TEXAS, UNITED STATES
Built military models in my youth but didn't pick it up again until a few years out of college. Served in a mortar platoon in the 2nd Armored Division from 1986-1990 at the end of the Cold War. I only build armor now with primary interests being M113s, CVR(t)s and Leopards.
Oops. Typo on my part but I thought it was 1956.[/quote]
I thought the BW was formed on paper in '55, but the tanks arrived in '56, so a little confusion is understandable.
My BGS reference comes from this:
http://www.beim-alten-bgs.de/Zu_den_Kameradenseiten/35_Vom_BGS_1954-56_zum_PzBtl_2/BGS_II_GSG6/bgs_ii_gsg6.html
Ive been told this became PzBtl 1.
And at bottom of this page:
http://www.beim-alten-bgs.de/Zu_den_Kameradenseiten/35_Vom_BGS_1954-56_zum_PzBtl_2/5__GSG6/5__gsg6.html
So units with M47 were given priority on Leopard 1 delivery over those who had M48?[/quote]
OK, some BGS units were transfered to Bundeswehr units and formed the base for the new Bundeswehr. As it is written on that page, it seems to be in the transitional phase with tanks from the Bundeswehr and personal still from the BGS. Never seen or heard before!
Regarding the delivery of the Leopard 1:
the M47 was replaced with the Leopard while the M48 was still in service until around 1990. Some of the M48 have been upgrated to M48A2GA2. The M48 in tank battalions of tank brigades were repalced with Leopard 2 and the M48 were then in use with the German pendant to the US-National Guard (German: Haimatschutzbrigaden)
Got the kit, and the contour of the glacis plate is drastically wrong. The raised area around the machine gun mount should blend smoothly into the rest of the glacis, but Takom depicts it like a plateau, with a very sudden transition. It will require a great deal of scraping, filling and sanding to make it right.
The Italeri kit is less sophisticated in its tooling due to its age, but it is accurate in shape.


Comments