Dragon Models is known for releasing somee of the best German WWII vehicles in different configurations. The same is the case with the famous Panther tank. Dragon released all three versions with different interesting features but this time we get something really interesting- Panther Ausf. G in a command version.
The Germans developed two versions of Panther command tank. The Sd.Kfz 267 as standard command vehicle for ground units and Sd.Kfz.268 as a ground-to-air-liaison vehicle. These two variants differed in an additional radio. In Sd.Kfz. 267 was mounted the Fu-8 radio set which allowed contact with units over 70km distance. In the second variant the Fu-7 was mounted instead of the standard Fu-5 radio set was mounted in both vehicles, but it was moved from the hull to the turret and mounted instead of coaxial mg, this is why all command Panthers had plugs in the gun mantlet.
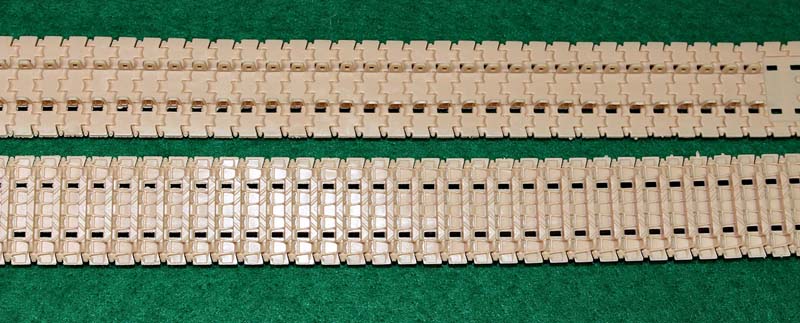
This is not the first Befehls Panther Ausf. G from this producer. In 2009 Cyber Hobby released the same vehicle in white box series. I compared the sprues in both kits and they are almost the same. To be honest I found only two differences between these two kits: decals and tracks. In Cyber Hobby kit Magic Tracks are provided, in this kit- DS Tracks.
Contents
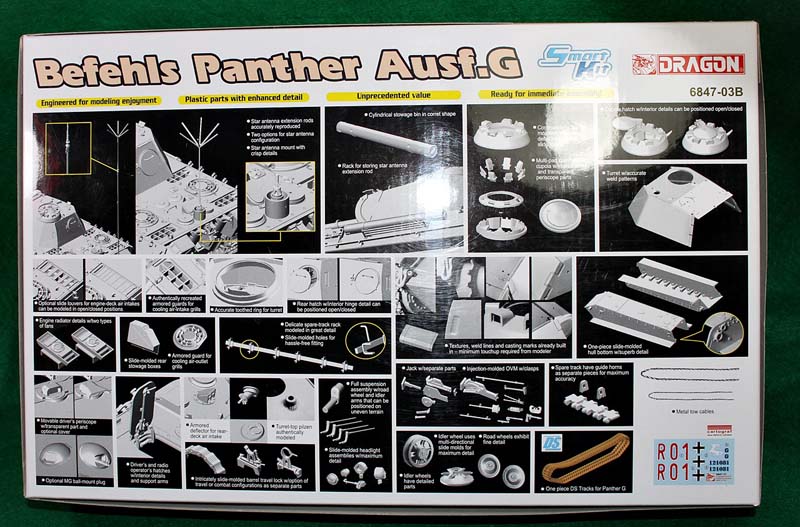
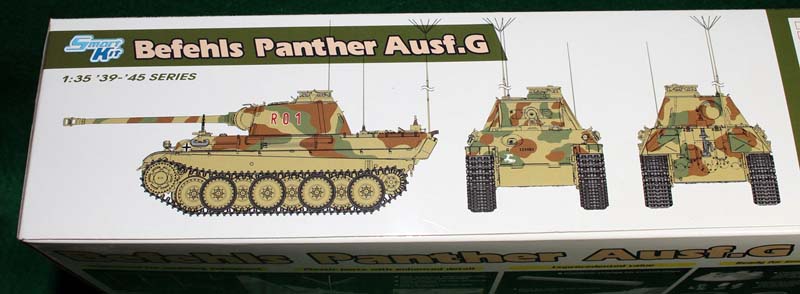
The kit comes in standard Dragon size card box with open top lid. This kit belongs to the Smart Kit series. Interesting box art on the top of the box shows the command Panther on the edge of a forest. On the sides and on the reverse of the box the producer has placed more information about all kit features and advantages.
The box is sturdy and will protect the contents, so all parts are undamaged and in great shape. Inside the box there are:
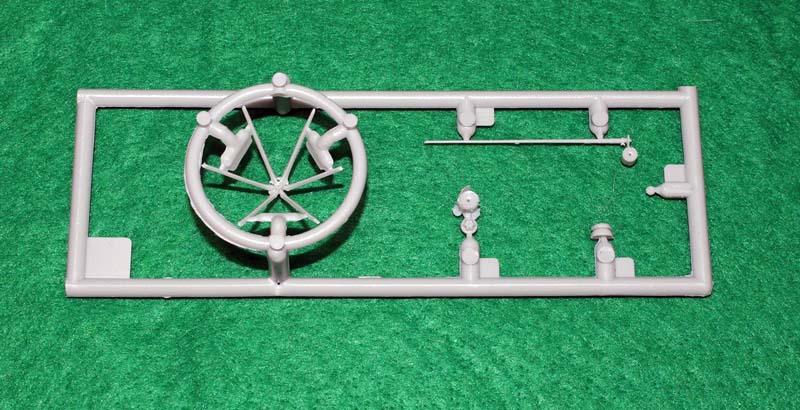
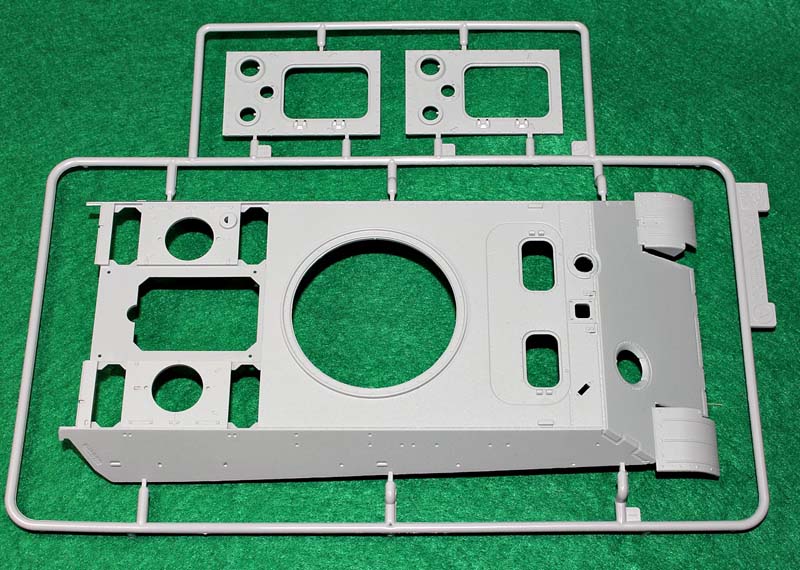
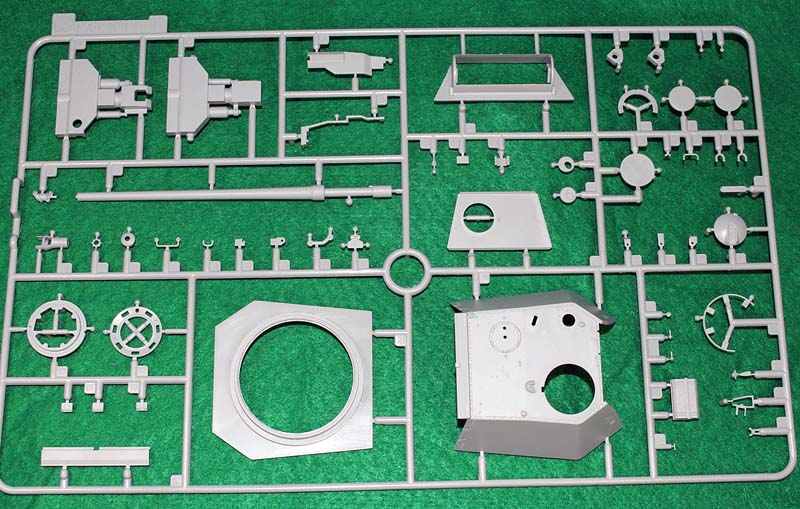
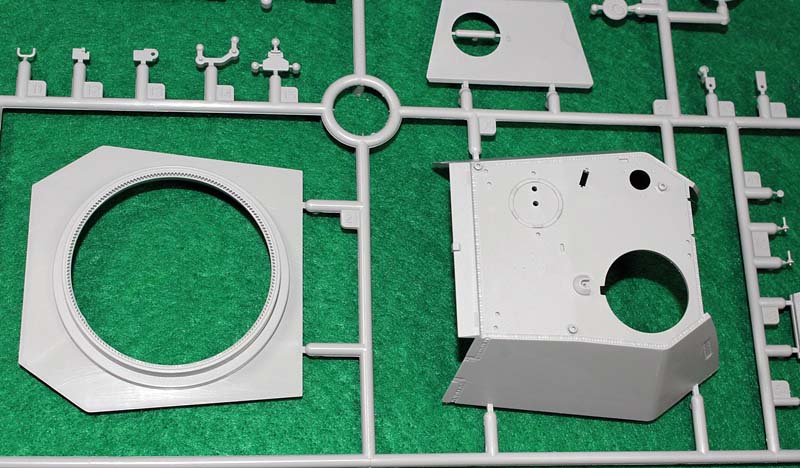
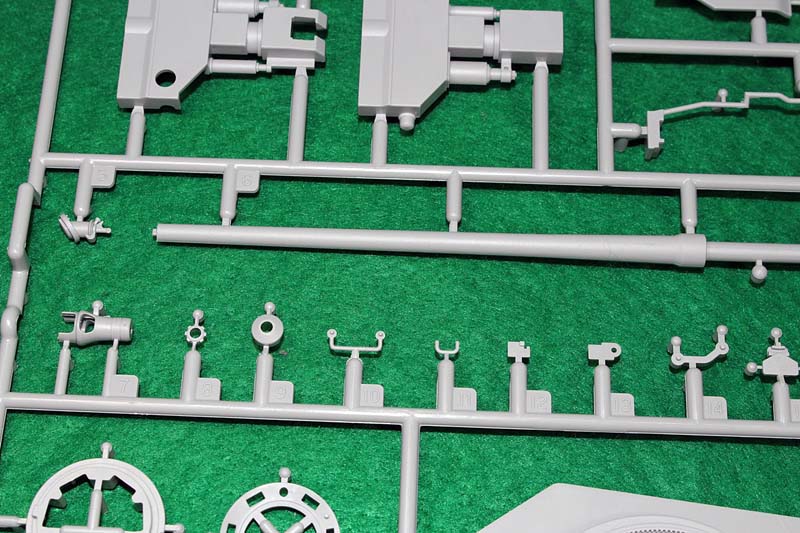
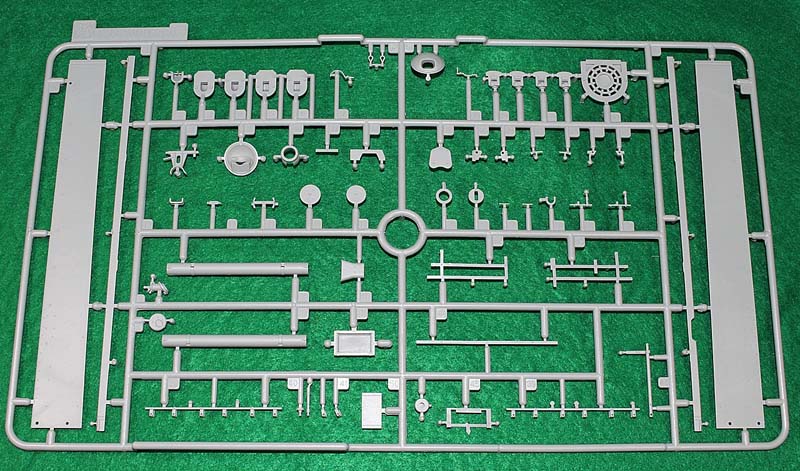
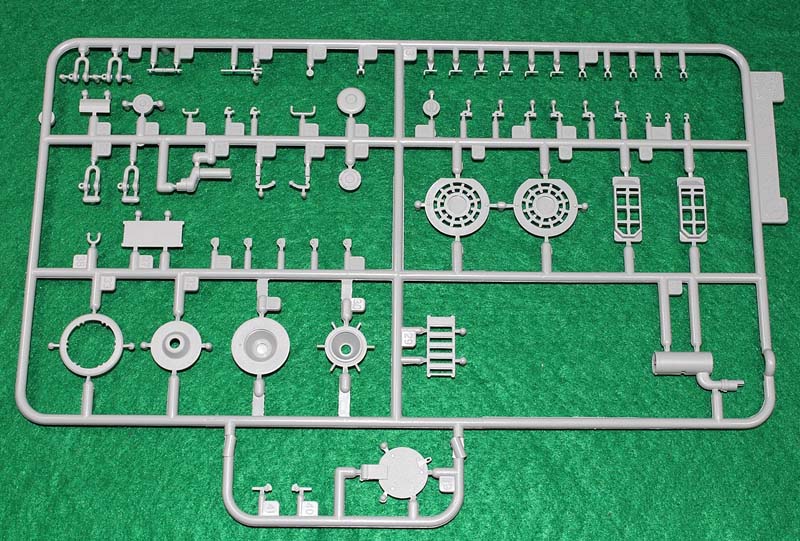
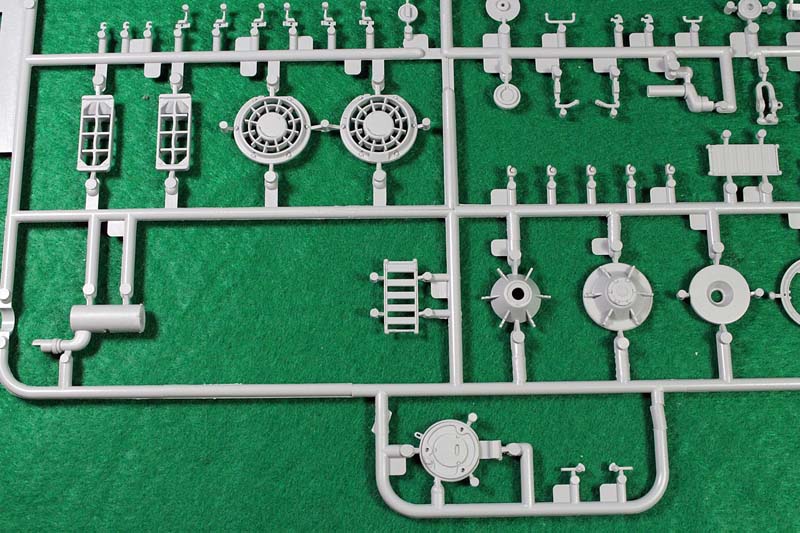
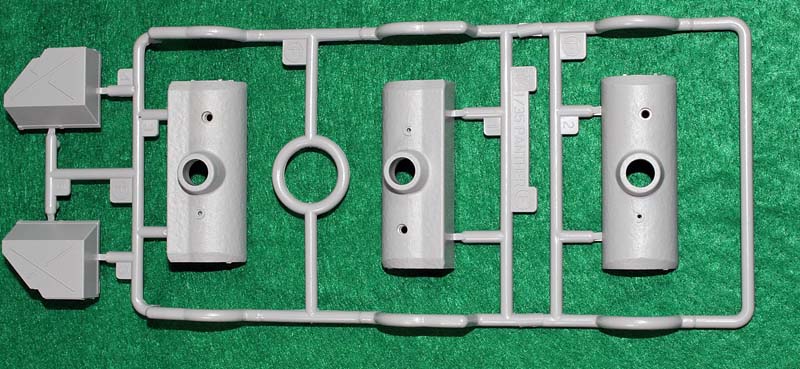
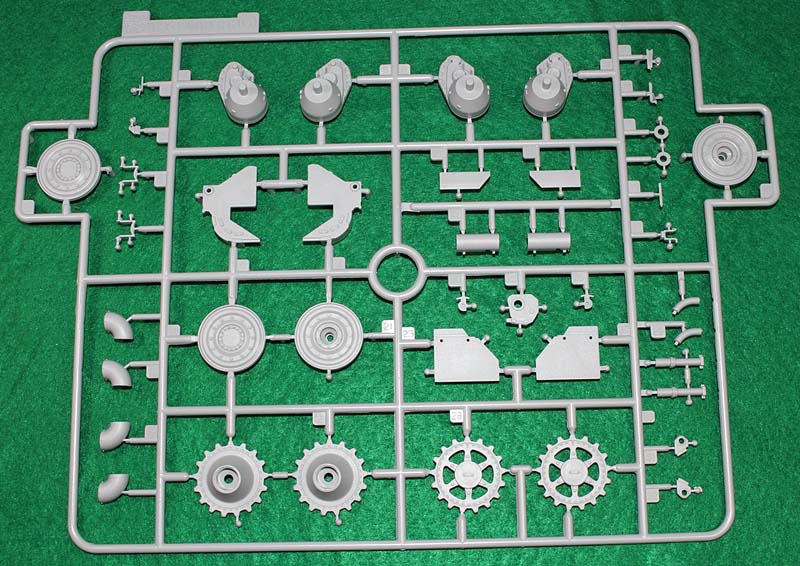
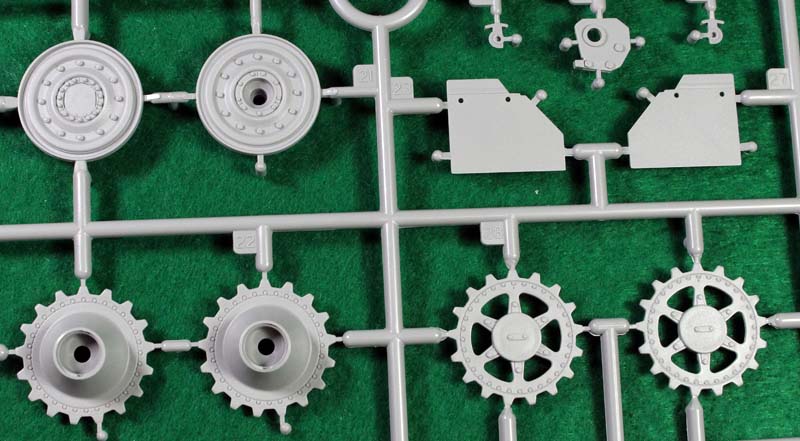
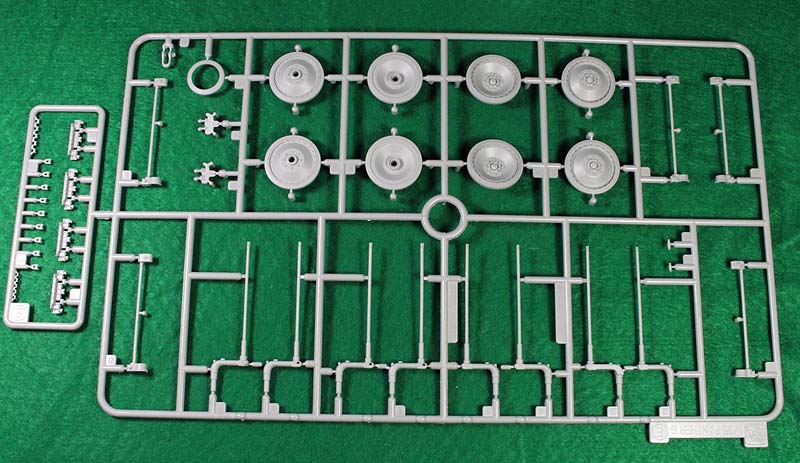
-17 gray plastic sprues
- 1 clear sprue
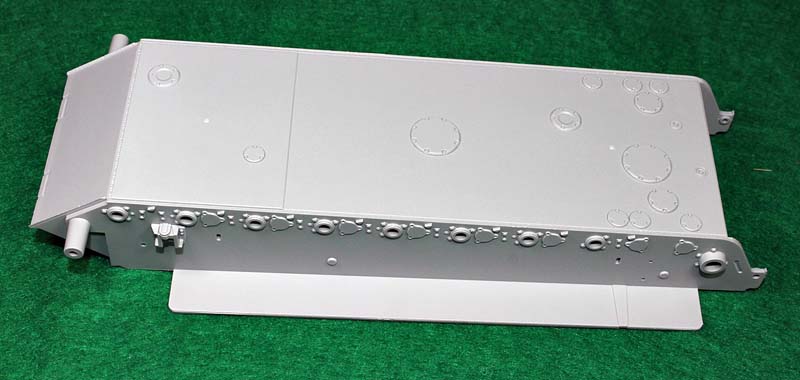
-lower hull tub
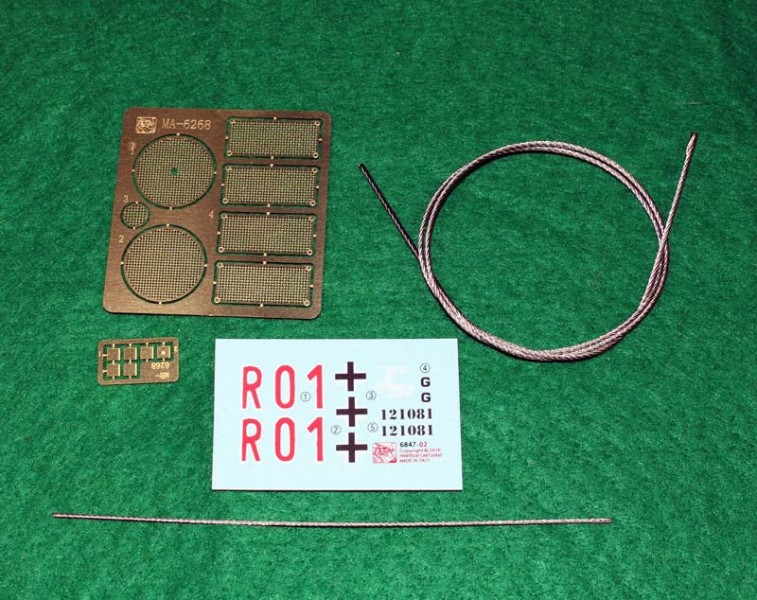
- 2 small pe sheets
- 2 pieces of metal cables
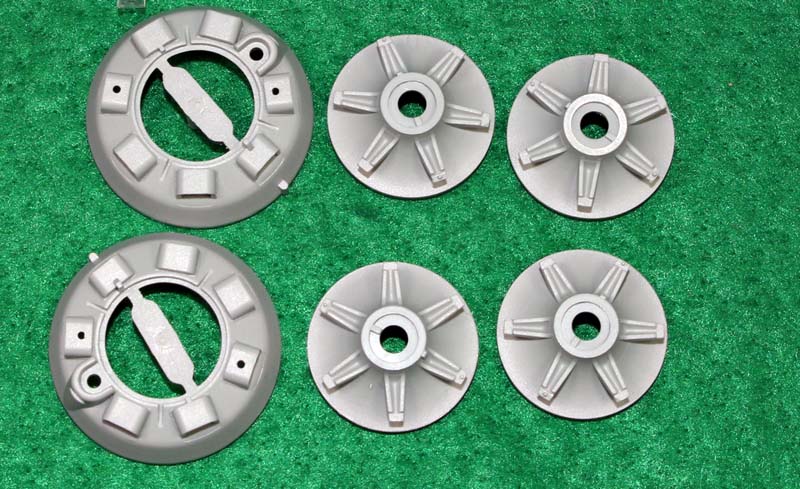
- 2 zip lock bags with idler wheels and commander cupolas
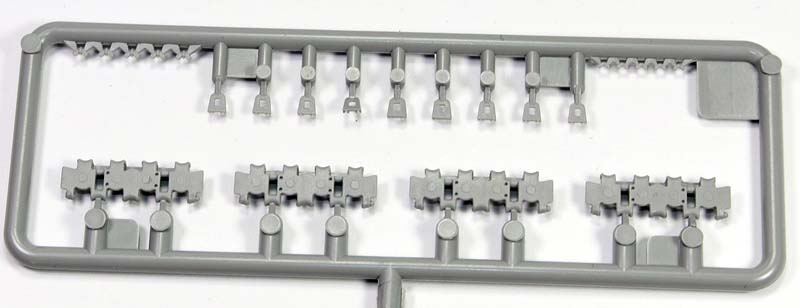
- set of DS tracks
- decal sheet
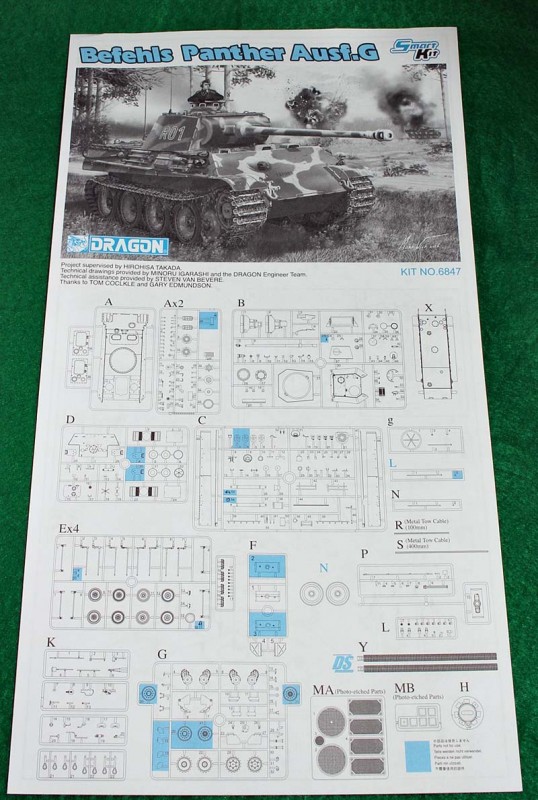
- instruction
For additional protection all sprues are separately packaged in plastic bags, apart from duplicate sprues which are packed together. The contents fill almost all space inside the box.
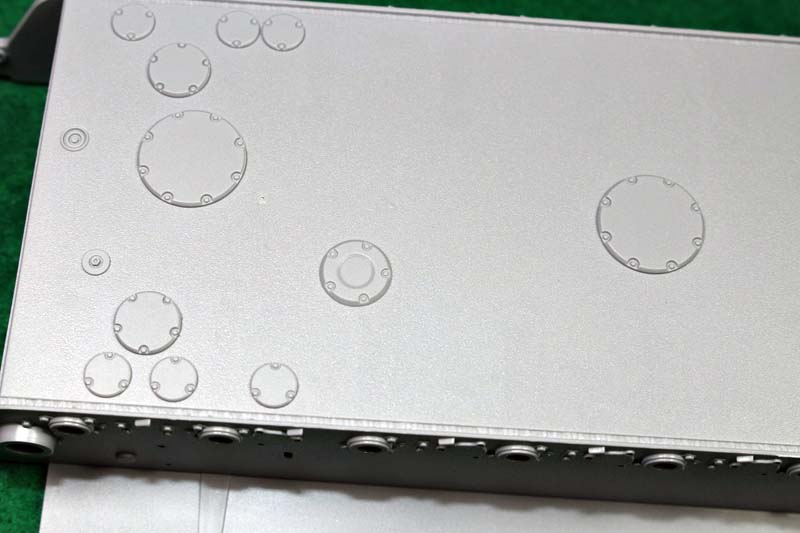
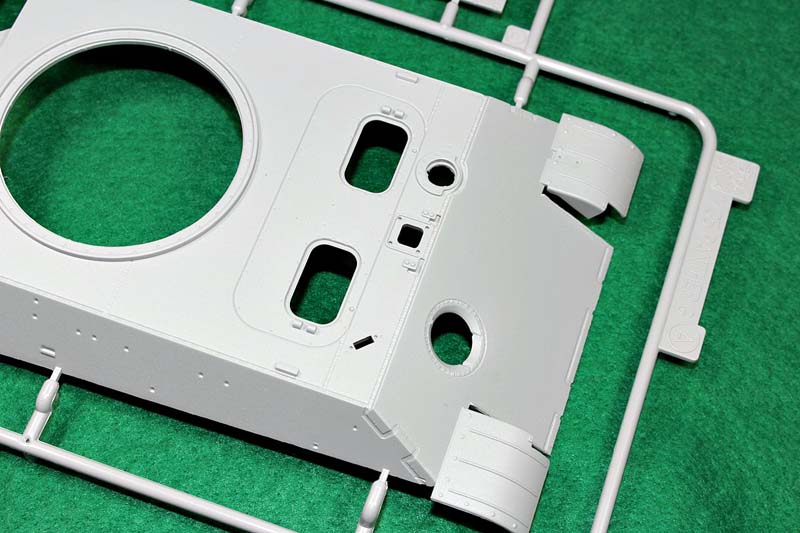
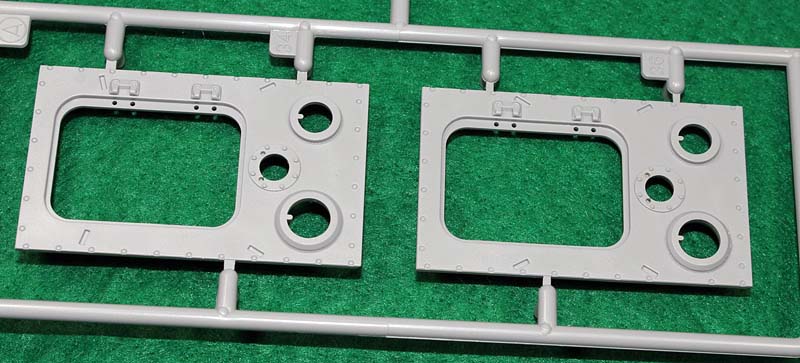
Most of the parts in this kit come from a release in 2006, the Panther G Late Production kit but as always in Dragon kits the moulding quality is very good. The box is full of clean and crisp made parts with sharp details. The weld seams and texture of rolled steel are also well made.
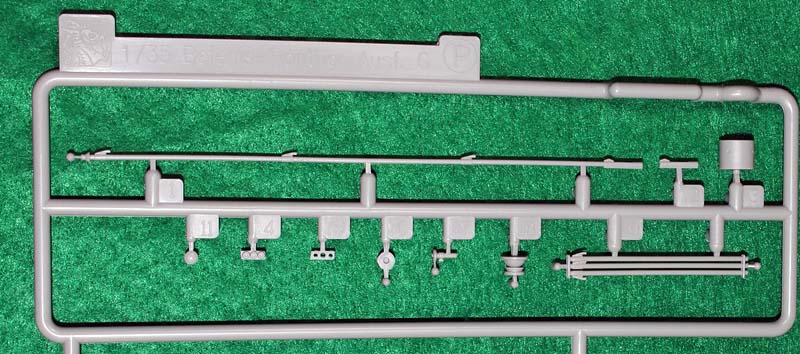
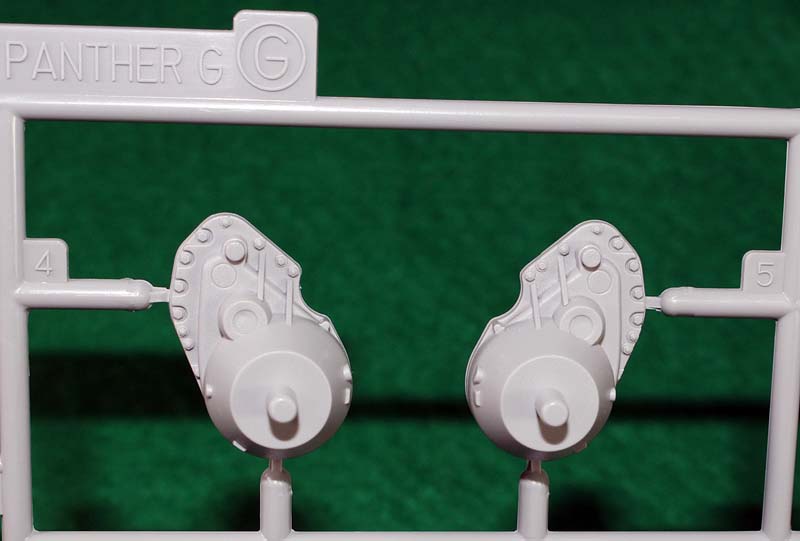
After the initial inspection of the sprues it's easy to notice that two or three variants of different details are included, for example there are four gun mantlets, two types of exhausts, two types of fans and fan covers, two types of idler wheels etc. In my opinion its a really cool thing because it allows the modeller to build each variant of the Panther G. Of course after the build a lot of spares are left, but for modeller there is never too much a good thing in the spare box.
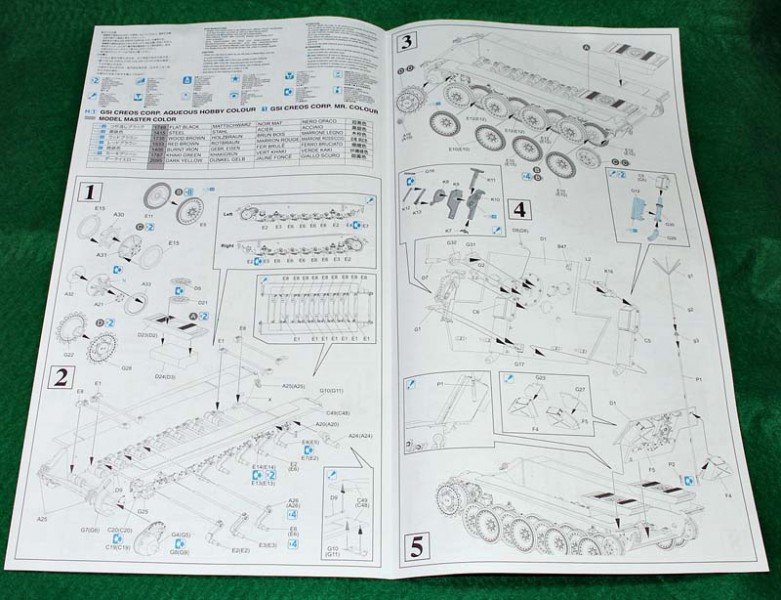
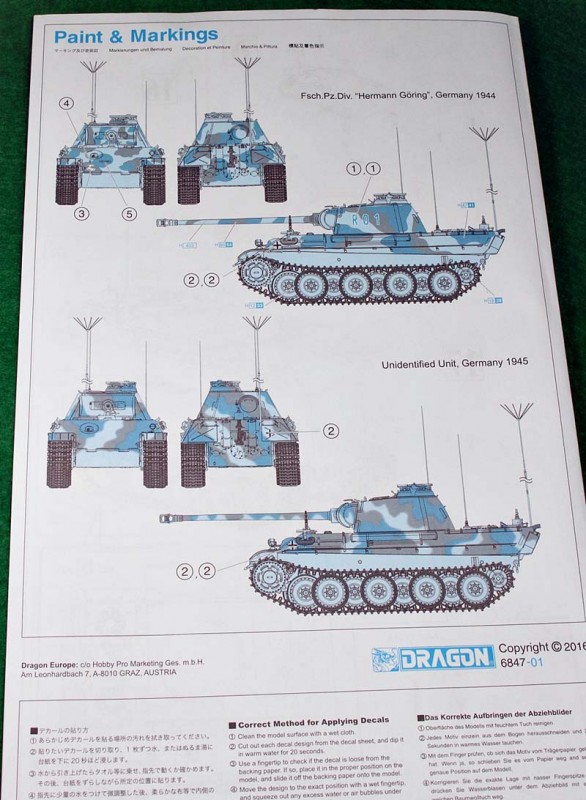
Another interesting thing to mention is the instruction. Dragon's instruction are known as not very accurate and not the easiest to follow but in this case is different. It contains seventeen steps and rather clearly shows how to build this kit. As I wrote above Dragon give a lot different details suitable for vehicles from different production periods but the instruction don't show which one is correct for the vehicle to which the decals are in the box so during construction you have to be careful which parts to choose, preferably to support of the original vehicle photos and the books. Fortunately, the R 01 Panther is rather well photographed.
The instructions provide only two paint schemes . One is the R 01 vehicle from "Herman Goring" Pz. Div, 1944 and the second option is for a Panther from an unidentified unit, Germany 1945. Both Panthers are painted in late war German three tone paint scheme. One important thing worth mentioning, is fact that the R 01 Panther was equipped with side skirts, which were painted in disc camo scheme, but they are not included in the box so if someone want to do a correct model of this tank they must buy or source them separately.
The Build
First of all: I decided to build the vehicle differently to the procedure proposed by Dragon: Panther number 151 which took part in fighting during the Ardennes offensive, exactly 19.XII.1944 Battle of Stoumont. This vehicle was commanded by SS-Sturmbannfuhrer Werner Poetschke, commander of I./SS- Pz.Rgt. And his unit was a part of the Kampfgruppe Peiper. The Panther no.151, the same like R 01 was manufactured in September 1944 by the MAN factory so this kit is perfect for my build.
Running gear and suspension:
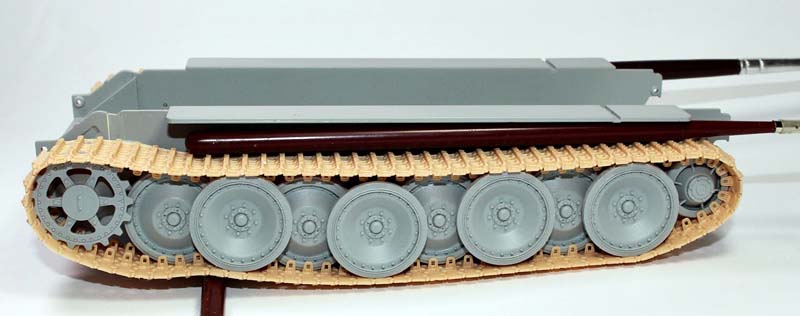
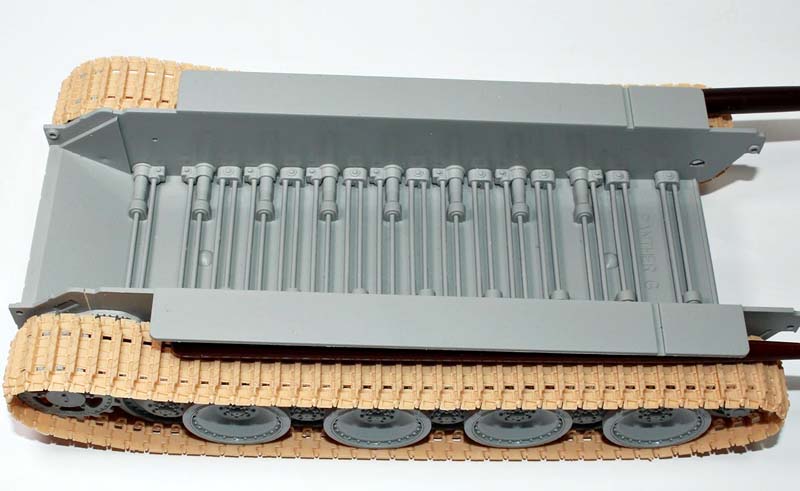
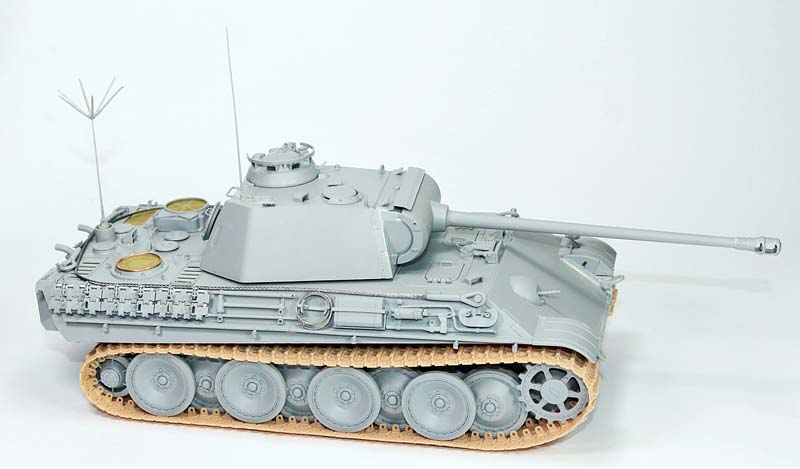
According to the instruction I started the build with the wheel assembly. Each road wheel and drive sprocket came in two halves, they have great details and look great. Next, I glued the idler wheels. Dragon provided two versions of them, the bigger (earlier) and the smaller (used later) for my vehicle the bigger are correct. The second step is focused on torsion bars, swing arms and other suspension details assembly. In this kit, the same as in the previous Panther from Dragon, it is possible to build workable suspension, it only needs you to cut off the positioning bolt on every swing arm. Like on the real vehicle it acts on the principle of torsion bars. I also mounted the final drive covers, this time it is an option to choose between cover with the Stützrolle (something like return roller) or without it, I chose a version with this feature. In the next step I mounted all wheels in their place and put on the DS tracks, remember to put them in the correct direction. Generally I'm not a huge fan of DS tracks but in this case there is no reason to complain. The tracks are well reproduced, guide horns are straight and not damaged, also they are rather soft so after final assembly its possible to glue the track to the road wheel and achieve the realistic track sag effect.
Rear plate
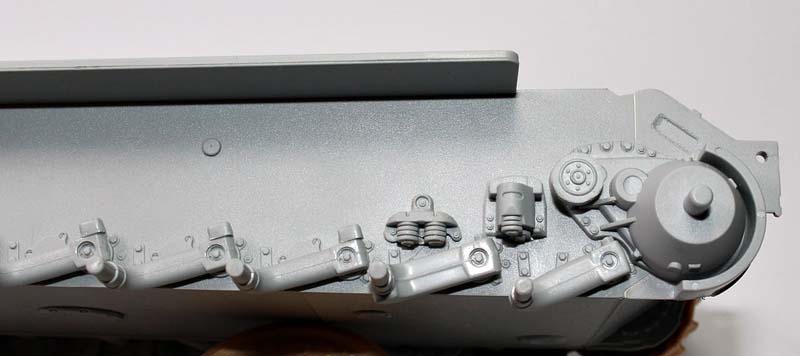
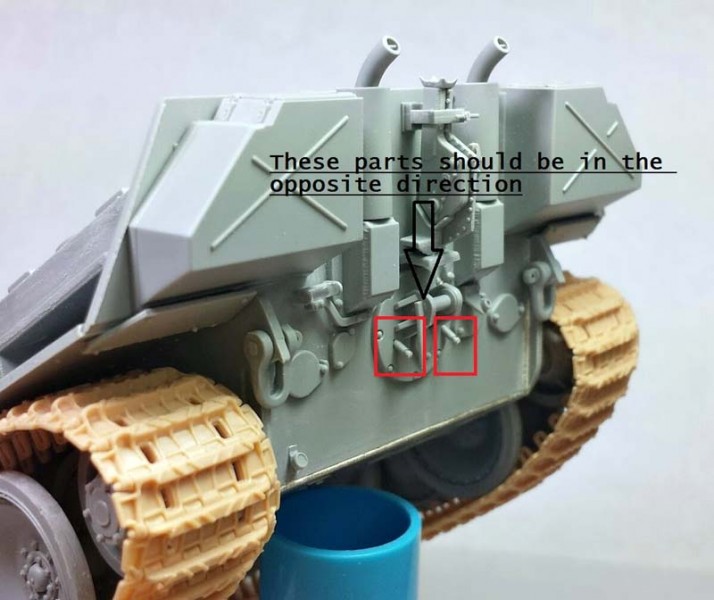
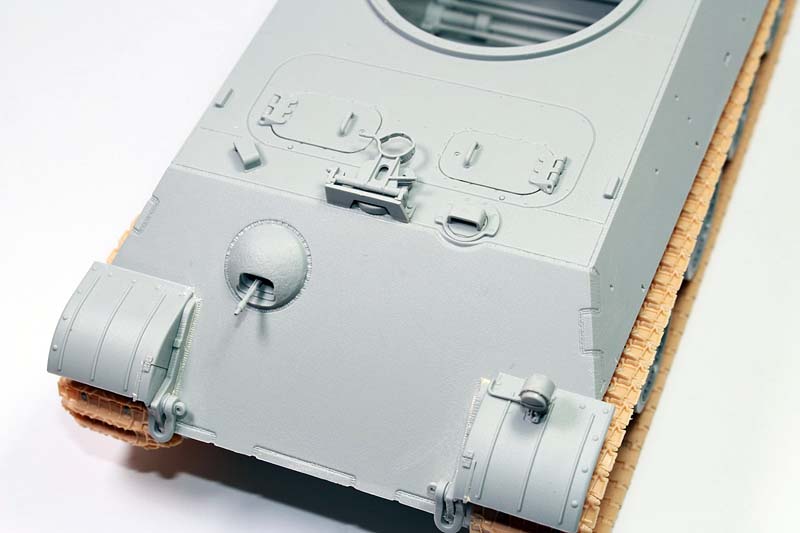
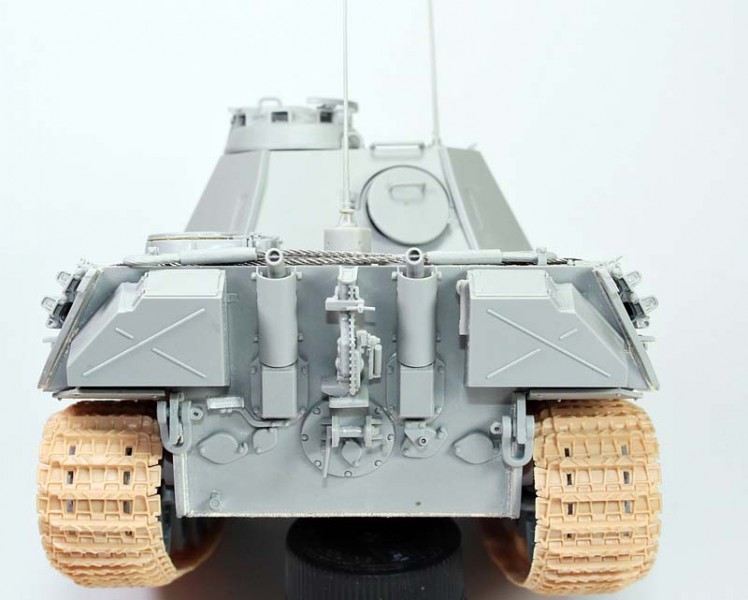
When my Panther stood on its own wheels I started work with the rear plate. First I glued the rear plate and the hull together, the fit is very good. It's worth mentioning the nicely reproduced welds in the edges on this part. This feature saved me a lot of time, I only added the weld where the rear plate is connected with the hull bottom. Next I added the other details like tow coupler, convoy light etc. Dragon provided two options for the exhaust and exhaust covers. I mounted the welded covers and the exhausts with bent armor plate around the pipes which are hollowed out and look pretty realistic. Between them is a place for the 20-ton jack. In this kit it consists of seven parts and looks excellent after assembly. The stowage bins assembly also didn't create any problems. While working on the rest of the details I noticed a small mistake in the manual. Parts D8 should be glued in the opposite direction, they should be directed upward. This is the only issue that I found and the other steps are fine.
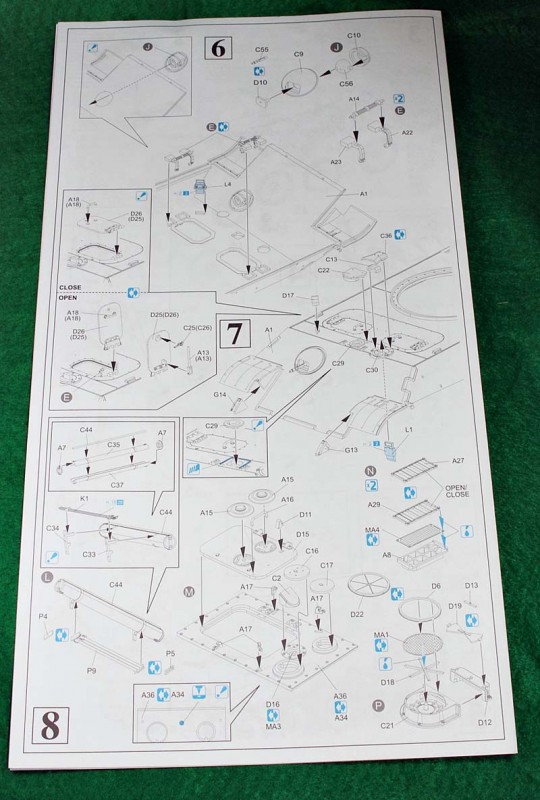
Front plate:
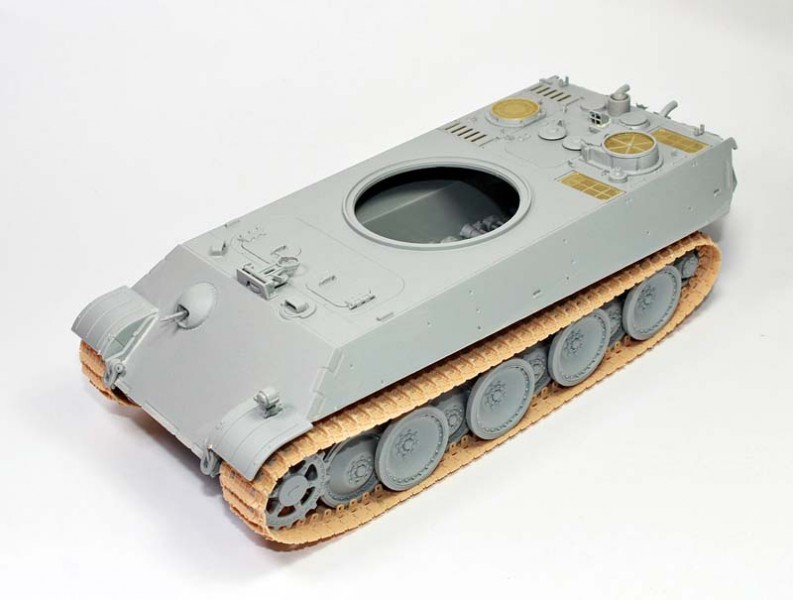
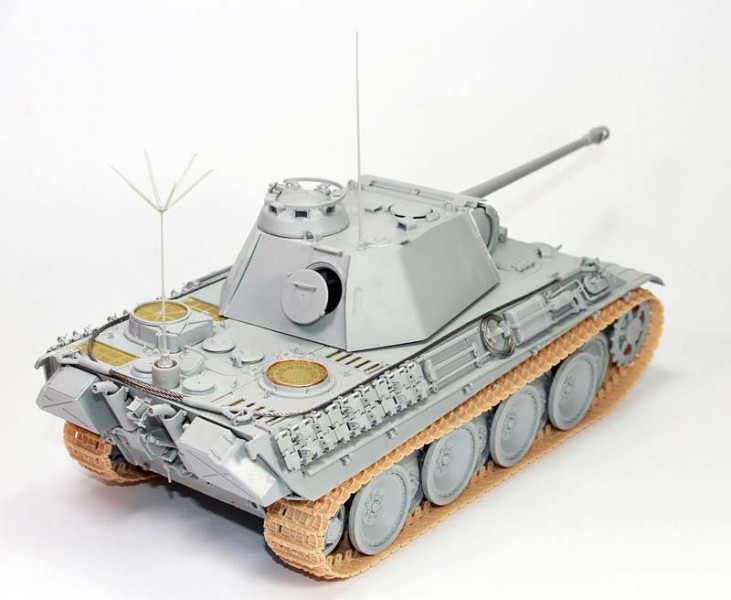
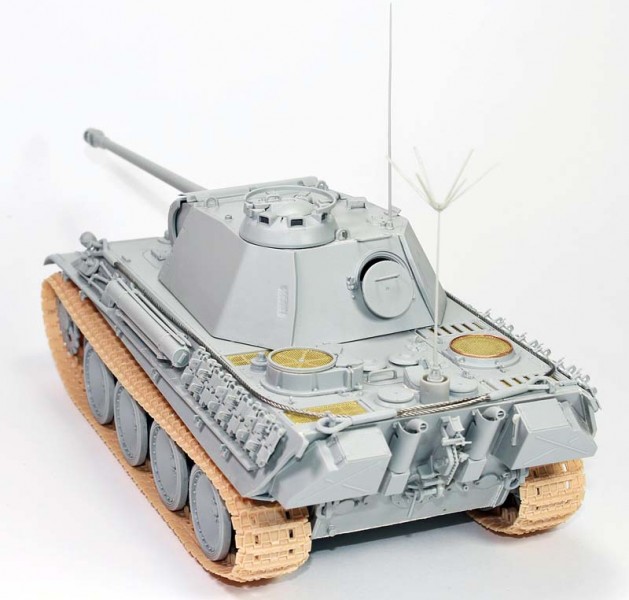
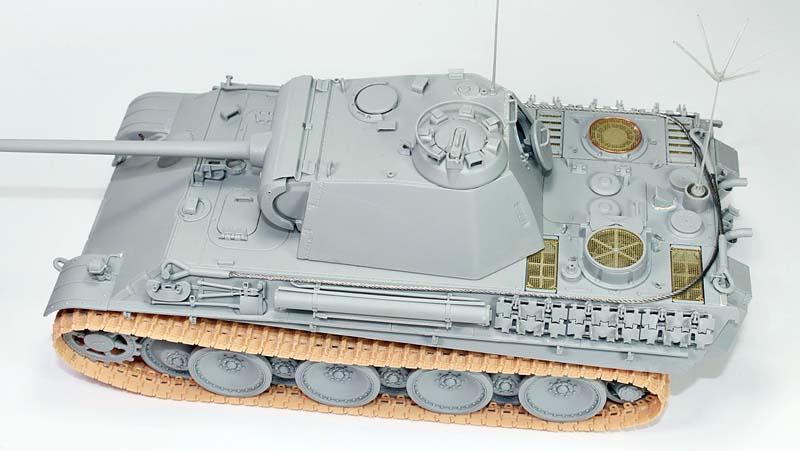
I glued the two hull halves together and added all of the details on the front glacis plate and around. The lower and upper hull fit together like a dream with the welds and marks of cut armor plates are very nicely reproduced too. Before joining them I glued the radio operators periscope. If someone wants to open the driver and co-drivers hatches it's time to assembly and mount the hatch opening mechanism. I skipped this step because in my model these hatches will be closed, but it's a good move on the part of the manufacturer. Next I focused on the exterior details. The bow MG with great looking barrel and four- part Bosh head lamp are one of the best that I have ever seen - well detailed and crisply molded. Comparing the reference photos with the model I noticed that Dragon forgot about some of the small details - the small elements which attach the fenders to the front glacis plate - I made them myself from spare photo etched parts. Next step on my build was the driver and radio operator hatches. They are also well made, with good looking details on the both faces, in case someone wants to leave them open. The armoured periscope covers and gun travel lock was the last details that I glued in this area.
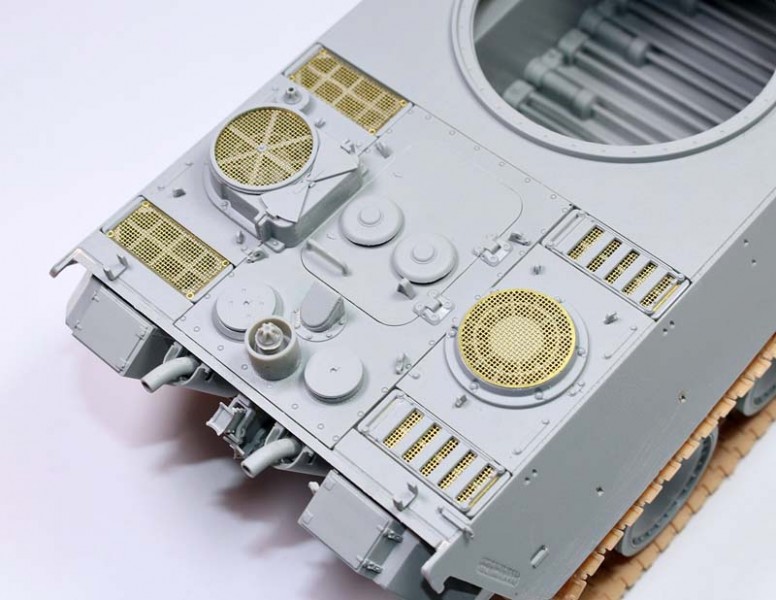
Engine plate
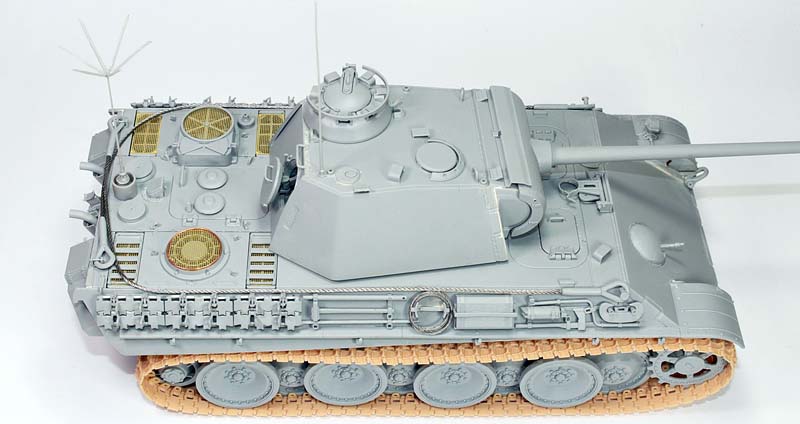
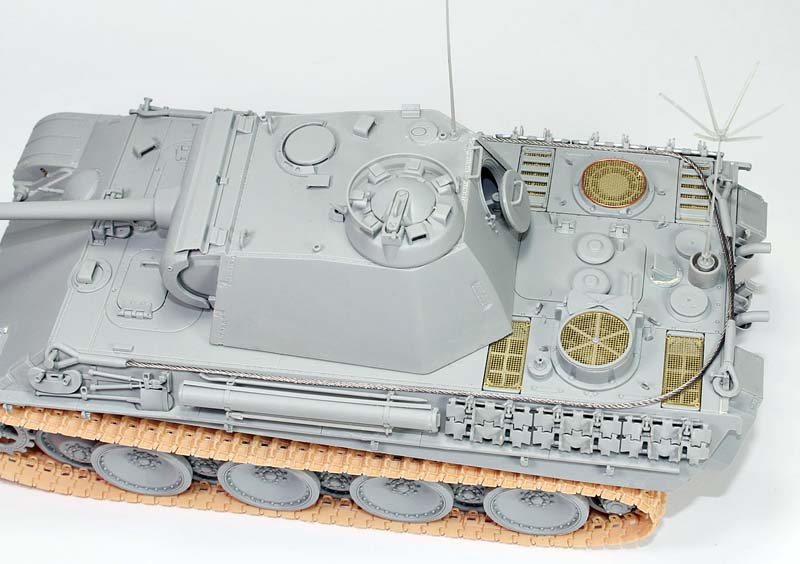
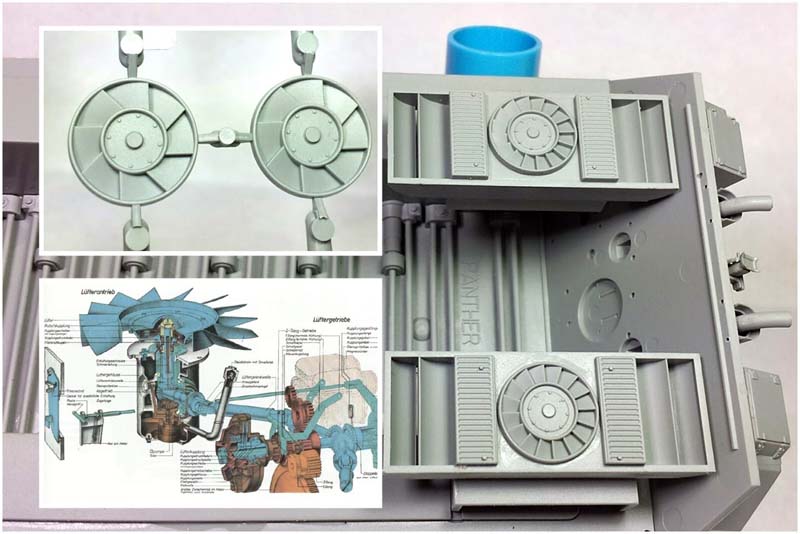
When the front of the hull was finished I started work on the engine plate. In this area Dragon provides a lot of options for the details, so good reference photos or someone who know a lot about Panthers is very helpful. First I assembled two bays with fans and then glued the central plate with engine access hatch; next I mounted two plates with fan covers. I used one standard low profile fan cover and the second is higher with later used crew compartment heater. In this area I used almost all of the photo etched parts that I used in this build. I glued the photo etched mesh on the fan and radiator covers. On the two right radiator covers I also used photo etched louvers. Comparing the instruction with photos of the real vehicles I noticed the next difference: on the left fan cover was mounted something like ring/ rounded rod above the mesh. This detail is not provided on the box so I made it myself from thin wire. All other details didn't present any problems, all details are well executed and the finished engine plate with the photo etched mesh looks pretty good in my opinion.
Tools and spare tracks
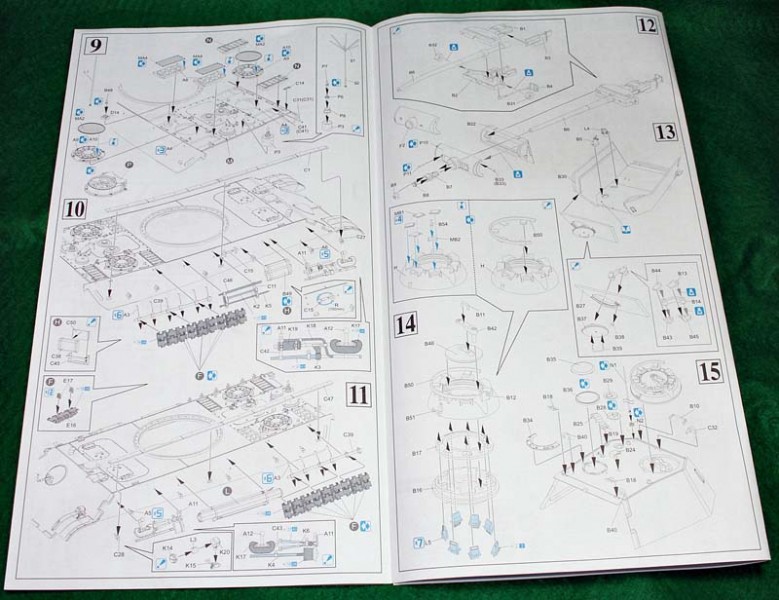
To finish my work with the hull it only remained for the details on both sides to be added. First I mounted the fenders and side plate brackets. On the left hull side I glued the tool rack with the c-hook- shovel and wire cutters. All OVM tools have molded on clasps, they are good enough that replacing them with photo etch is not necessary. Next I placed the tube for spare antennas and bracket for spare track links. Spare tracks assembly was a little bit time consuming and these also require some correction for the correct appearance. Every track link comes from three parts- the main part and two guide horns. On the main part are two pin marks which need to be remove and the holes in the tracks are too narrow to mount them on the bracket so they need to be increased ( sharp hobby knife makes a good job in this case). The second thing worth mentioning is the fact that the spare tracks links are molded with pin blots on the edges so for the correct look they need to be cut off and the hole through the track needs to be drilled out. I came up for another idea to simulate the pins I glued the pieces of the thin plastic rod in the appropriate places. Of course the third option is the easiest- replace the spare links and use the aftermarket track links. For keeping spare track links in place six thin plastic bolts need to be used. They are really small and fragile so special attention is required.
The process on the right side of the hull was similar. First I mounted the rack with c-hook, fire extinguisher, crank starter and the axe. Then it was time for the jack block with finely replicated wood texture on it and the next rack with other tools. Between them is the place for track changing cable, like the other metal cables from this producer it is a little bit stiff and hard to put on the bracket, cooper wire will work much better in my opinion. Lastly I repeated the same process with spare track links from left side and the hull was almost finished.
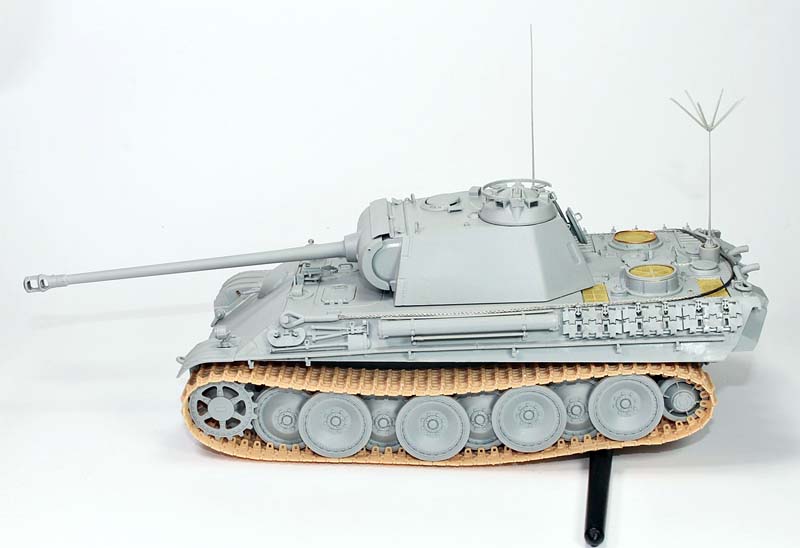
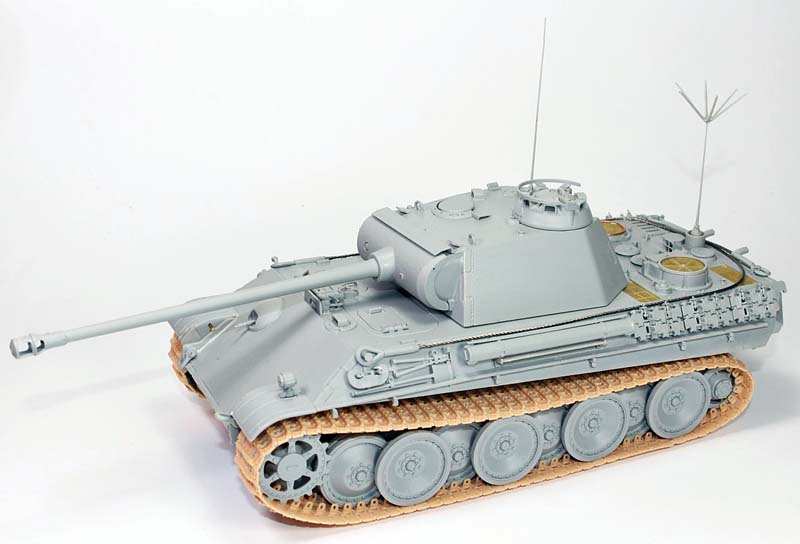
Turret
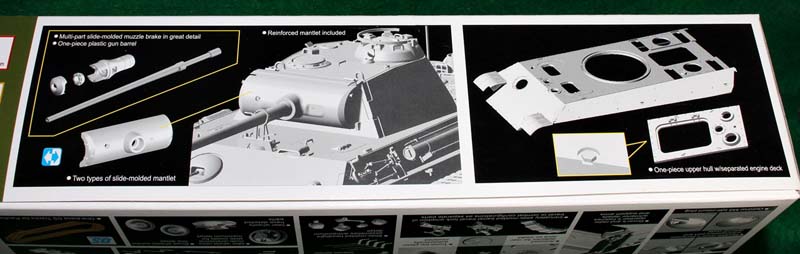
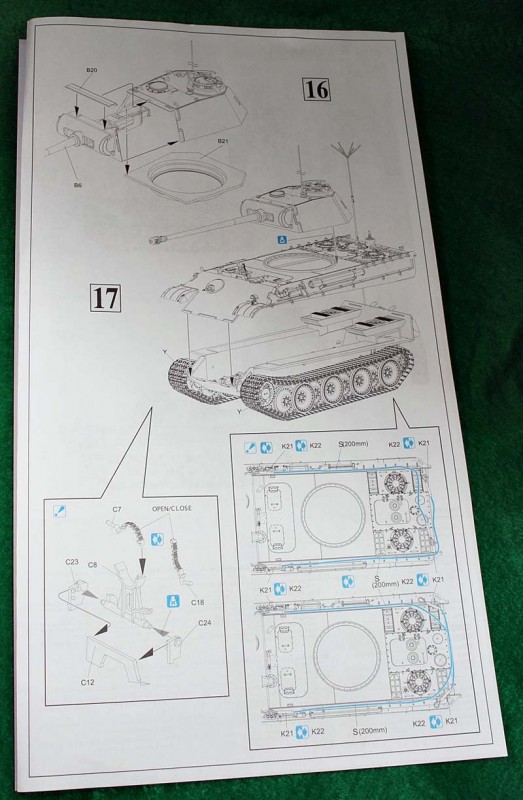
It's time for the turret which starts with assembling the gun breech, gun barrel and the mantlet. The gun breech is not superbly detailed but it's still better to see it through the open hatch than emptiness. The gun barrel is slide molded one piece part without muzzle brake, which comes from three parts. The main gun after assembly looks decent, only two seam lines and three marks from the sprue need to be carefully removed. Before the muzzle brake assembly it's time to choose the correct gun mantlet. Dragon provided four of them and two are special for the Befehls configuration. Next I built the rear plate of the turret with movable hatch and glued to the main turret part which comes as slide molded part with great details like welds and pilzen on the roof. Then I added the turret base with well executed teeth of the turret rotation mechanism. In the meantime I glued all remained details, all of them look great. The last turret part- commander cupola is the icing on the cake. There are two variants: with the ring around and without, I chose the option with it. It comes from sixteen parts and look awesome when is finished.
Final assembly
The last steps of this build was the fitting of the antennas and tow cables. I decided to use the star antenna without the telescopic extension, with it this model will definitely be one of the highest in this scale. Styrene antennas looks good, initially I thought that metal replacements would be necessary but when I fitted the styrene versions I decided to leave them on the model. During work with them I advise special care because they are very fragile and can easily break. For the tow cables Dragon provided one long piece of metal cable, which is cut to create two pieces of 20 centimeters in length. The same as the track changing cable they are a little bit stiff, but a few drops of super glue help put them on place correctly.
Conclusion
Overall, this is a really good kit, allowing you to build an interesting model with a high degree of detail straight from the box. This is an example of a typical Dragon kit, very good quality, beautifully molded parts, very good fitting but it is also not without issues. The biggest in my opinion is the lack of side skirts which are necessary for the proposed paint scheme. It's a pity because it's evident, that Dragon paid a lot of attention in every detail on this kit and a little more research would avoid thing like this. Of course it is still a very good kit with a lot of options for the modellers and in my opinion it deserve my recommendation.
SUMMARY
Highs: -interesting subject with good details
-high molding quailty
-good fitting
-possibility to make the workable suspensionLows: -incorrect R01 paint scheme (lack of the side plates)
-one mistake in the instructionVerdict: This is a very well executed kit which allows to build a great model out of the box. Interesting addition for the collection of all German WWII armor fans. Highly recommended.
Our Thanks to Dragon USA! This item was provided by them for the purpose of having it reviewed on this KitMaker Network site. If you would like your kit, book, or product reviewed, please contact us.
Nice review, only the box art looks a bit funny though... As the Panther was squeezed together along it's length, or rephrased: as if a bit too narrow and therefor more toylike!? ... and maybe the camo scheme just adds to this appearance...
This looks like Dragon returning to what they do best, definitely a possible for me. The R01 transfers aren't a big issue for me, after all there are only about 40 other Panzer Regiments to choose from who would also have a BefehlsPanther so numbered!
The kit is probably simply another rendition of Dragon's great Panther series (again) but I agree on the box art; they're simply not as good as they were a decade ago. New artists and the details aren't as good. Remember Volstad and his magnificent #6253 Tiger I late kit art? WoW! Now that's art! Wonder what happened to him in the intervening years?
I just started this kit only to find the body's rear section is a little warped causing fit issues. Excellent review. Thanks for the heads up on part D8.


Comments