This is a review of Rye field Models newly released kit # RM-5008 Bergepanzer Tiger I Sd.Kfz.185 Italy 1944. Rye field Models (HK) Co. LTD. is a relatively new model company that hit the modeling scene around summer 2015. This kit appears to be the 8th release from this China based manufacturer. Seeing that three of their first few kits were Tiger Is, I would suspect that some of the sprues in this Bergepanzer Tiger I have been reused from their other kits.
There is much discussion on the internet as to what this kit actually represents and what a Bergepanzer Tiger I was actually used for. It appears that this kit is in some ways a representation of a unique vehicle used in Italy in 1944 that was issued to the Pz.Abt.508 battalion. The theory appears to be that this tank may have started life as a Befehlstiger (Command Tiger) but, due to production shortages, it was converted to be a normal Tiger while still at the factory. Many of the Command fittings were left in place, but it now had a coaxial MG and only one radio antenna. Early in 1944 this Tiger suffered battle damage, including hits to the turret rear and a fire. It's not clear what the damage was, but the fire was probably external only, because the tank was now considered unusable and yet could still be driven.
In May 1944 the Allies found this Tiger abandoned in the Anzio region, apparently due to engine trouble. The gun was removed and fitted with a 10 Ton winch and crane boom for lifting such items as drive sprockets, engine covers, etc along with a foldable set of towing bars mounted in the front. The crane is obviously inadequate for vehicle recovery, so we can believe that this may be for charge laying. The Zimmerit was mostly gone from the turret walls, due to the fire. Most of the spare track hangers were removed. The hull had towing hitches added on front and back.
Contents
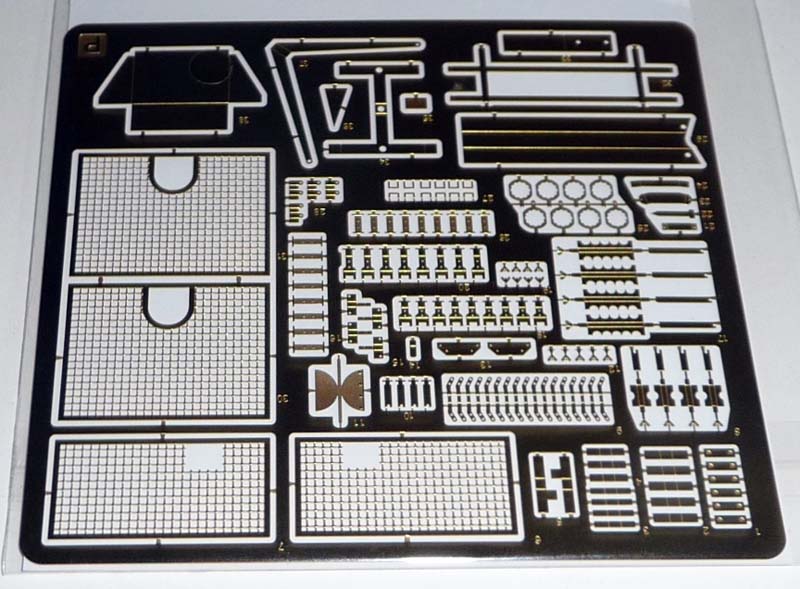
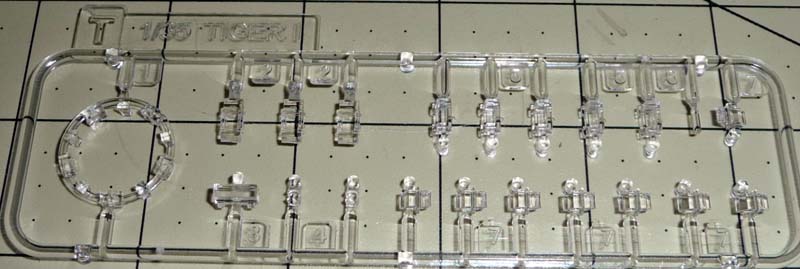
This kit competes with Dragon Models # 6850 Bergepanzer Tiger I Pz.Abt.508. Neither model can be fully correct because of the lack of photographs of the assembled crane; the kits therefore contain speculative parts. While the kit comes in a fairly large box, larger then the average Tiger kit upon opening the box, you will see why, its packed to the top with sprues of plastic. All sprues are individually wrapped in re-sealable plastic bags, except when there is more that one of the same sprue. The track links are neatly packed in their own clear plastic box. There is also a fret of photo etch, some copper cable, some string and a small decal sheet. Additionally, the kit includes a set of four Zimmerit pattern tools. The instruction packet is actually 16-page booklet printed on glossy paper that depicts three pages of color camouflage patterns and one page showing where the Zimmerit should be in green. There are 15 assembly steps and the painting and markings guide features Mig Jimenez color profiles.
Build Review
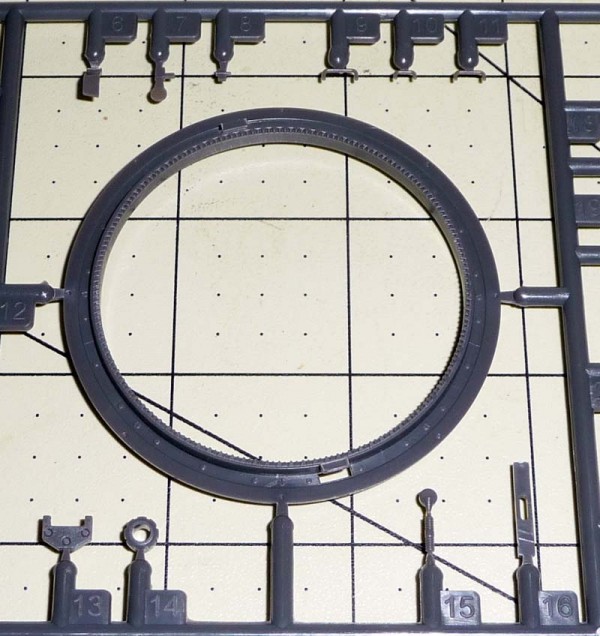
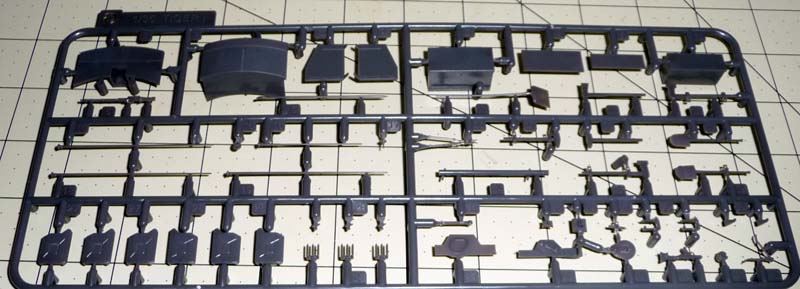
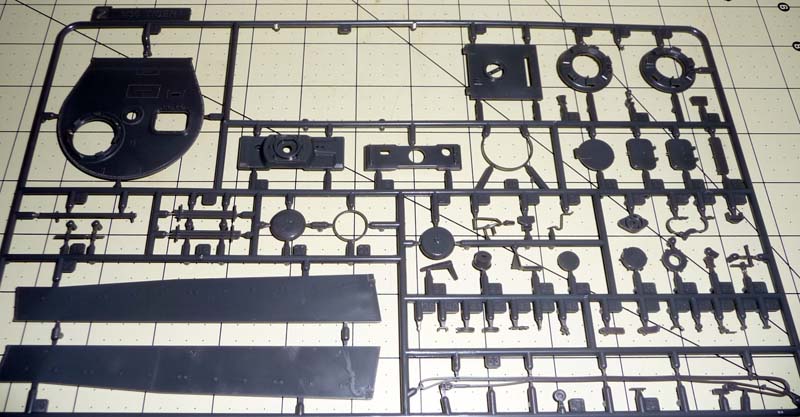
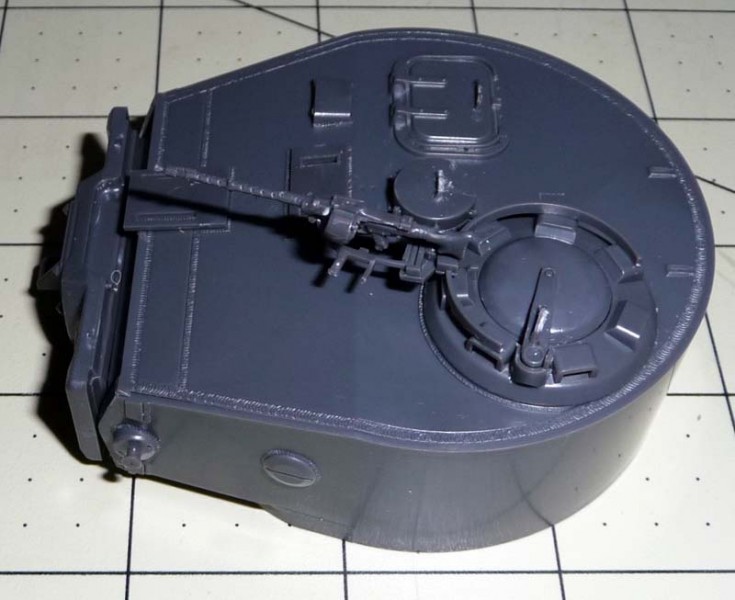
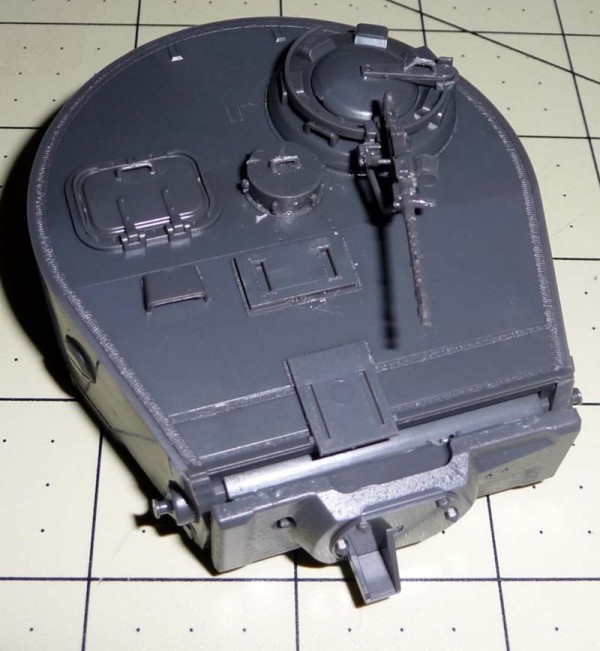
The parts are flash free and feature very nice fine mouldings. The plastic has a harder more brittle feel to it and there are some larger parts with punch marks. Most of the punch marks are on the inner side of the part and will not be seen. When I build a kit I like to follow the instructions as much as possible so I start with Step 1, which for this kit was the turret assembly. Actually Steps 1-7 all contribute to the turret assembly. A little change here as most tank kits start with the lower hull and the turret is at the end. The turret on this is three pieces all on Sprue S. Here the kit differs from most tanks as there are two halves that are the inner sidewalls of the turret and a traditional outer turret ring.
Step 2 and 3 is the top assembly of the turret with 2 different copula options. One had relief cuts the other was solid. The commanders hatch, again 2 options, has a hinge bar that attaches to the hatch but no place for it to actually attach to the top of the turret.
Step 4 was the mounting parts for the boom and the turret MG. The MG itself is 3 pieces and nicely figured but the mounting bracket is also 3 pieces and I feel a little over engineered.
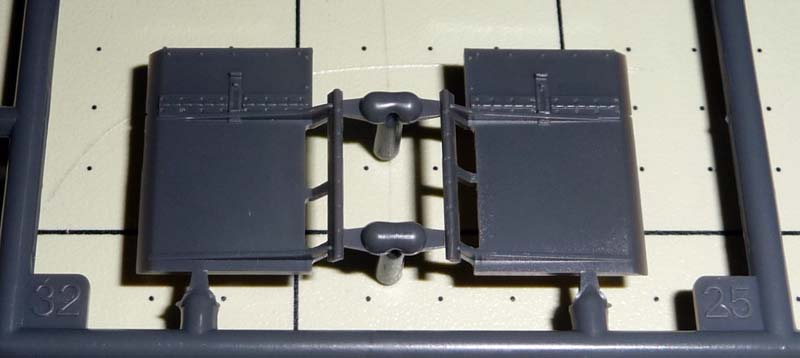
Step 5 is the spare track that mounts on the side of the turret. The instructions say to make a total of 7 track links. These are not your normal track links. The road wheel guides need to be placed on each link individually, two per link. Additionally, the instructions show that to place the upper track hangers while they are still on the spruce, which is curved, and then to discard the spruce. I actually skipped this step as I plan to add zimmerit to the turret.
Step 6 is the assembly of the crane boom and has 4 subassemblies. For the boom itself there is the option of a 45 mm or 75 mm length, I opted for the longer one. However, where the outer half of the boom fits into the mounting piece there are no alignments marks and its not a snug fit. Therefore, you must eye it up and hold the boom in place until the glue dries a bit. I also did not like the flimsiness of the whole crane and winch assembly. I felt that overall it should have been beefier.
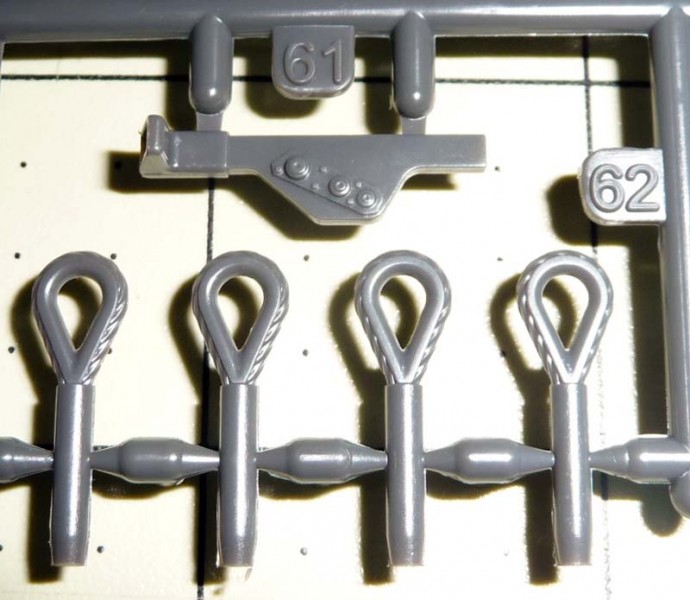
Step 7 allows the builder to place the boom in an elevated or level position. After step 7 there is a full page in the instruction booklet for the assembly of the pulley and cable for the winch. On this page is the first time the PE is used as an option for the pulley bracket and the yellow string that is provided is not a tightly wound string that would make for a good simulation of a cable. I may replace this with some better string.
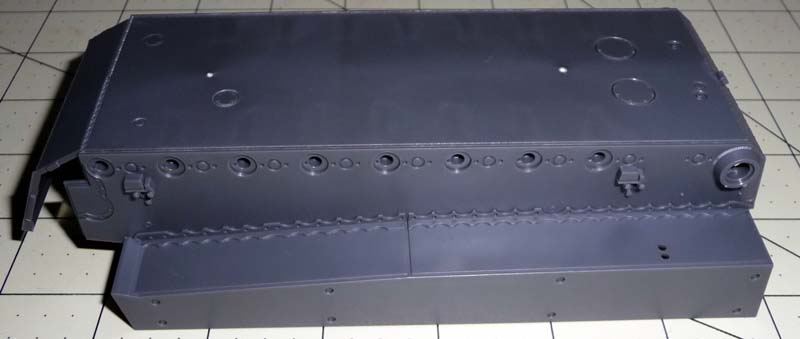
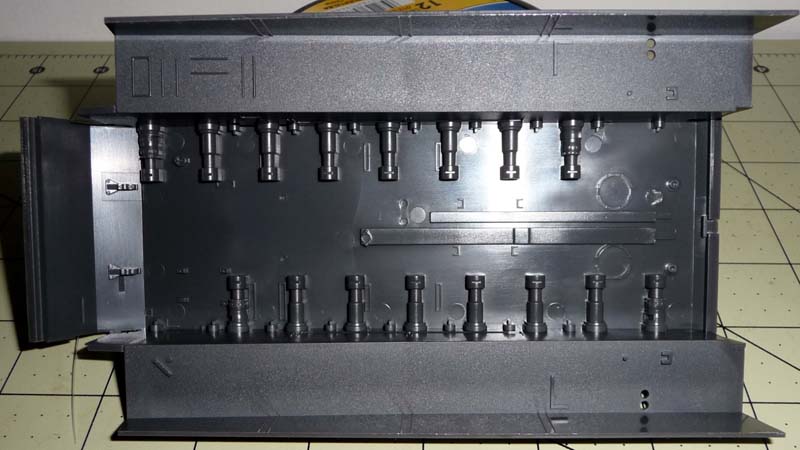
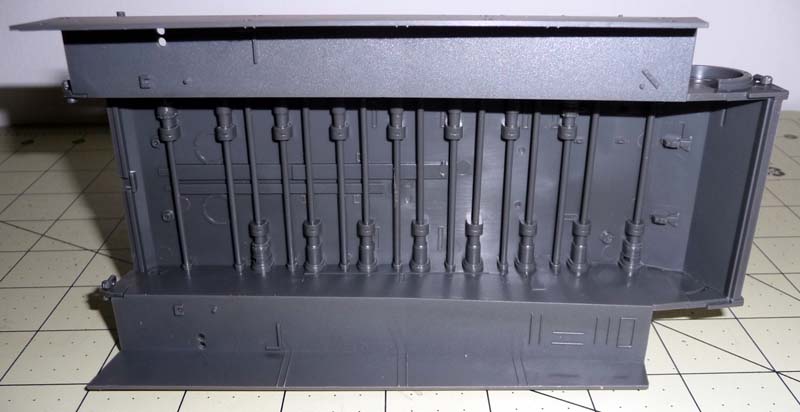
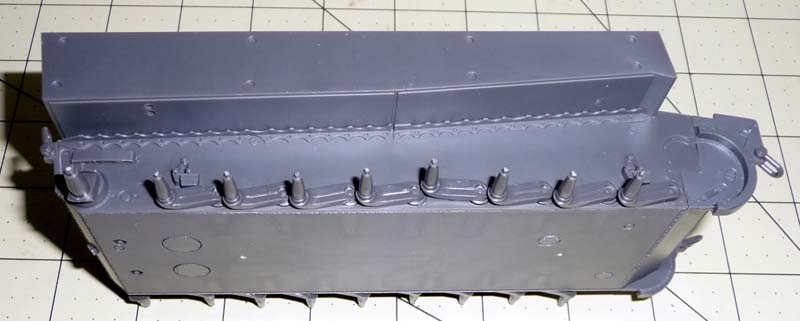
With Step 8 we finally start on the construction of the lower hull. This kit has torsion bars that run through the hull and the builder has the option to make them moveable by removing the locking nub.
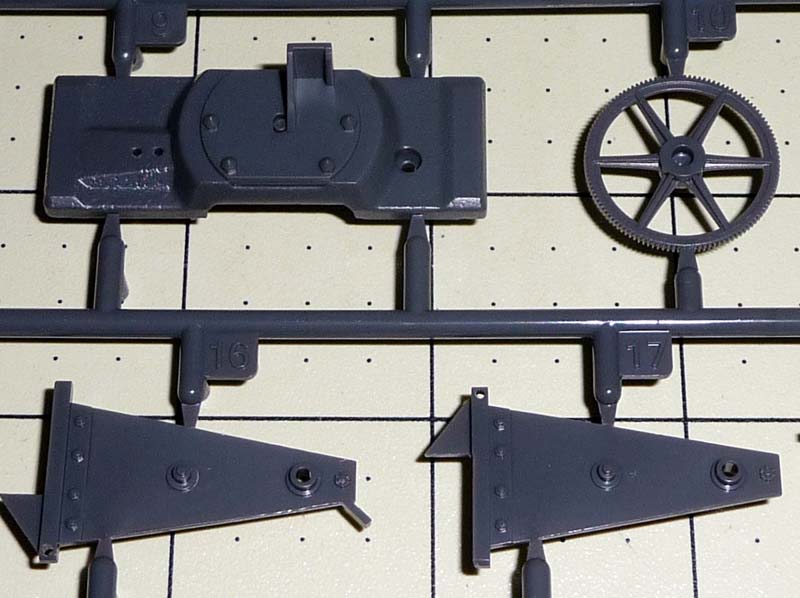
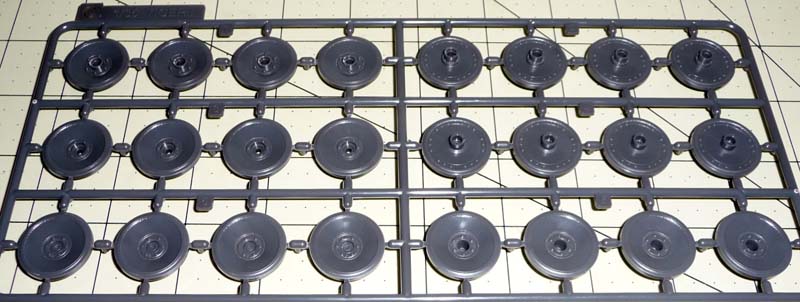
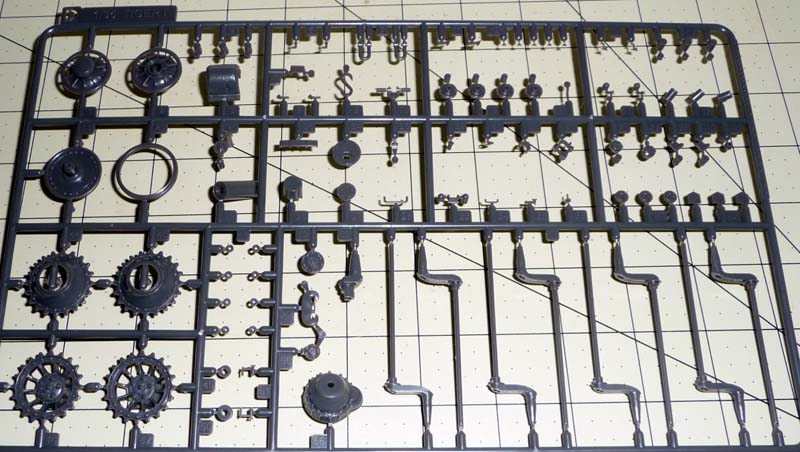
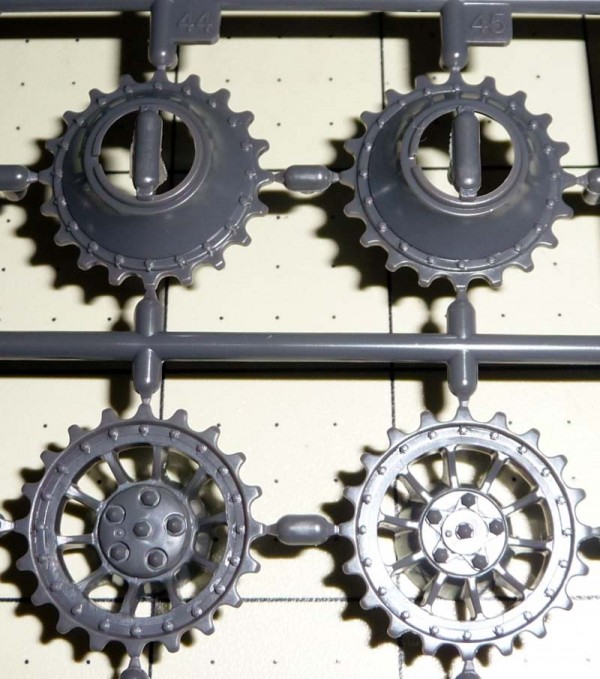
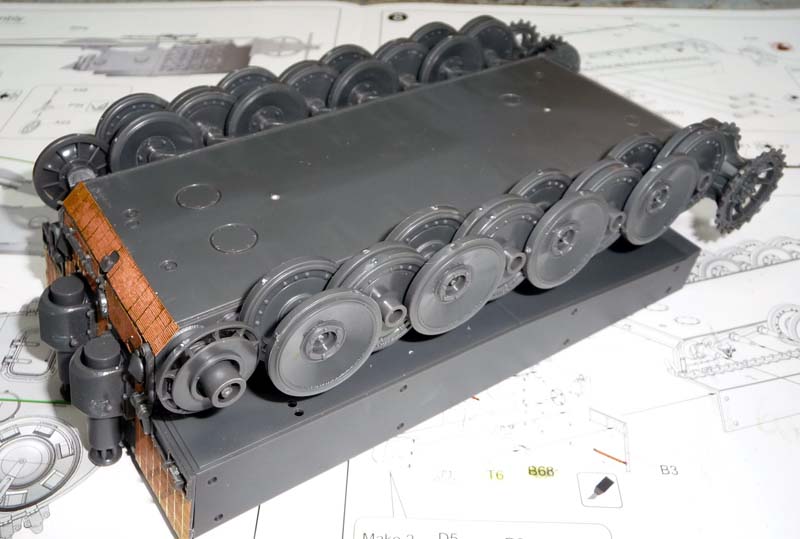
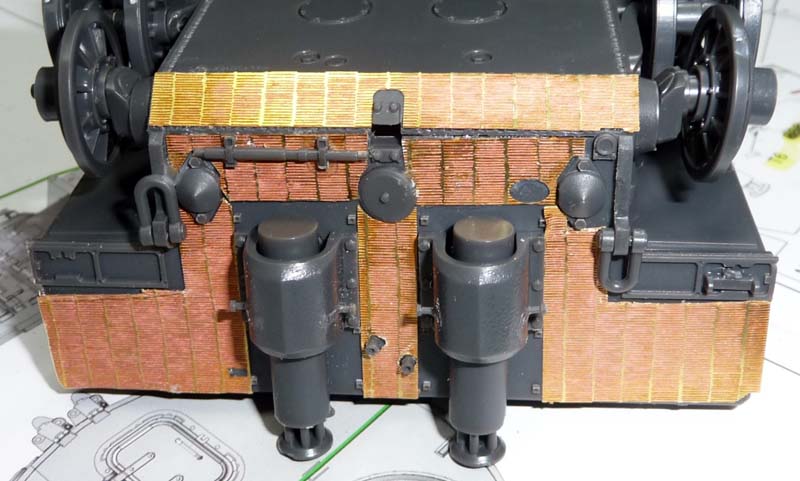
Step 9 is the assembly of the rear plate and exhaust as well as the drive sprockets and road wheels. Any one that has previously built a Tiger kit will know that the inner wheels go on 1st followed by the doubled middle wheels and lastly the outer wheels. However, the instructions will have you assemble all the road wheels in pairs before placement on the hull which just doesnt work. Another quirk in the instructions has the builder adding the inner half of the rear idler and not adding the outer half until step 11.
Step 10 and 11 is the continuation of the rear of the tanks assembly. Here you have an option to use a plastic or photo etch box frame on the rear of the tank. In this step we find the first mislabelled part, the instructions call for the use of part Z5 when you need to use part Z25. This step also has you use locking ring on the road wheels which I skipped until after the road wheels were painted.
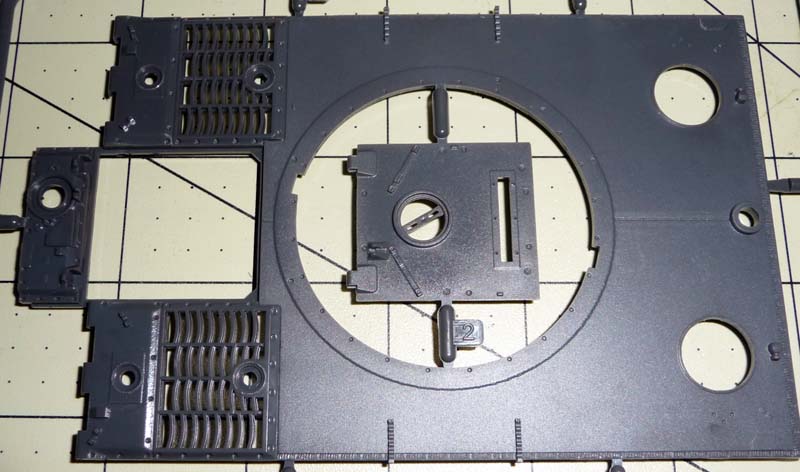
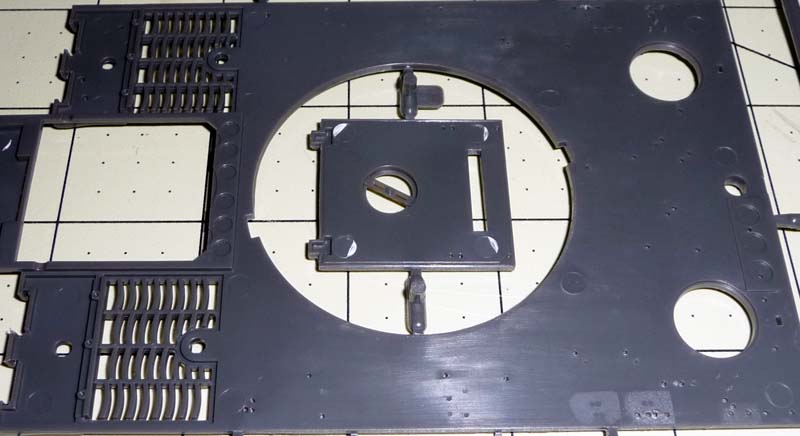
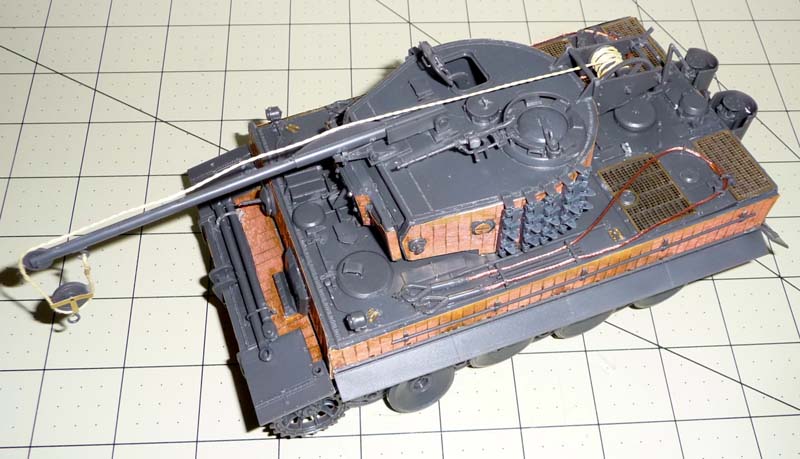
Step 12 we start the assembly of the upper hull and many of the holes for the attachments need to be hand drilled. However, there is no guess work or micrometers needed as the holes are clearly marked. There are adhesion points on the side of the hull, for the placement of the side fenders, these needed to be shaved off for the application of zimmerit whether it be photo etch Zimmerit or some other type.
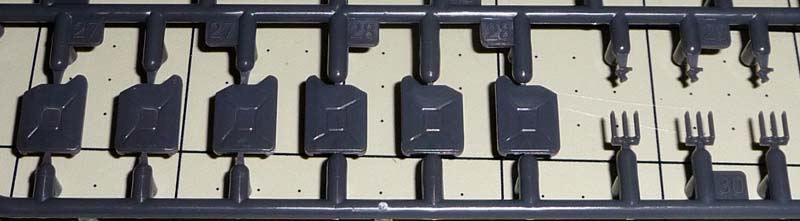
Step 13 we use the hand drill again. There are plenty of marks for several different versions for tool placement, so care needs to be taken here to make sure you are drilling out the correct spots for the tools that you want to use. Also with the tools the builder has the option of using tools with molded in clamps or without molded in clamps and making clamps out of PE.
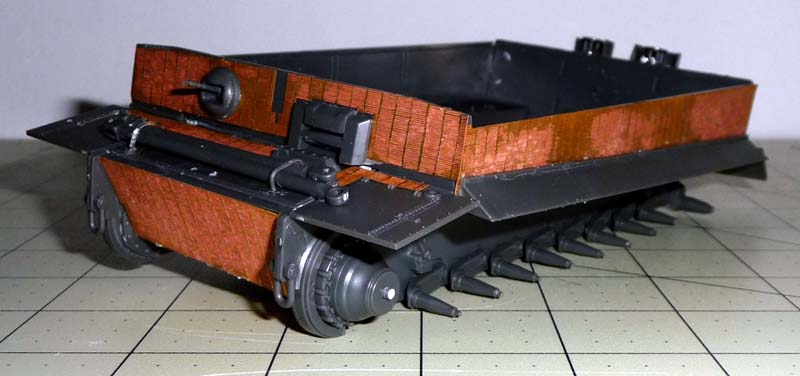
Step 14 is the final additions to the upper hull including making and applying the Tow cables. The kit provided cable is a soft copper cable that is actually easy to bends and hold the shape that you put it in. The only issue here is that the instructions state to make the cable 45mm when you actually need 200mm.
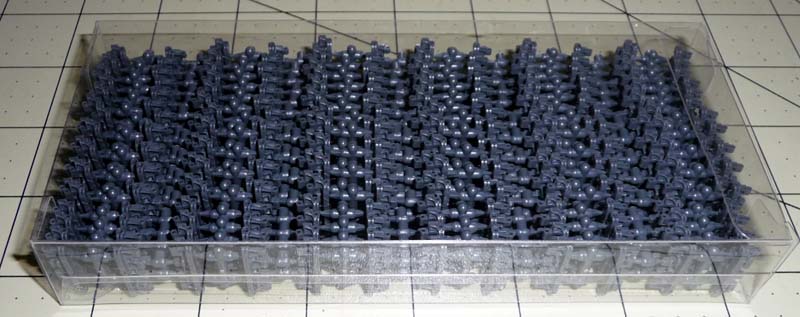
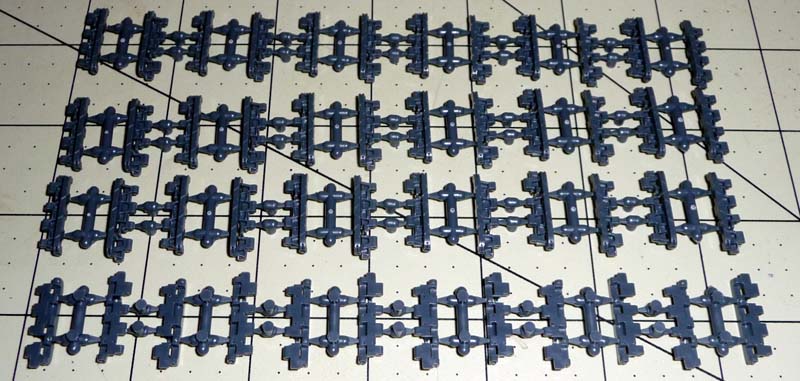
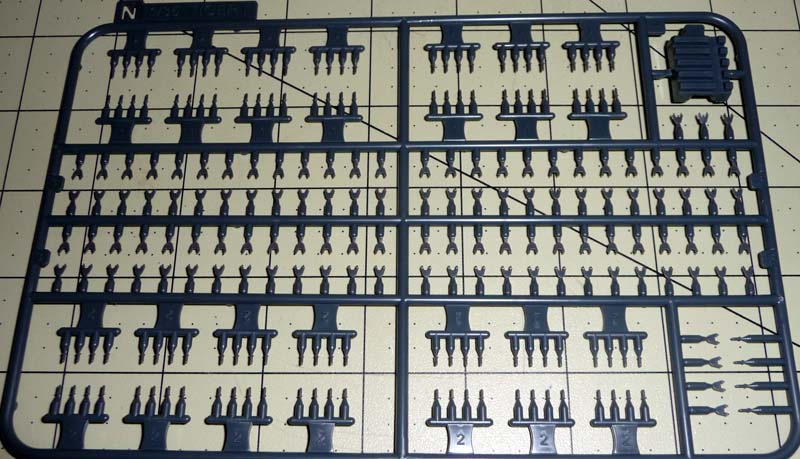
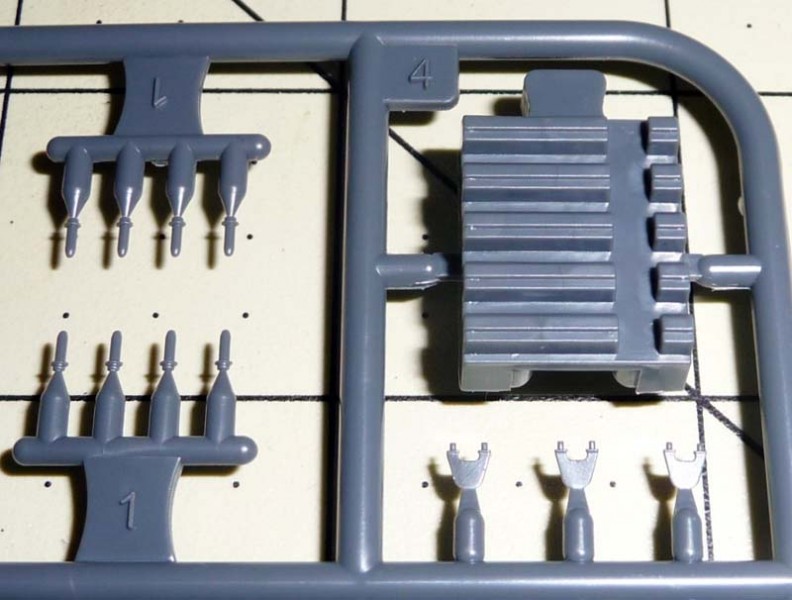
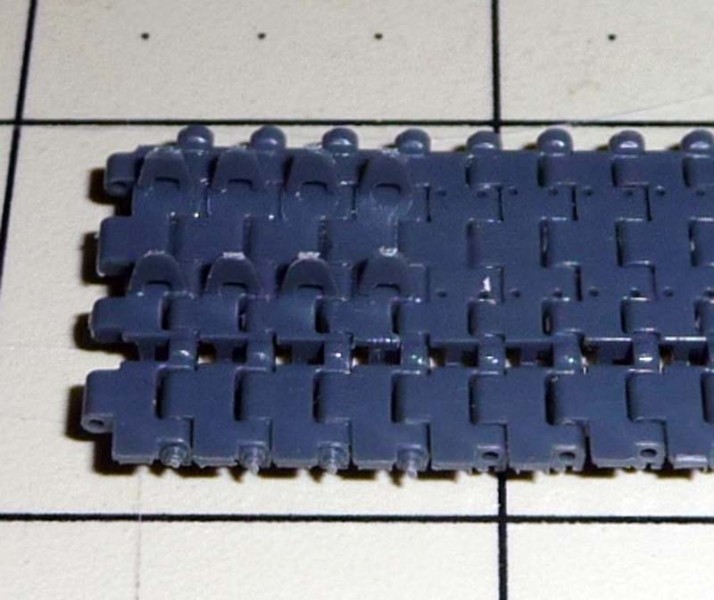
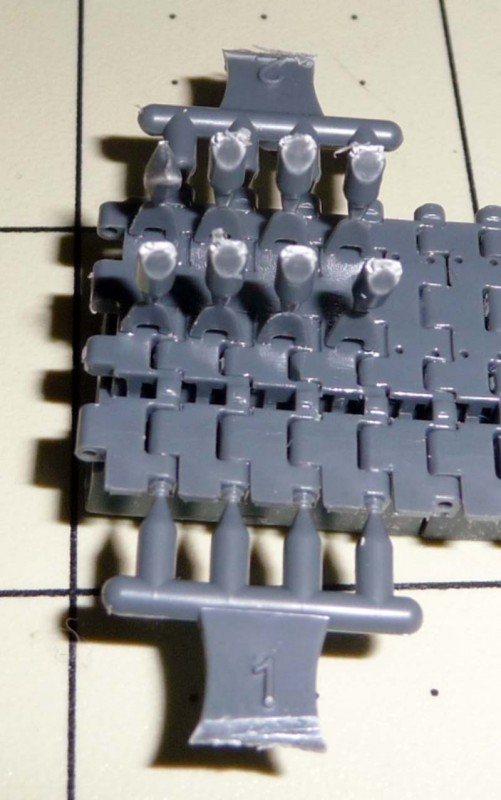
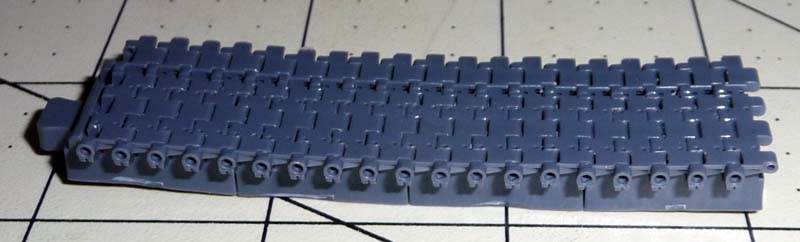
Step 15 will be the most challenging and time consuming step for the builder, track assembly. The tracks assembly is the last item in the instruction booklet and calls for 96 track links for each side. There are 4 parts to the tracks links and require the placement of the 2 teeth and 2 side pins. In total the kit has 1052 pieces just for the tracks. Included with the kit are 4 interlocking blocks that will hold the links in place. When the blocks are linked together it allows the builder to assemble about 75mm length of track or about 18 links. The link pins are labelled as part N1and N2 and are shown as assembling 4 pins at a time while they are still attached to a piece of spruce. The track teeth are part N3 and are also shown as being installed with part of the spruce attached. This is a time consuming part of the build and cannot be rushed. I used some liquid cement let the 1st 4 links rest then cut the spruces off.
Also as previously mentioned the instruction booklet contains a paint guide for three different color schemes and a paint guide featuring Mig Jimenez color profiles. Each paint guide diagram offers 4 views of the tank, top, the left side, front and back view. There are no unit identifications with the paint guides but the 3 painting scheme options are:
Dunkelgelb with Rotbraun crane, winch and tow bars
Tri color camo with a Dunkelgelb base
Dunkelgelb with a Olivegrun camo pattern
SUMMARY
Highs: Nice details, comprehensive color instruction booklet with ease understanding and great piece of copper cable for the tow cables. Lows: The tracks were overly complex and the string provided for the winch cable is a poor simulation.Verdict: Overall this kit builds up into a very nice specialized version of a Tiger Tank. The instruction booklet for the most part was clear and the pieces had some nice molding with no flash and minimal pin marks. The tracks are a headache.
Our Thanks to Rye Field Model! This item was provided by them for the purpose of having it reviewed on this KitMaker Network site. If you would like your kit, book, or product reviewed, please contact us.
As a child I built mostly autos and truck models and what ever came from the Revell Model of the month club. Later on I switched to military planes in jr. high school. When I started to work several jobs and didn't have the time to build. I completely left the hobby around 1982. In 2008 I got back ...
Sal, Thanks for the excellent review. Have been thinking about adding this one to my Tiger collection. From the pics, I can see that the tracks will be a slow assembly process. Will probably go metal tracks when I get this one.


Comments