These years seem to be the golden years of scale models. Vehicles that have not been available or only available in resin suddenly get a lot of attention. The Luchs was one of these vehicles. Ive built the ModellTrans version five years ago, inspired by the online game World of Tanks, and now, in a very short span of time we get not one but three Braille scale plastic versions of the tank.
I have reviewed Flyhawks 1/72 Luchs offerings before, and I was really curious what the other Luchs kits look like. This review will be about the first of the Maco offering; Ill comment on the differences between this and the Flyhawk kit here and there during the review.
Contents
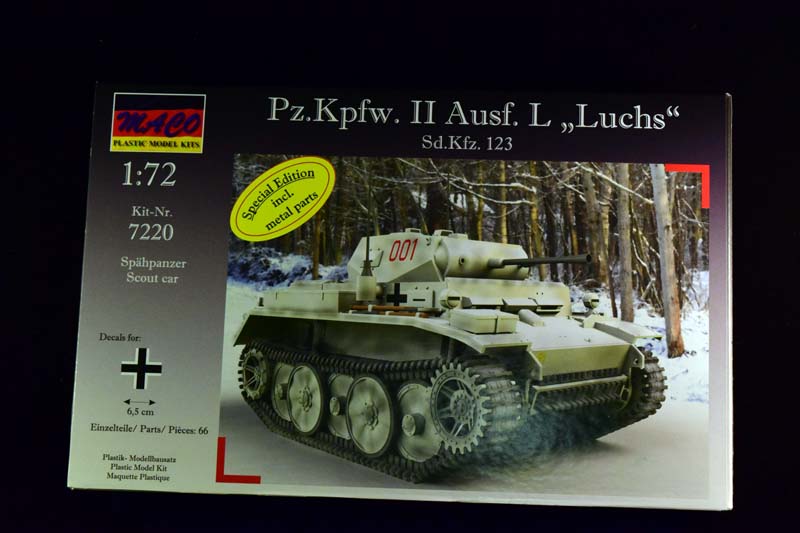
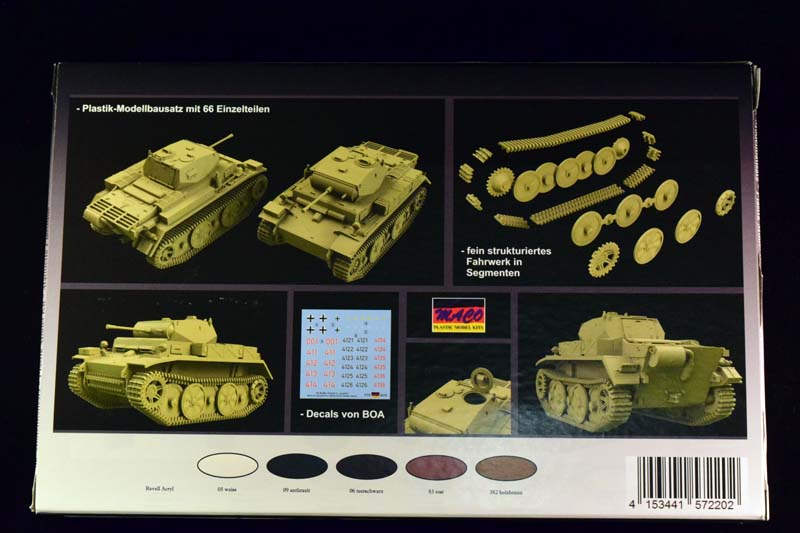
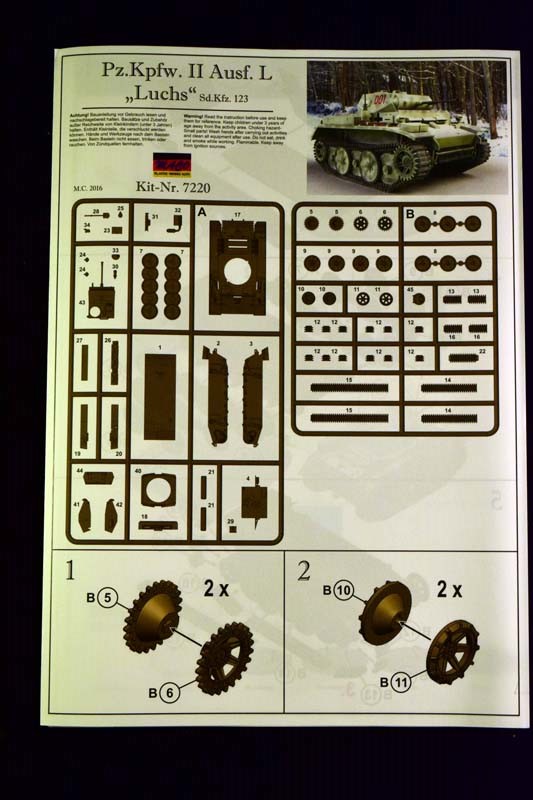
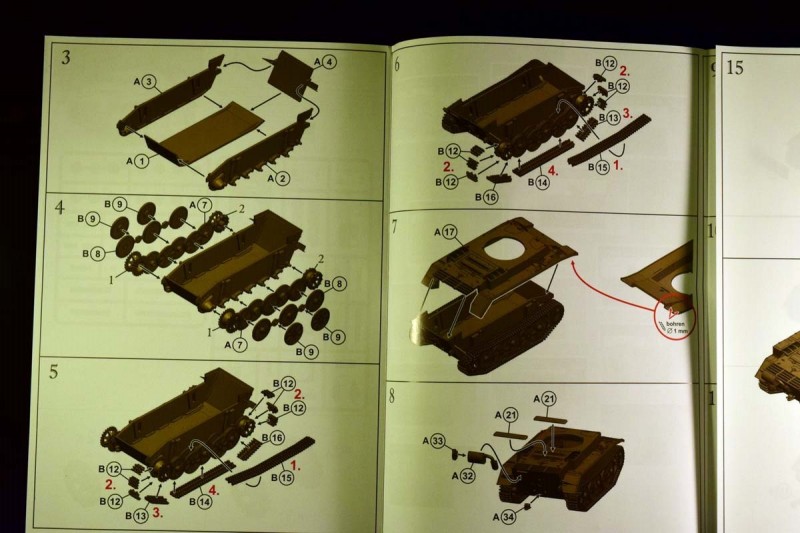
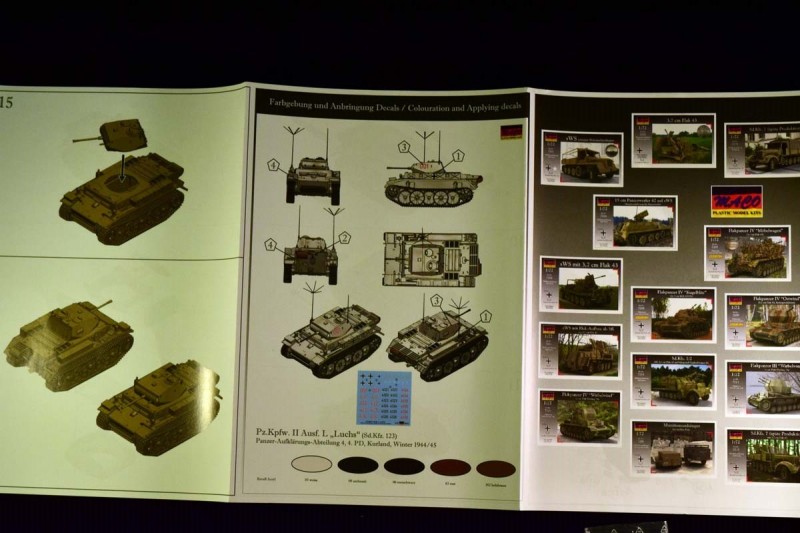
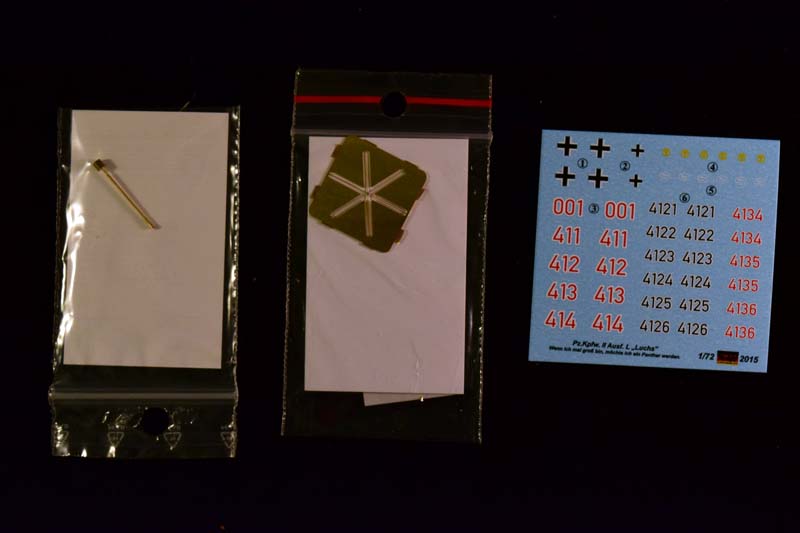
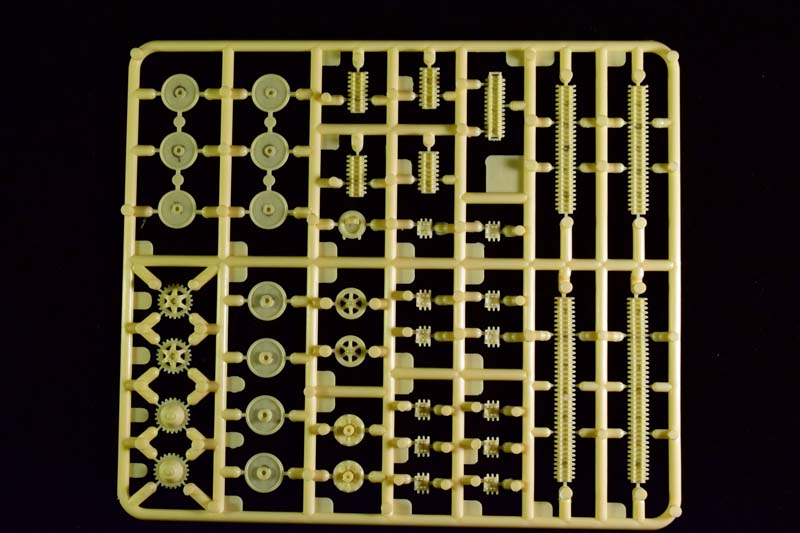
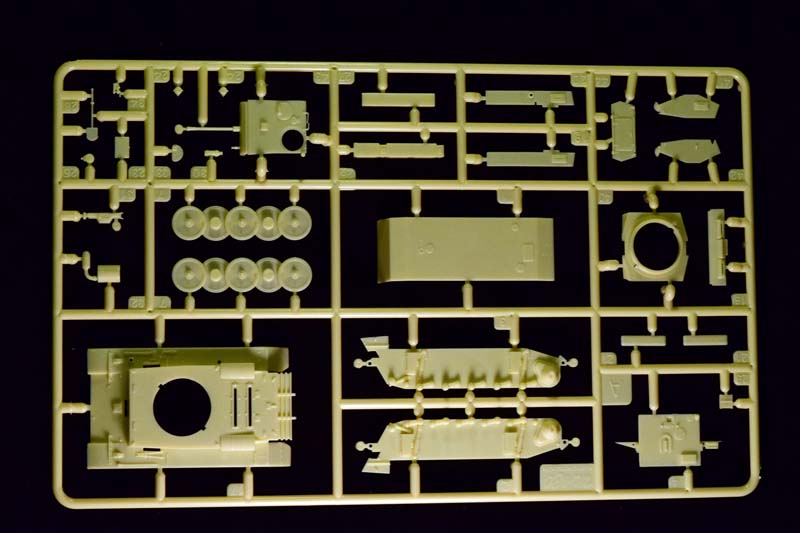
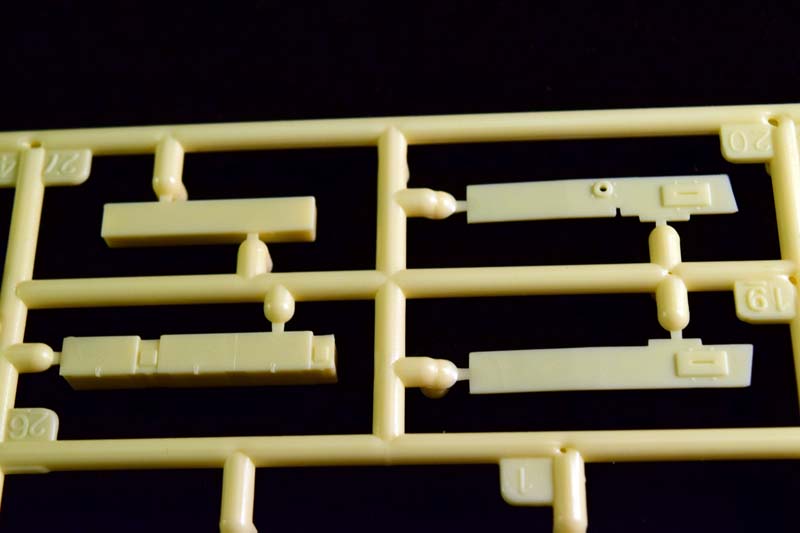
The model comes in a flat, envelope type box, which can be opened on the top. The cover art is the vehicle in winter whitewash; on the back theres a couple of computer rendered views of the model itself. The model comes in two sprues: one holds most of the running gear and tracks, the other the rest of the model. The plastic is light color, and soft; its really nice to work with. Theres almost no flash present. The decals are finely printed and thin. The instructions are computer generated color pages, and very easy to follow.
Review
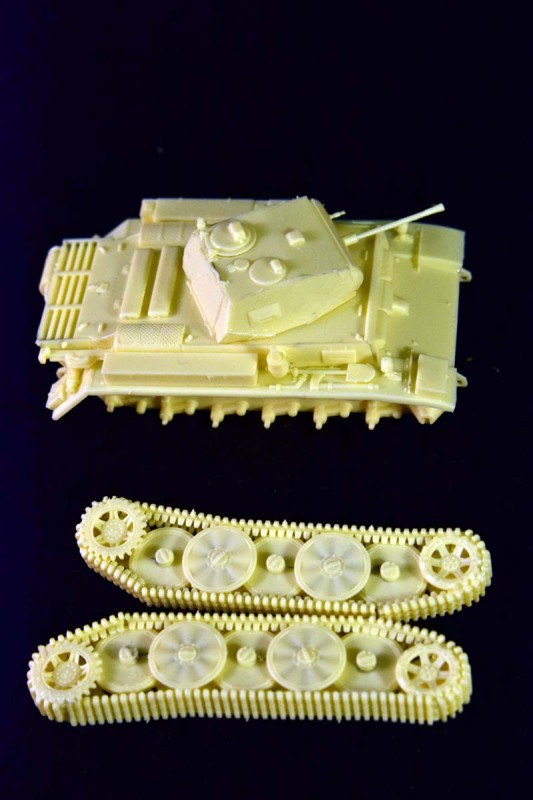
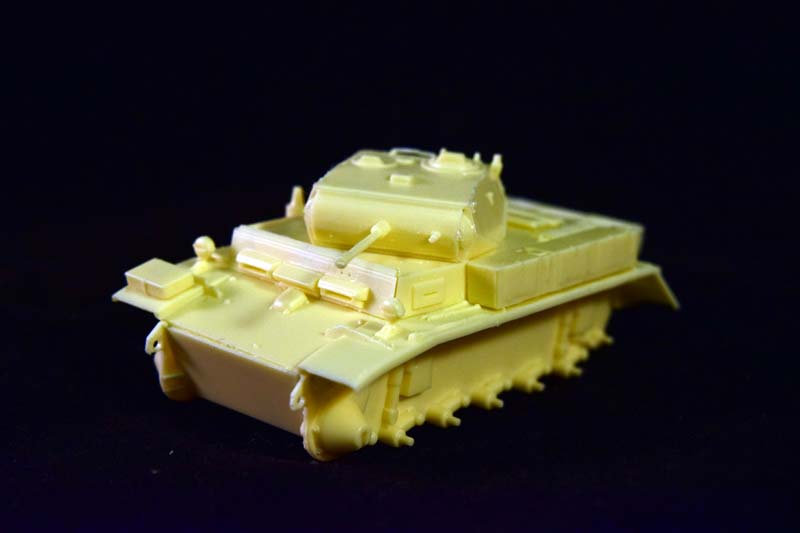
The breakdown of the model is quite old-school: we have a traditional lower hull assembly from four parts (two sides, a bottom and the back). The suspension units and the swing arms holding the roadwheels are already molded onto the sides. There is an interesting solution for the last brace of the mudguards: they are molded onto the back panel. The mudguards will need to be slid under; be careful not to cut them off. (First I thought they were some sort of plastic overflow during the molding process.) The back light is molded onto the left brace.
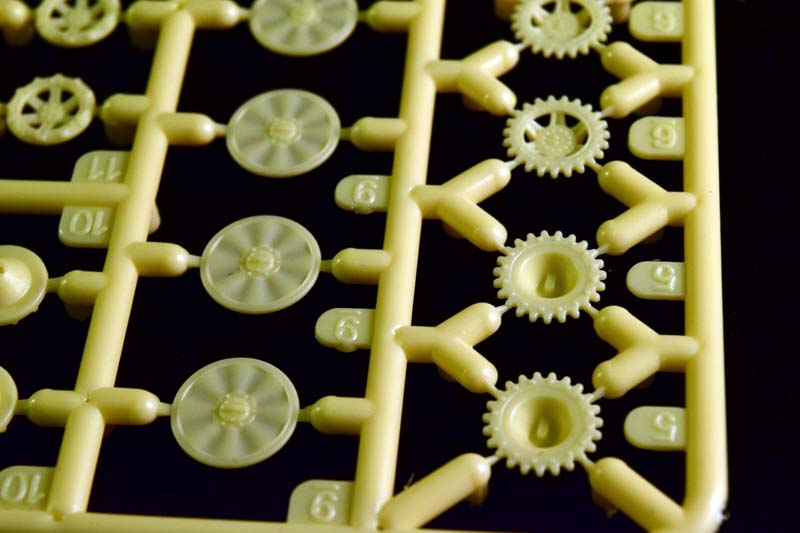
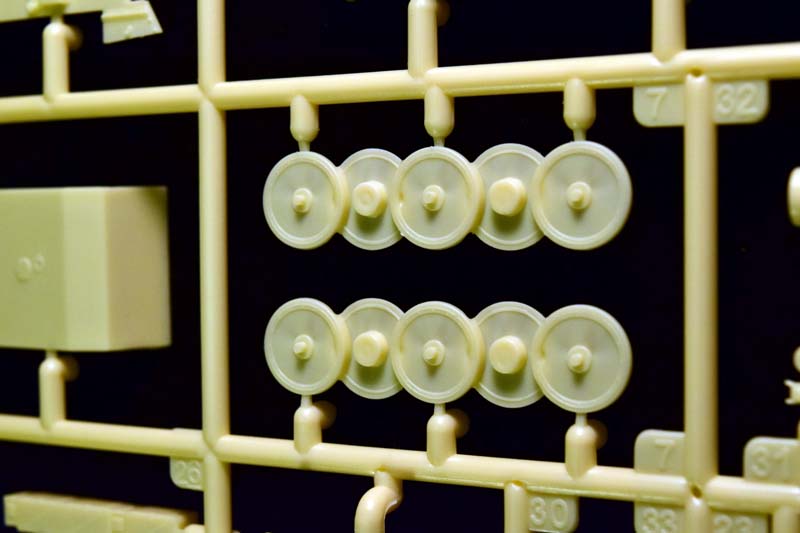
The interweaving road wheels are done the same way as DML handled them with their kits: the two inner rows of wheels form one part each, onto which youll have to attach the outermost row as individual wheels. This solution makes assembly much simpler, and its a great solution to avoid any misalignment. The pattern on the road wheels is very well replicated, and the wheels are very thin, which is probably quite true to scale. (Although its a conjecture on my part since I have no access to a real vehicle, and neither have I found any information on the thickness of the wheels anywhere.)
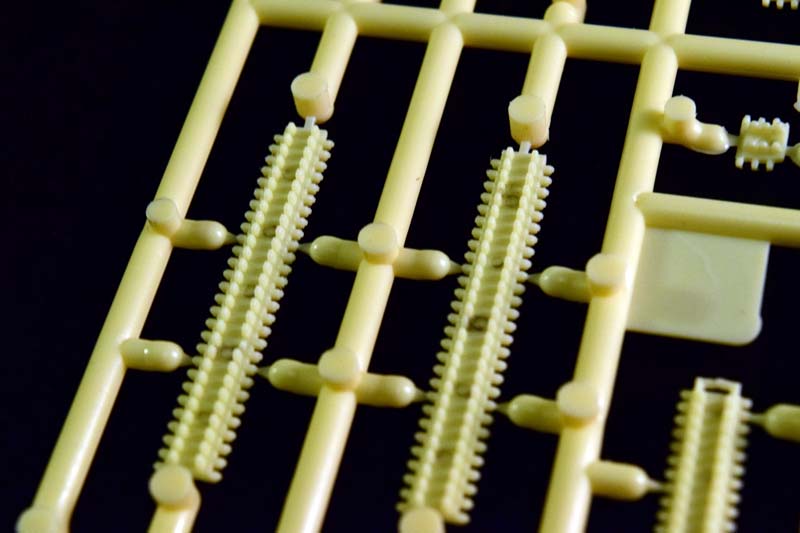
The drive wheel is nicely detailed, and the plastic is a tad thicker than the Flyhawk kits- this is actually a good thing, because it can easily bend when you are trying to install the tracks on the Flyhawk model. The tracks come as link-and-length, and they are very easy to assemble. (They are probably the easiest Ive had so far in 1/72.)
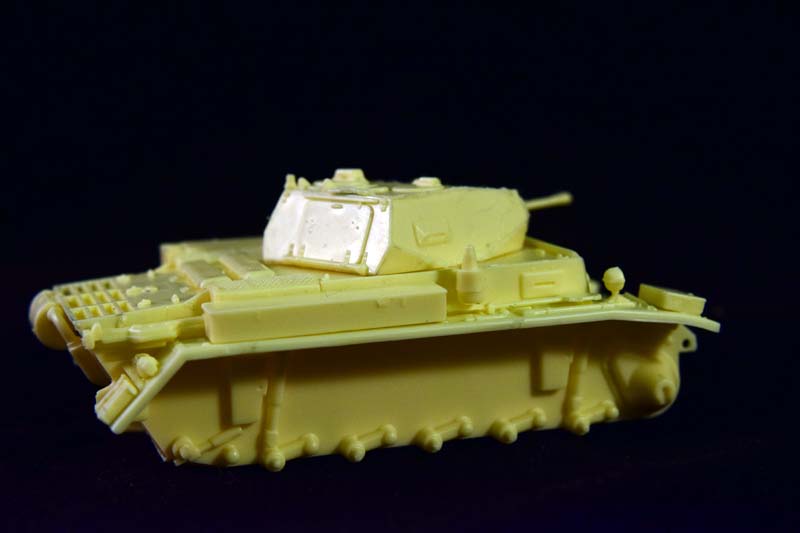
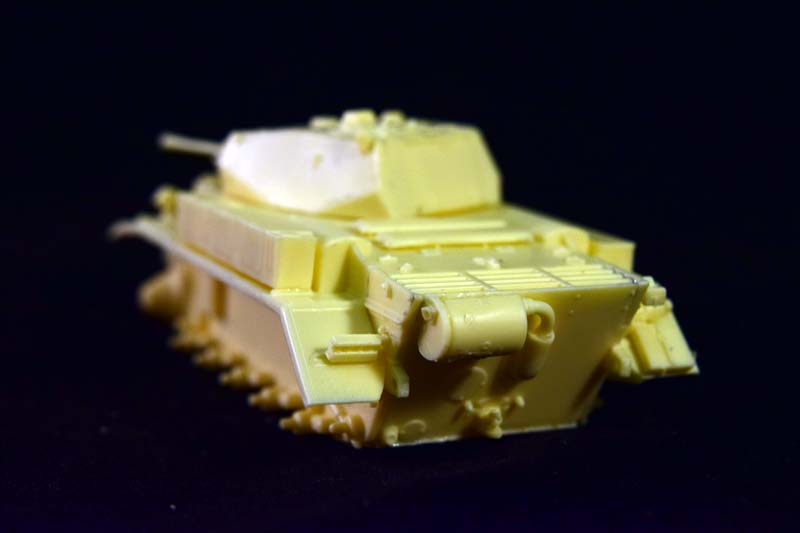
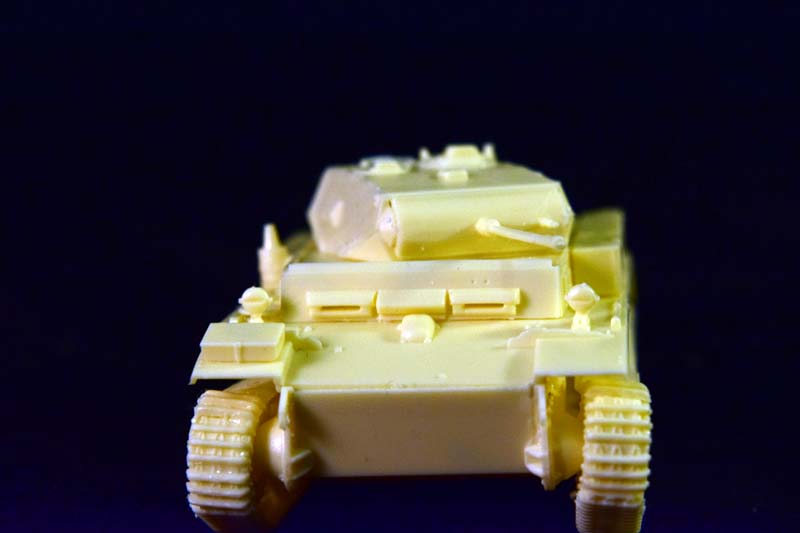
The upper hull and the mudguards come as one piece. The model is really traditional in this sense as well: the sides of the hull will need to be fitted as separate parts due to the details (viewing ports) that need to be there. The fit is remarkably good, though, so no problems there.
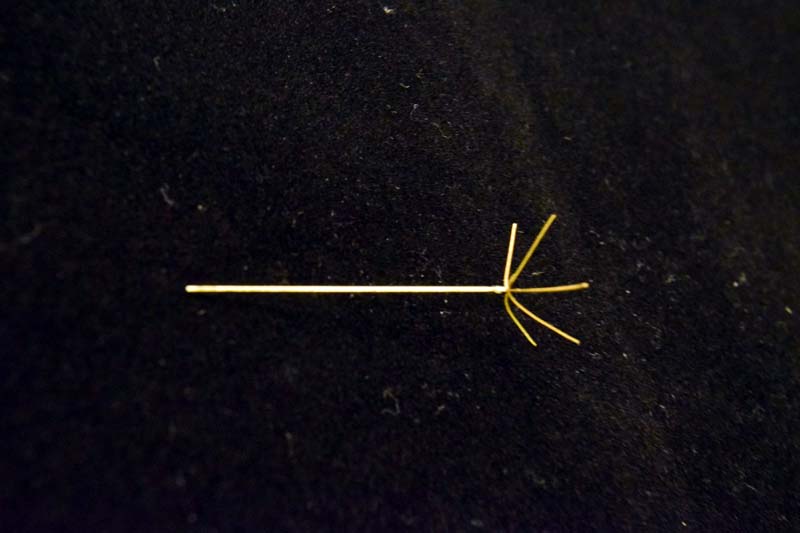
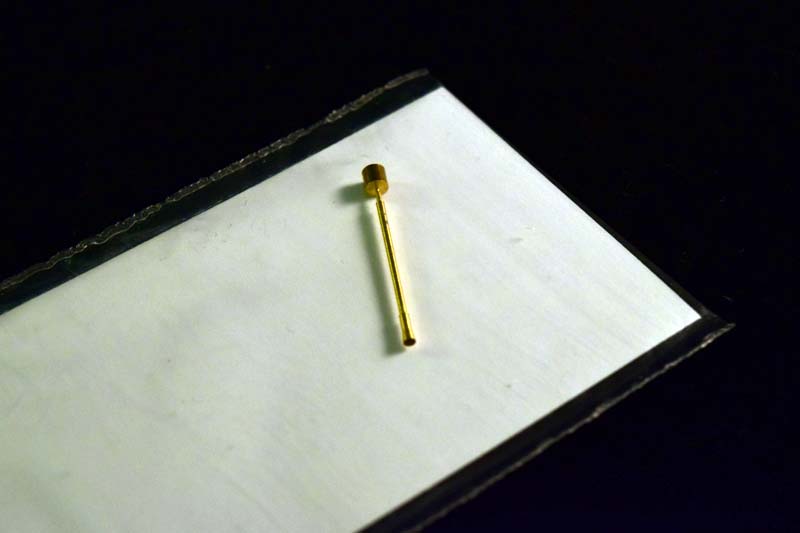
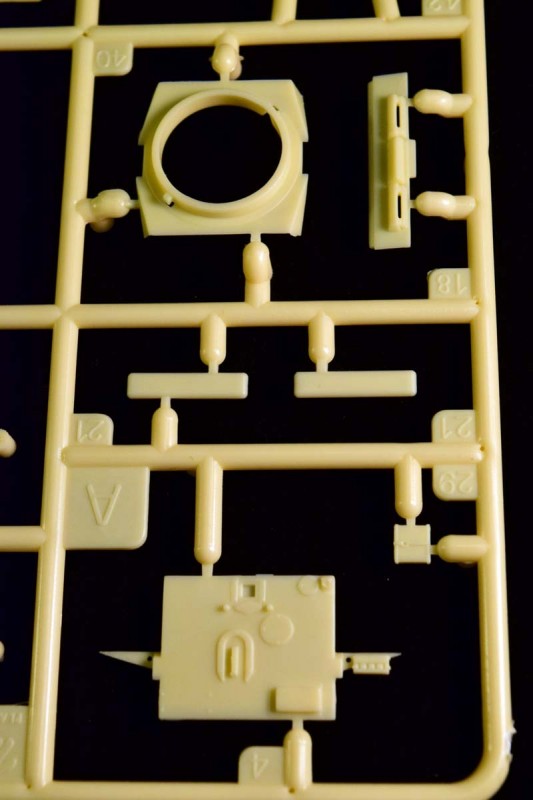
The model does not come with many PE parts: we get the top of the German crows foot antenna, and thats it. We also get a couple of brass items: the rod part of this antenna, another whip aerial, and a turned barrel. (The thin metal aerial with the crows foot looks much more convincing than Flyhawks version of plastic rod combined with the metal top.)
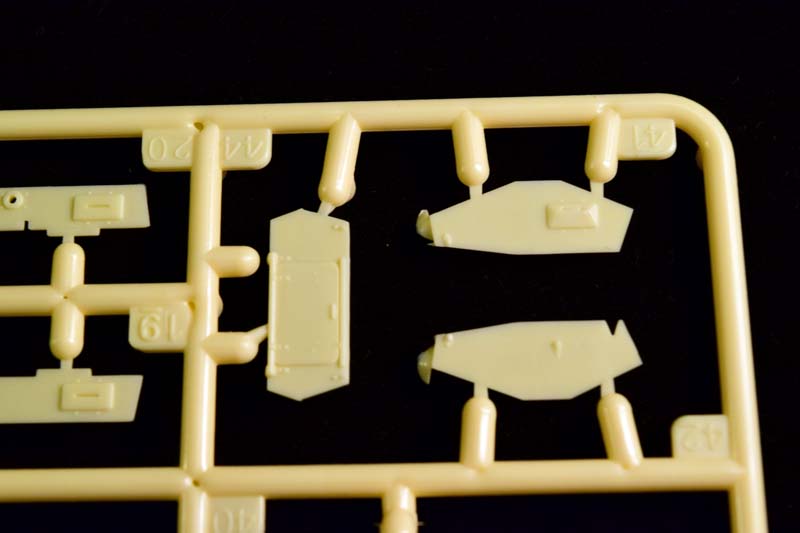
The tools -with the exception of the jack, the fire extinguisher, and the shovel- are moulded onto the mudguard; this is something Im not very keen on. (I prefer painting them separately before attaching them onto the model.) The shovel is a pretty simple affair; its probably better to replace it from the spares bin. The model does not have a width indicator. They were so fragile in the Flyhawk kit that I just used PE aftermarket ones instead of trying to clean them up. The tool boxes are slightly different than in the Flyhawk kit, and their locations are not exactly the same, either- again, these could be simply because the models were based on different production versions.
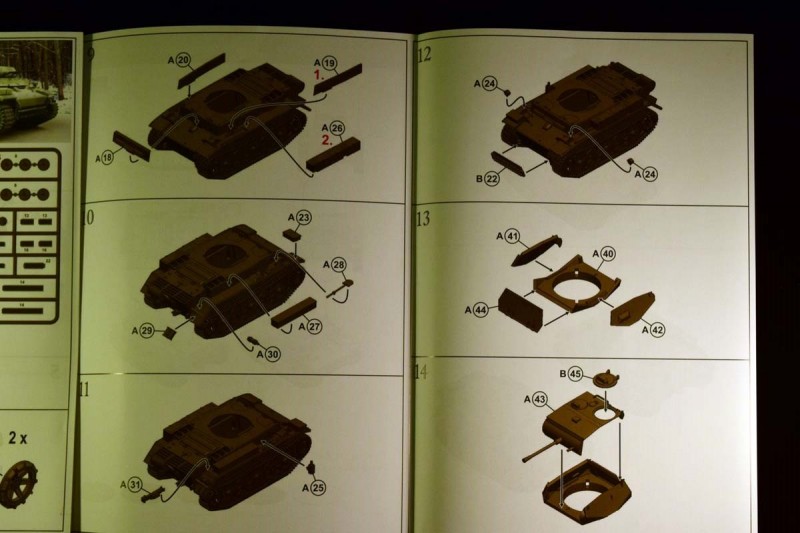
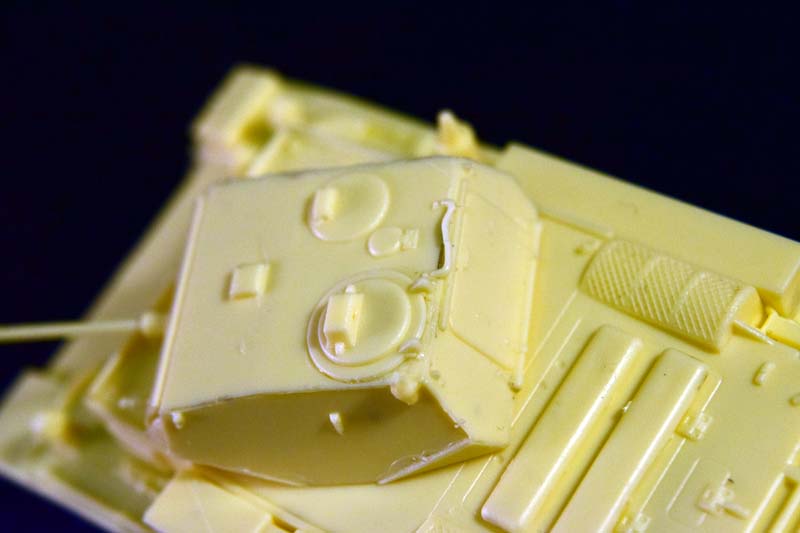
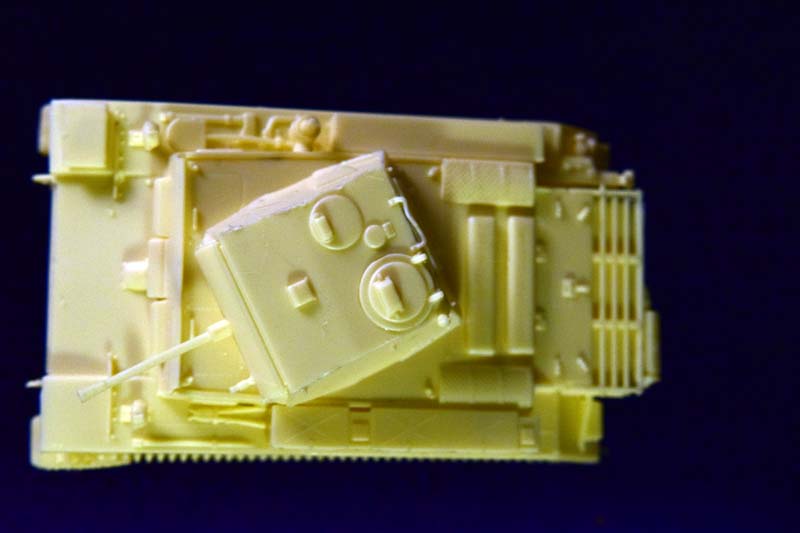
The turret is made out of five parts; the plastic barrel is molded on the top section. Interesting solution (both the assembly of the turret and the gun barrel), and it works. You have an option for a metal barrel, which is nicely detailed. The only imperfection I found with the kit was the grab handle on the back: it was broken and bent during transit. The other issue I have with the turret is the almost perfectly rectangular shape of the top of the turret; I think its a bit larger than it should be- its certainly larger than the Flyhawks turret (which is also smaller than the ModellTrans turret). The shape is not the same, either. The Flyhawk kits turret is more hexagonal: the back and the front are a bit narrower than the middle; in the Maco kit its more rectangular. It also looks like the top is a bit larger than on the drawings I found online. The big question is which one is correct; and I dont have access to an actual tank to check, and the photos I found were taken from eye level -for obvious reasons. (If theres one in Bovingdon Ill keep an eye out next year.)
The top turret hatch (the commanders) can be opened. The hatch has interior details, but the rest of the turret does not; its probably best to put a figure in it if you leave it open. The back large, rectangular hatch cannot be opened.
The assembly was about two hours -tops; its a very well engineered, easy to assemble kit. I tried something new (for me) in this build, and made the whole running gear/track assembly as a single sub-assembly; the whole shebang can be removed for painting and weathering. (I think Ill use this approach in the future more often.)
For this build I kept the plastic gun barrel; I have the up-armored version waiting to be reviewed, and Ill use the metal barrel for that one. (Since I do not wish to damage the antennae I have left them off; and only at the writing did I realize I did not add the extra track sections on the lower hull.)
Interestingly some details are different from the Luchs kits Ive seen so far: for example the jerry cans that you can normally see on the turret sides are not present on this version (they are, however, present on the up-armored version. These jerry cans are on the back of the tank in the Flyhawk kit of the same up-armored version, however.) As an extra layer of uncertainty, the ModellTrans kit differs in some minute aspects from these two kits as well. I do not have books or any reference other than what you can find online on the Luchs, so I cannot really comment on the accuracy of these details. Most of the photos and drawings Ive seen show the jerry can holders on the sides of the turret, though.
Conclusions
The kit overall is a great little kit; it is simple to assemble and it is well detailed; I did not run into any frustrating issues during the build. (Since I dont like molded-on tools, this might change during the painting phase.) The layout is well thought of and fit is very good; I think it represents the best you can do with traditional injection molding technology. I can absolutely recommend it. Inevitably itll be compared to the Armory, ModellTrans and Flyhawk offerings, so lets see how it compares to the two versions Ive seen so far.
The ModellTrans Luchs is a typical resin model: very few parts, accurate, good detail, some air bubbles, and costs about twice as much as the plastic ones. It builds into a respectable depiction of the Luchs, but its kind of rough on the edges, and does not come with the aerials. (I have posted the photos of the ModellTrans version on my blog; unfortunately it is in storage on the Continent, so I dont have access to it right now.)
I have not (yet) had a chance to take a look at the Armory version, but I have, as I said, reviewed both of the Flyhawk kits so far. They are incredible kits; essentially they could be scaled-down 1/35 models for the number of parts and level of complexity, but it only comes with one antenna - the whip antenna from the turret is missing. Both tanks are the same dimensions (theres that issue with the slightly different turrets), and measure up to the real vehicle quite well. (As far as the published dimensions online are correct.)
To choose between the two completely depends on your preferences and aims. How much challenge do you want to face? While the Flyhawk kits can be adjusted in difficulty using the alternative options (PE vs plastic vs molded-on detail), a lot of the tiny parts cannot be avoided. The Flyhawk offerings are definitely not for beginners. It also takes considerably longer to build the Flyhawk kits. Another aspect to decide is: how much the lack of PE matters for you? The details on the engine deck grille are good enough in plastic on the Maco kit, and in this scale there is an argument that it does not make much difference. (Talking about PE: none of the kits have the wire mesh protecting the engine grilles.) You might also want to have a metal barrel; this is not an option in the Flyhawk line of Luchs. (Although the plastic barrel is perfectly suitable; its even bored out.)
At the end it comes down to personal preference I think: if you want a quick build that builds up into a nice representation of the Luchs, this is a great kit for you. Its also good if you are not comfortable with very tiny parts and working with PE. If you need to build several of the tank (for wargaming) its also a good choice. If you prefer to have the more complex, more challenging option, then you probably will choose the Flyhawk kit. But there is no bad option.
SUMMARY
Highs: Simple assembly, good fit.Lows: Molded on tools, lack of width indicators.Verdict: Recommended.
I am a biologist by trade, and as a hobby I've been building scale models for the last twenty years. Recently I started to write reviews of the models I bought. These reviews are written from the point of view of an average model builder; hence the focus is on quality of the model, how easy it is to...
Thanks for this review, Andras! Exactly what I was looking for! I guess I'll go for the Flyhawk version then, because I like things to be complicated...
Really? I think it is very good. Some people just don't like to use PE in Braille scale, and the kit will be perfect for them. Personally, I prefer PE options, but from my experience Maco still does outstanding models...
A nice review Andras, thanks, a very clear description.
I'm always surprised when I read anyone say that a model only took two hours to put together!! I don't think I ever would manage that, perhaps I'm just too distractable.
I notice that Maco also offer a version of the kit with two models in the box, I think that one has no metal parts.
Good to see quite a big decal sheet supplied in a small scale kit, no apparent corner cutting there...


Comments