The German Leopard 1 series has been in service with many countries over the years and the need for a device to clear minefields was needed for operations and training.
The Track Width Mine Plough unit (TWMP) was designed and built by RAMTA, a division of Israel Aircraft Industries, and allows the clearance of anti- personnel and anti-tank mines from the path of the tank tracks. The plough action moves the mines aside without detonating them, and can be adjusted to give a clearance depth of 200, 250 or 300 mm. The TWMP clears a lane about one metre wide in front of each track, and there is an unploughed lane 1500 mm wide between the tracks. In this uncleared area, the TWMP drags a dog bone which is used to detonate tilt rod mines. The total weight of the installed equipment is around 3 tons.
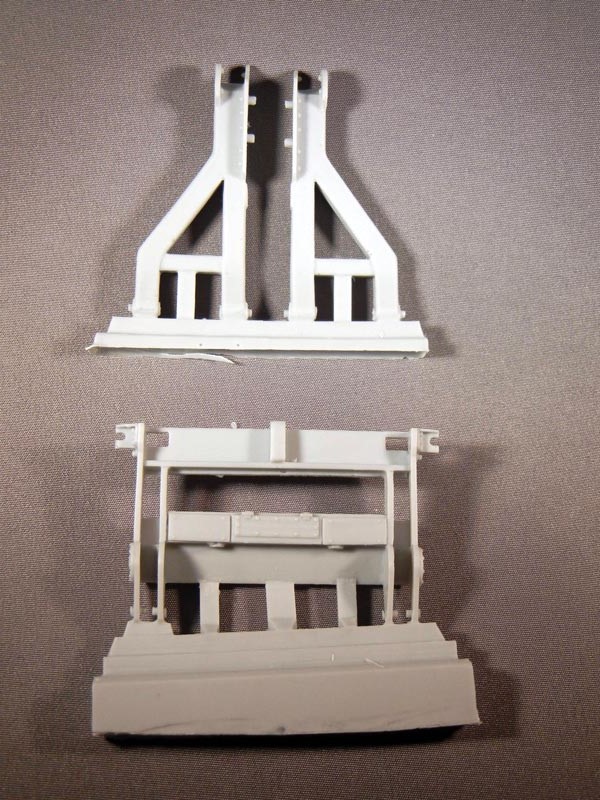
The TWMP comprises a main frame, which is attached to the tank in a similar manner to the dozer attachment. Push beams provide support to the ploughs, known as moldboards. Skids are located on the push beams to regulate the plough depth. Lifting mechanisms allow the left and right moldboards to be raised and lowered independently. An electrical harness, feeding though the armoured conduit cover, connects with the control box in the drivers compartment. This provides the driver with the means of operating the TWMP and also allows him to fire the quick disconnect cartridges, which allows the whole assembly to be jettisoned in case of damage.
If you wanted to build an accurate mine plough version, the wait is over as Perfect Scale Modellbau has come out with a resin kit of this much needed Leopard accessory.
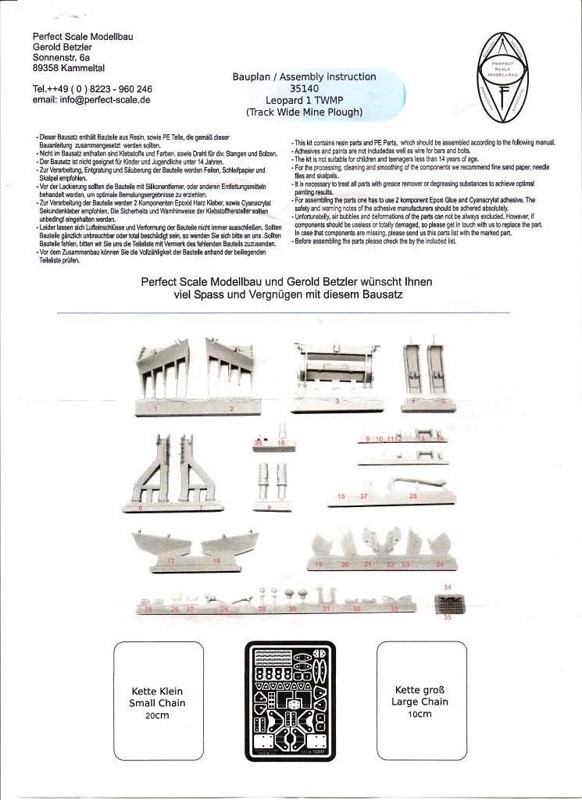
Contents
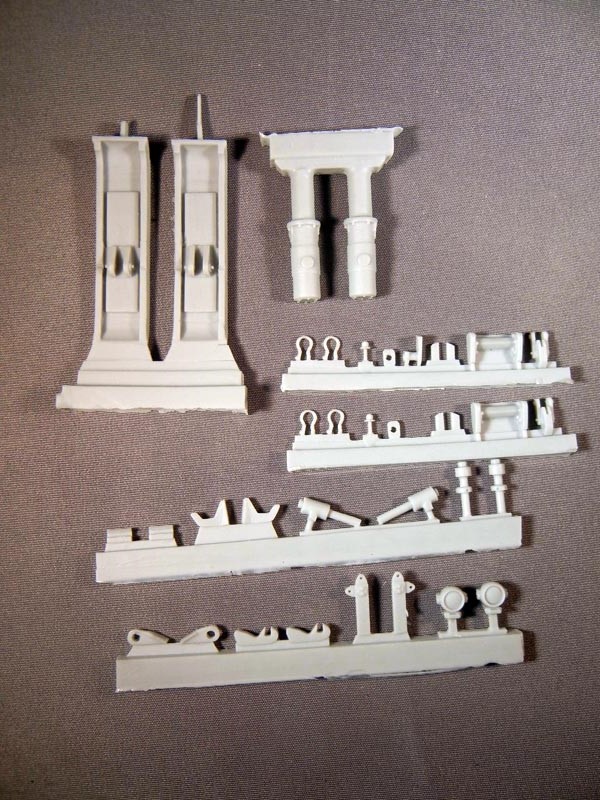
13 Resin Sprues of parts
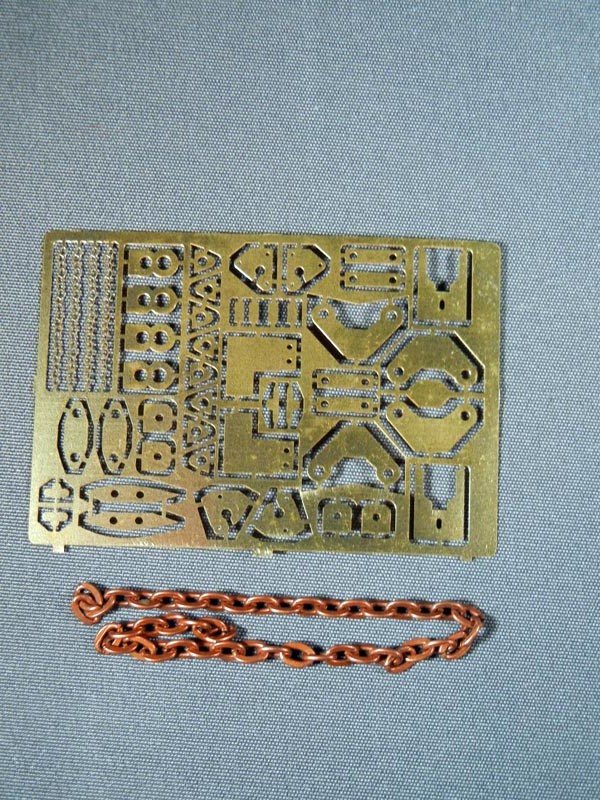
1 fret of photo-etch
2 sets of chains
Instructions
The TWMP kit can be built straight out of the box and the kit includes alternative parts for Australian, Canadian and Danish versions. So, please follow the instructions closely to make sure you model the correct version that you plan to build.
On page 1 of the instructions gives building recommendations, and the kit contents the resin sprues, photo etch & chains.
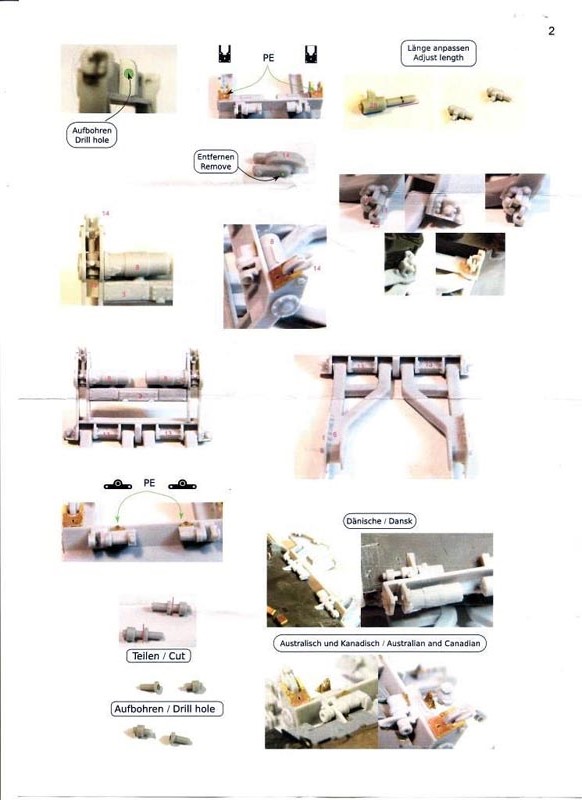
Page 2 deals with the upper plough motor and upper hull components. The next steps deals with the support arms that hold the mine plough itself. At this point follow the instruction path to which country you plan to model.
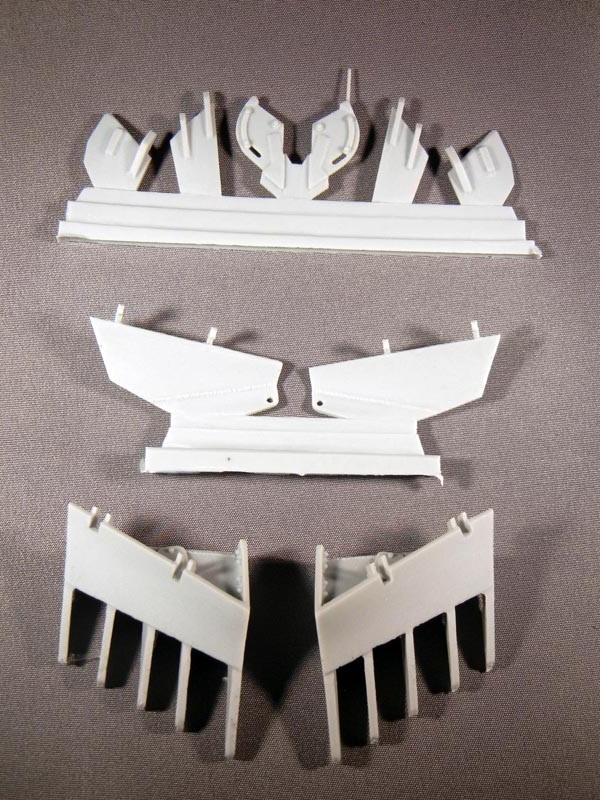
Page 3 deals with adding the photo etch and the straps that are used to raise and lower the plough. At this stage you will have the option on how you want to model the plough assembly in the raised / lowered position. At this stage you will have to decide if you plan to build the plough blades in the folded / open position.
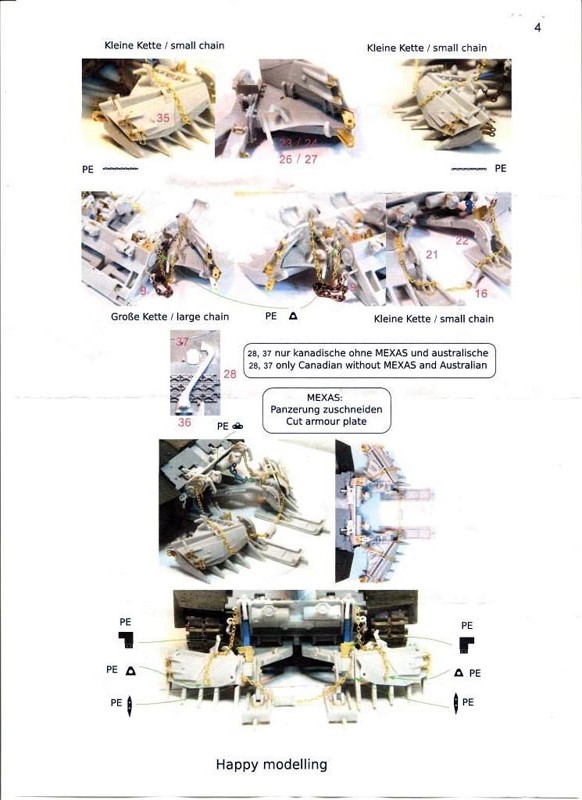
Page 4 deals with adding the photo etch chains to the blade upper/lower connections to the main blade. Also, that is included in the kit is the armoured cable cover for the mine plough, the scope that has the cable connections that supplies power to the plough. If you plan to add the kit to a C2 MEXAS you will have to modify the front hull armour as seen in the build-up photos. If doing this , make sure you have a good set of reference material handy to show how the modified plates are added and were the power cable go under the plates to the power connector.
Conclusion
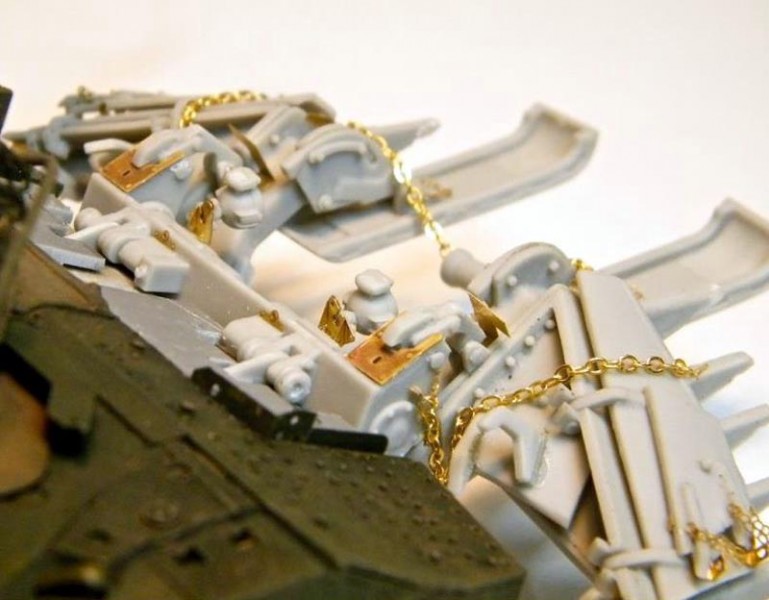
The assembly is straight forward , easy to follow, detail is crisp on the resin. Great addition to the Leopard tank range from Perfect Scale Modellbau.
I commanded Canadian Leopard C2 MEXAS in Afghanistan in the summer of 2007 fitted with the TWMP and this kit is a great addition for anyone wishing to build a Leopard fitted with the Track Width Mine Plough. The kit replicates the plough in great detail and, you will have to have a great set of reference material to see how the plough is added to the Leopard to get it just right.
SUMMARY
Highs: Easy to follow instructions, crisp detailed Resin parts.Lows: No mention of the location as to where to place the power cables for the TWMP kit, headlights.Verdict: An excellent kit that can represent a lot of nations Leopards fitted with the Mine plough.
About Anthony Sewards (recceboy) FROM: ALBERTA, CANADA
Served with the Lord Strathcona's Horse (Royal Canadians) for 26 years. Was chief gunnery instructor on the Lav-Recce (Coyote), Lav-3, Leopard C-2 / Leopard 2. And various small arms from pistol to .50 cal. and 84mm .
Have been working behind the scenes with REALMODELS, BLACKDOG, MENG,LEGEND,HOBBY ...
Great to see this this kit finally realized ... no more struggeling converting a Dragon M1A1 mine-plough
Thanks for the good review Anthony.
Cheers
Walter
I've gone over the mine plough kit and I have noted the following:
- There are no chains/turnbuckles for the inner top corner of the upper moldboards to the inner raised attachment point above the inside tine. This is a prominent feature. The holes are included on the moldboards but the chains and attachment turnbuckles are not shown or included.
- There are no L and R welded on letters on the plough frames. Again, a prominent feature that will need to be added for Canadian ploughs.
- There is no mention in the instructions of the headlight electrical connections that provide power from the hull mounted headlight sockets to the rear of the plough headlight sockets.
- There is no mention of the plough bank manual release pull cables.
- The instruction images are not overly easy to view or read. The images just due to the nature of colour photocopying are a bit washed out and there are some very small images.
- The instructions do not show how the tine extensions are actually mounted on the outer sides of the tine banks. They are shown in the stowed configuration on the rear of the tine assembly.
- Large cotter pins are used to secure large components on the plough assembly such as the locking arms and the skids. These are easily visible but not included in the PE parts.
- The instructions indicate that there is 20 cm of small chain and 10 cm of large chain. My kit has no small chain included at all. I suspect this to be a quality control omission.
- Four small PE retaining chains are provided on the PE fret. The instructions actually show 6 x PE chains being used (1 on each skid, two on each of the upper moldboard extensions). In fact there should be six more small retaining chains on the plough (two for each of the two tine extensions and one each for the two plough ground mount support arms.
- Holes will need to be drilled into each of the mounting arms of all four extensions. This is how the extensions mount to the moldboards and tines. This is why the additional chains, not to mention mounting pins, are required.
- Pre-planning is a must have with this kit. You have to decide very early whether you want to have the plow banks raised and locked or lowered and if you want the extensions mounted.
- The lifting/lowering straps running from the motors to the plough banks will be only slightly visible if the plough banks are raised. Bear this in mind as the instructions show you using tape to replicate the plow in the lowered position where the straps are visible. The instructions only show the plow in the lowered position. Refer to the PSM sight to see the plow mounted on a kit in the raised position.
- It would have been a nice option to have included a second "dog bone" as this is a common addition to Canadian ploughs.
- The instructions don't show in detail how the mine plow frame actually attaches to the Leopard hull. Again, review the instructions in great detail as you will have to alter the Leopard build so you can use the PSM parts properly. This pertains to replacing the kit towing eyes/shackles with the PSM resin towing eyes.
- I do like the mould quality and the fact that effort was made to include weld seams that are visible on components.
I am a huge fan of seeing this kit finally produced in 1/35. Overall it is pretty good but for sure it needs additional detailing to bring it up to snuff.
I used the real mine plough on the Leopard C1, including ploughing a large decommissioned tank and mortar range for unexploded ordnance, so I know it fairly well.
I look forward to seeing the projects developing from modellers using this kit.
There is some confusion :
- There are no L and R welded on letters on the plough frames. Again, a prominent feature that will need to be added for Canadian ploughs. This was only seen on the mine rollers, unless this is a one of, the ones we used for domestic training and in Afghanistan, did not have them.
- It would have been a nice option to have included a second "dog bone" as this is a common addition to Canadian ploughs. Only 1 dog bone comes with the plough kit, we never had a second one to add to the plough, so you are good to go with one in the kit.
With this kit make sure you have the right kind of reference and the right info for what Country you plan to build.
A great photo walkaround of the Canadian version can be seen in the Canadian Leopard Project DVD Series on the Canadian Leopards C1 & C2, and the Canadian Leopard Project C2 MEXAS both are avail from Trackjam Models in Canada and Leopardclub.ca in the UK.
Cheers
Anthony
Author Canadian Leopard Project.......
What is wonderful about modelling sites is that there is always an opportunity to learn something new and to never say never.
I have seen multiple Canadian Leopard 1 mine ploughs with the welded L and R followed by a single or double digit number. The weld marks don't appear on all mine ploughs but they are present. I don't know the percentage or why the weld marks were added. I suspect a means of tracking components.
Beyond the mine ploughs I have seen in person I have images of the same type of welded on marks on a Leopard C2 MEXAS mine plough in Afghanistan during 2007/2008. These images are shown in Ken LeClair's excellent Leopard C2 MEXAS DVD.
The plough frame weld marks can be added or left off. Adding them provides an enhanced level of detail on the kit. It is not incorrect to have them or not to have them.
The double dog bone has been used on Canadian Leopards. Regardless of how many times or on how many mine ploughs it has been set up that way it has been used. Perhaps it is a post Afghanistan deployment feature.
It would have been nice to have included a second dog bone but it is not a must have. It would just be a unique feature to add to a plow.
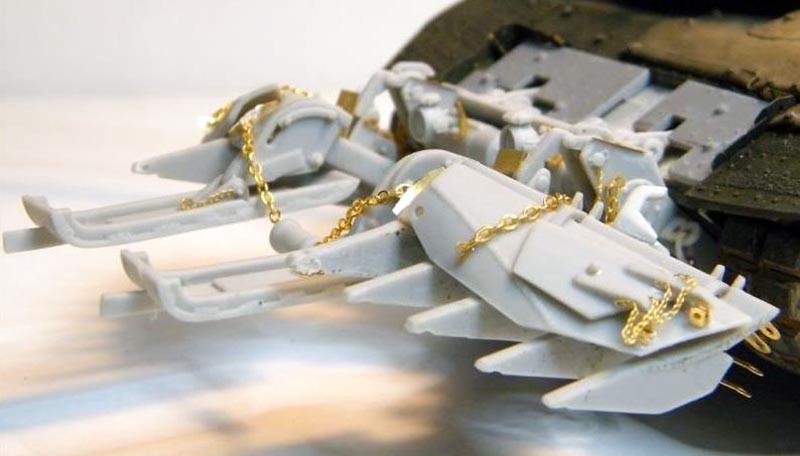
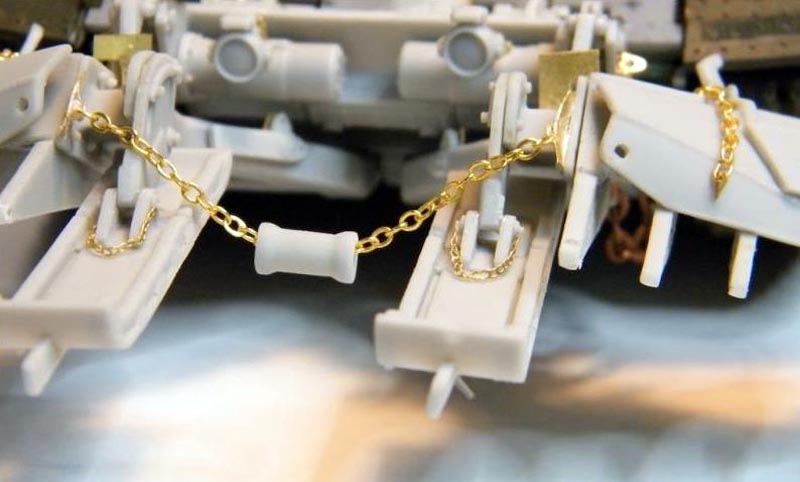
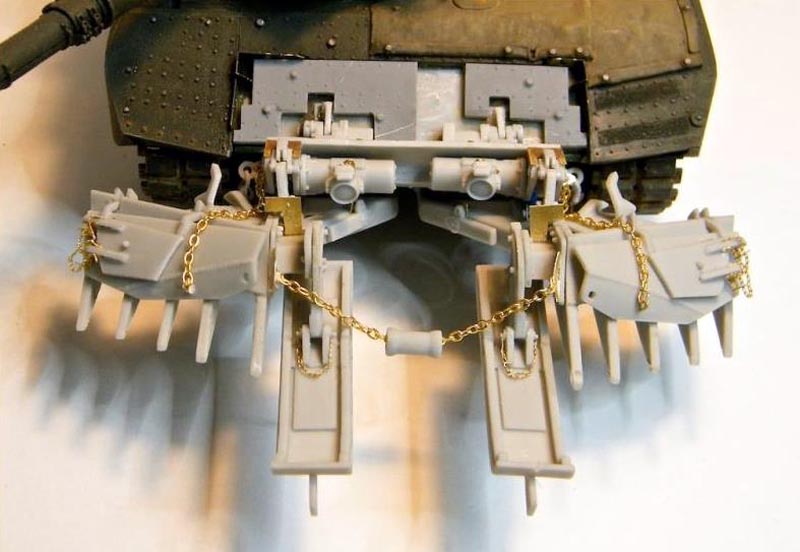
Folks, I won't post information without backing it up with images. Below are my images of a mine plough showing the weld marks and the dual dog bone configuration.
The images also show the turnbuckle type attachment points for the chains to the plough mouldboards. This is a feature not included in the kit. When the turnbuckles are broken sometimes C shaped tow hooks are used to secure the chain to the attachment point.
I've also noted that the small support platform for the ground stands are not included in the kit. These are small rectangular platform that the ground support arms sit in so they don't sink into the ground and provide additional stability. They are stowed by being bolted under the stowed tine extensions on the back side of the left and right tine banks.
All of the input regardless if the detail is always present or sometimes present is meant to bring attention to details that can be added to enhance the kit. There should always be open-mindedness and flexibility to say something new has been learned or a different perspective has been shared. There is not one single person that knows everything.
It should be explained further that these weld marks of L / R were not done by the manufacture ,or were they fleet wide as found in researched tech documents.
They were done at unit/ field level. And as stated not all would have them as it was not fleet wide. So as a builder , your choice, just check your reference first.
The double dog bone would be a nice to have, but not commonly seen, as they can become hard to find in a complete plough kit.
As stated in the great comments, track down the good reference material that is out there, ask questions if any and build how you the builder want to.
Cheers
Anthony
Author Canadian Leopard Project DVD Series...........
And to think that I thought that I'd ask something basic, like "Who uses the TWMP?" and instead learn an amazing amount of detail from The Source. Thank you LeoCmdr for your experience and informative insight. So I guess I'll build a Canadian Leo. Question that just popped in: Did we use the same mine plow on our new Leo 2s deployed in Afghanistan or something else?
Have fun with your build. Only the C2s had the mine plow fitted in Afghanistan as the plow mount could not be adapted to the Leo 2 versions. The mine rollers were adapted for use on the Leo 2s. New mine plows, mine rollers, and dozen blades will be used on the Canadian Leo 2s in the near future.


Comments