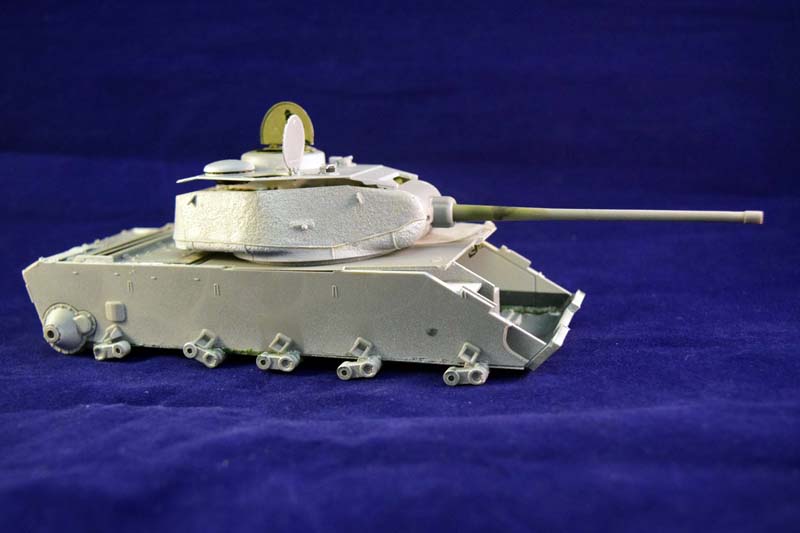
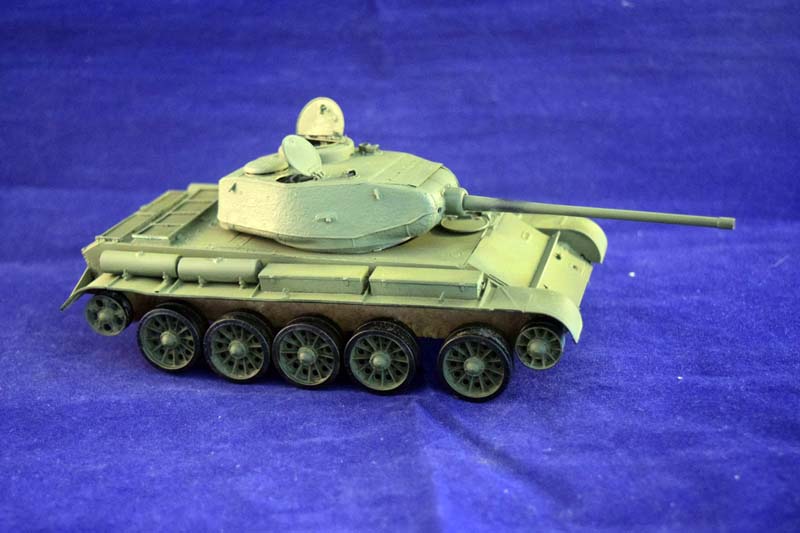
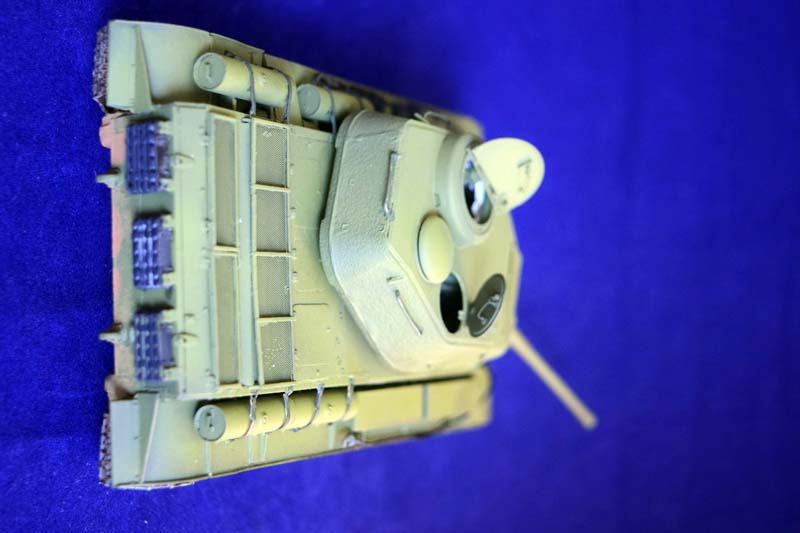
The T-44 was not a very successful model as far as tanks go, however, it was a very important transition between the late-war tank designs and the absolute success that was the T-54/55. MiniArt has issued two versions of this tank: the early (the subject of this review), and the T-44M. If you take a look at these two versions, youll see the transition taking place. The T-44 looks like an improved T-34: the tracks, the external fuel tanks, etc. resembles the late-war T-34/85. The T-44M, however, looks like an older brother of the T-54/55: the tracks, the fuel tanks, etc. are definitely post-war designs.
The Issues
AS I have reviewed the model before I would like to share my experiences of building it. I have yet to finish the weathering process, but the model is essentially done, and ready to be reviewed. There are some issues with the instructions although the instruction booklet is great, and easy to follow, there are some minor typos.
Step 17, assembly of hull: a part holding the engine is labelled as c8. The color number is superimposed onto the part number; the actual number should be Hc8
Step 41: part G15 is shown to have a small locating peg in the middle to which part De7 is attached. This is not present in my kit.
Step 43: Part C17 is in fact C3
Step 58: Part C32 is in fact C38
The Build
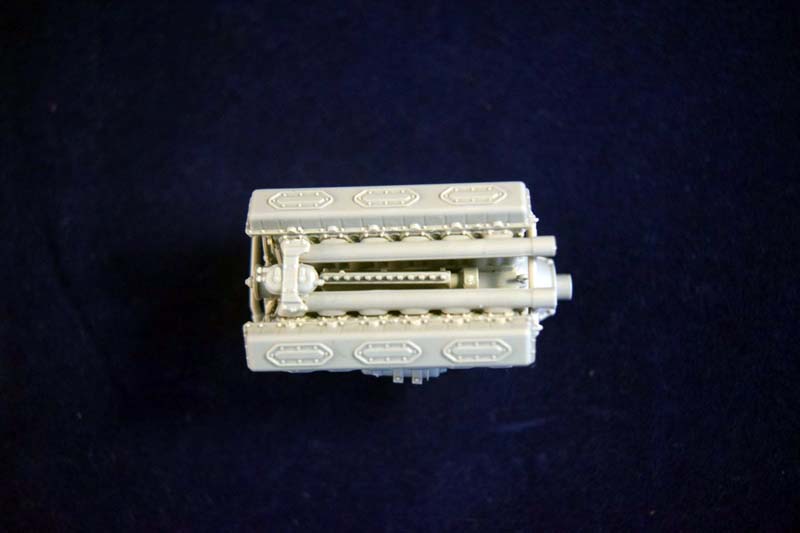
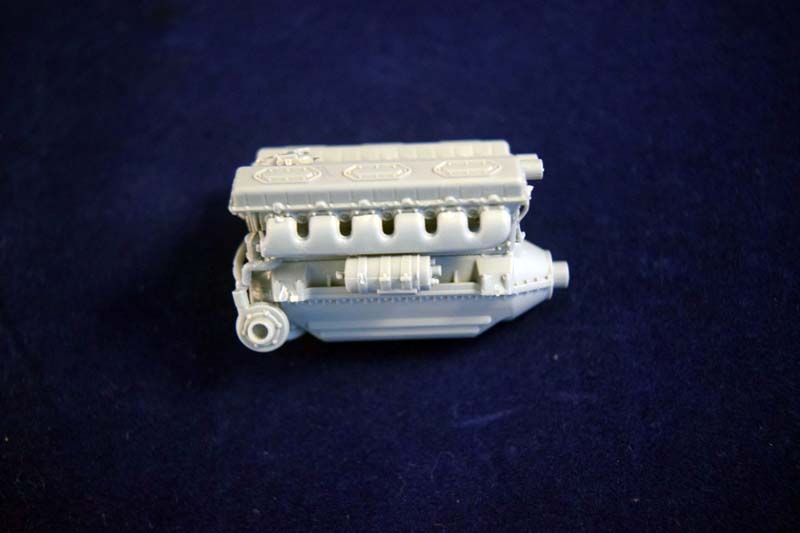
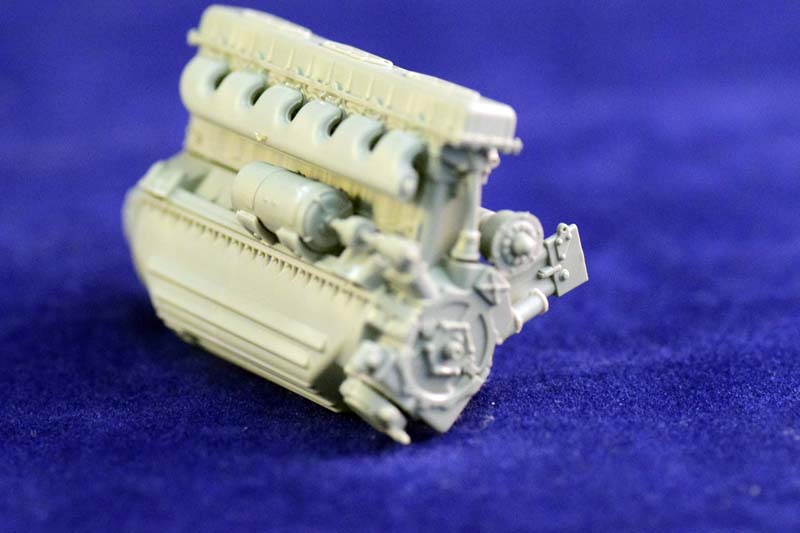
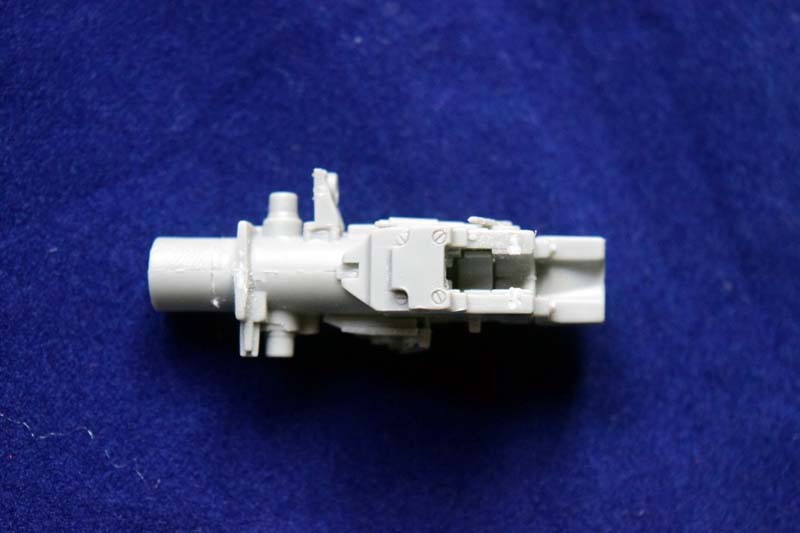
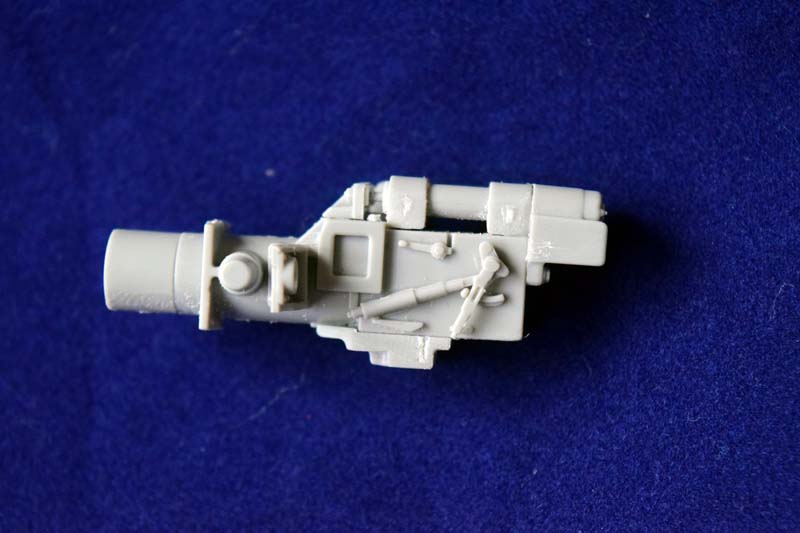
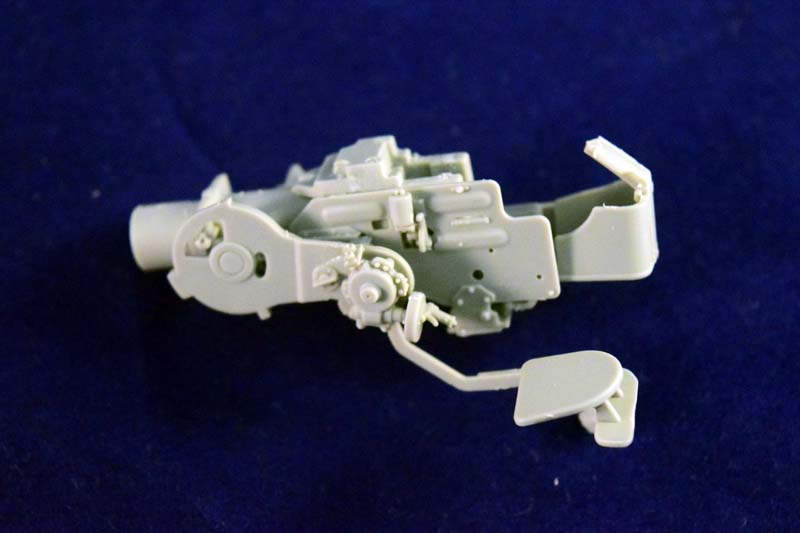
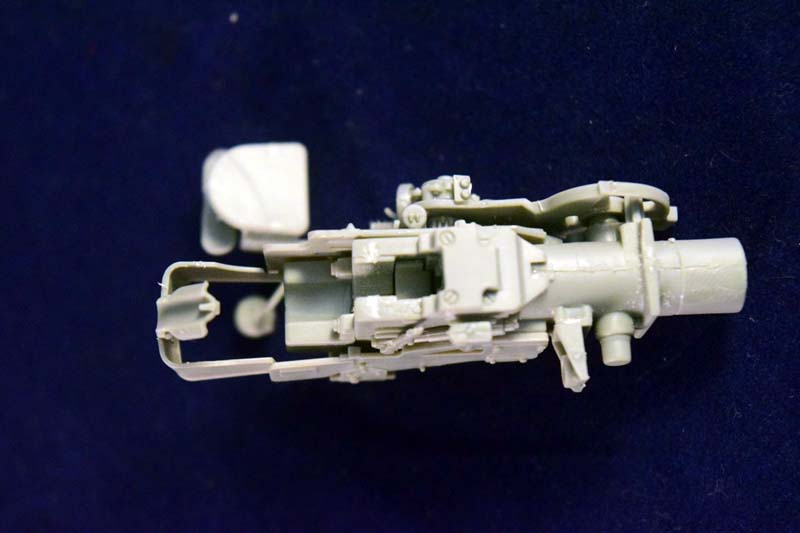
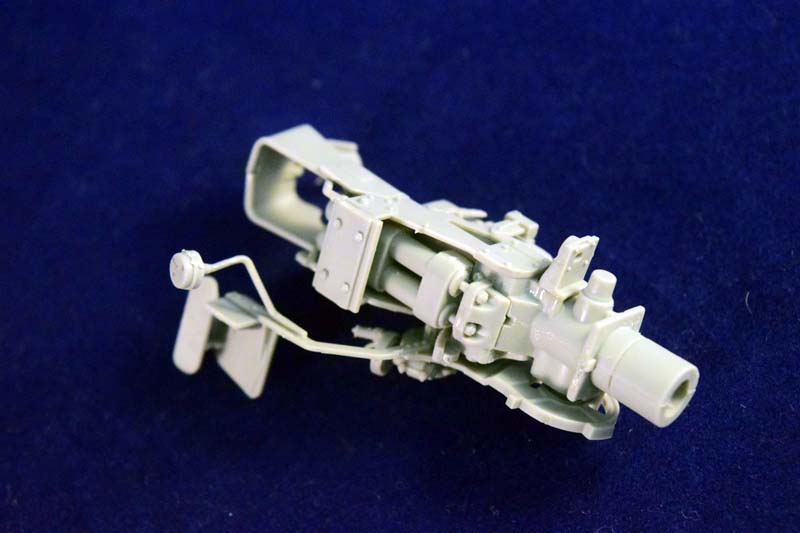
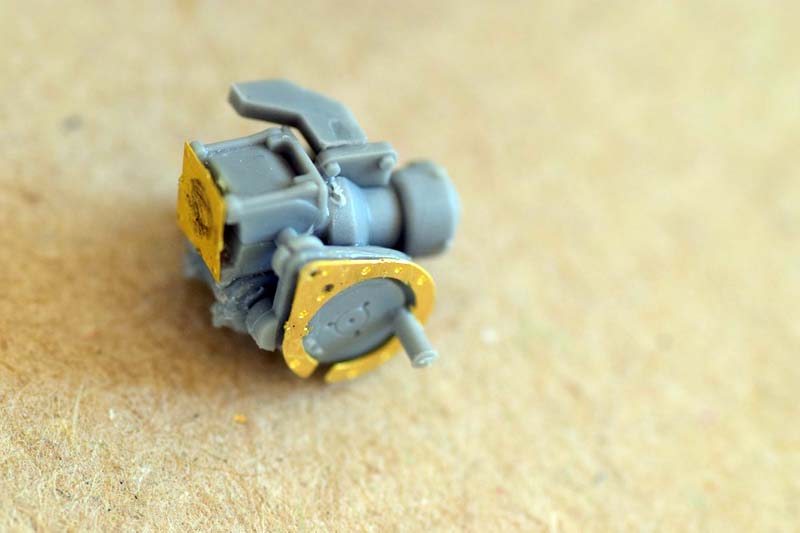
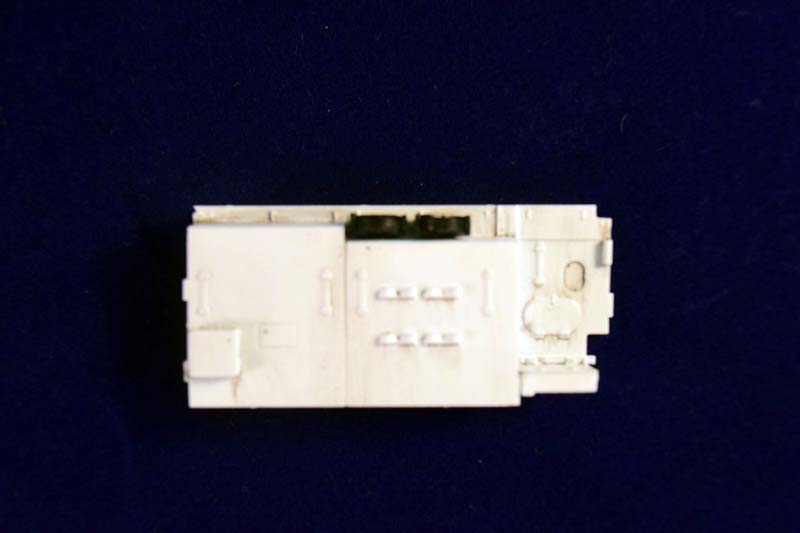
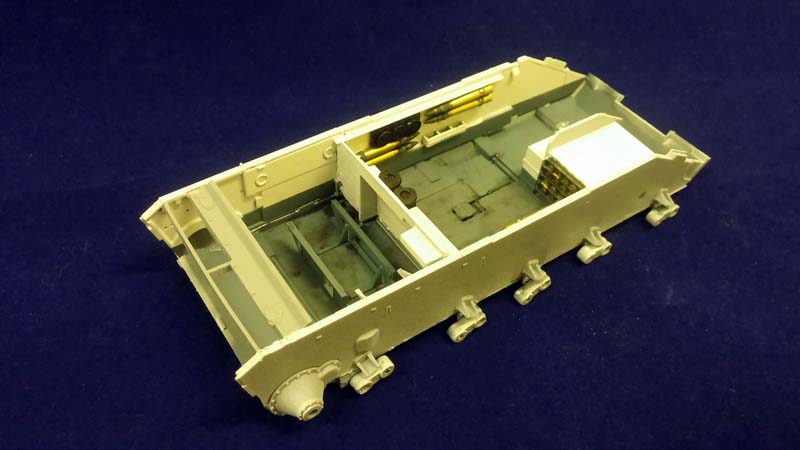
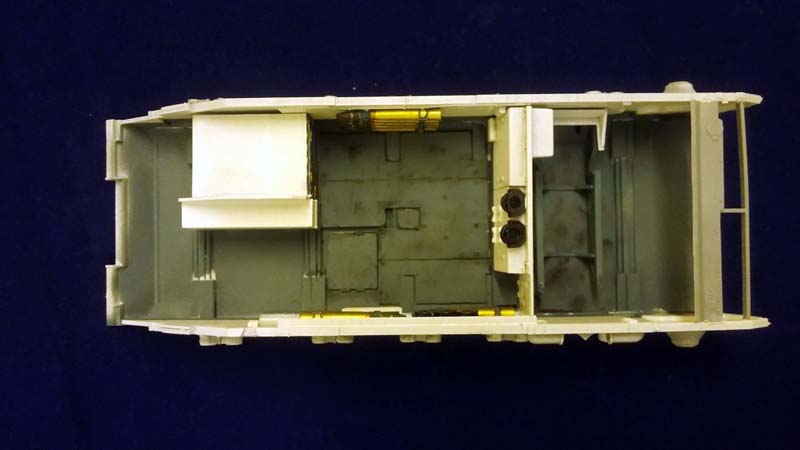
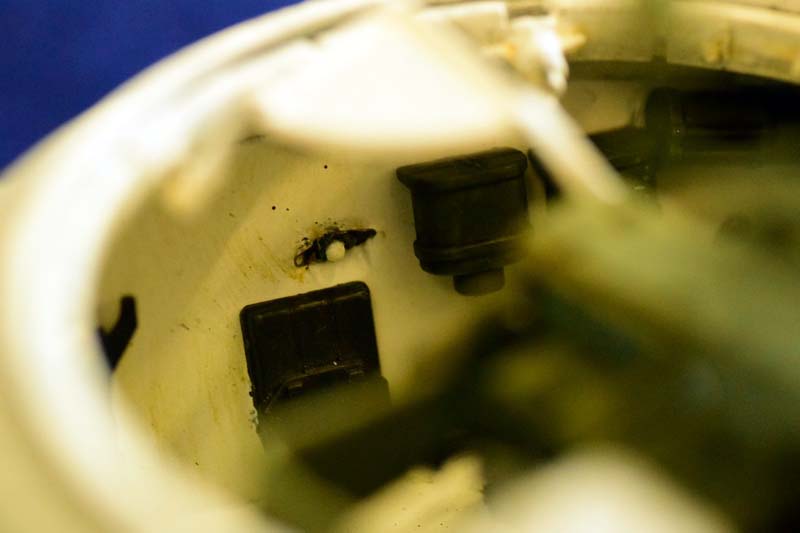
Engine (photos 1-6) MiniArt supplies us with the engine and the transmission; unfortunately the rest of the engine compartment is not provided. The engine is a multi-part affair, which looks great. If you wish to leave the hatches open it can use some upgrading by adding the wiring and different cables. I left it out of the model, as Im planning to display it separately. (You cant really see it if the hatches are left closed, anyway.) MiniArt actually included two sets of engine parts: I assume the second sprue carries the parts for the T-44M engine.
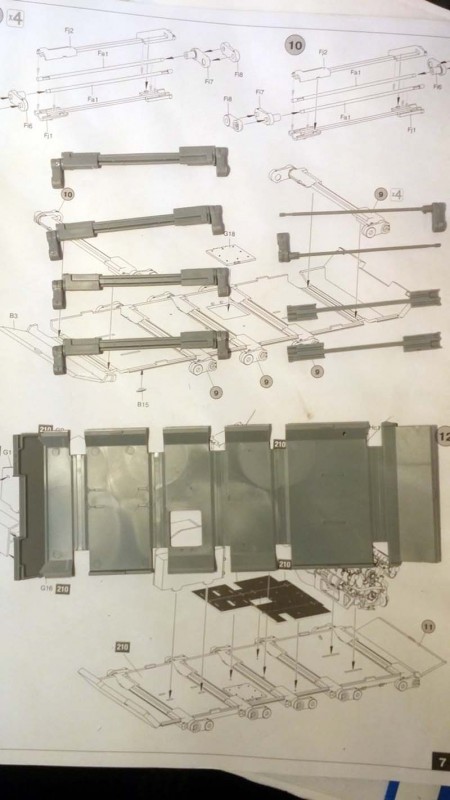
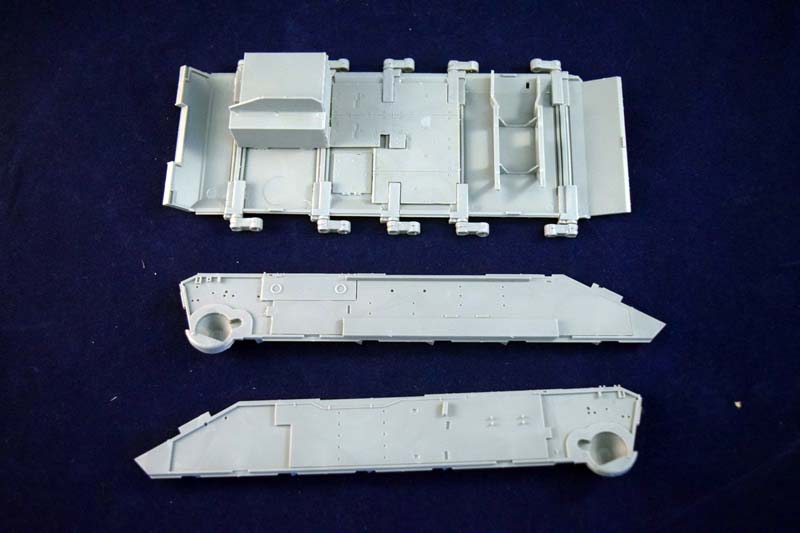
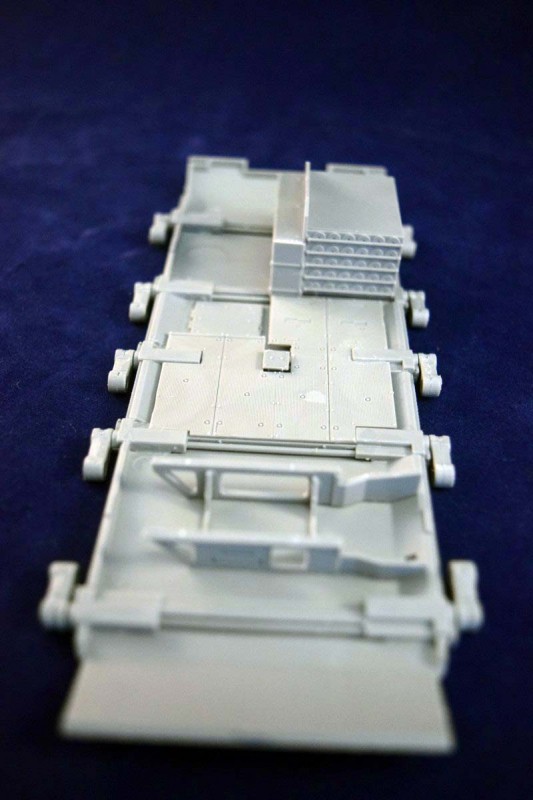
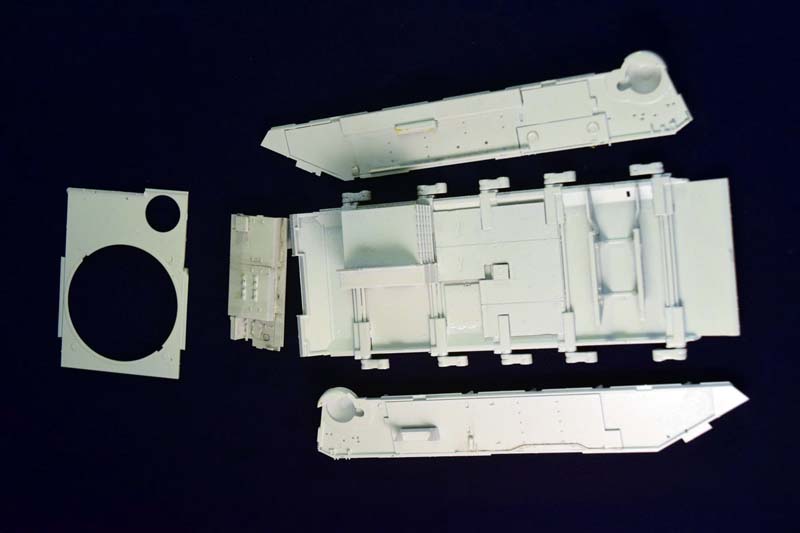
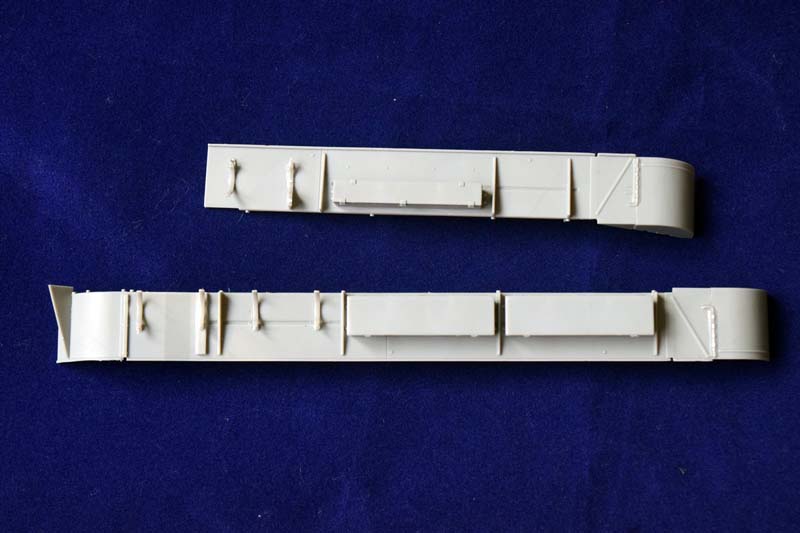
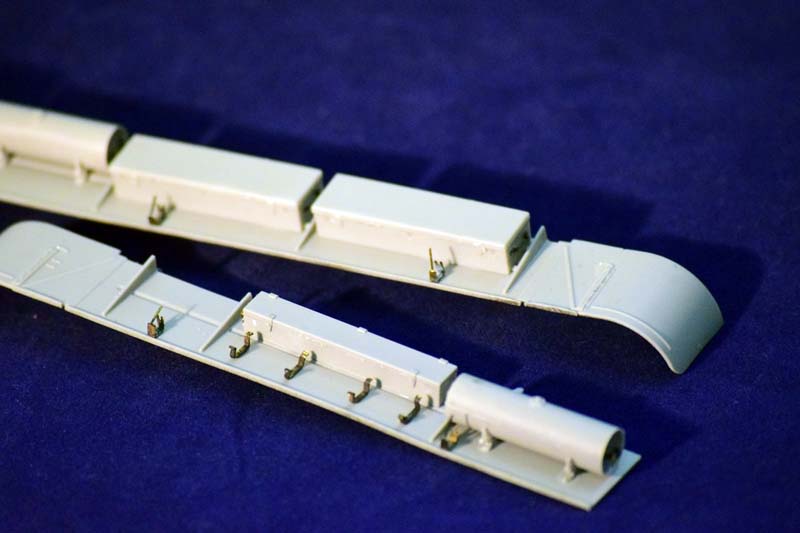
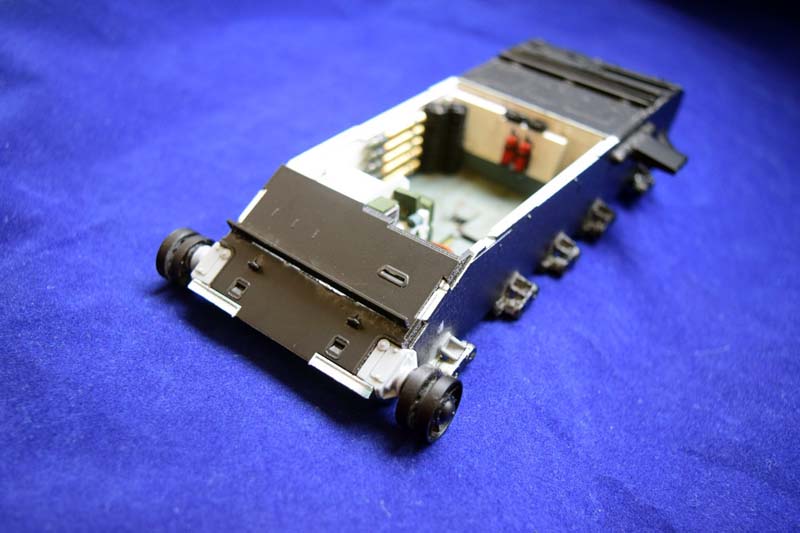
Lower chassis and suspension (photos 7-10)
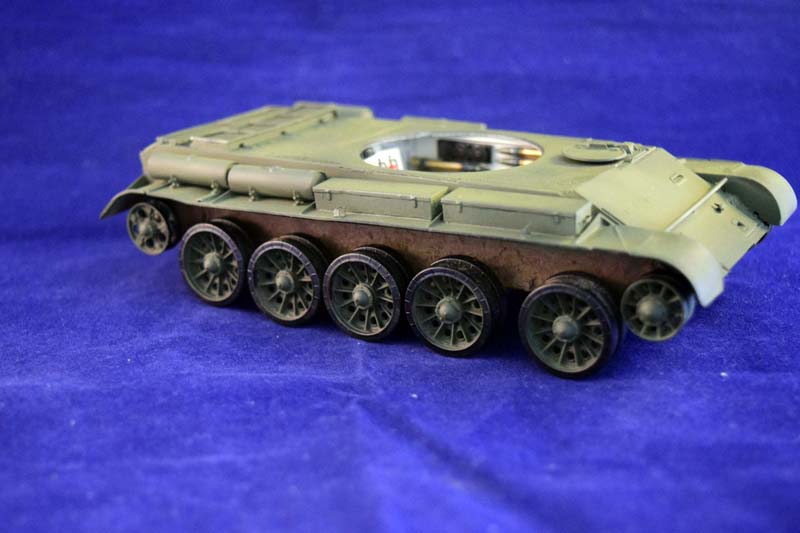
The model has workable torsion bar suspension, which is a very nice touch. Youll have to be careful not to glue the bars to the sheaths, but if you only apply glue sparingly to the outside of the finished torsion bar assemblies, youll be fine. The only minor issue is the positioning of the swing arms for the road wheels: they do tend to fall into the right position, though. One thing you need to keep in mind is that even though the plastic parts function like the real thing does, it will not be as rugged; its great for positioning them for static displays, and not for constant use. The other issue is that the road wheels are only attached with very small pegs to the swing arms (and they should be able to rotate around these pegs, too.) I found that the area is too small to securely attach the wheels, so at the end I reinforced them with two-part epoxy.
While we are at it: the cover of the instruction manual says the tracks are workable; this is true to only a certain extent. The track links do click into each other, but you will need glue to fix them in place; they very easily separate. I would say individual links would have been a more accurate description.
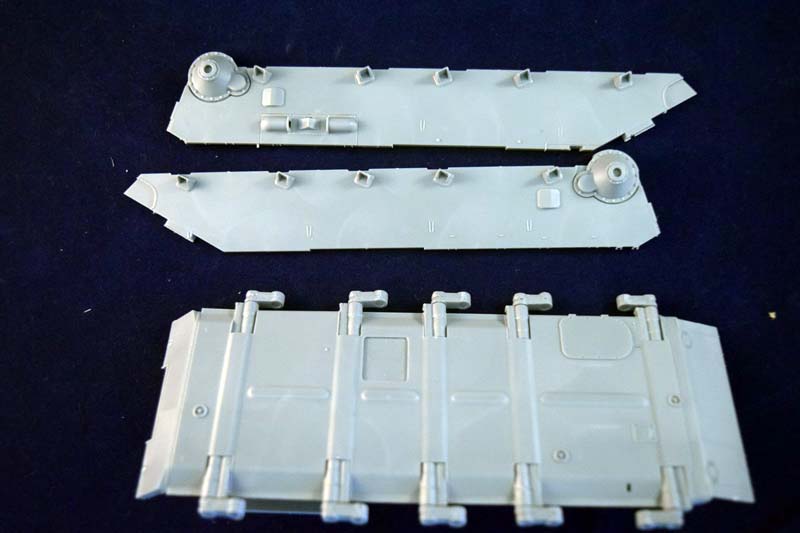
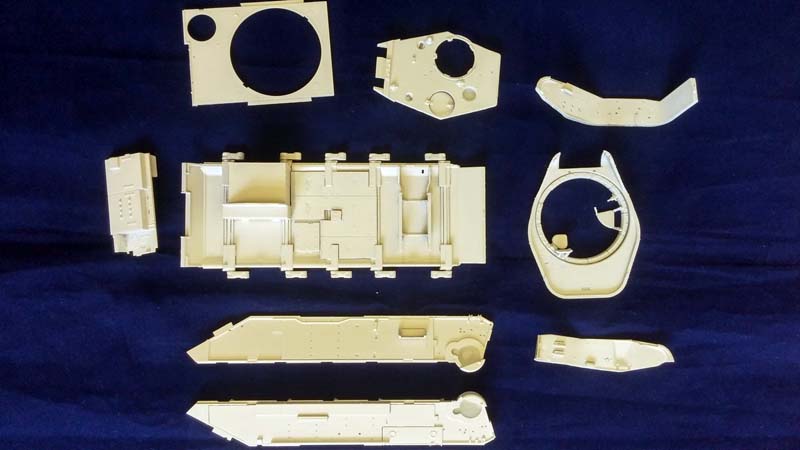
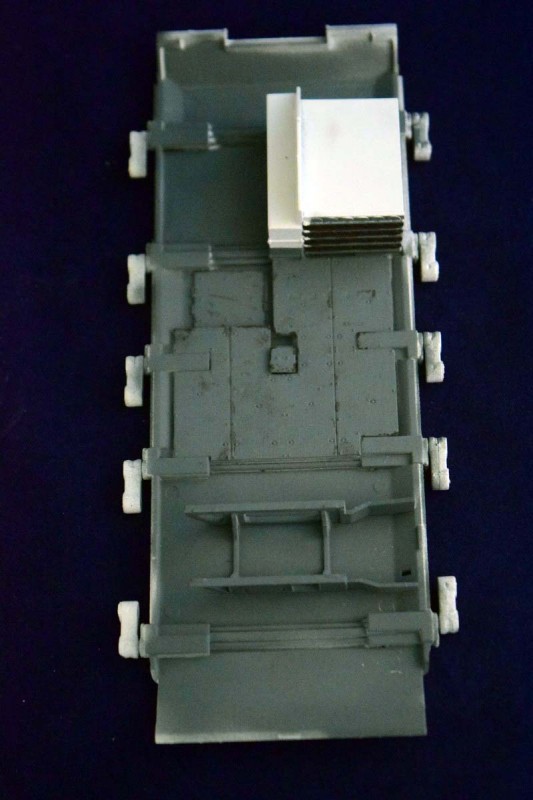
The rest of the lower chassis goes together well. The model assembles like the old school ones: you dont get a tub for the chassis, but instead youll need to assemble it from the bottom part, and the two sides. This will allow you to work on the interior details more easily, however the fit will be an issue later. I think it might be wise to do dry-fitting of this part, and once youre done with the torsion bars, simply put the hull together at this stage. (I assembled the hull after the assembly and painting phase as the instruction manual suggested.) One minor gripe: the rolled armor of the actual tank has a peculiar and very subtle texture to it; it would have been nice to have it reproduced.
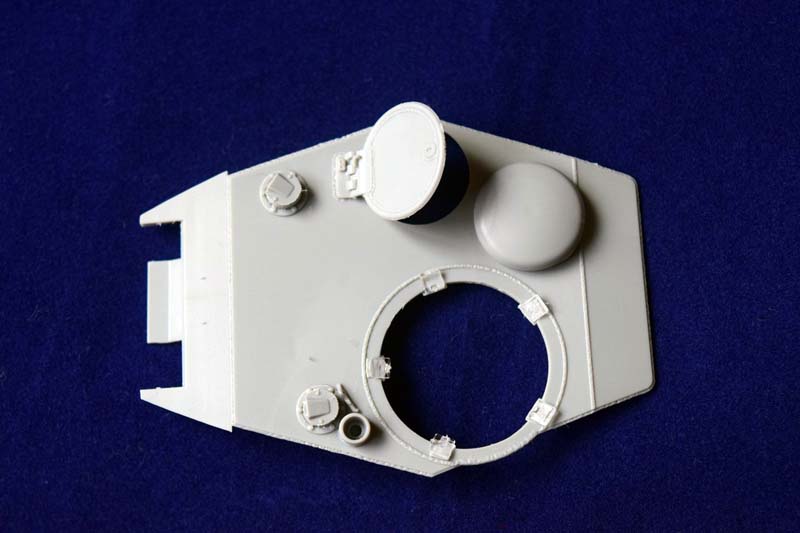
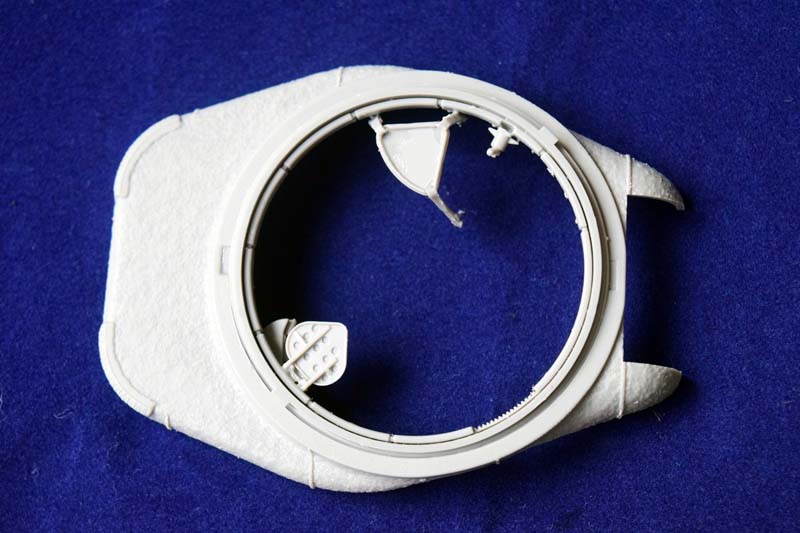
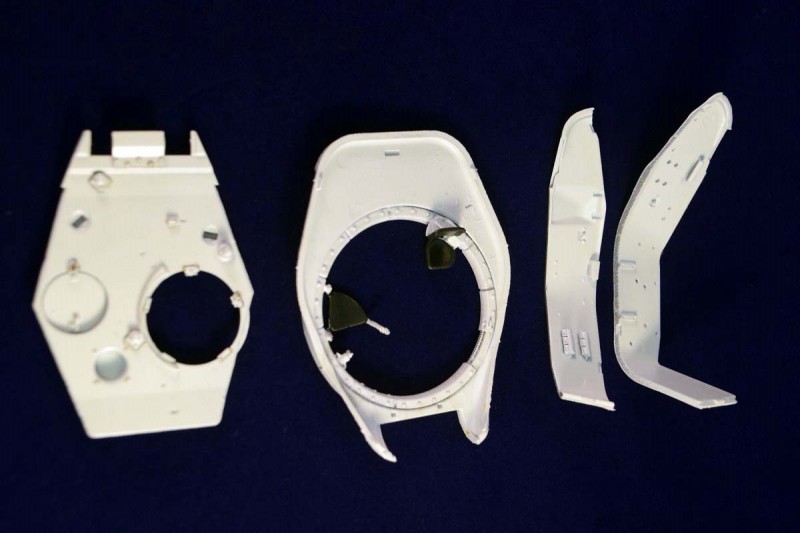
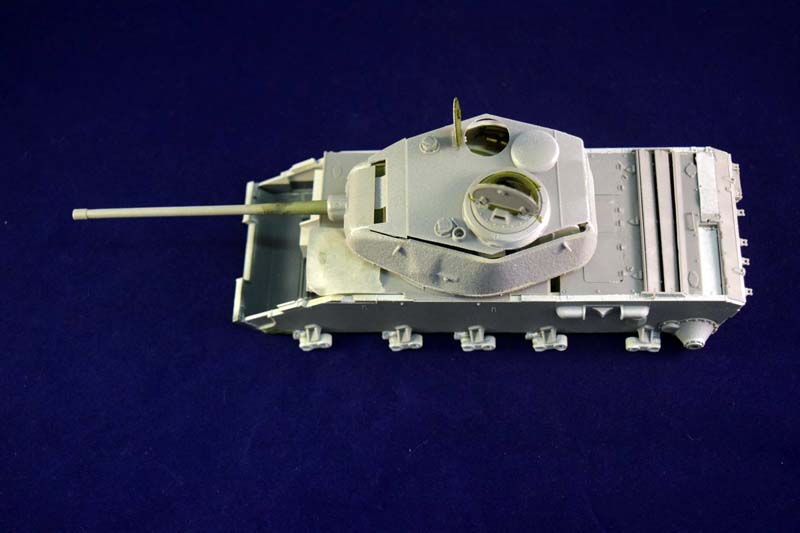
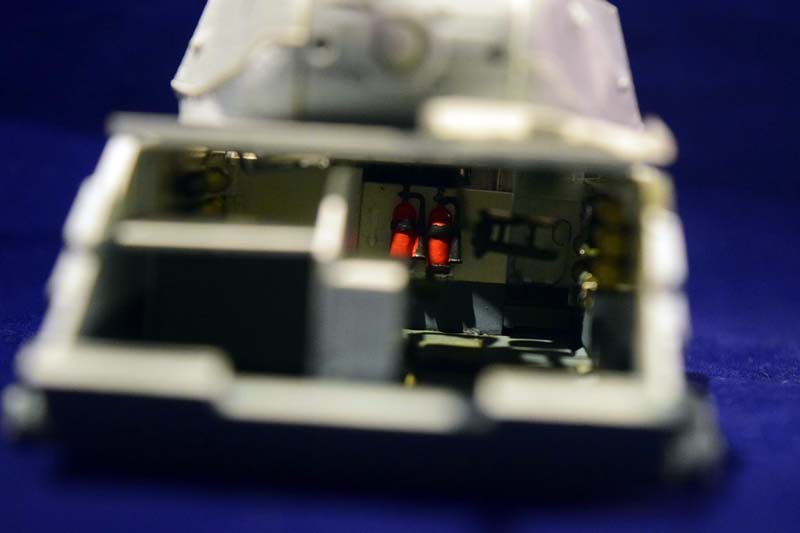
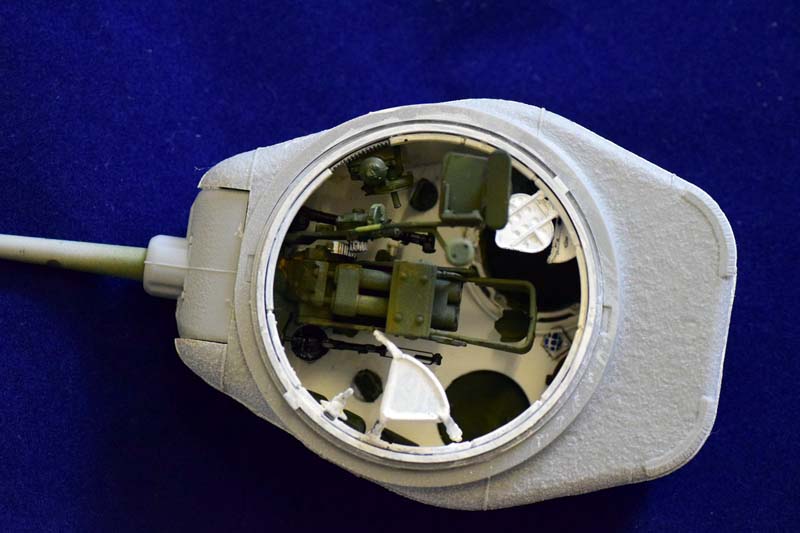
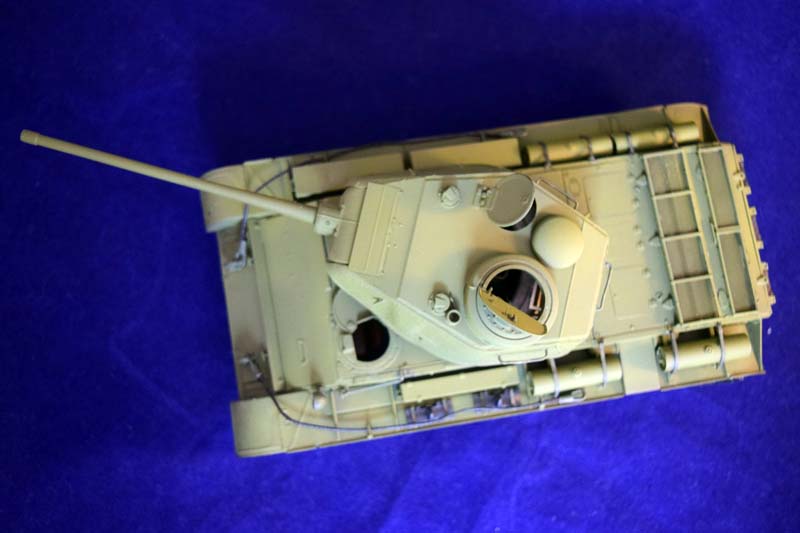
Turret (photos 11-28)
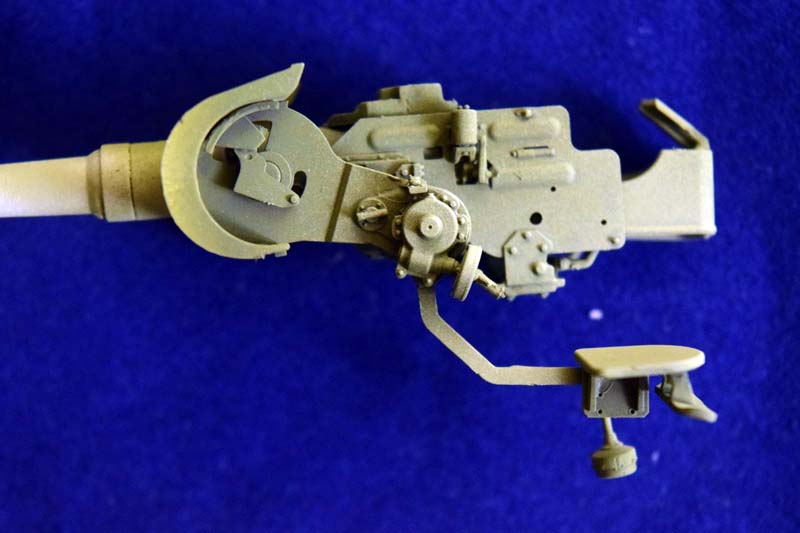
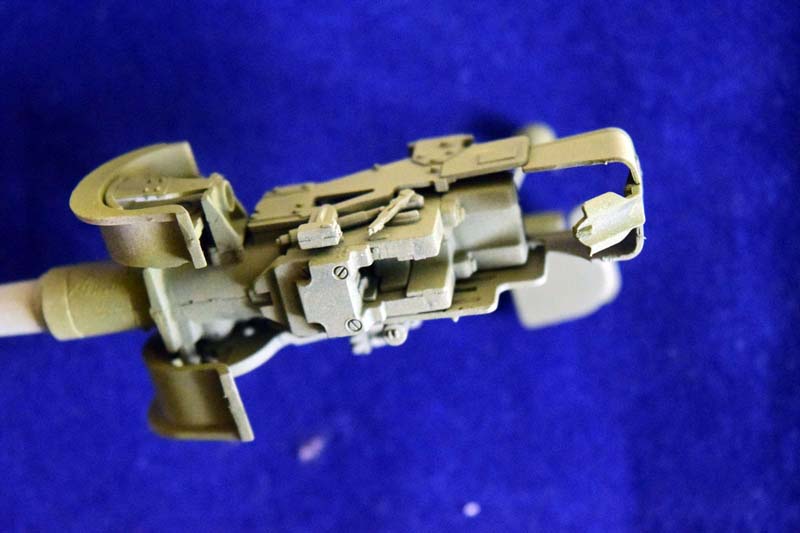
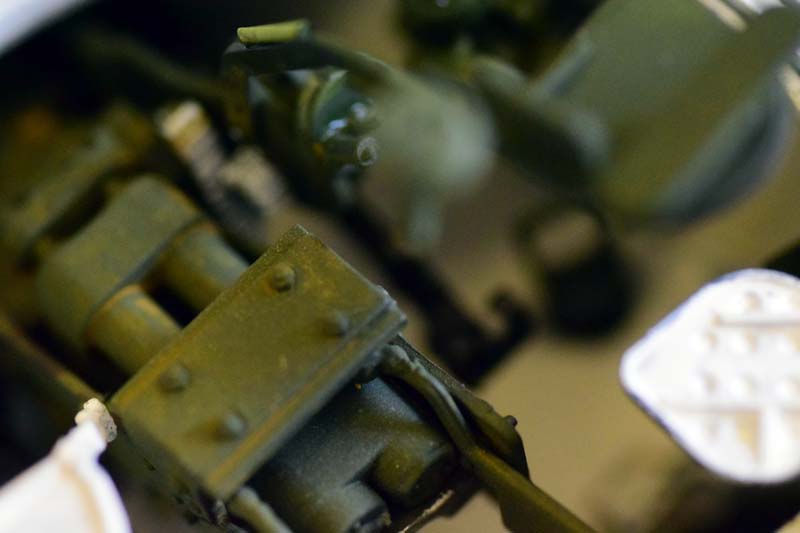
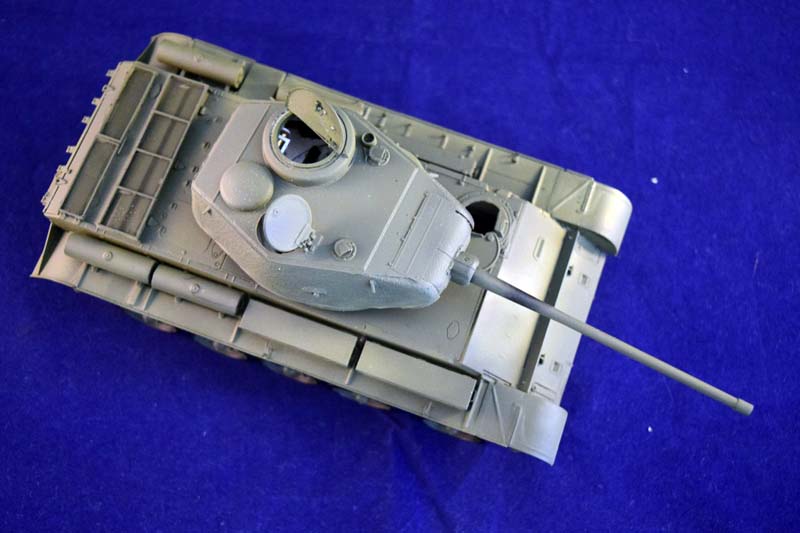
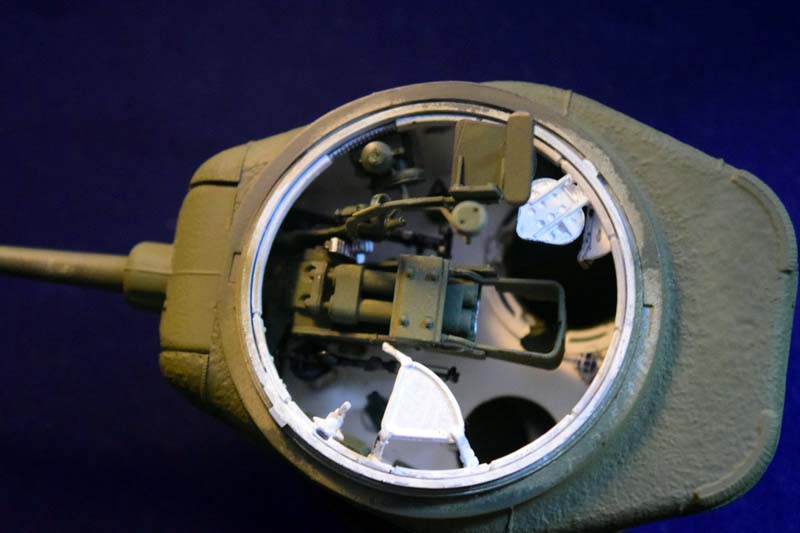
The turret is a very nice two piece affair. Good fit, great detail both interior and exterior. The casting texture is great, and the parts are made in a way that the fit will be hidden (in most cases) by the welding joints. The only exception is where the two sides of the turret meet on the back; with some careful filling of the gap resulting, you can avoid damaging the casting detail. I simply used white spirit to wipe off the excess, hence did not have to sand it down. Only two ejector pin marks needed to be filled in the interior; the rest were hidden by the gun. The turret grab handles are very delicate, and unfortunately they broke on sprues as I tried to remove them. It was easier just to replace them with wire. Its worth waiting with this step to the very last stage, so that I dont break them off while working on other parts.
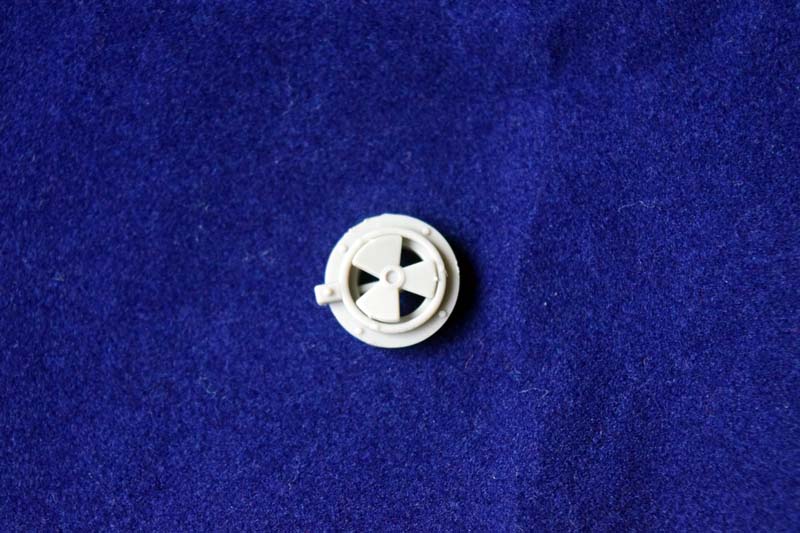
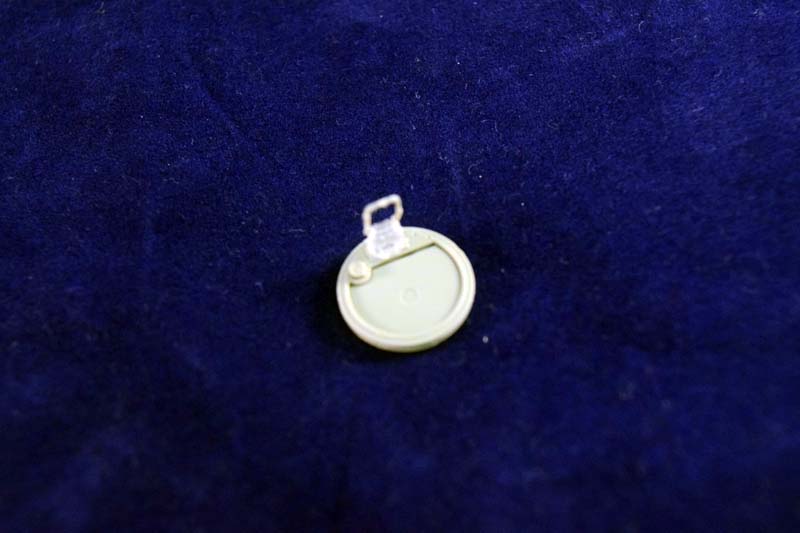
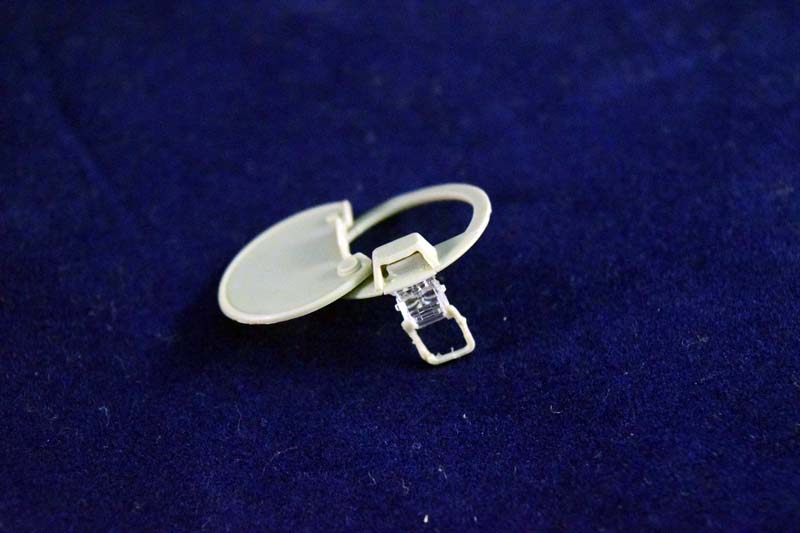
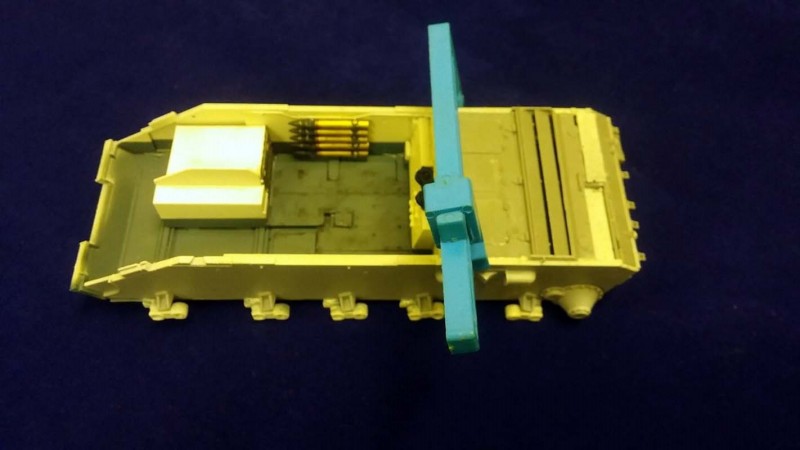
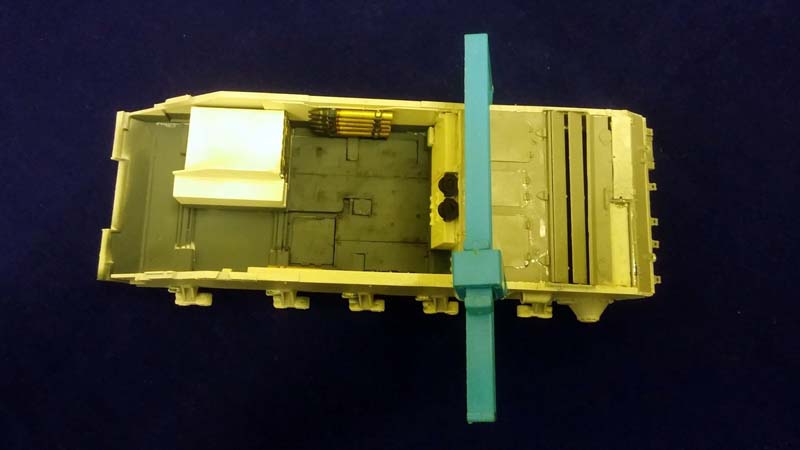
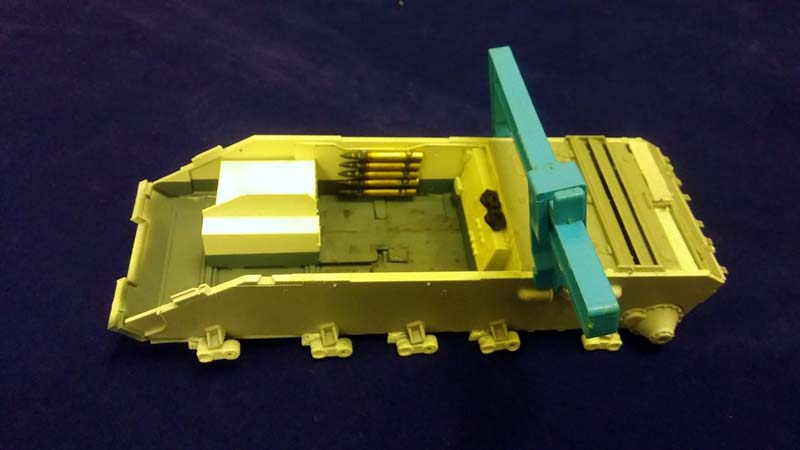
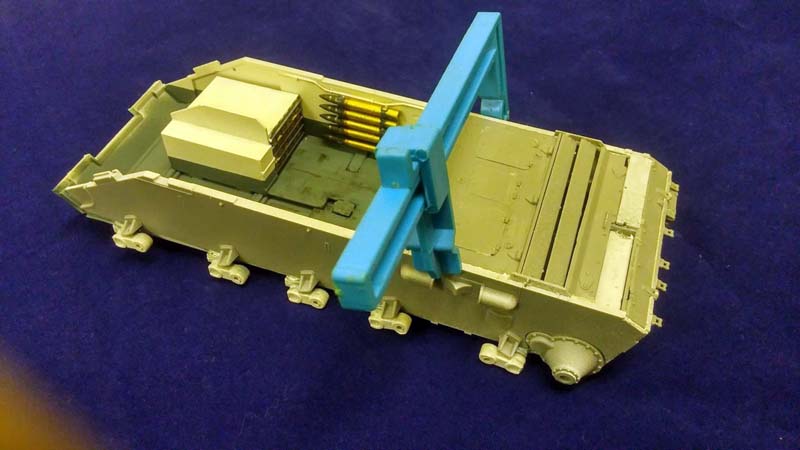
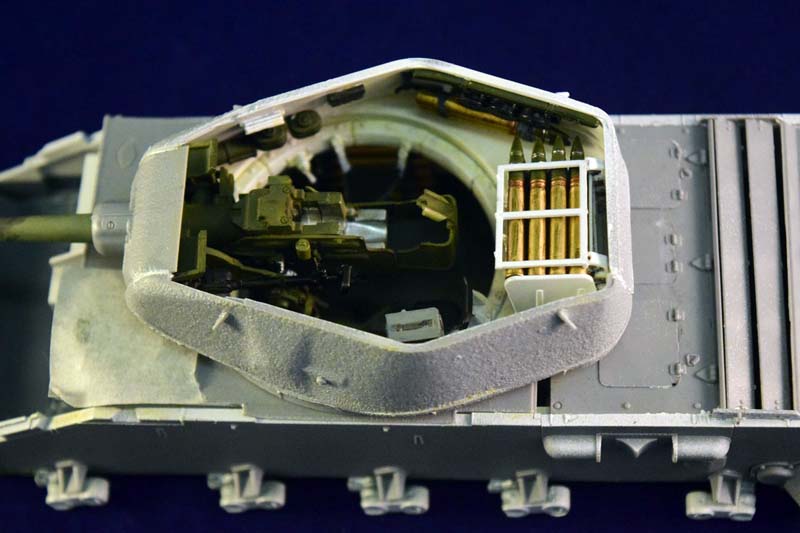
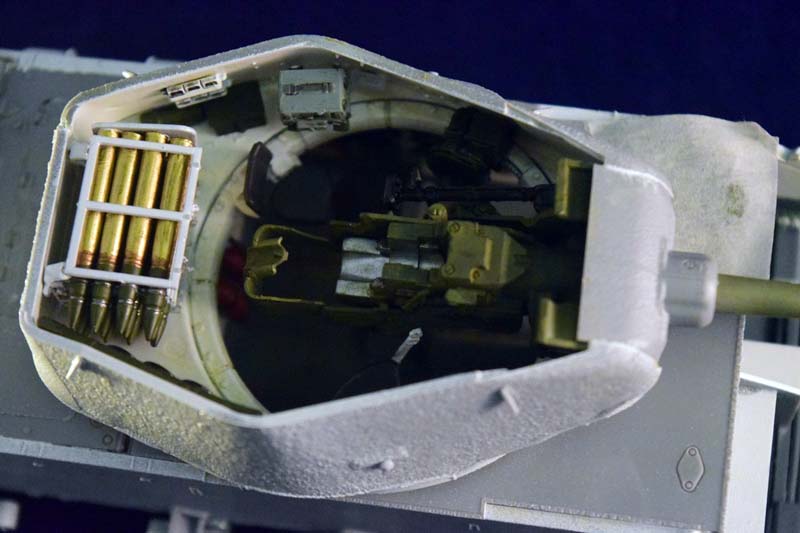
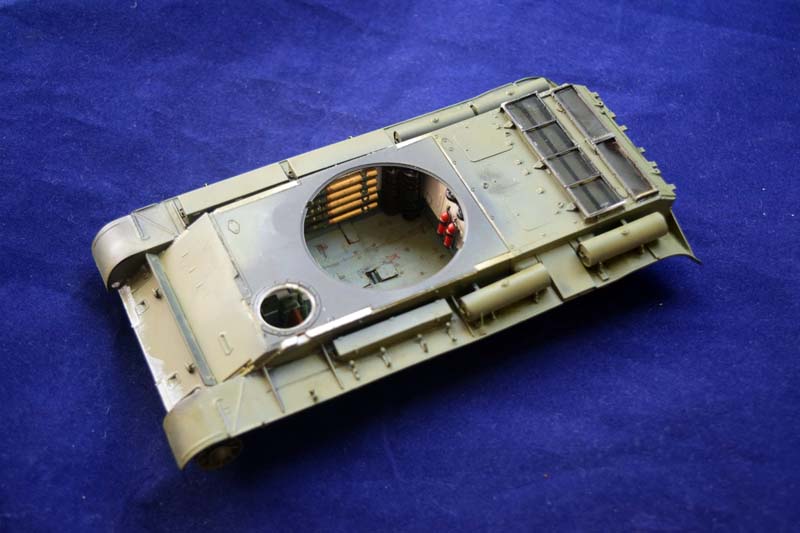
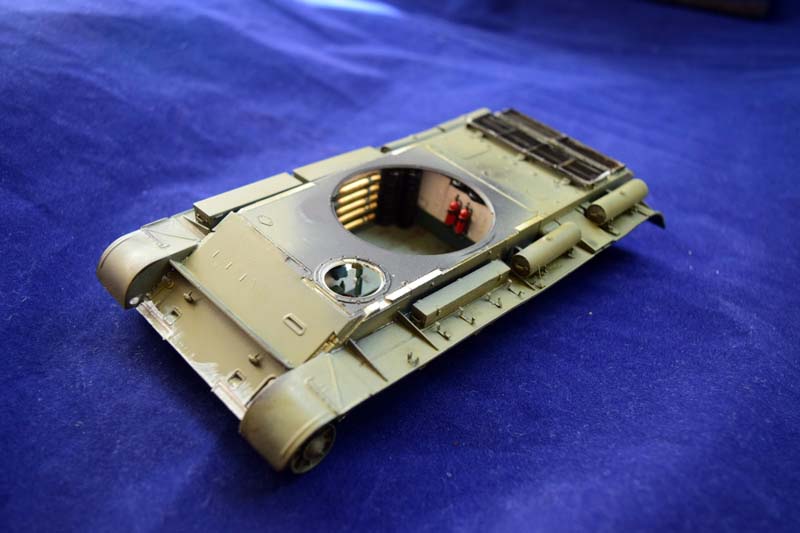
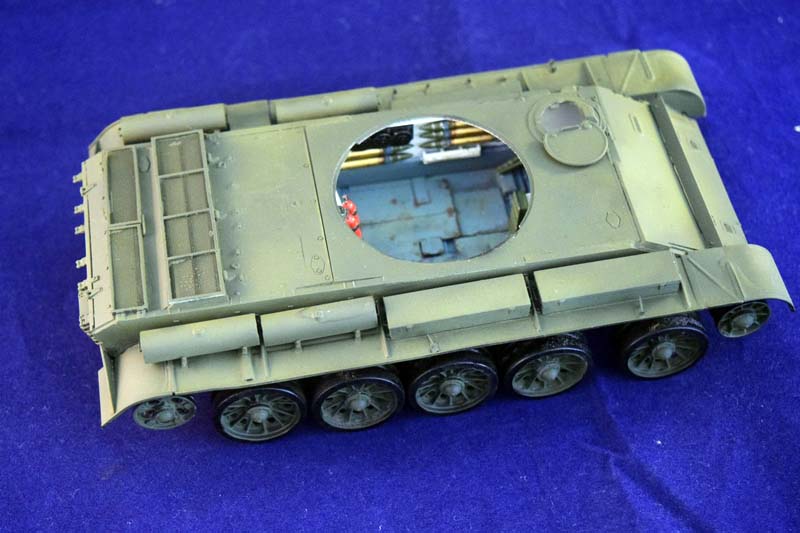
The interior of the turret is quite busy, and frankly brilliant. The fume extractor, the small lights, the radio, the turret cranking mechanism, all the other details are just great. You do get the fan for the fume extractor, but it will be hidden by the PE cover. The periscopes are made out of transparent plastic. The commanders cupola has the very fine teeth where the cupolas turning mechanism is meshed to; small details like this make the model really shine. I was worried about installing the PE holders for the pistol gun port plug, but they snap on surprisingly easy (considering how small the pieces are). I think there might be a chain holding the plug itself in the real tank, but it was not included; if you want to depict them open, youll need to add the chains.
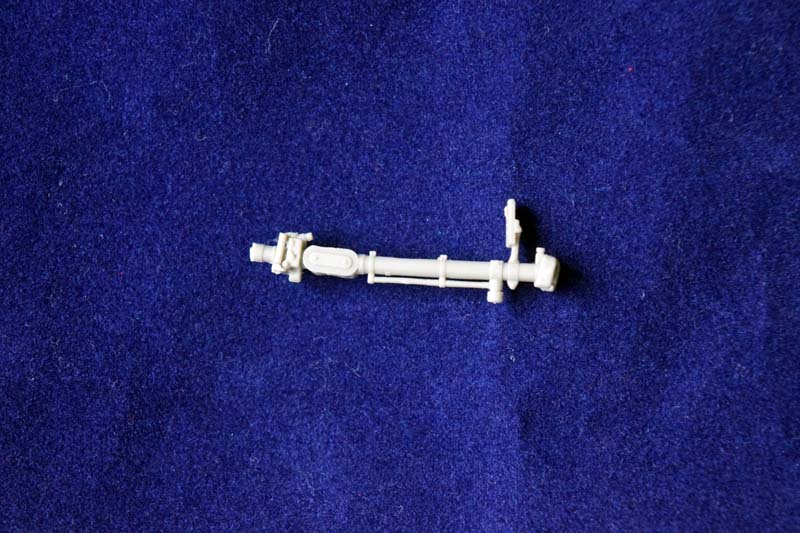
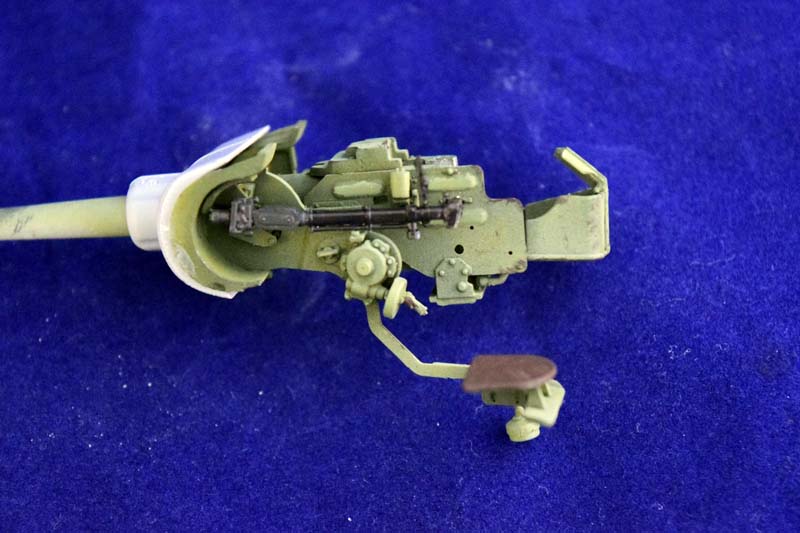
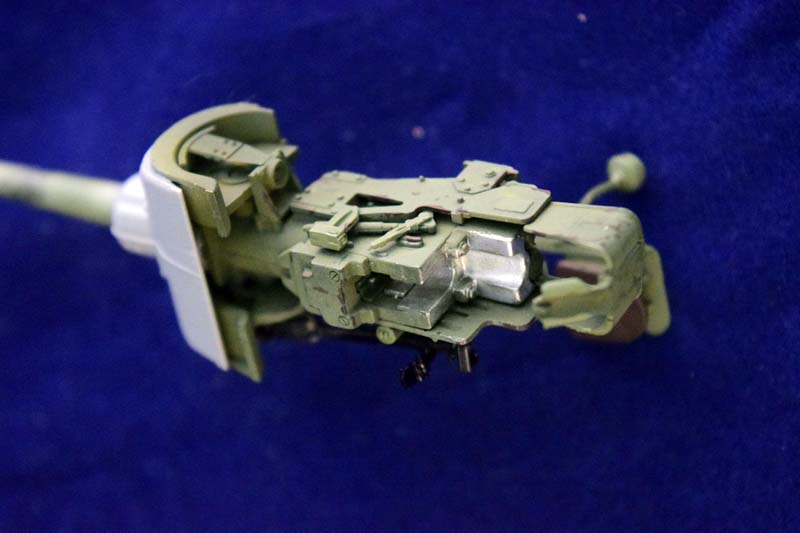
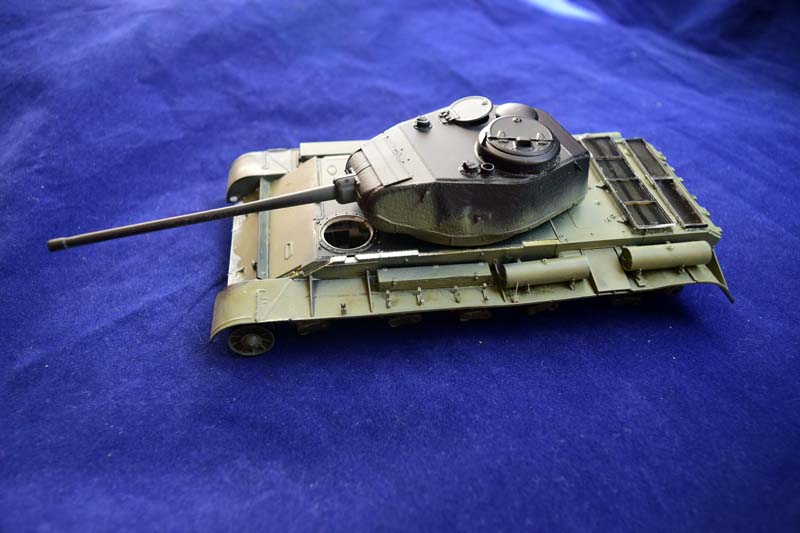
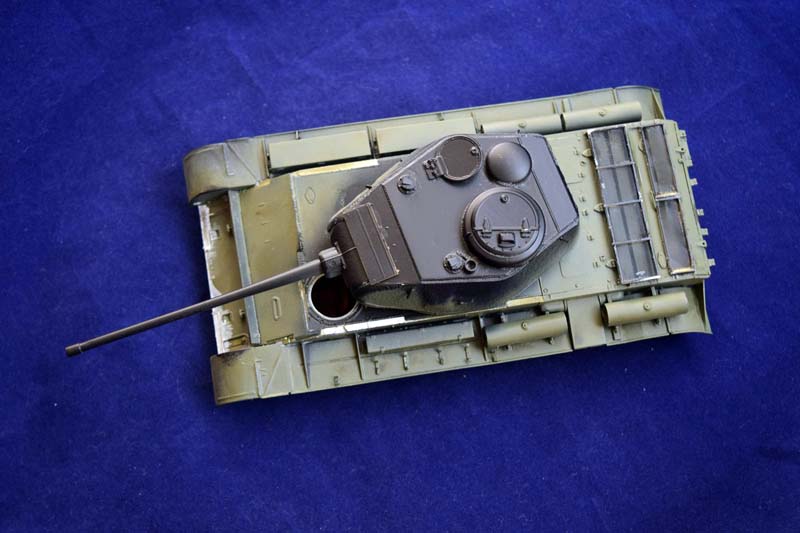
The gun is a really nice, multiple part assembly, and the plastic gun barrel is perfect (its easy to find a metal replacement should you want to, but its not necessary). One word of caution: once you install the gunners seat, you will be in constant danger of snapping it off You will find the same problem with the top of the turret: once you add the little PE peg on the commanders cupola that indicates the front of the tank, you cannot put the turret down upside-down, either (Talking about the commanders cupola: make a note where the notch for the PE peg is; its easy to glue the cupola on in a different orientation.) All the hatches are workable if you are careful with the glue.
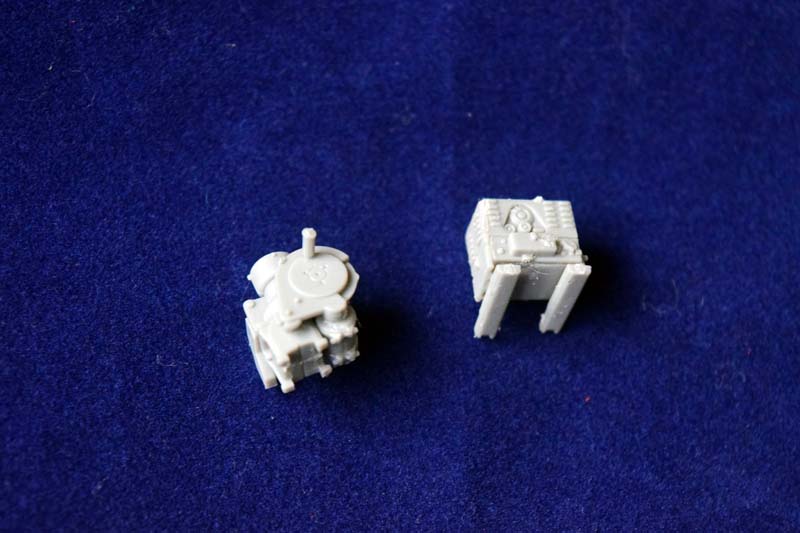
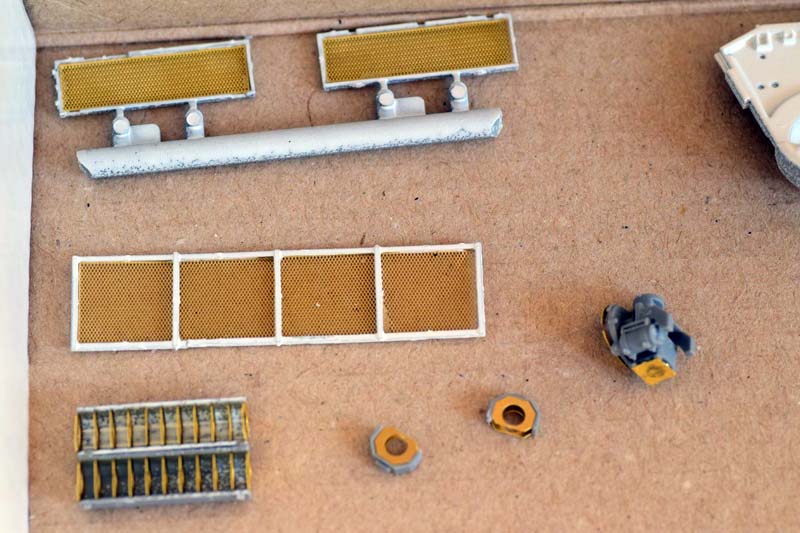
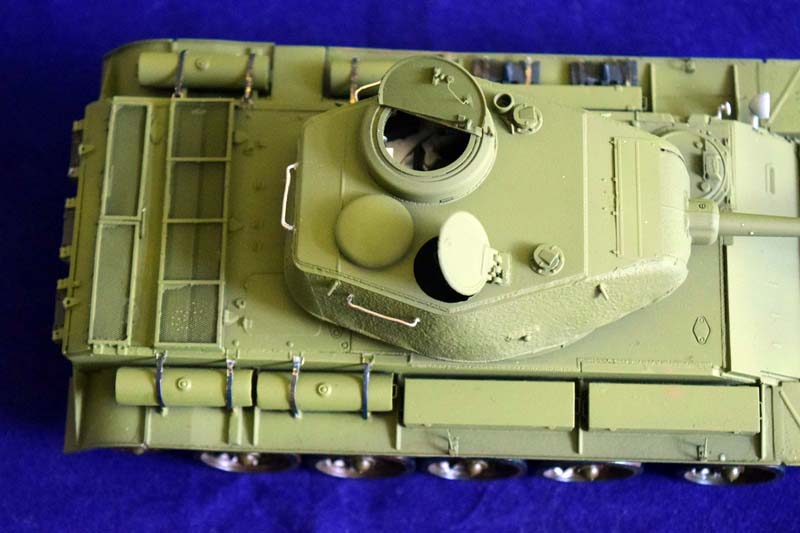
PE parts for the ammo holders, grills, and turret rotating crank (29-32)
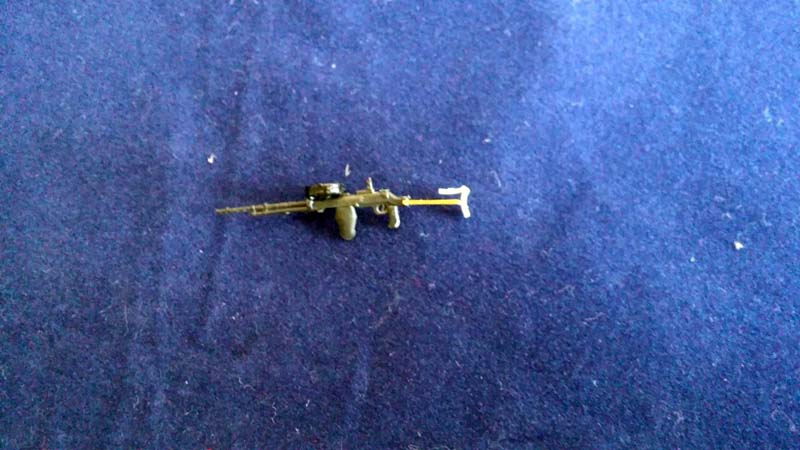
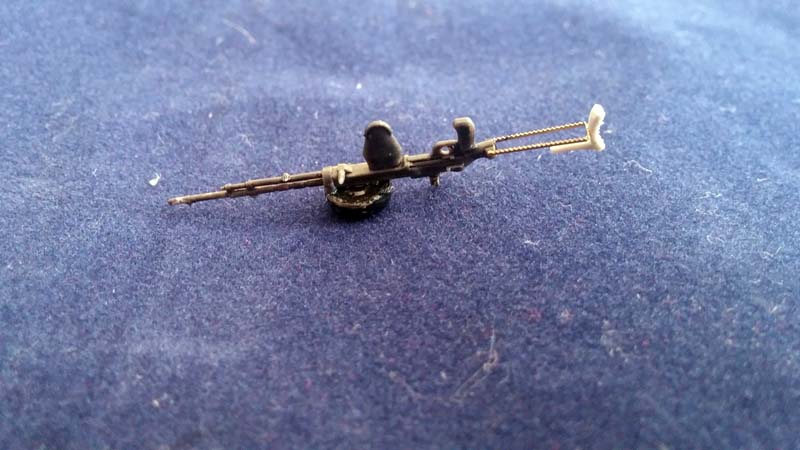
There is a small, but comprehensive PE sheet provided. The engine deck grilles, straps and small details are provided as photo etched parts the bare minimum, but they do make a difference. (I quite like the fact that MiniArt does not go overboard with the PE some of the workable tool holders I had to assemble in the past are still giving me nightmares.)
Painting starts (photos 33)
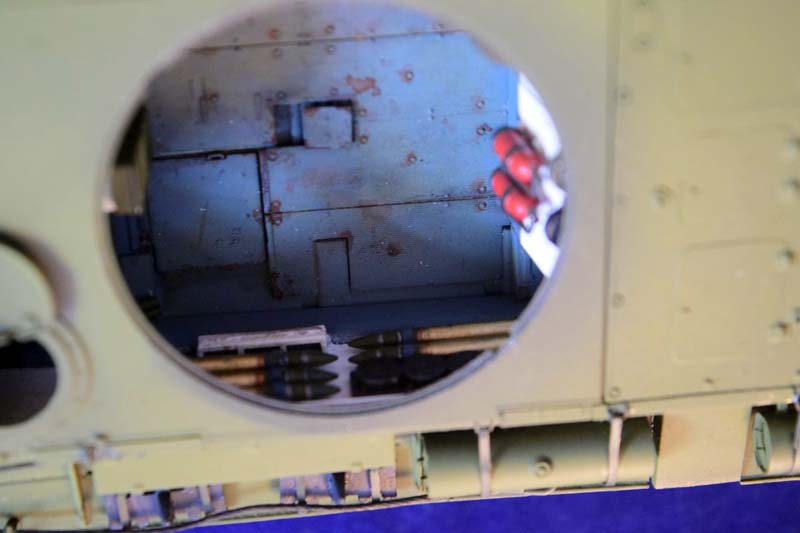
Once I did the gray primer base, and assembled everything to the level I thought was necessary to start the painting process, I used several light coats of white enamel paint on the interior parts. (The tank was painted white in the inside, as most AFVs are.) The key is to use several light coats, as white is a notoriously difficult color to work with. Once the paint was cured, the bottom of the hull was painted in a grey-blue color, which I mixed up using Tamiya paints, and sprayed onto the white base coat. (I used a youtube video as a reference, as the instructions would have you paint the sides completely grey. It is possible that both versions are correct, but I went with the video.)
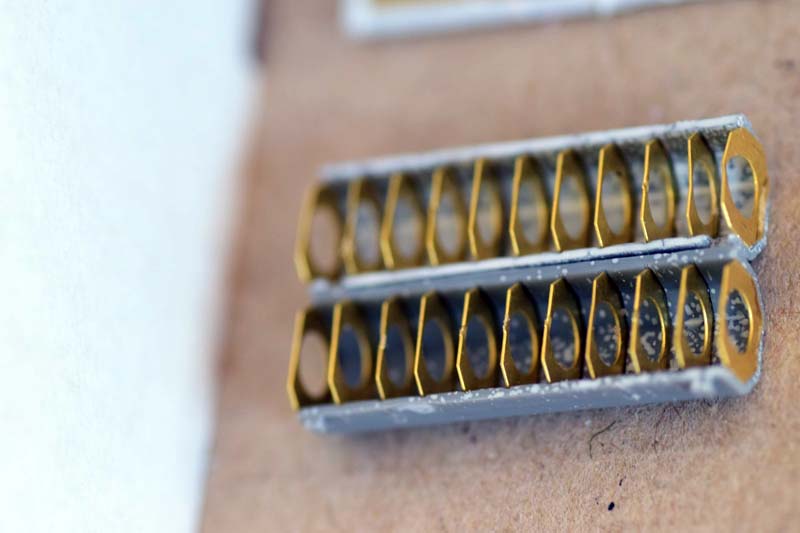
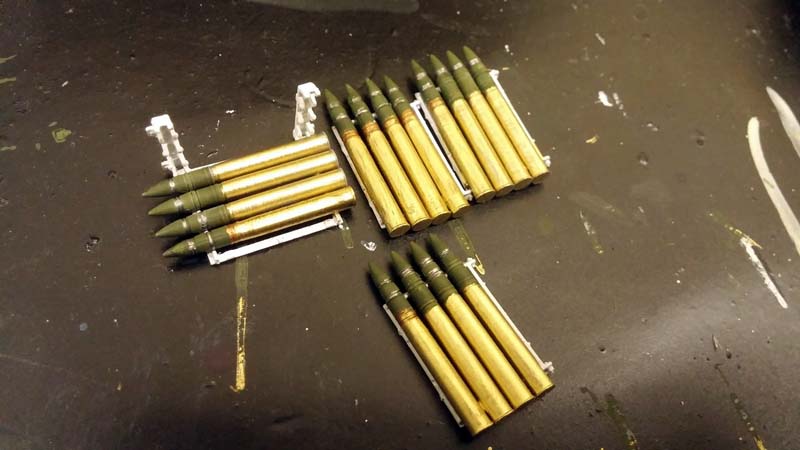
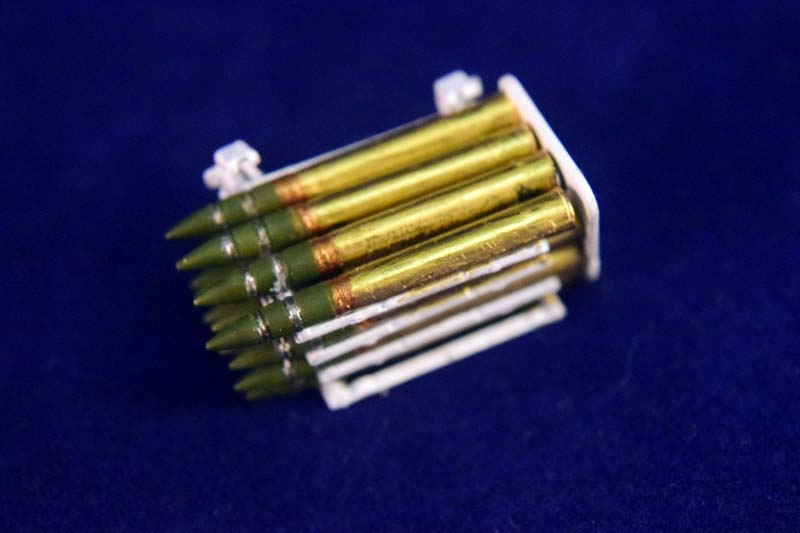
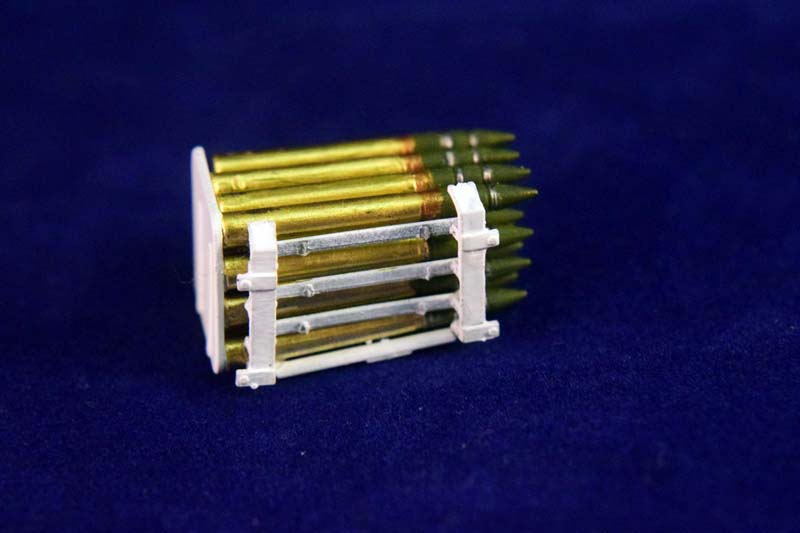
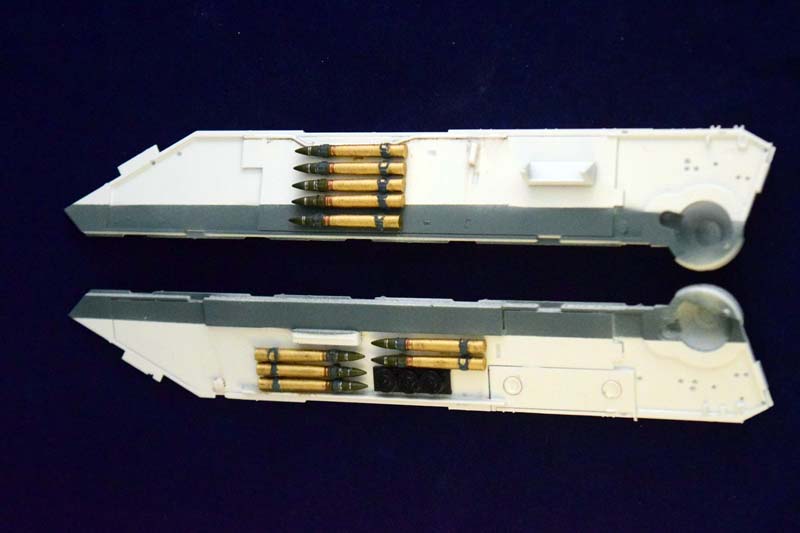
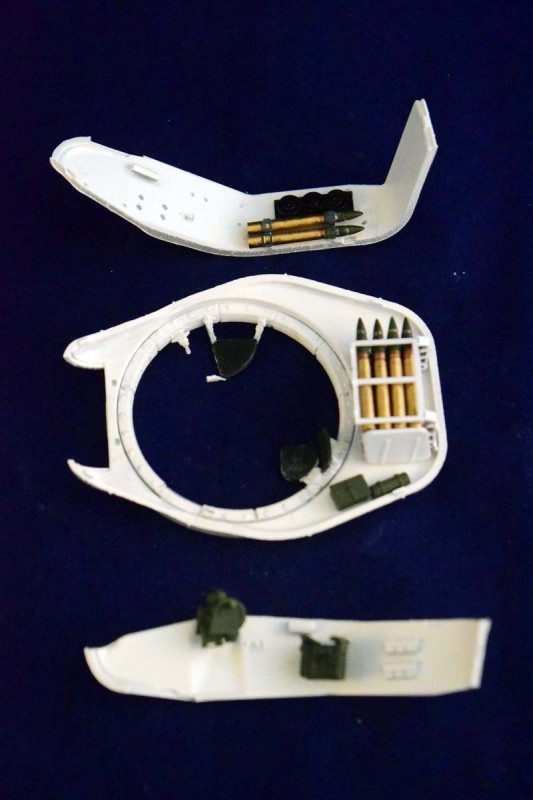
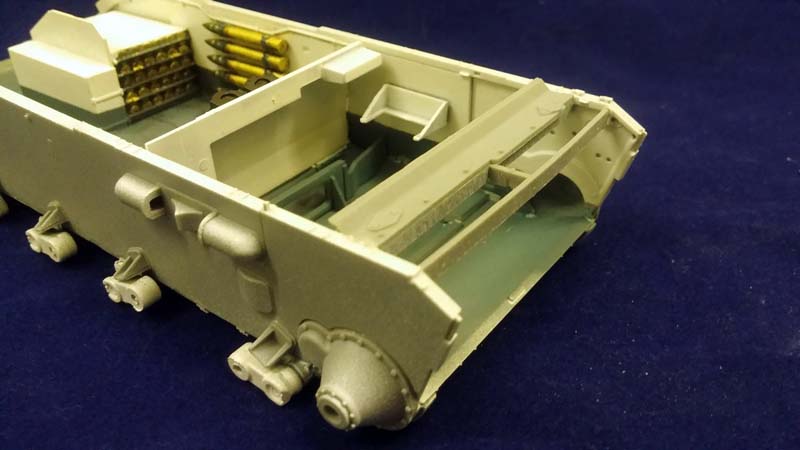
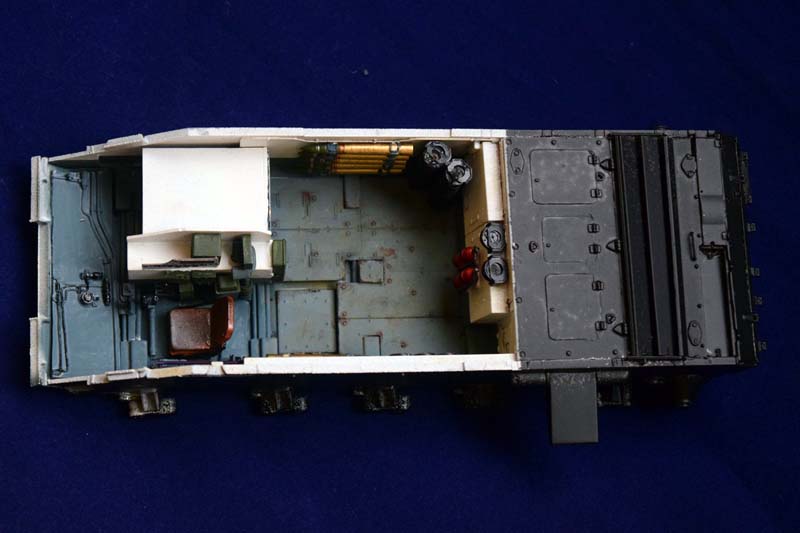
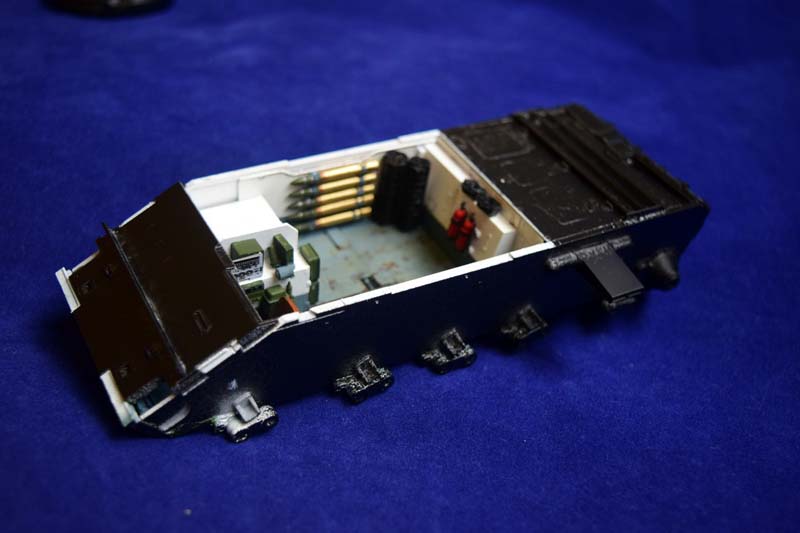
Ammunition (photos 34-36)
Since there is an interior provided, there is the task of painting the ammunition. MiniArt provides a lot of extra pieces, so make sure you dont do extra work, unless you really enjoy painting ammo casings and shells. The instructions give an extensive guide to paint them; there are several colors needed to be used on the shells themselves. I was a bit lazy and only painted the pieces of ammunition which would be visible completely; the rest of the shells received only the green overcoat, and the copper color for the casings. (They would be covered by the fully painted ones once installed into the racks.)
Ive tried AK Interactives metallic wax colors to paint the shell casing, but it took ages to dry. When I tried to polish it, the paint simply rubbed off even a week after application. Perhaps a completely matte base paint would help the paint stick to the surface better next time; the finish is not as smooth as I hoped it would be. As a side note: I used steel from the same paint range for the breech of the gun, and it did adhere better; the difference was the base coat the gun was painted with Tamiya matte acrylics first. (I will need to figure out how to use these paints properly. Normally I use Citadells gold/shining gold/copper colors to paint shell casings.)
Its safe to say that the preparation and painting of the ammunition took almost as long as the assembly of the rest of the interior; having a good podcast to listen to is very useful in this situation.
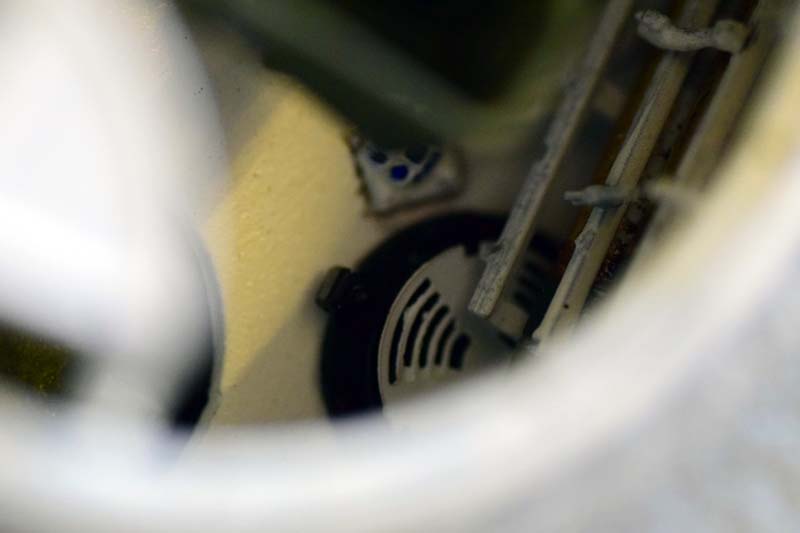
Interior (photos 37-49)
The finishing of the rest of the interior is a very straightforward process. All the pieces can be built, painted and weathered separately, yet I would suggest assembling the lower hull as soon as possible, and once its finished, only then proceed with the rest of the details. I decided not to add too much rust and streaks to the interior, as most tanks Ive seen on photos and in real life were relatively clean in the inside. I did add some dirt, and some rust, but I tried not to go overboard. (I worked on the floor plates a lot more though. I did apply some serious wear-and-tear to them, as to the horizontal surfaces of the bottom of the turret.) I built a somewhat accurate (but not very accurate) drivers station using an AM set for the T-55 by CKM (some parts I adopted, some like the pre-painted instrument panel- I left alone). Its not accurate, but at least there is something there. (The basic outline of the T-44 and T-55 drivers station are similar enough, though.)
Once everything was in place, I proceeded gluing the hull together.
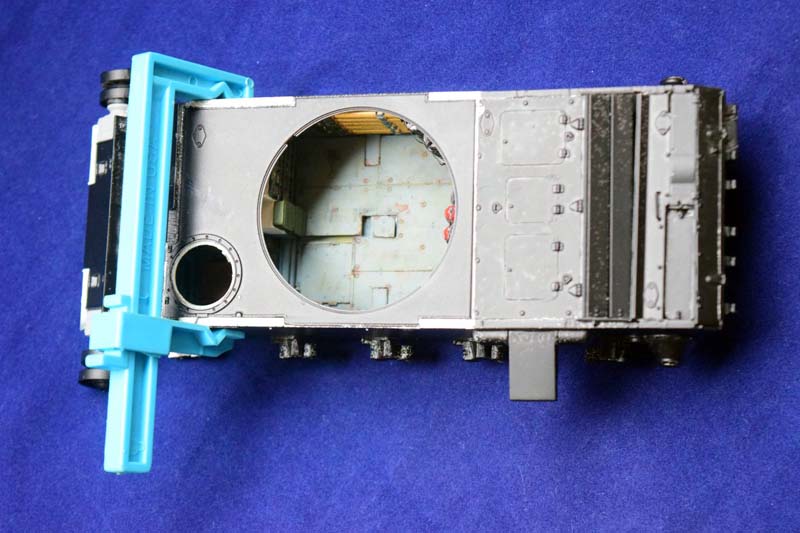
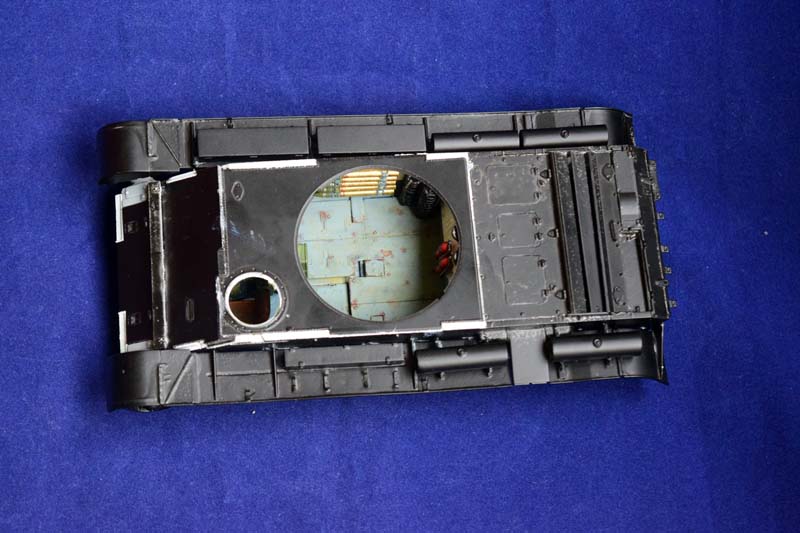
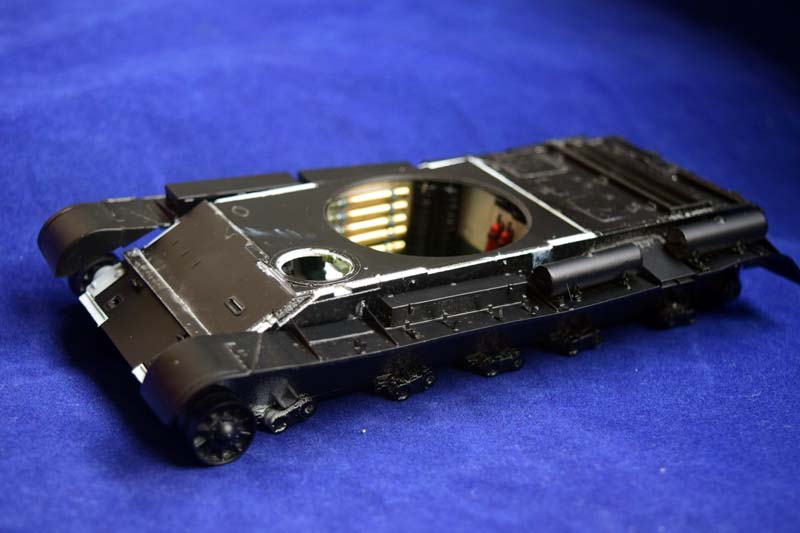
Lower hull construction (photos 50-58)
Well, there were some fit issues here. Most of it is easy to deal with if you are patient, and go section by section. I started from the back, and went forward, clamping and gluing the hull in sections. There were some minor gaps remaining (see photos). These were easily filled, and would not really be visible anyhow once the running gear was in place. Nevertheless it was not a shake the box and done affair; this is why I suggested to start with this step before you assemble and paint the interior.
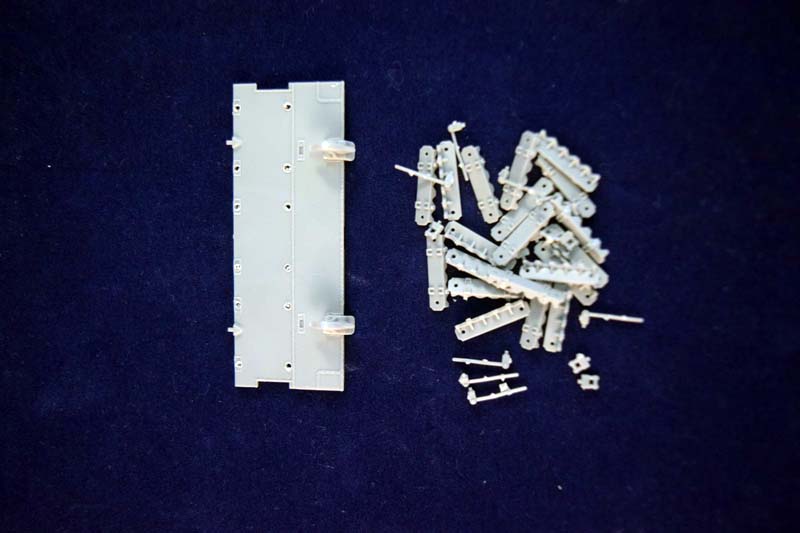
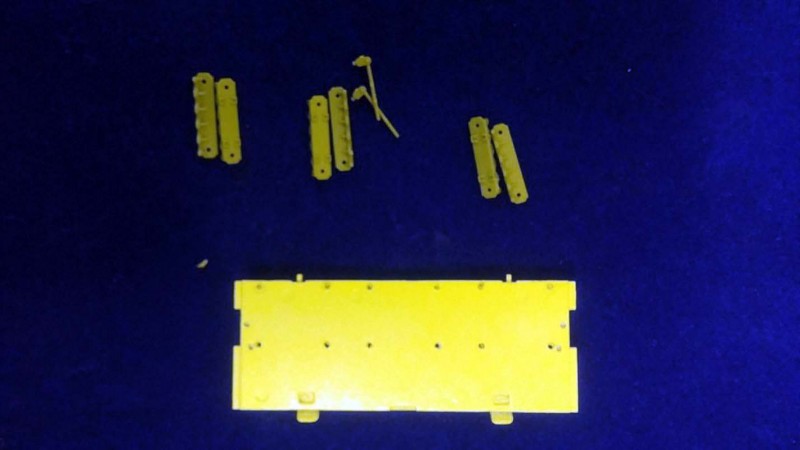
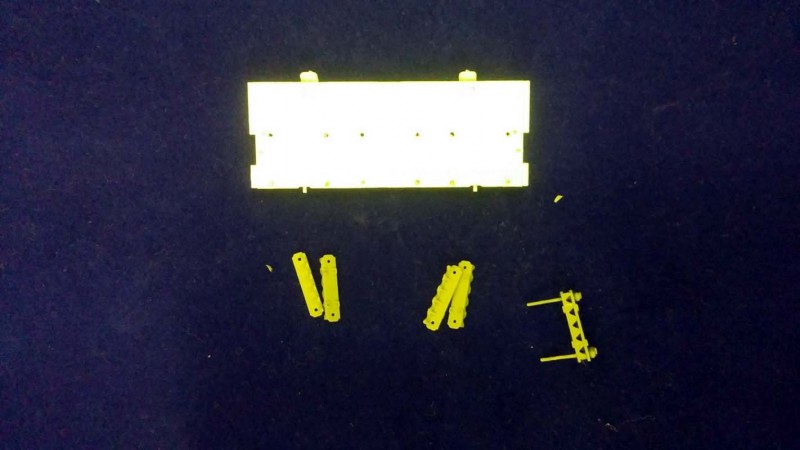
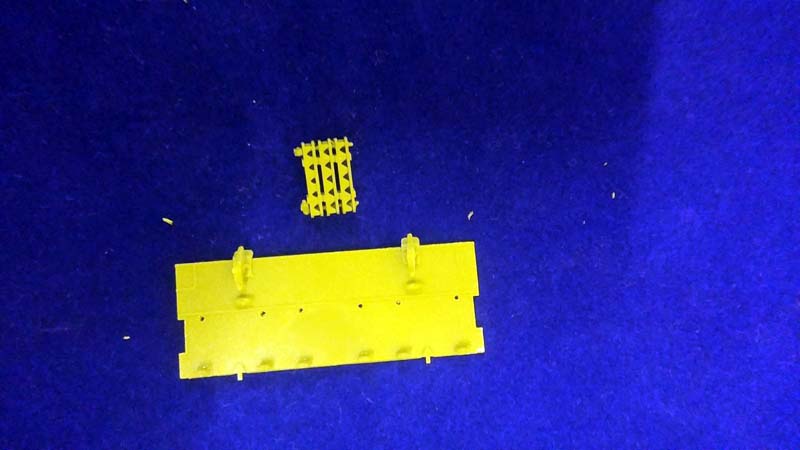
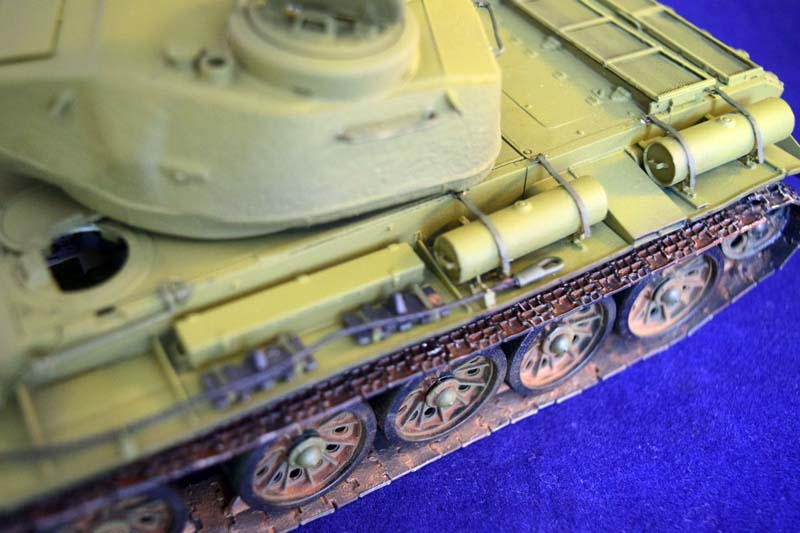
Grousers (photos 59-64)
The grousers for the tracks are mounted on the back on a special rack. The straight poles that are holding the grousers however are very difficult to clean. The parts are tiny and thin, and the sprue attachment points make it really difficult to make them smooth enough so that they fit into the holes cut into the grousers. First of all, its worth slightly enlarging these holes. (photos 60-61) Second, its very easy to snap these thin parts when you try to clean them up, so its better just to cut them off completely, and use styrene rods. (see photo 64) I apologize for the quality of the photos; it took those with my phone instead of my camera, and the white balance was somewhat off; you can see it on some other photos as well. Lesson learned: DSLR only from now on.
Theres also a slight mistake on the last set: only three pairs of grousers need to be put into one holder; I went overboard and did four (I guess I was happy that I found a simpler way than to try to clean up some fragile piece of styrene, and just kept going.) It would have been very nice if MiniArt had shown us how to apply the grousers to the tracks themselves; Ive very rarely seen these in use on models.
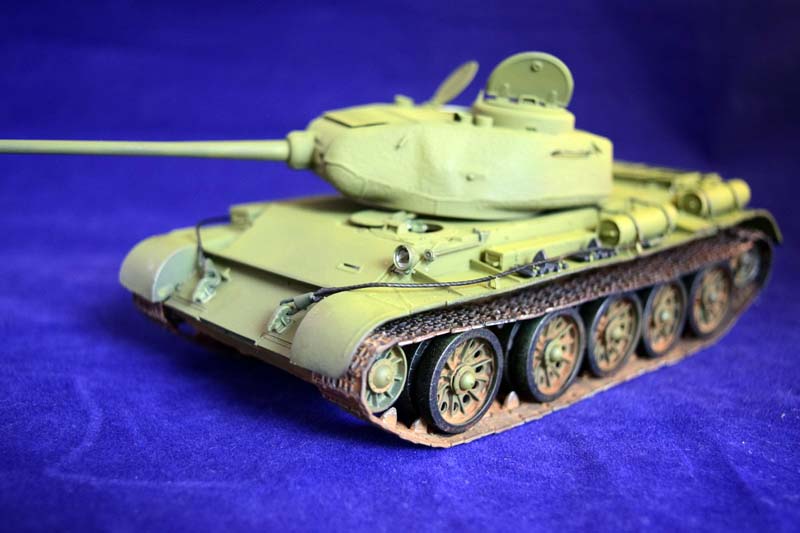
Assembly (photos 65-73)
Well, this is when the tank started to take shape, and resemble an AFV. The top of the turret was glued in place finally, hiding a lot of the details in the interior. (I was tempted to do a cutaway version.) Interestingly the turret roof is a very thin piece of plastic; I think its pretty close to scale thickness. (I dont have the instruments to measure it accurately, though.)
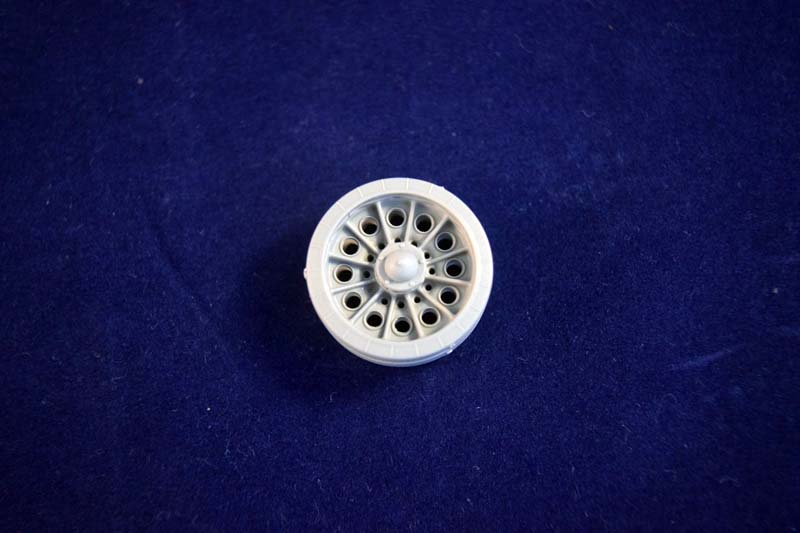
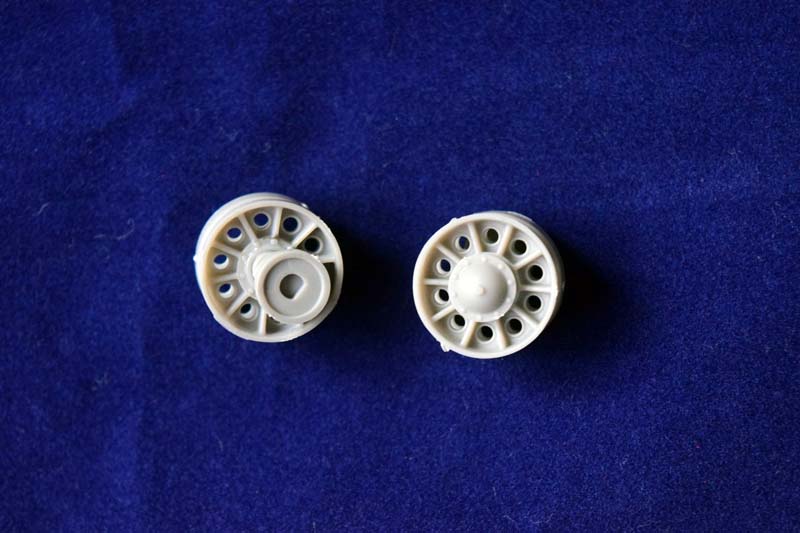
Road wheels and return rollers (photos 74-75)
The road wheels are simple to assemble, however, the peg that supposed to hold each wheel is tiny (about 3 mm long ) in theory you can assemble the wheels so that these pegs can rotate, but I did not bother with this; they were glued in. I also used epoxy glue, as I said, to make sure the wheels stay in place once attached to the swing arms and since I will display the model on a flat surface, I also glued the torsion bars in place... Leave the return rollers and the drive wheels off; the tracks will be simpler to attach if you attach them together. The tracks are really nice; the detail is very good on them, but as I mentioned, they are not workable. You will need to glue them on. I could not put the whole 70 link assembly together without it coming to pieces, so I just assembled sections, applied thin model glue to the joints, waited an hour, and then put them in place. Once the tracks were dry, I removed them (I left them in two large pieces on each side), painted and weathered them, and glued them in place for good.
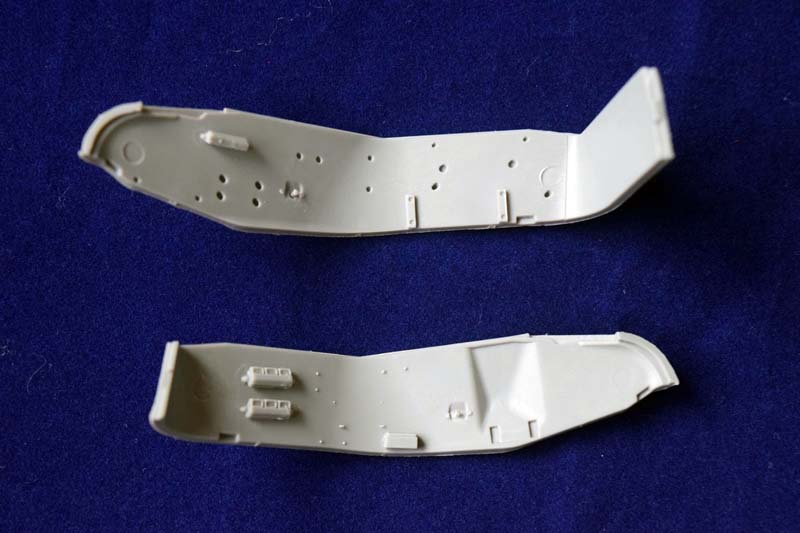
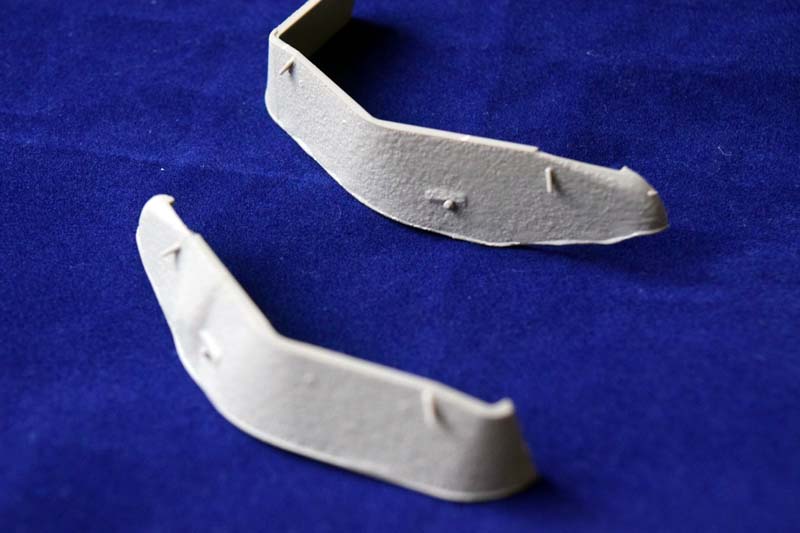
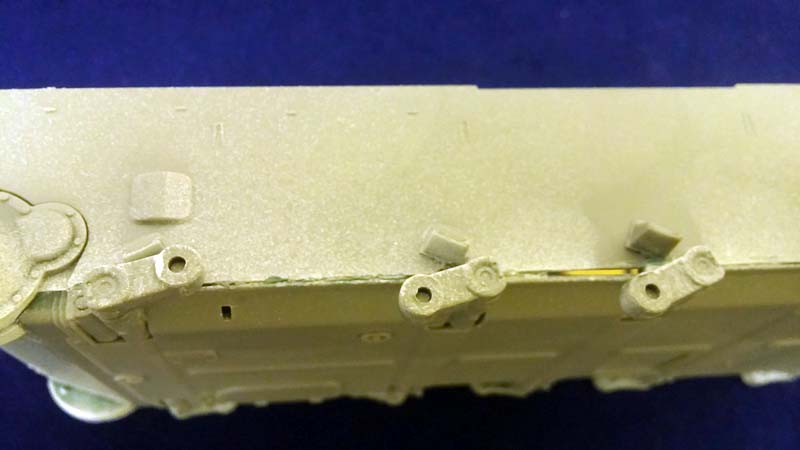
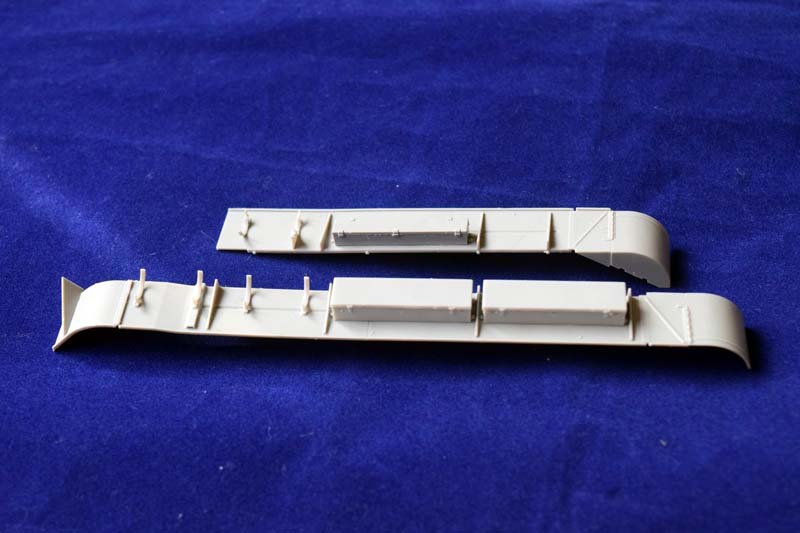
Mud guards (photos 76-80)
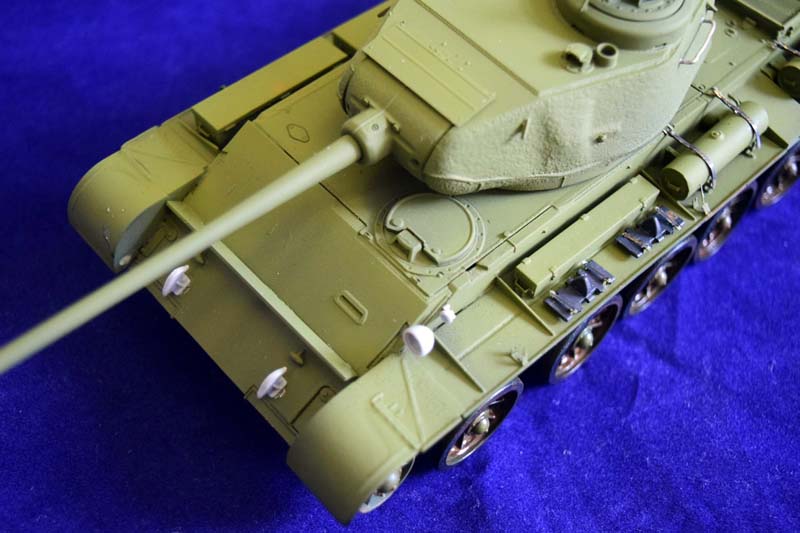
I chose to attach the mudguards before I installed the running gear; I think it would be better to do the other way around. The detail is pretty good, and the assembly is straightforward to build. The problem is that the attachment to the hull is somewhat problematic. First of all, there are no locating holes on the sides for the little pegs on the mudguards; you either drill these out, or cut the pegs off. Once everything is on, the PE straps holding the external fuel tanks need to be installed. These are two-part assemblies each: one metal strap and one tiny U shaped part that is originally welded to the hull, and used to fasten the strap to.
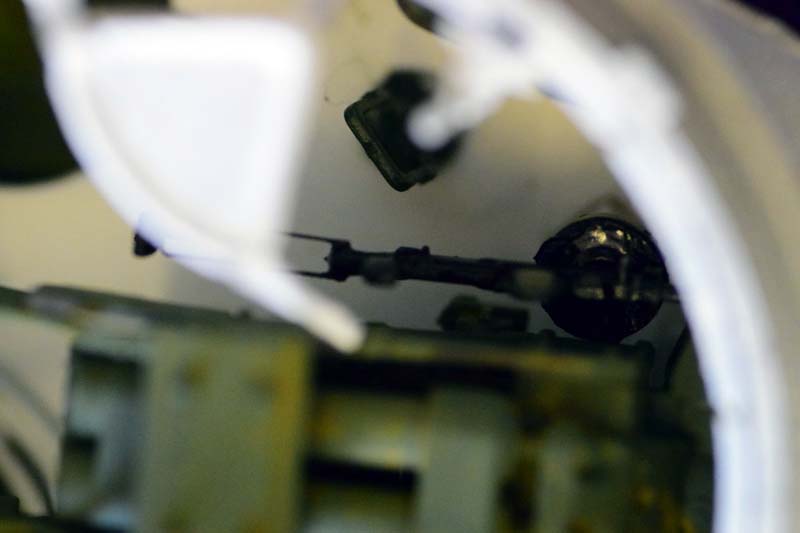
Turret interior (photos 81-88)
As I said the turret interior is incredible, and fortunately most of it can still be seen if you peek from underneath. (Less so through the hatches.)
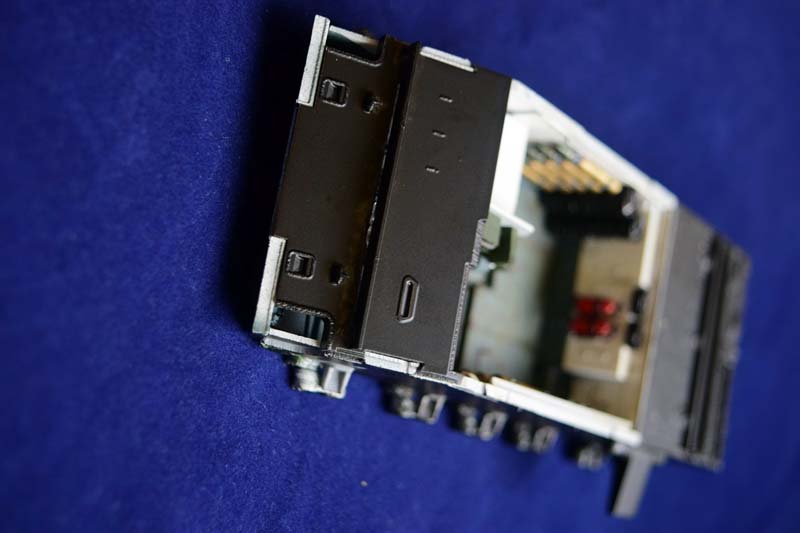
Finishing the assembly of hull (photos 89-98)
Once all was done inside the hull, I started to add the armor plates protecting the front and the top. The frontal, angular plate fitted perfectly. (I would suggest leaving the splashguard off until the front plate is in place.) The top plate is probably scaled so that its scale thickness (its noticeably thinner than the side or frontal plates), however, there were some fit issues with it. Nothing that some patience could not solve: I went ahead and did what I did with the hull and the mudguards, and glued it on section by section, while holding the hull in place with clamps. Once the model was reasonably ready, I added the extra bits which I left off. I usually attach the tools, headlights, etc. last, so that I dont damage them in subsequent steps of the build.
There is one major problem with the turret ring: the turret does not fit well. As usual with tank models, the turret is attached by sliding two little pegs into two corresponding openings, and then rotating it. This should lock the turret in place. The problem, as far as I can see, is that these pegs are very tiny, and simply do not hold the turret (or cannot click into place to begin with). Gluing a bigger piece to the turret to hold it better might solve this issue. The problem is for me is that the tank was ready when I ran into this, and its difficult to play around with it without breaking parts off. To be honest I was thinking about displaying the turret on a stand to show off the interior better, so I might side-step this issue; it would be a shame to glue it in place, as it would hide all the interior details.
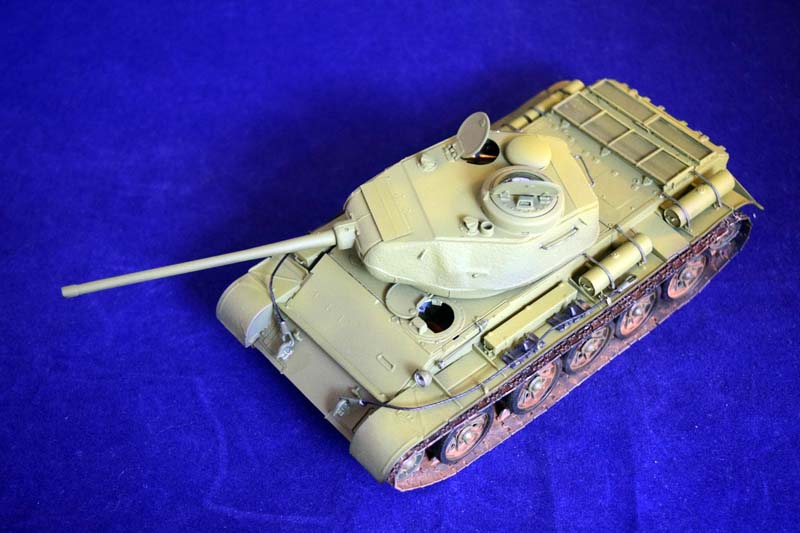
Basic green coat (photos 99-106)
Ive layered successively lighter coats of dark green over the model, and declared it ready for the review.
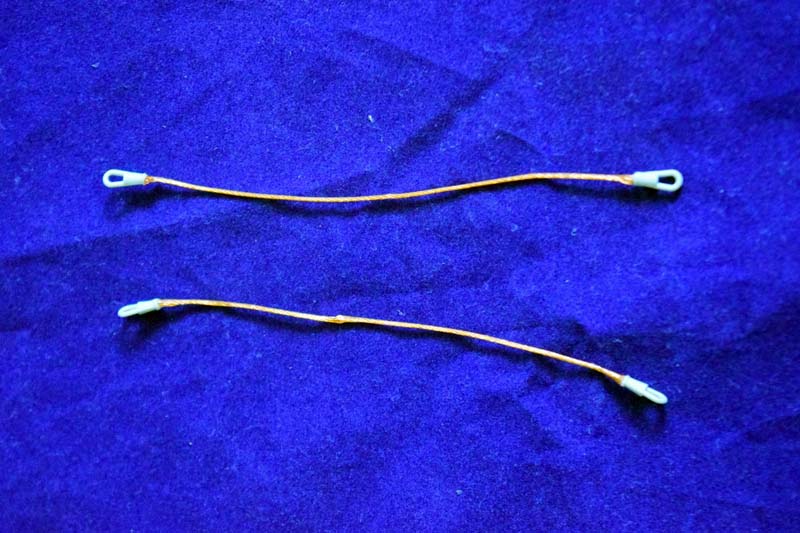
Tow cables (photos 107)
The tow cable provided with the kit is a plastic one; it has great detail, however, the plastic is not flexible enough to be bent into shape; it will snap as soon as you try to install it. My solution was simply to cut the ends off, and use metal cables. This is definitely a part you will need to replace.
Finished model photos 108-
Im planning to try the Windex chipping technique later on, so I deemed safer to call it a day for the review it in this stage in case something goes wrong the blog, however, will be updated later on. I really enjoyed the build. The model is accurate, and the build was not very challenging overall, the results look great, even though I did encounter a couple of problems on the way. With the exception of the turret attachment, nothing was overly difficult to fix. (If you keep in mind the problem with the turret ring from the beginning of the build, its probably a much easier hurdle to overcome.) I did highlight all the problems I came across, but I hope it does not detract from the fact that his model is a really nice, detailed model of the T-44; I can recommend it to anyone with a couple of kits under their belt.
SUMMARY
Highs: rare, important subject, partial interior, great instructions, generally good quality.Lows: no drivers compartment, some plastic parts break, small attachment points for road wheels, some fit issues with the hull, turret does not lock into the turret ring, no metal tow cables. The tracks are not workable (the instruction sheet says they are).Verdict: a moderately challenging build of a really rare subject; recommended.
I am a biologist by trade, and as a hobby I've been building scale models for the last twenty years. Recently I started to write reviews of the models I bought. These reviews are written from the point of view of an average model builder; hence the focus is on quality of the model, how easy it is to...


Comments