Introduction
Its worth pointing out before I start that I had an idea for a small vignette which meant that I wanted to model this as an abandoned vehicle. To this end I have left quite a few details off or modified them to show items that have been borrowed or removed over time; in particular some of the interior fittings, instrumentation and exterior tools and fittings. As I go through this write up Ill detail what I have left off and modified.
Review
The first step of the instructions
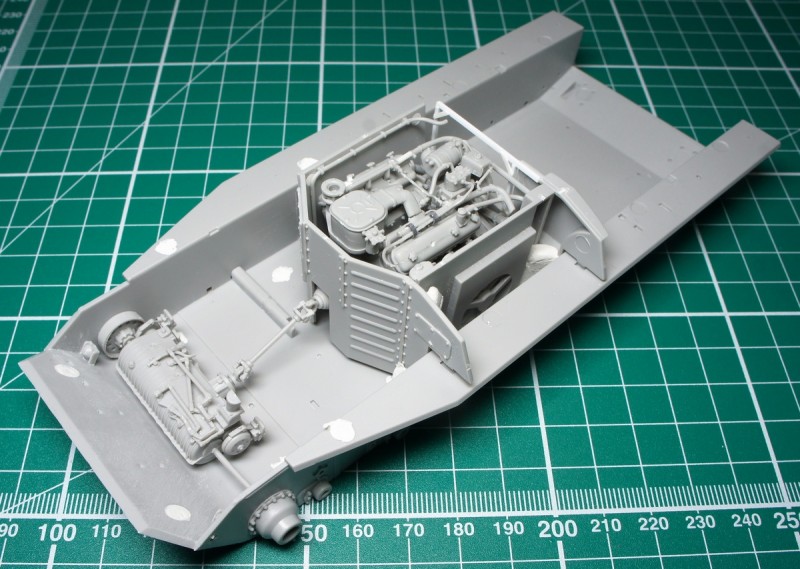
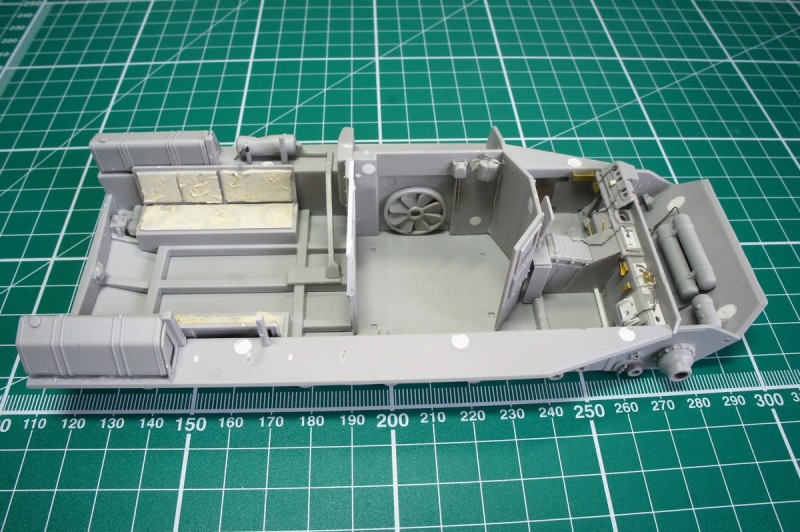
Trumpeter has you fit a few of the smaller interior hull parts and fittings. If youre going to display the hatches open, I would suggest that before doing this you will want to fill a few of the punch marks in the lower hull interior. A lot of these will be hidden by the rear seats and engine bay, but a few of the forwards ones will be visible. I would have liked to have seen a hull floor here, but mine is going to be a derelict so I will be putting a lot of gunge in the bottom which will hide this area anyway.
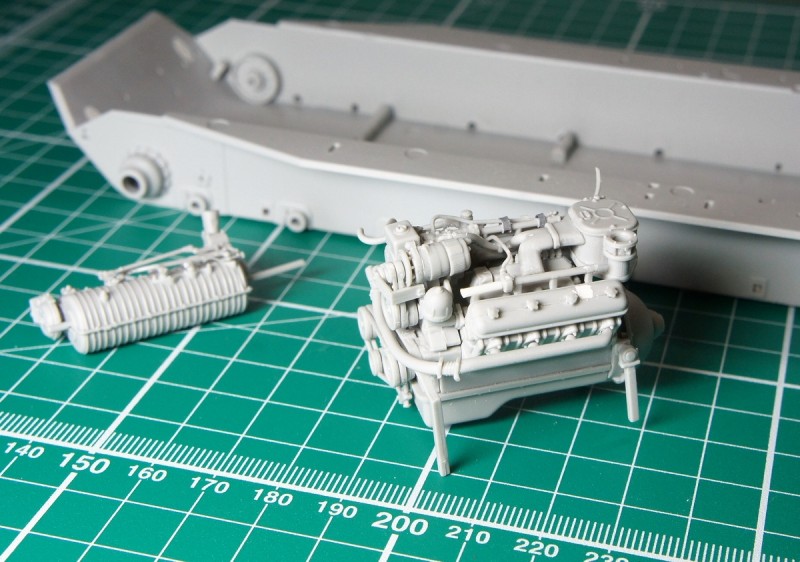
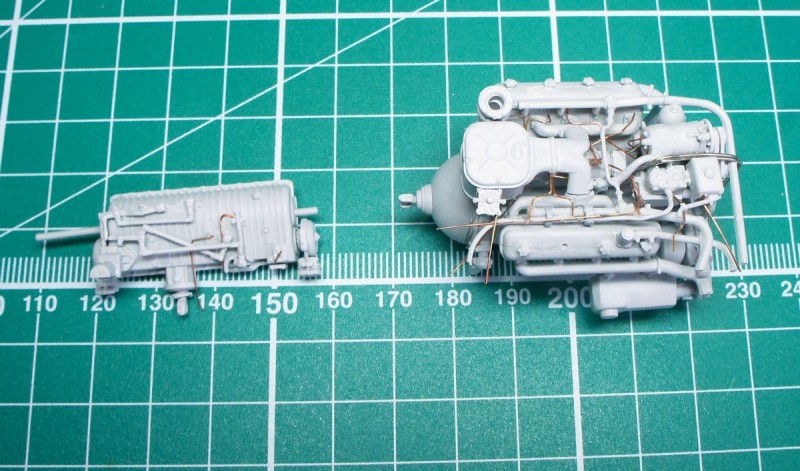
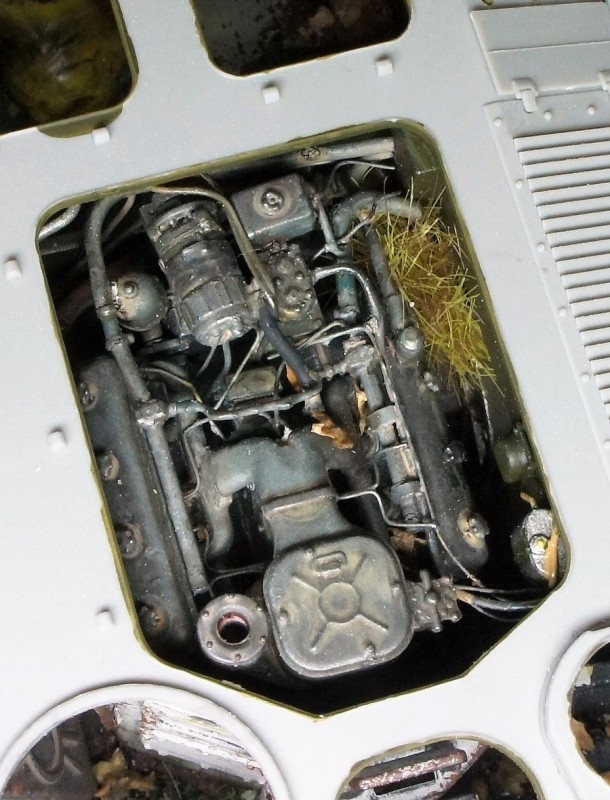
Moving onto step 2 the gearbox falls together nicely although many of the control rods are very fine and take some careful removal from the sprues. Looking at reference pictures the gearbox looks great although a few fine cables and wires wont go amiss. The bulkhead in front of the gearbox is a bit bare when compared to photographs: I added the tube sticking out from the centre point here but didnt go overboard. I have referenced some walkarounds above that will help in this area.
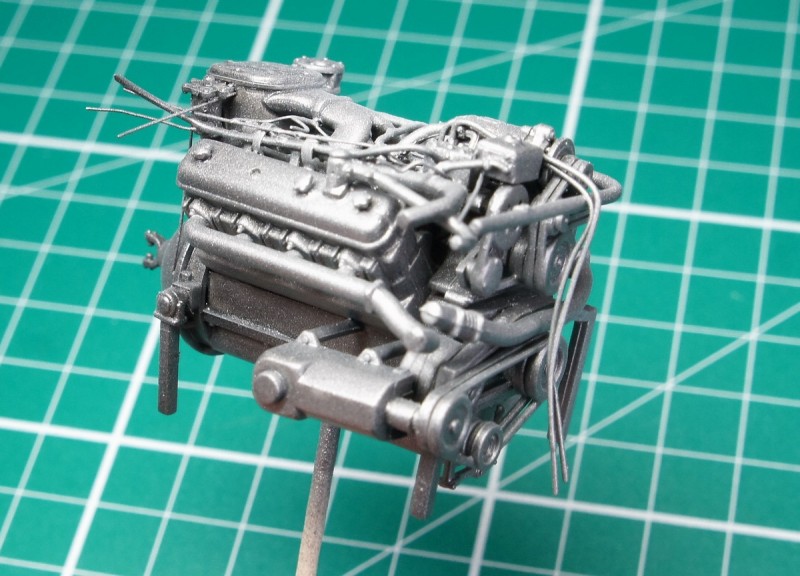
Step 3 starts the epic engine build. I think I have honestly built full kits that are less complex and with fewer parts than this! Sadly, if you flick forwards a few steps in the instructions you realise that only the top of the engine will be visible when fitted into the engine bay. There are a multitude of extremely fine parts that make up the engine; and sub-builds that once fitted need to align to have further sub-builds fitted to them. I suggest taking your time and studying the instructions in detail. In a few steps here they are a bit lacking in their exact location of parts jump forward a few sub steps to see what parts fit to them and ensure that parts align. I managed to lose one of the very small B6 parts which fit on top of the piston housing blocks (later found under the cutting mat) I was disappointed that there were no spares of these vey minute parts. In doing build reviews I try to follow instructions step by step but here I bounced around a bit to ensure that all parts fitted. I think I got it right but later on in fitting to the engine bay many of the pipes werent aligned and needed some adjustment and extensions. Again, like the gearbox the engine will benefit from some fine cables and wires to spruce it up a bit. Remember that you will only see the top of the engine Ive again included a link to a good top of engine shot above.
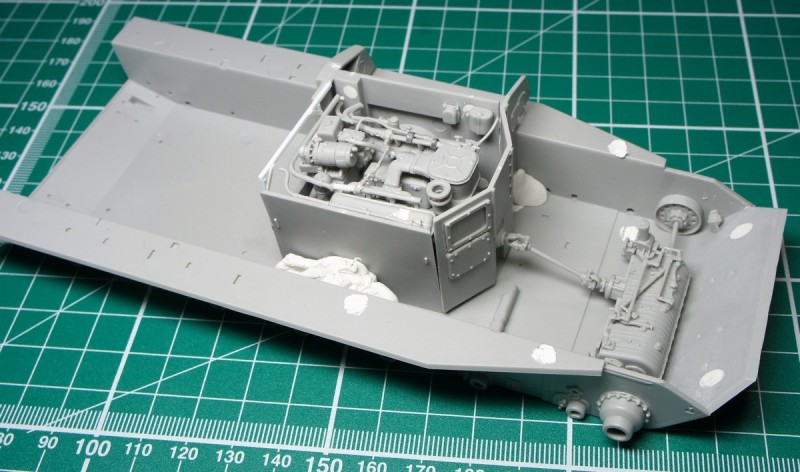
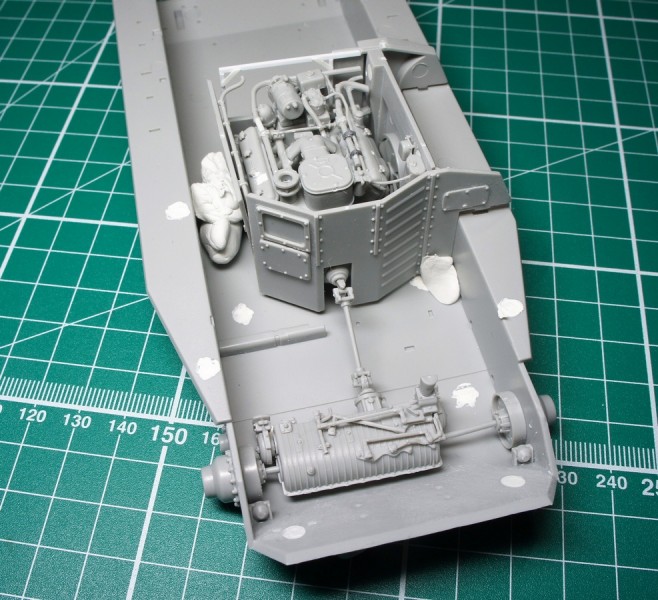
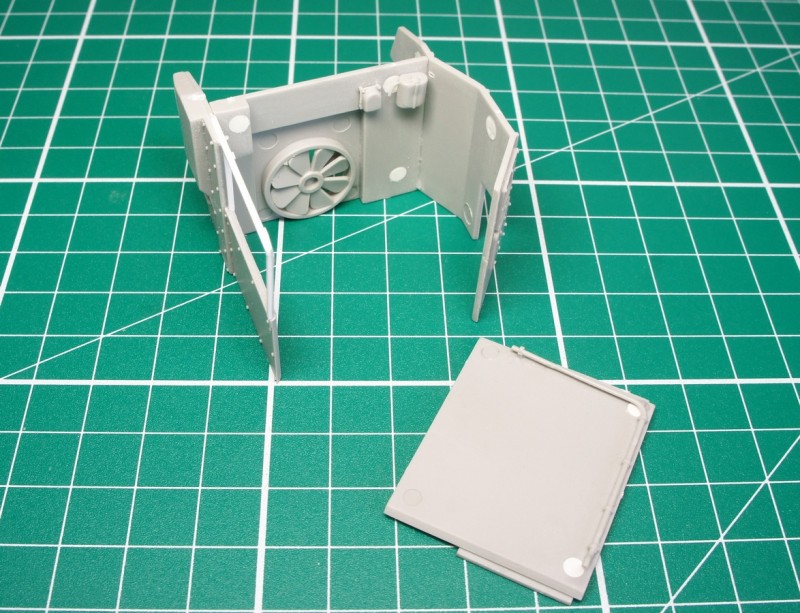
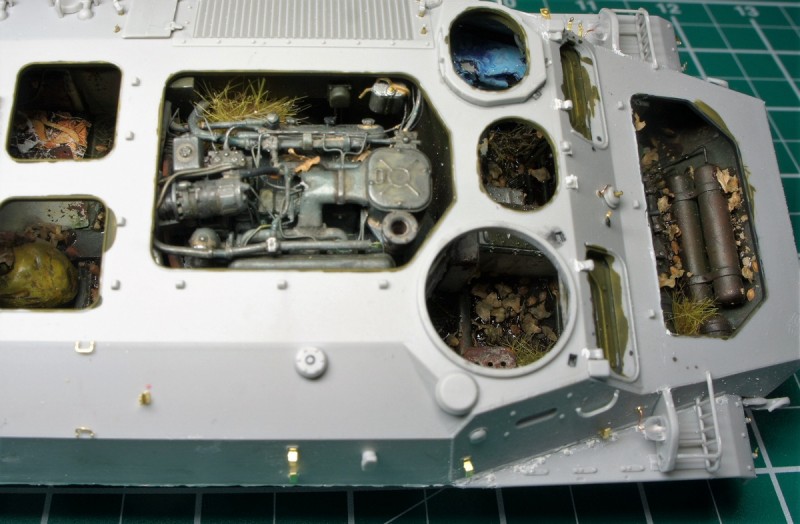
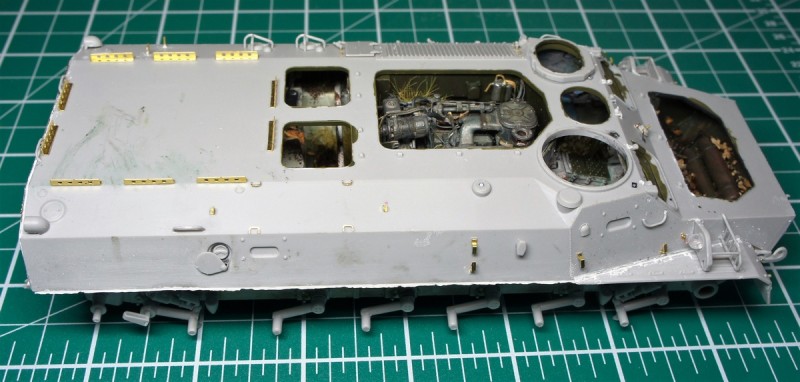
Following on from the engine you build the engine bay walls here I opened up one of the panel walls as shown in one of the walkarounds. This will allow you to see more of the engine once fitted. Once the panel was removed with a scalpel blade I added the interior structure bars and drilled some small fixing bolt holes to show where the panel would be fixed to.
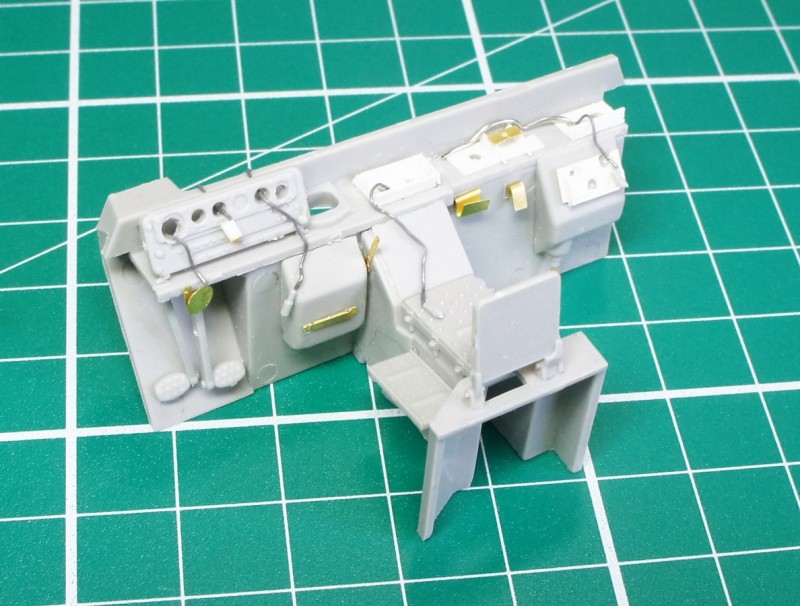
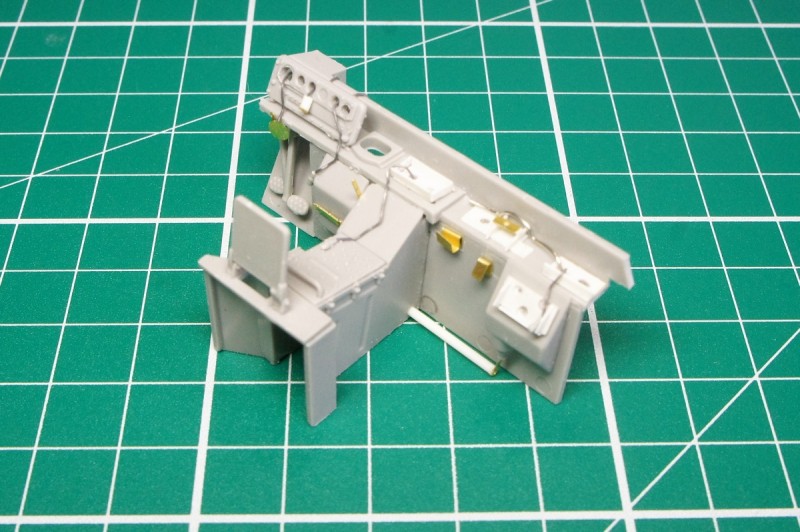
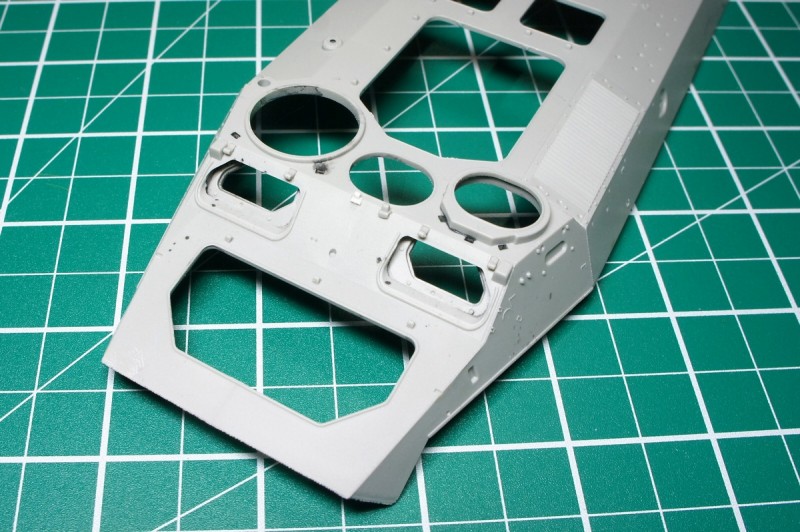
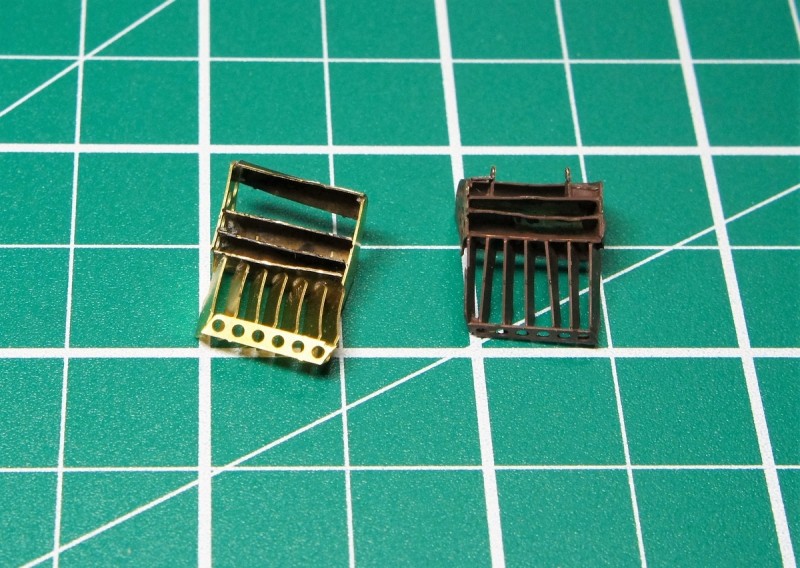
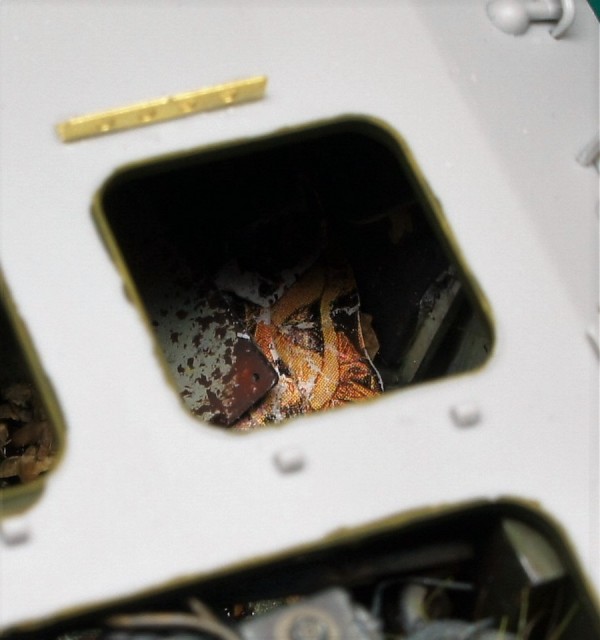
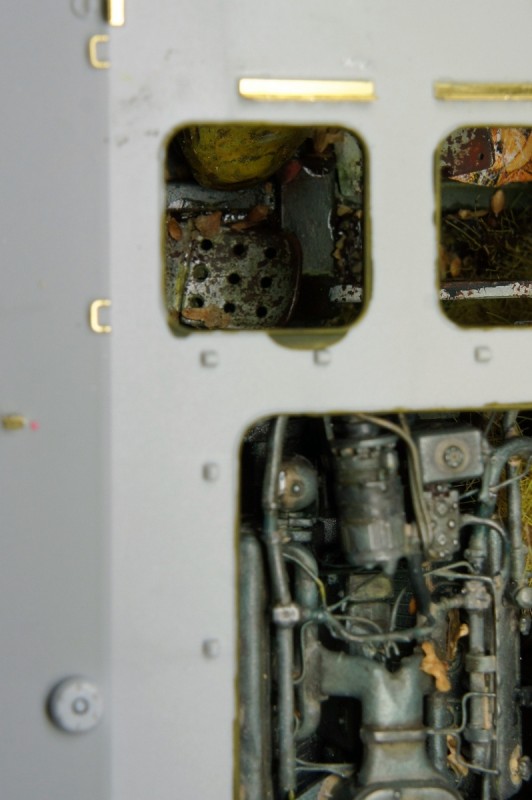
The drivers and commanders positions are next. I followed the instructions here but left off the instruments and added some gizmology to represent fixing brackets for them. Looking at interior walkarounds I notices that Trumpeter seem to have left off the drivers gearstick and gate this is a glaring omission and I can only assume that the vehicle they used as the reference was missing a few parts! Theres also a lot of detail missing from on top of the inner sponsons beside the drivers position. This will be visible with the hatches open so I cheated and covered this area with some folded and torn lead foil representing discarded tarpaulin. I drilled out the holes for the gauges and instruments but left them bare with a few wires hanging out I did add a speedometer type gauge from plastic rod, but also left this hanging from the dashboard. I would suggest adding the handle and locking levers (?) to the drivers steering handles before fitting these very fiddly parts to the control rods. On the commanders side theres a control rod and shaft missing from the lower panel I added these with plastic stock but you have to ask how much is really going to be visible once inside the hull..? I also noted at this point that only the top of the drivers and commanders periscopes are provided despite their lower halves being visible when the hatched are open. I have some leftover etched brass periscopes from an old T-55 kit which I cut in half and added the head pad from solder wire. I also fitted a small hinged cover over the drivers central periscope as this seems to be present in all of the photos Ive seen this part is actually provided in the kit but is not called out in the instructions.
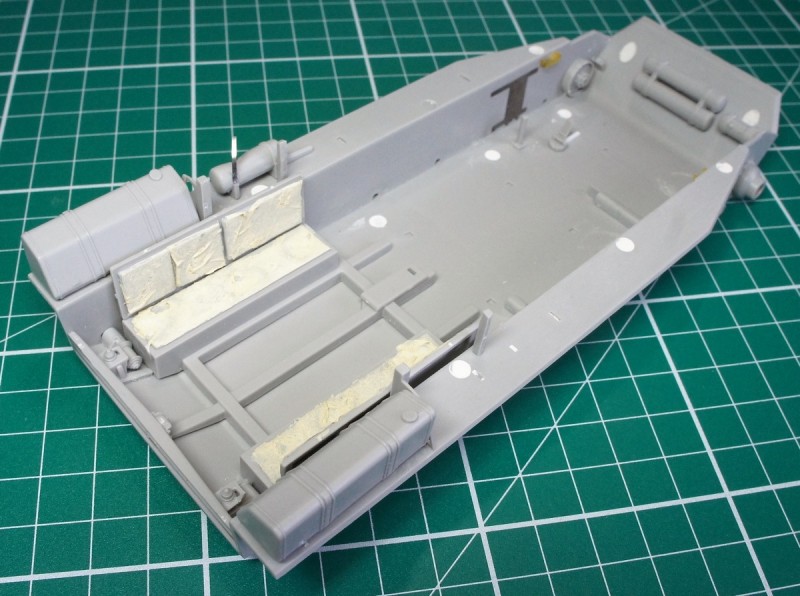
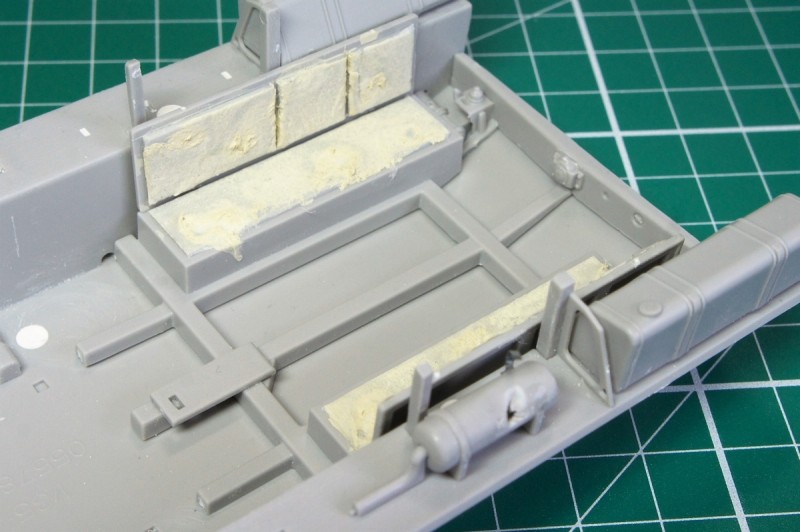
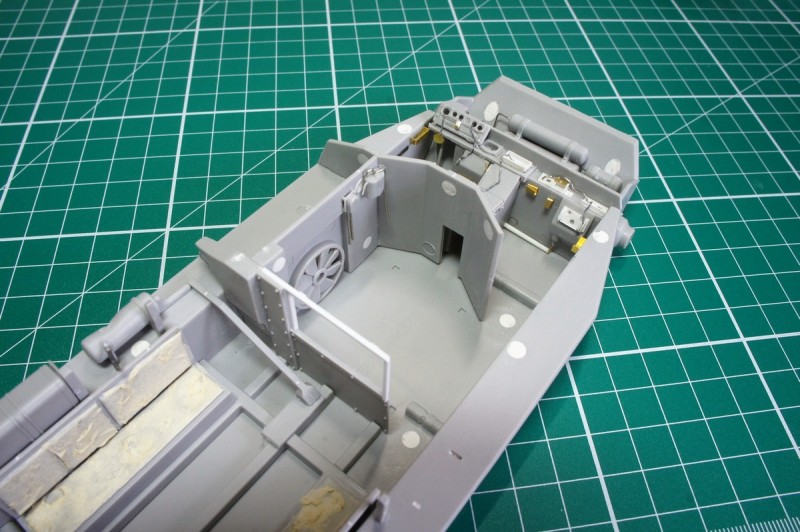
Moving into the rear hull I fitted the lower structure bars and (jumping forwards in the instructions slightly) rear hull wall the fit of this part was poor and I would suggest fitting the rear hull wall first as I think the horizontal rear strut fouls the rear wall dry fit everything! I ended up having to use filler here. Note that in Step 12 Part PE-B5 is incorrectly labelled it should read PE-A1.
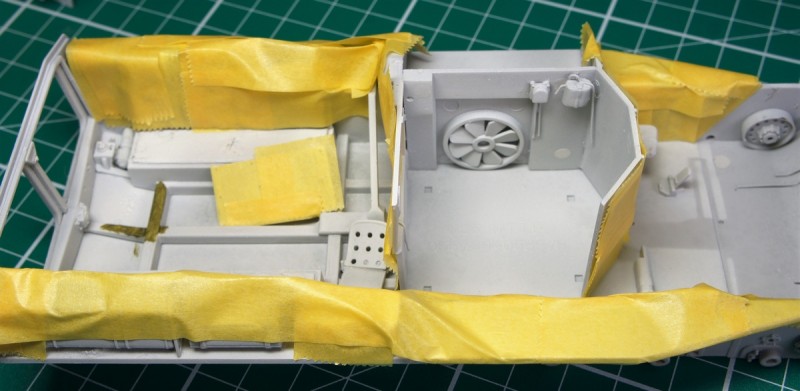
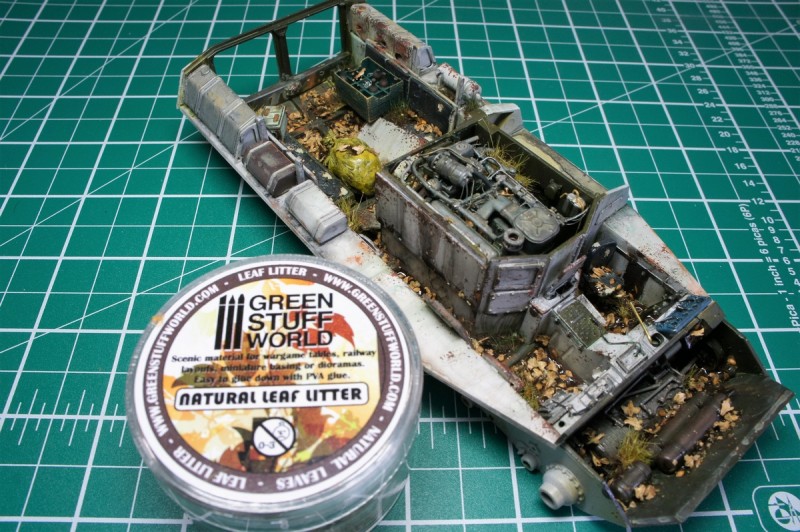
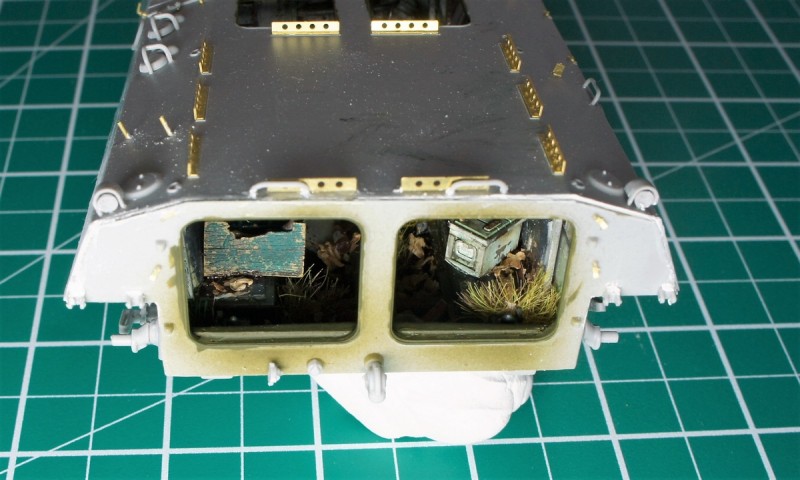
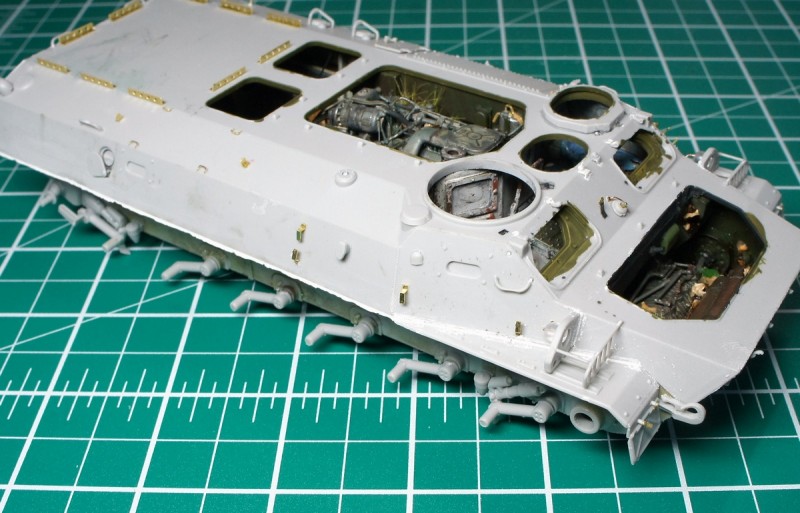
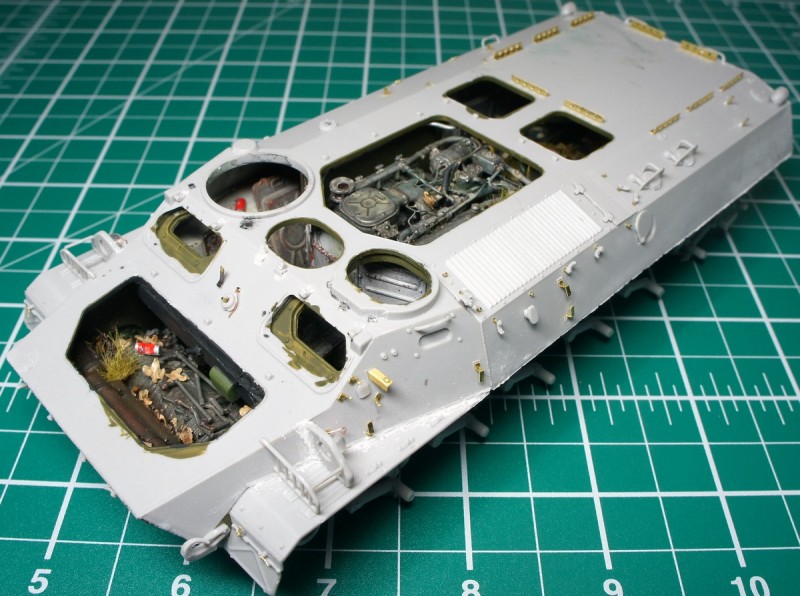
Following this I scuffed up the rear seat covers and added white glue soaked tissue paper over the top of the seat pads. This allows you to tear the covers. I repeated this process on the drivers seat as well. I thinned out one of the fuel drums from the inside and punched through with a scalpel blade to represent rusted through parts. I also placed an Accurate Armour bin bag in here; box of bottles from the spares box and a few broken bottles and cans. At this point I painted up the engine, gearbox and hull interior I wont go into full details here but I used Alclad Flat Aluminium on the engine and gear box and white/olive green on the hull interior Ive seen a number of different interior schemes but the green/white colours seem to be most common. Following this I hand painted a number of detail parts to break up the scheme including some blue on the dashboard. I also added some cables hanging down from the interior hull top and a few hanging from various places in the interior. Knowing that I wouldnt be able to get into the hull once the upper hull was fitted I fully weathered the hull interior at this stage, adding puddles, rubbish, gunge and leaves suitable for a vehicle left with its hatches open for many years. I used
Lifecolor Liquid Pigments weathering products during this phase. Im sure someone will review this in due course on here, but I can thoroughly recommend them. Theyre water based and odourless ideal for someone like me who models in the dining room!
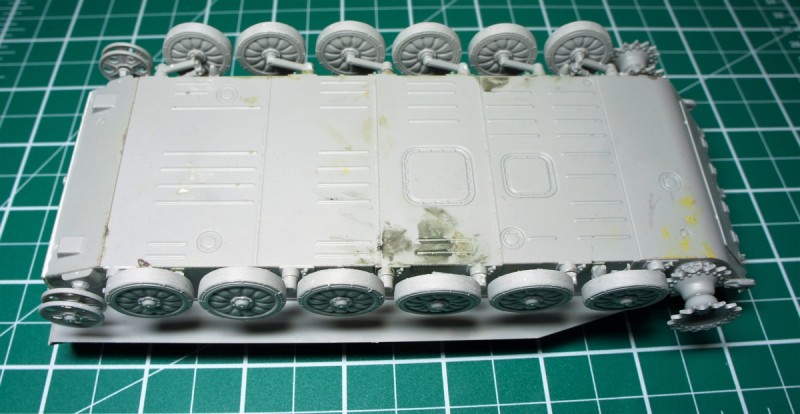
Moving on from the interior the suspension and running gear are fitted next; I sanded the ribs from the outsides of the road wheels. If like me you paint the interior first you may want to ream out the holes for the suspension arms and fittings as the fit is very tight and a layer of paint will make it even tighter! There are also a few fittings to be added to front and rear hull Ill add a note of caution here; this kit is full of minute parts
Id suggest a set of very fine tipped tweezers! At this point I also started the tracks. Ive found with these types of mundane steps that tackling a few at a time helps. In removing the tracks from the sprues I simply bent the tracks backwards and forwards and they fell of the sprue. The tracks click together easily and hold without any glue. I didnt clean them up unless they obviously needed it. Each track only took about half an hour each to click together the 107 links per side. I used a side cutter to remove the teeth and again worked a few links at a time adding them to the tracks.
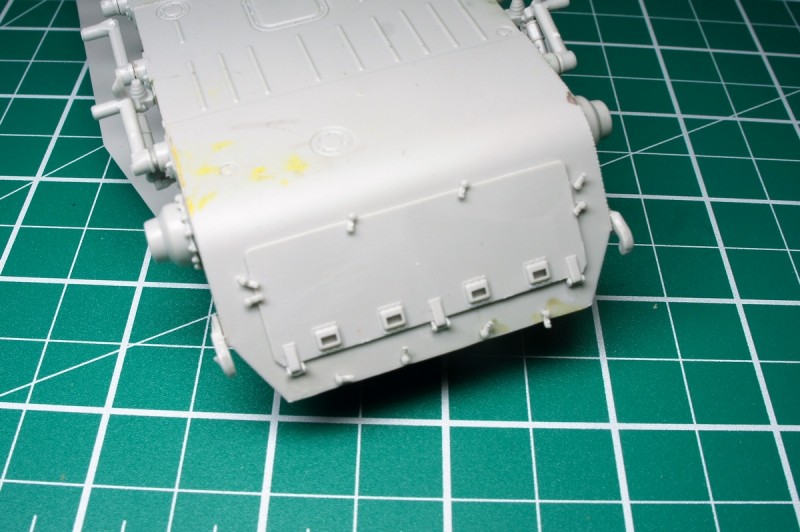
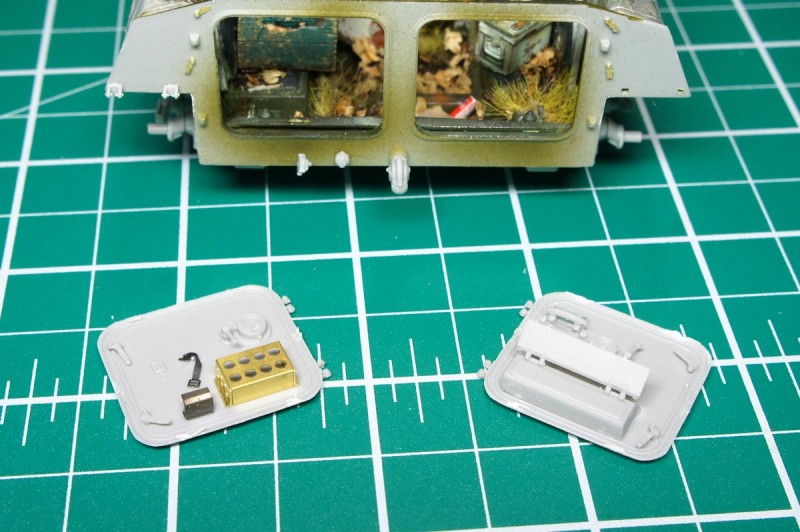
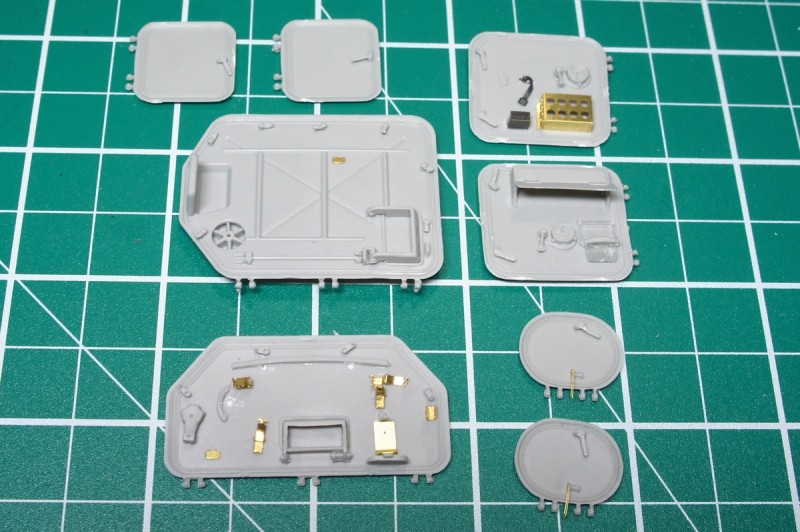
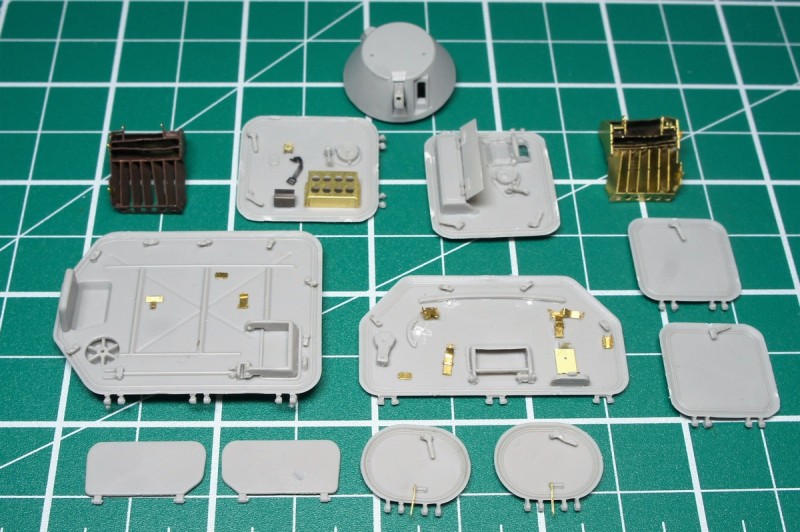
I always find it a relief to get to the end of the tracks and running gear as I find these parts to be the most labour intensive and mundane part of any build; all for parts which will be mainly hidden. Moving on I jumped around the instructions a bit and completed all of the doors and hatches. The upper hatch and gearbox hatch both have tools fitted to their inside I removed these and added clasps and brackets from the spares box. This was a case of if it looks right
The rear mud guards were very tricky as expected. There are a multiple of photo etched parts, many of which need bending along their length. I heated these above a flame before quenching the part in cold water. This anneals (softens) the metal making it easier to bend. I worked a couple of steps at a time allowing the CA to set in-between. Those who a competent at soldering will probably do a better job here but on the walkaround examples Ive seen these parts are always damaged and bent. I was disappointed to note that on test fitting these seem to be too wide as they should sit flush with the side of the hull I may replace these as many examples seem to have either rubber or metal standard mudguards retro fitted in their place.
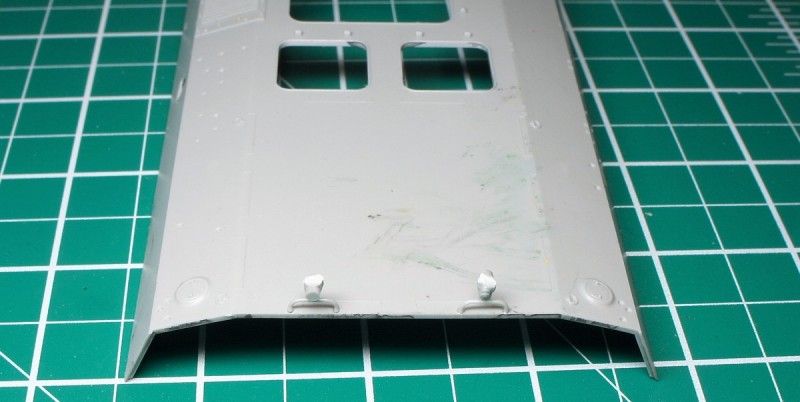
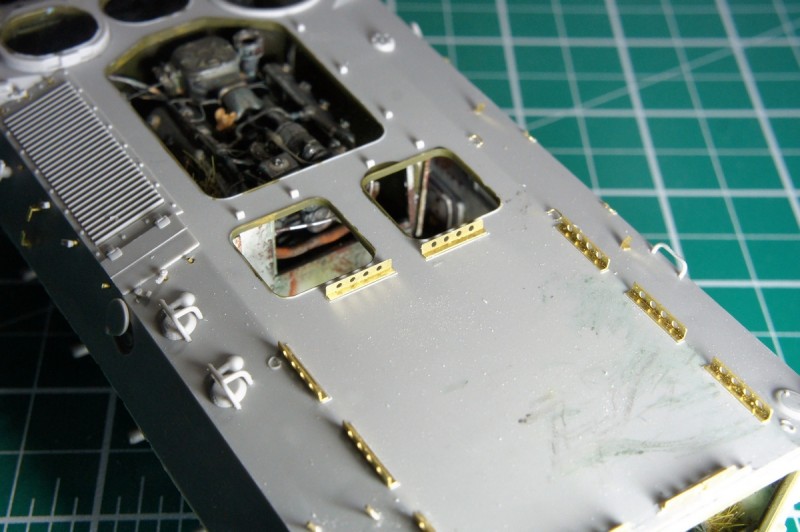
The remainder of the build is concerned with the smaller fittings around the hull. I used a trick here to attach the small parts by leaving them attached to a small bit of the sprue for ease of handling. Once the CA is dry you can cut this off and sand any mould lines off using a sanding stick. The instructions dont show the fitting of the 4 etched brass tie down points on the right side of the upper hull but the mounting points are clearly defined in the plastic. Theres also 2 brackets missing in this area added from spare photo etch. I fitted a bracket for the horn from the spares box but removed the horn. I also omitted the searchlight on the front but again fitted a bracket; I added a cable just above this area as seen in various pictures. I left the spare tracks off the top of the hull and fitted some thin brass tubes as mounting brackets in their place. Again, I left off the mirror arms but used old etch as a mounting bracket to show the mirror removed. I added some fine cable to the rear of the headlights and drilled out a small hole in the hull side for the other end. I left off all of the clear parts prior to painting and remade the drivers window from clear sheet to show it broken.
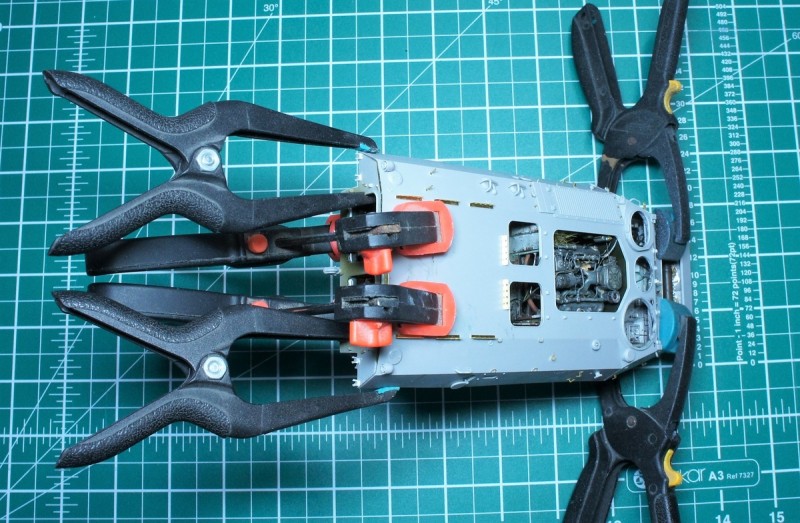
Strangely you fit all the hull fittings before actually fitting the two hull halves together. You may want to fit the halves together before adding any fittings I did have a few fit problems with the hull halves but nothing too big a bit of filler along the edges cleared this up. I ended up having to sand some of the interior parts down slightly to get a good fit and add some filler between the forward bulkhead (behind gearbox) and hull top. I left off all of the hatches and tracks for painting.
Conclusion
I loved building this kit, especially after the dramas of the
Hong Shilka build. I do resent the title of a full interior being present as there are quite a few details missing. The engine and gearbox are works of art but will benefit from the addition of a few finer cables. The tracks are a pain to remove but click together easily without glue; the teeth fit well into their slots but this is very time consuming - at of the time of writing I am still adding teeth to the tracks..!
References
Scale Models Russia Live links
Prime Portal (1) Live links
Prime Portal (2) Live links


Comments