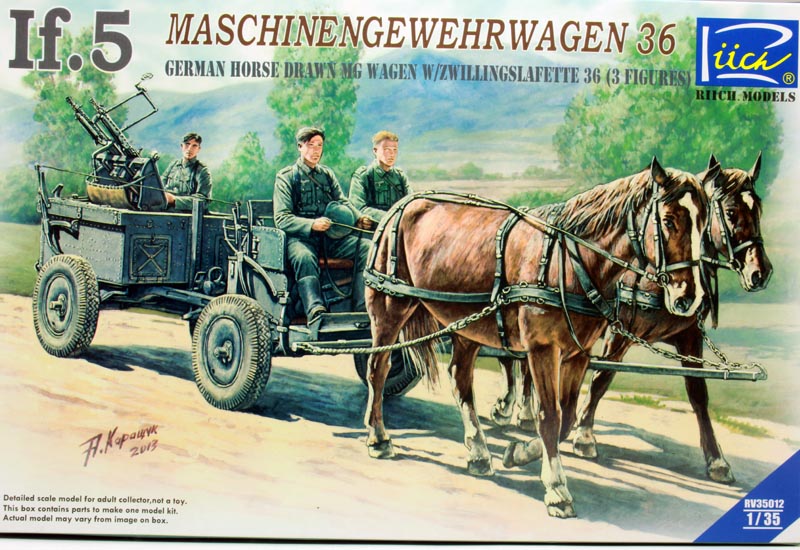
In the 1930s the Wehrmacht still relied heavily on horse drawn transport, using it for scouts, cargo and horse drawn machine gun wagons. The Russian and German armies first used machine gun wagons in World War I, and the Wehrmacht continued using them in World War II. The Maschinengewehrwagen 36 or If.5 was the most common of these machine gun wagons. Used primarily by second line infantry divisions on the Russian front, the If.5 was comprised of a four wheeled wagon in two parts. The rear box compartment carried a Zwillingsockel.36 mounting twin 7.92mm MG34 machine guns while the spares and ammunition were carried in the front compartment , where the driver and his assistant also sat. Normally pulled by two horses, four could be used in bad conditions.
Riich Models released this unusual subject in 2013.
the kit
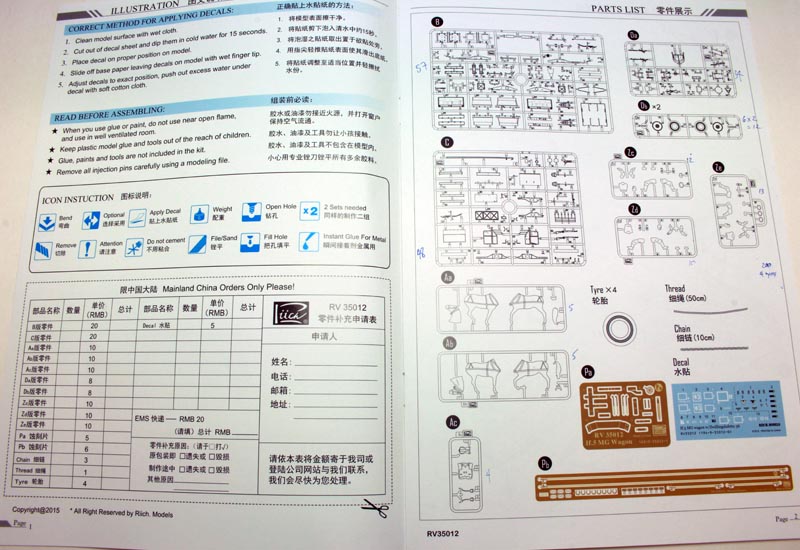
The kit comes in a smaller size cardboard box with some very nice artwork on the top, a couple of paint schemes on one long side and kit contents on the other. Inside you will find a total of 11 sprues of parts, 4 tires moulded in a black plastic or hard vinyl, two photoetch etch frets, a length of thread a length of chain and a small decal sheet. All of these are in separate polythene bags. There are a total of 200 parts plus the tires, thread, chain & PE.
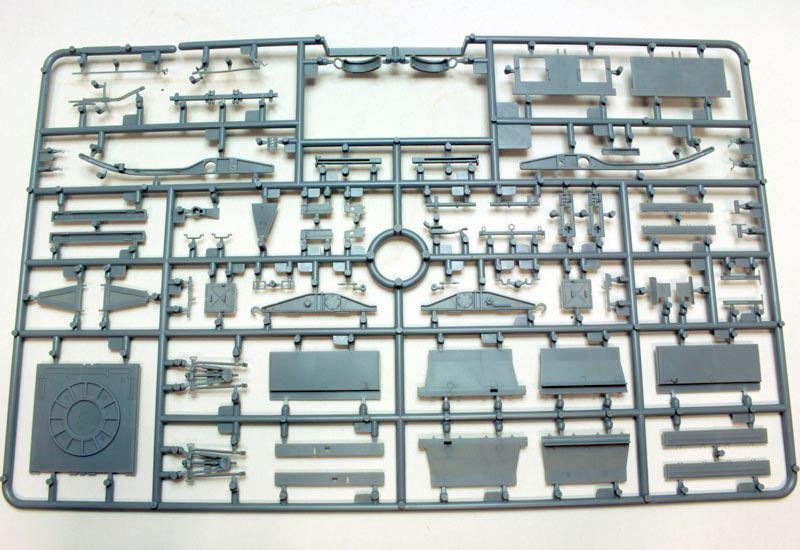
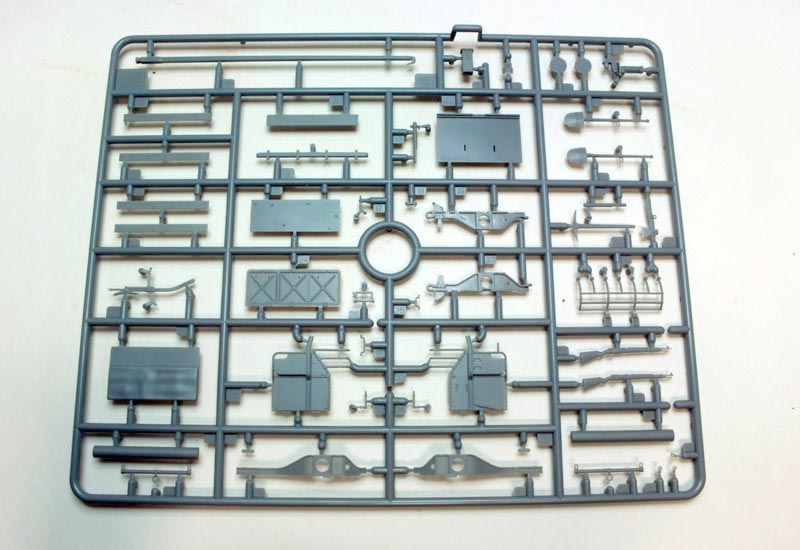
The kit is moulded in grey plastic and the overall quality of the moulding appears very good for the wagon, with sharp details, at first glance the mould lines dont appear too bad but when assembly starts they become a bigger issue due to the small, delicate nature of many of the parts. There is a bit of flash a few ejector pin marks located where they will need some attention as they will be visible after assembly. The horse and figure sprues are moulded from a slightly lighter coloured plastic and have significantly more flash and mould lines.
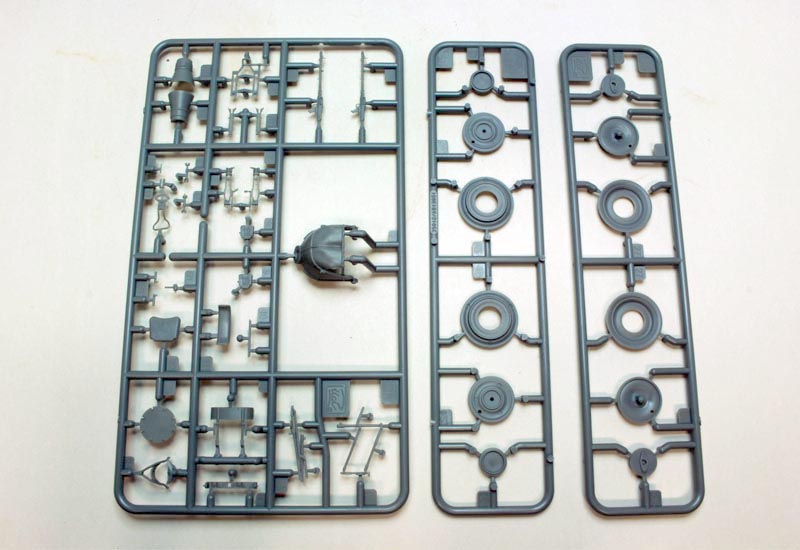
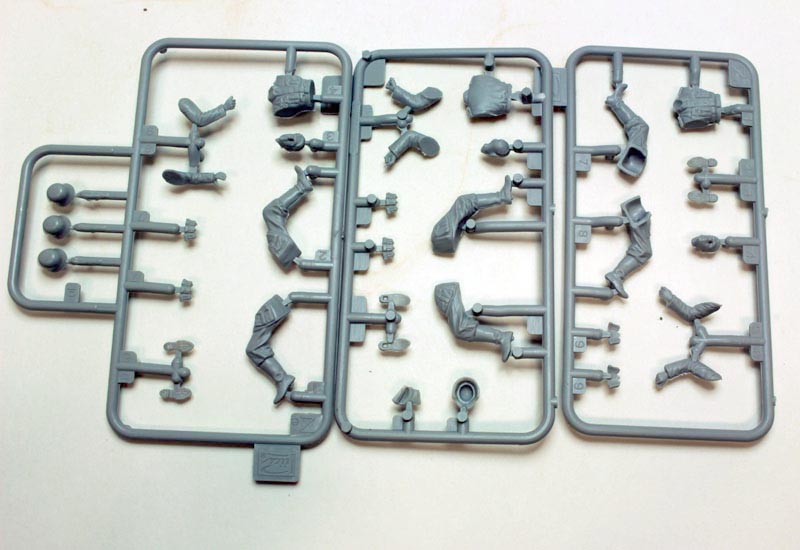
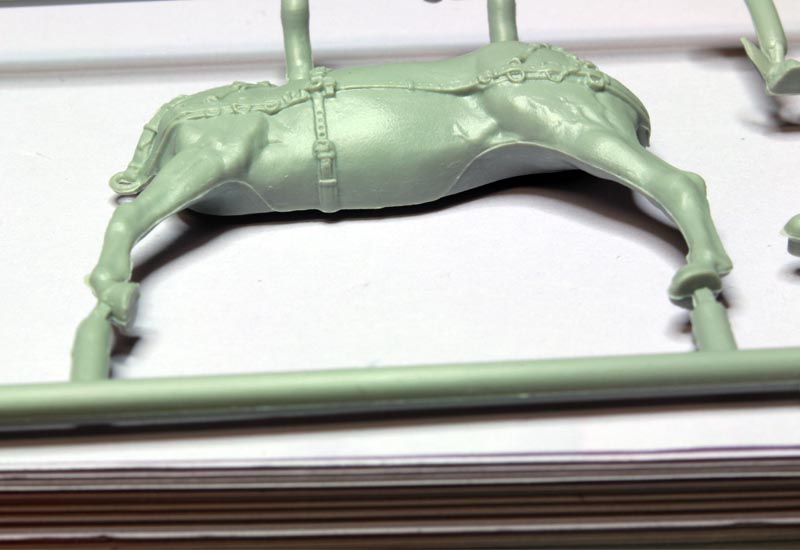
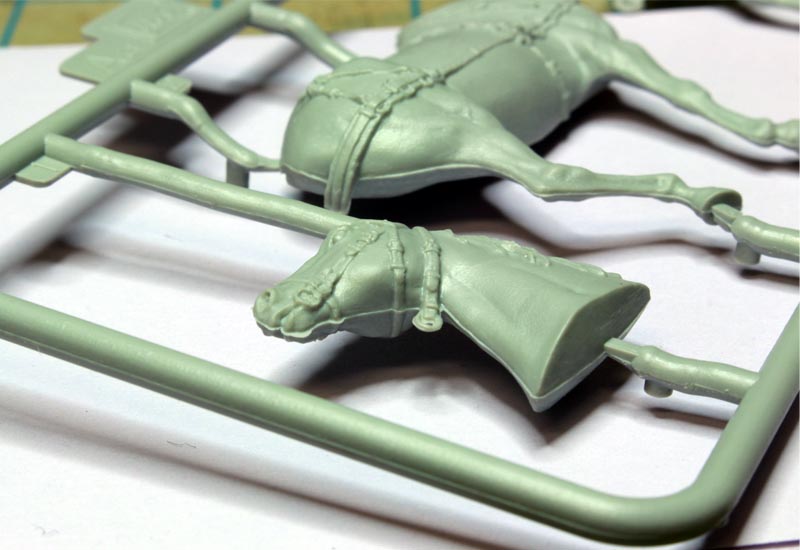
Sprue B, consists of the parts for the rear (hinter) wagon that holds the machine gun mount. Sprue Da has the actual mount and machine guns, while the two Db sprues provide the wheels. Sprue C consists of the front (vorder) wagon, Sprues Za, Zb and Zc include the driver, assistant and gunner. The two horses to pull the wagon are provided on sprues Aa and Ab along with an optional saddle on sprue Ac. The horses and the PE for the harness are shared with Riichs other horse drawn wagon kits.
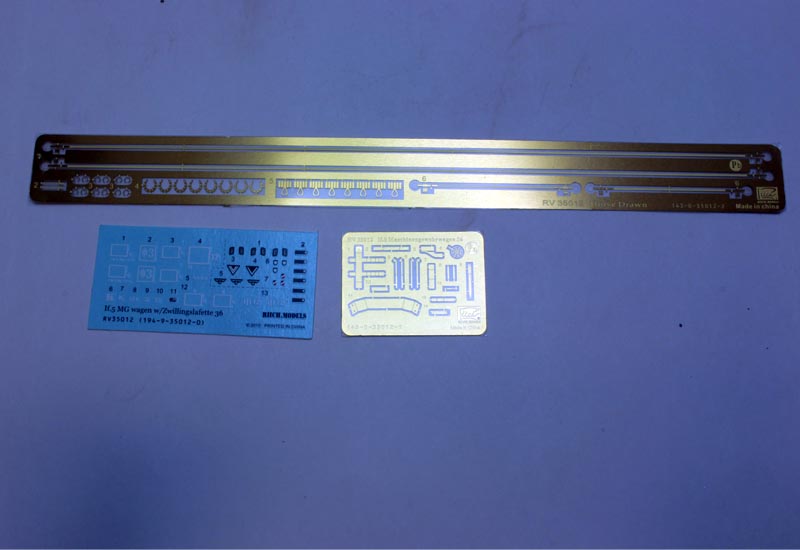
Photoetch fret Pa consists of details for the wagon and gun mount while Pb provides the traces for the harness, horseshoes and various rings for the harness.
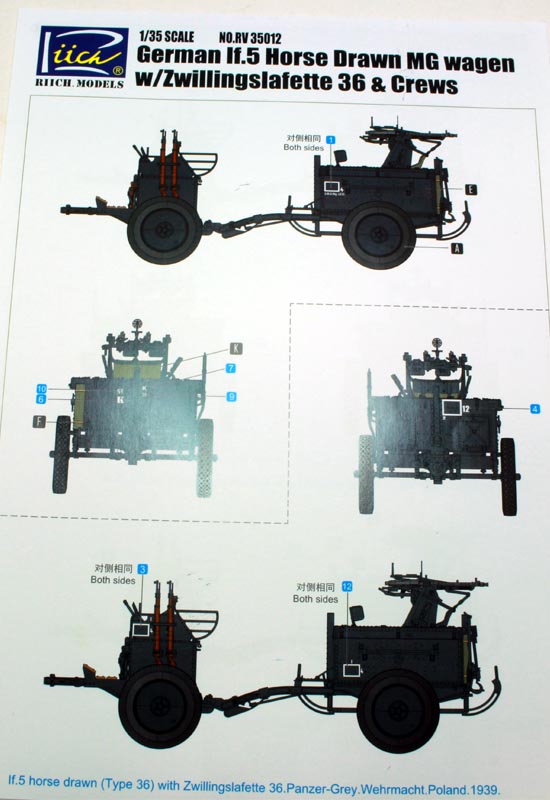
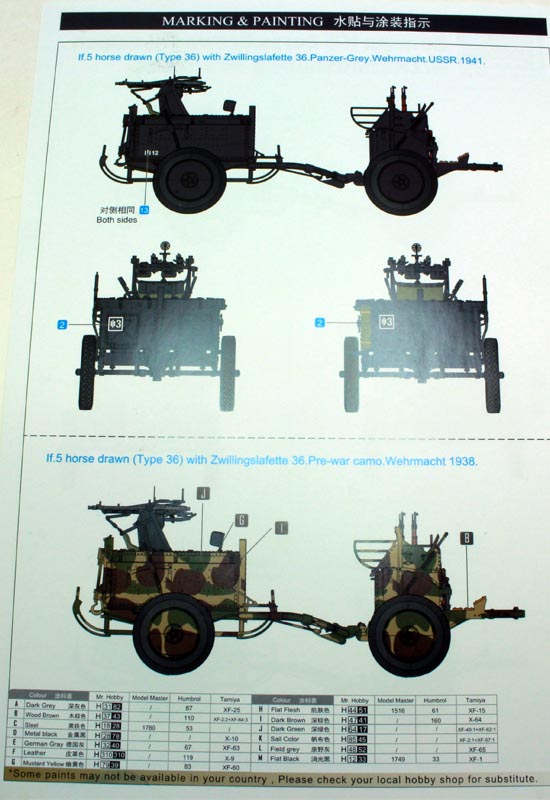
The decal sheet provides markings for three different units, plus the insignias for the figures. Three paint and marking schemes are provided on a separate sheet, two in plain dunkelgrau, one for Poland 1939 and one for Russia in 1941, plus a 1938 three-colour pre-war camoflauge scheme, although only one elevation view is provided so youll have to wing it for the sides not shown. Paint codes are called out for Mr. Hobby, Model Master, Humbrol and Tamiya colours. The Tamiya callouts even include mixing ratios for blending to make the correct colour.
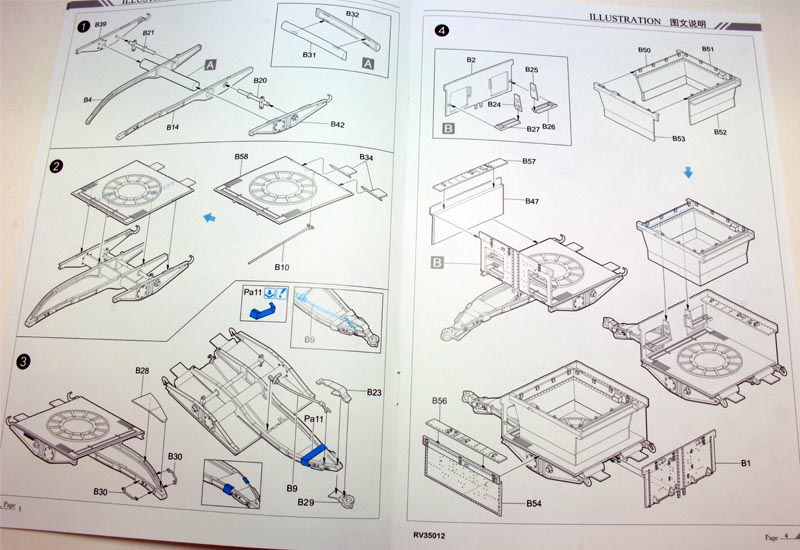
The instruction booklet is 11 pages and covers 21 steps clearly illustrated with 3D drawings, with a number of the steps being split between two alternative ways of assembling various parts of the model. Painting for three variants is well covered in the painting and marking manual.
The Build
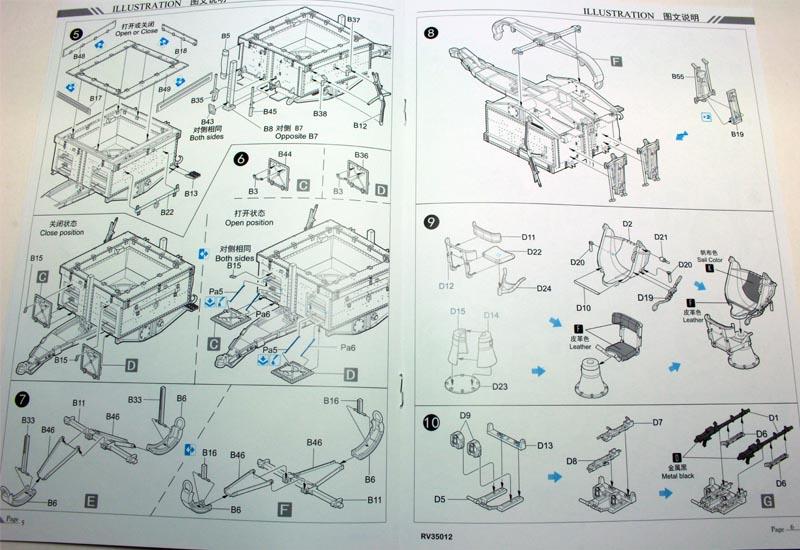
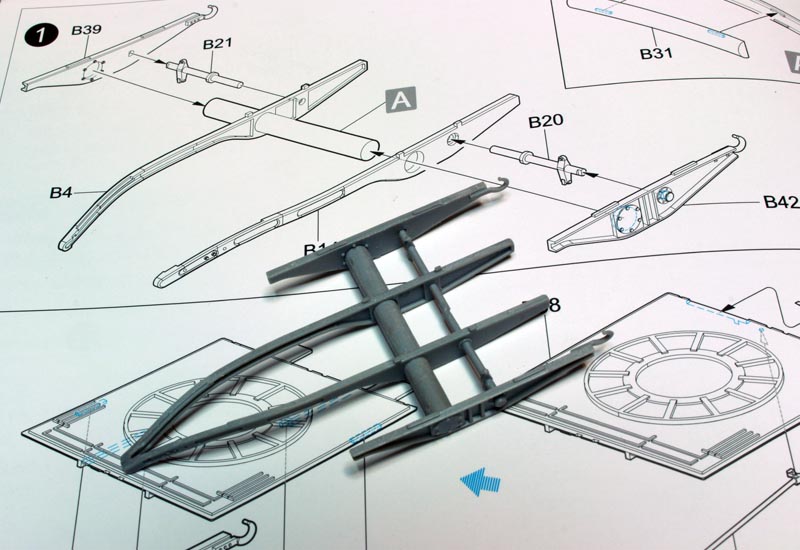
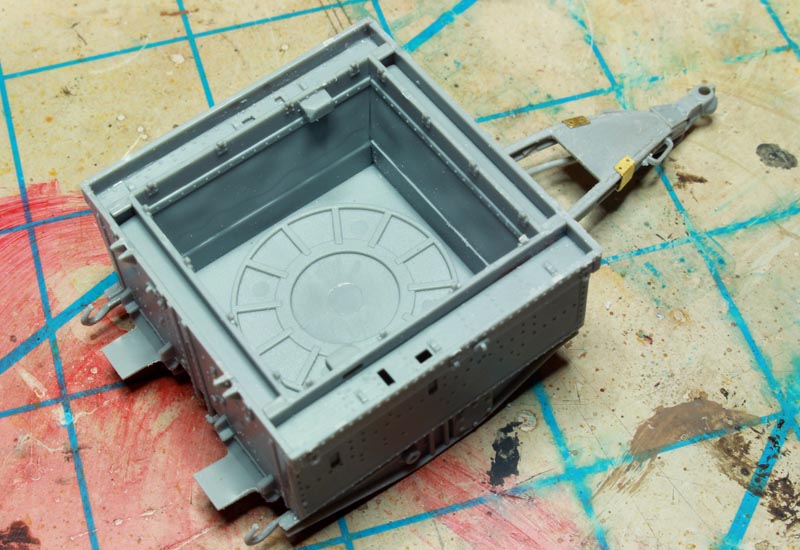
STEPS 1 to 3
Construction begins with the rear wagon (Hinterwagon) that will hold the machine gun mount. The lower frame is the starting point with the frame rails, bracing and axles. Cleanup of mould seams is required but goes quickly. Everything fits together well and with no drama, although some of the part locations are not clearly located but it is not hard to figure out. Once the frame is assembled, the floor of the wagon goes on. There are some ejection pin marks on this that need to be filled before assembly. The hitch and gussets are then added to the frame rails.
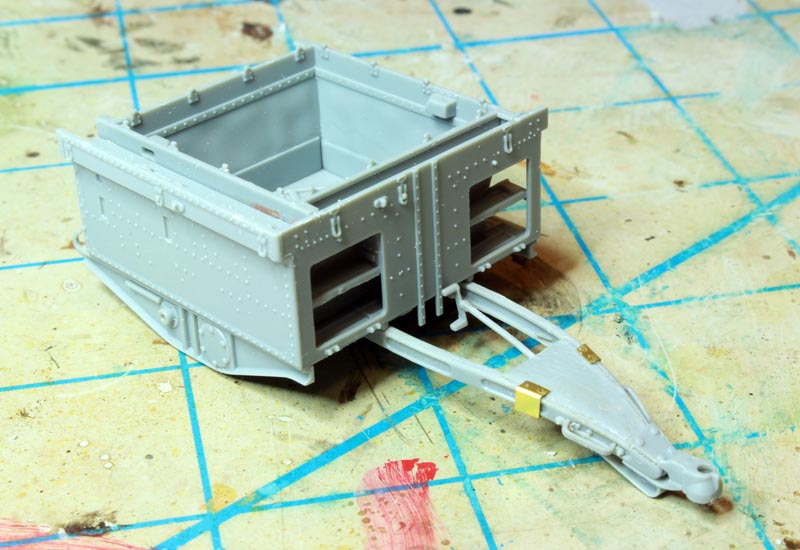
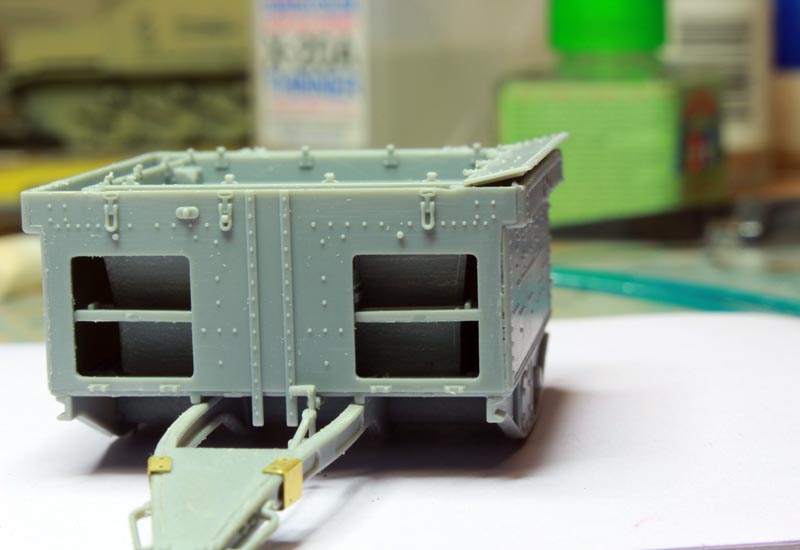
STEPS 4 to 6
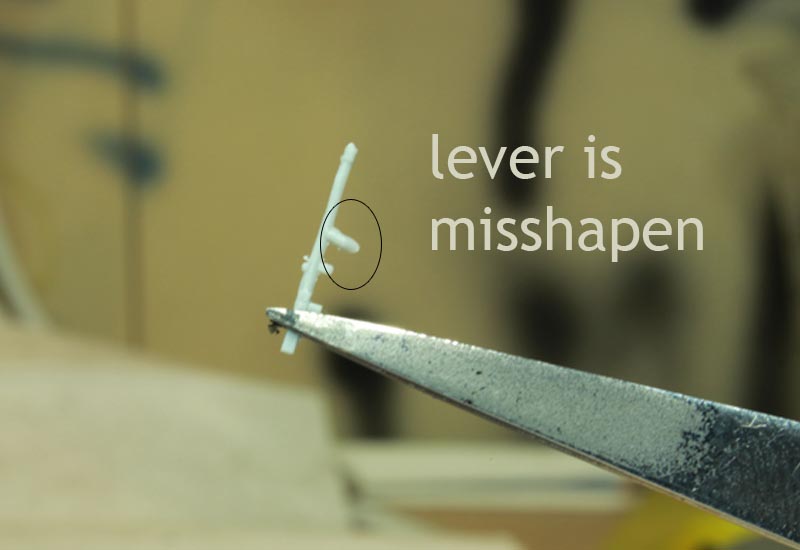
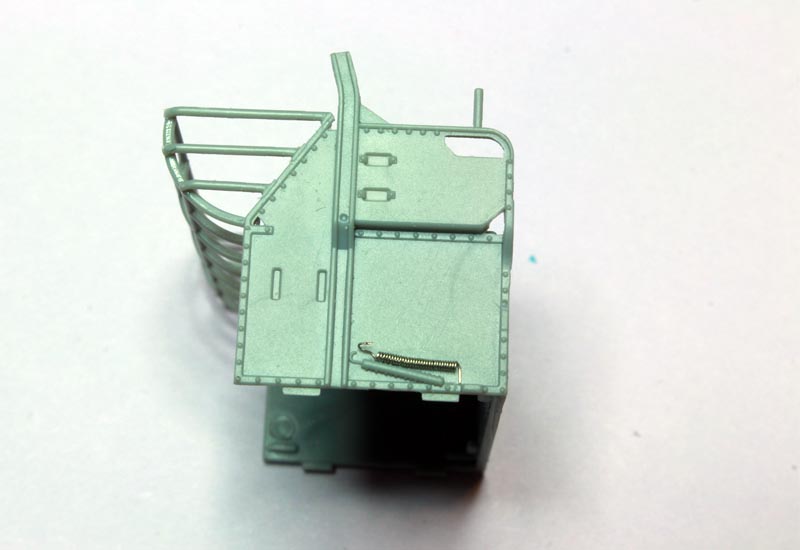
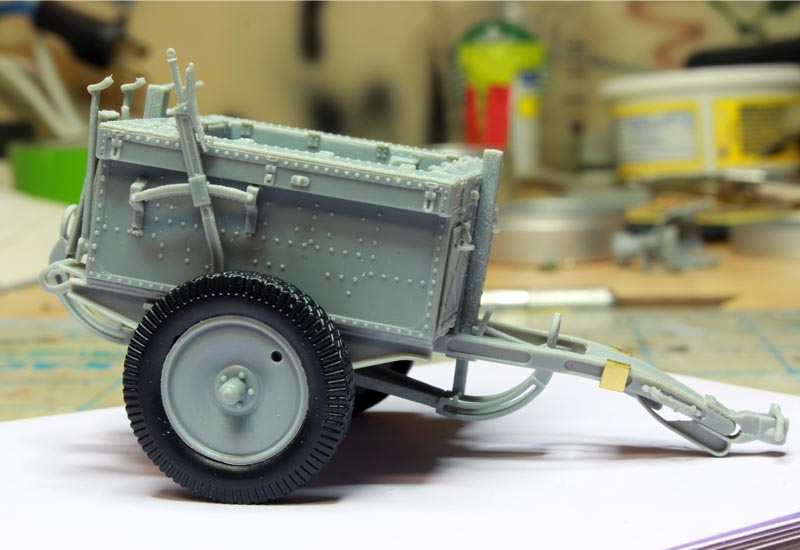
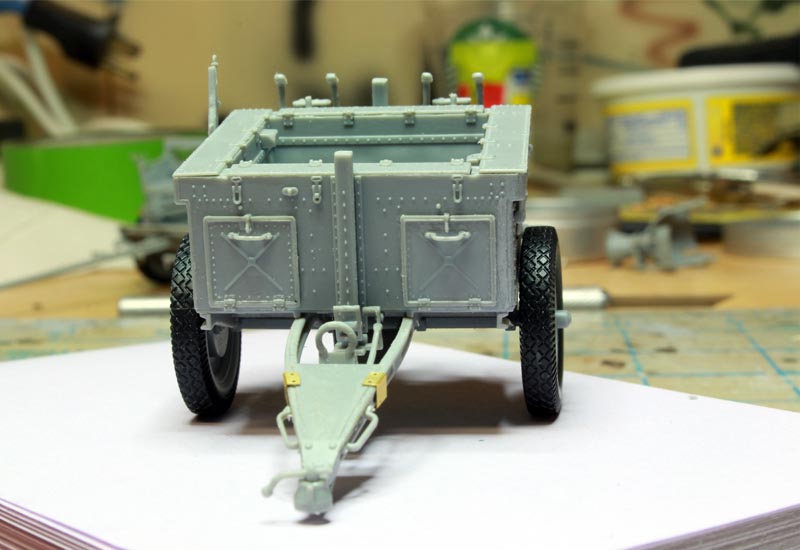
This involves assembly of the hinterwagon body. The inner and outer panels of the wagon fit together very nicely and only very minimal filling is required. The access panels for the ammunition and spare parts can be assembled opened or closed. I chose to assemble all the doors closed as the horses are moulded in motion, so everything will be in transport mode. The access doors fit very well with the exception of the top access hatches along one side. Some trimming was required to get them to close properly. The brake lever, leveling jack housings and various details are also added to the exterior of the wagon body. Some of the smaller pieces were a bit deformed and needed some re-work.
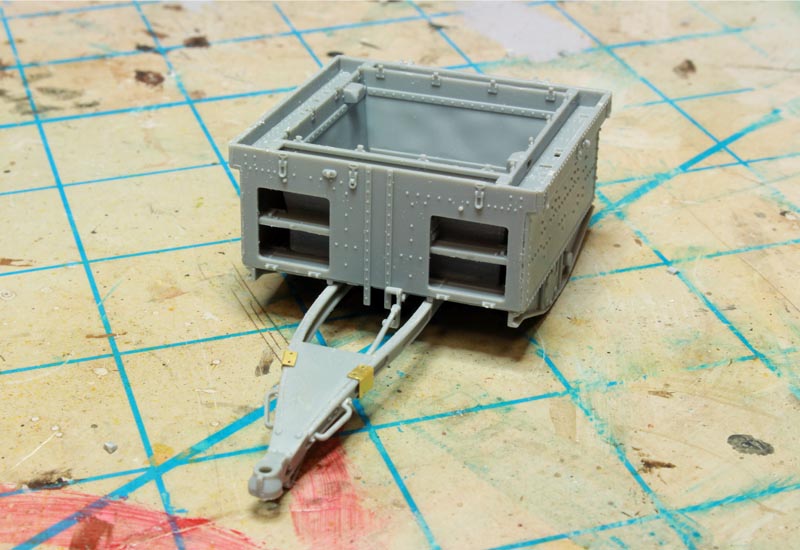
STEPS 7 & 8
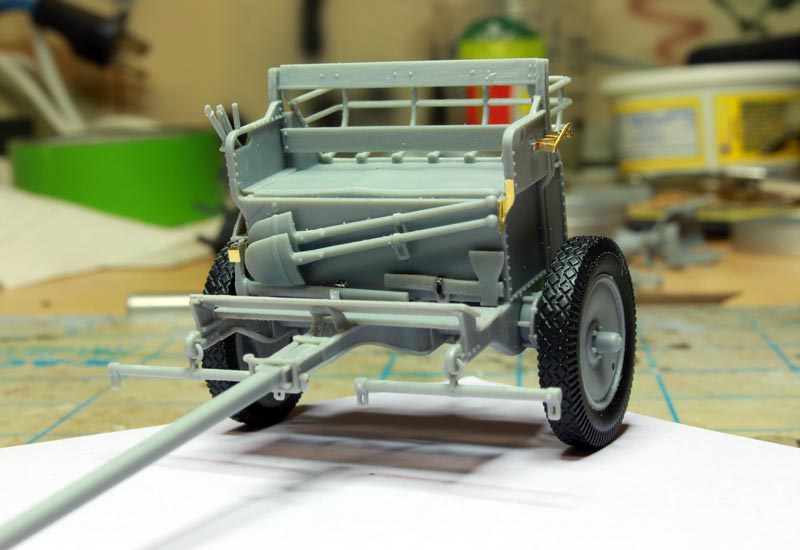
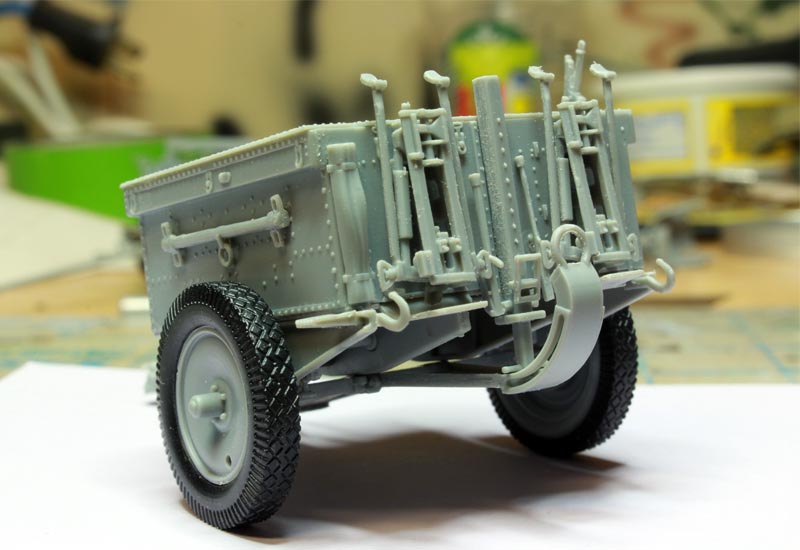
Step 7 is the assembly of the leveling mechanism. It can be assembled retracted for transport or extended to provide a level, stable firing platform when the guns are in action. As mentioned earlier, I am building this in transport mode so the mechanism will be assembled retracted. Once assembled, it is attached to the bottom of the wagon frame. Two additional MG-Lafette 34 (machine gun mount 34) are also provided and attached to the rear of the wagon.
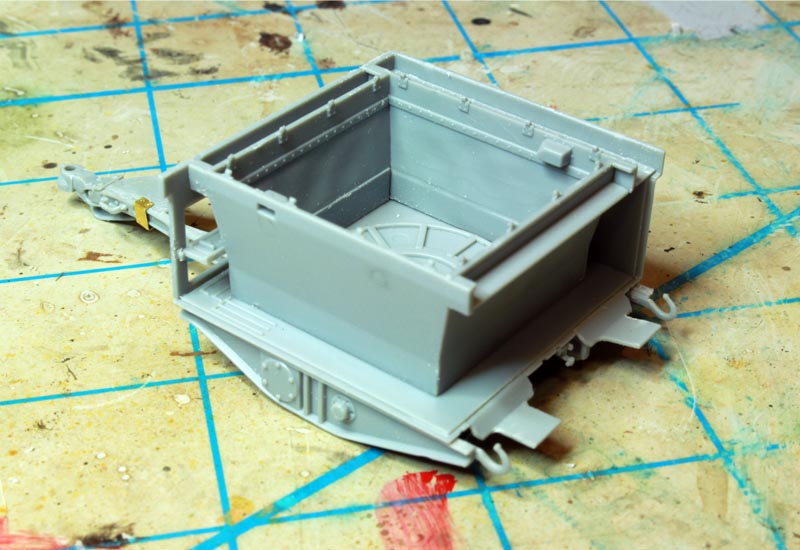
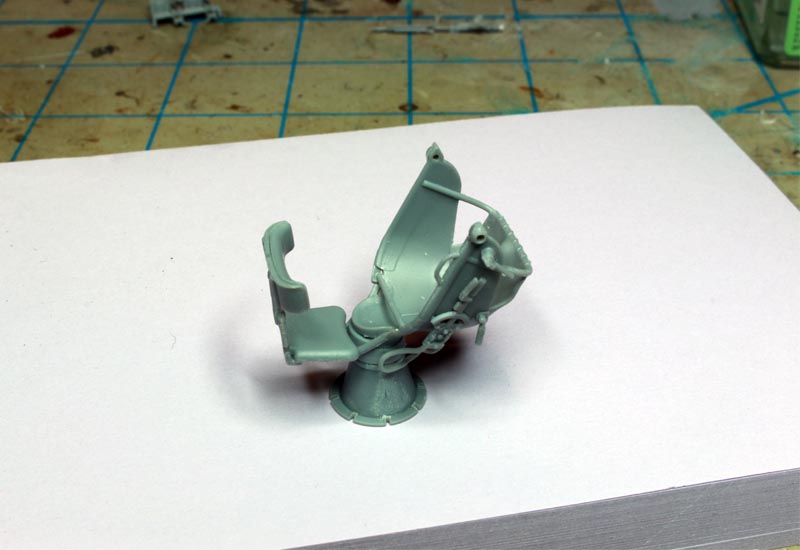
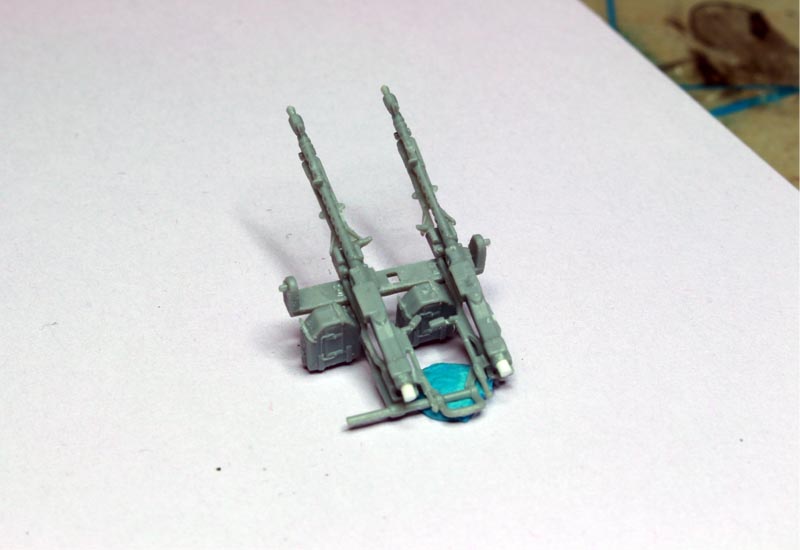
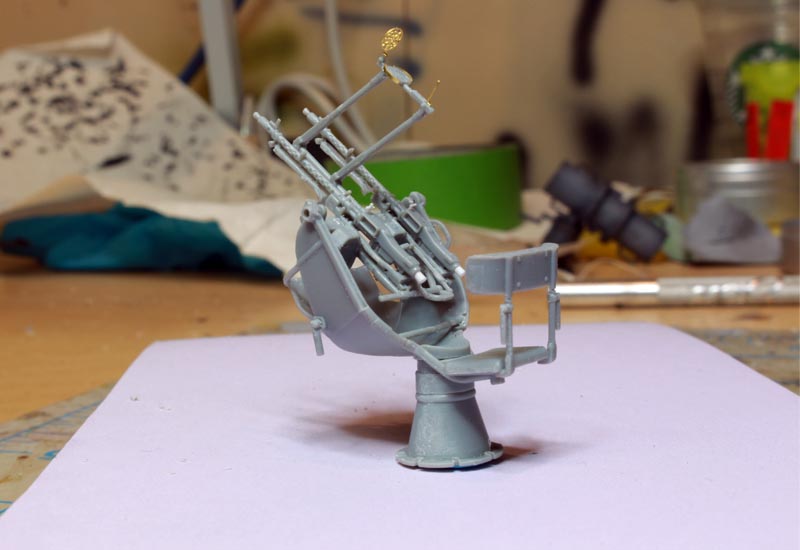
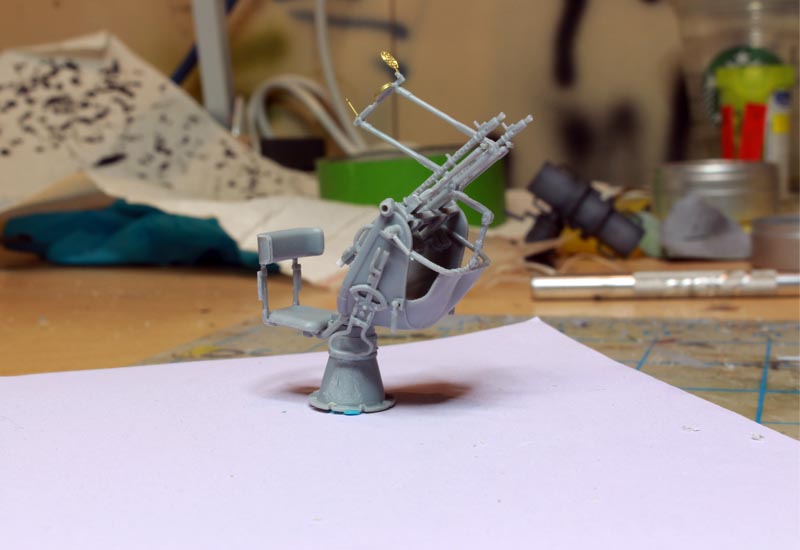
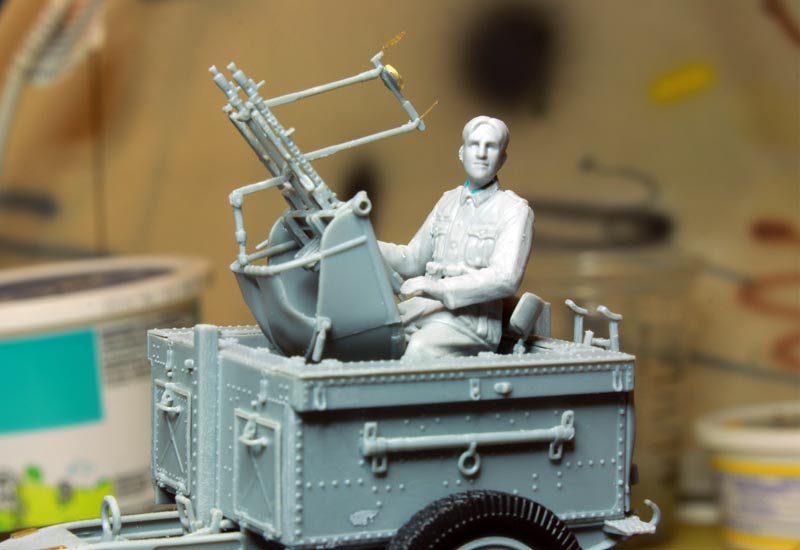
STEPS 9 to 11
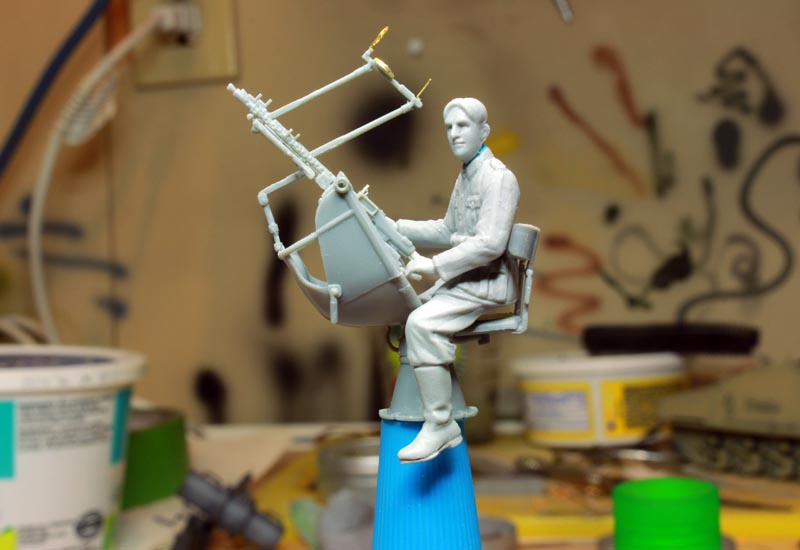
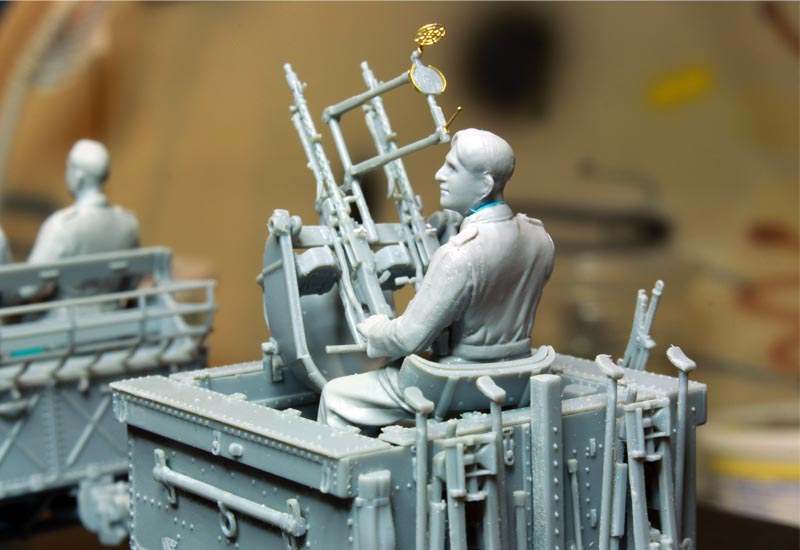
This step involves the assembly of the pedestal mount for the Zwillingssockel 36 (pedestal mount 36 for two machine guns). The base and pedestal are assembled first, followed by the gunners seat and basket. The twin machine gun mount is assembled next, the machine guns added and the mount can be assembled either fully elevated or level. This is a very delicate assembly and at times requires a third hand to hold everything in the proper position. Riich has included a very delicate PE anti-aircraft ring and bead sight is also provided. Overall detail is quite good, although the machine guns were missing the rear sights (but they are shown in the instruction illustration) and there is a lot of delicate work required to remove prominent mould seams on all the parts.
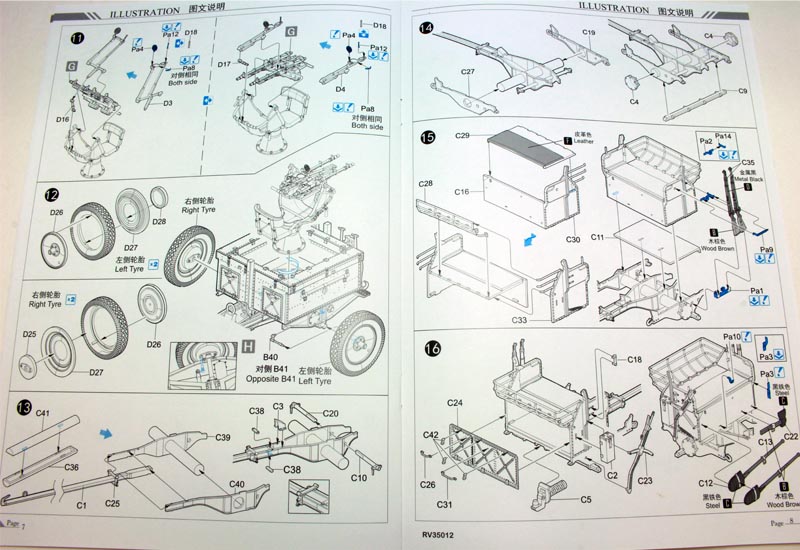
STEP 12
This is assembly of the wheels and tires for the hinterwagon. The tires are moulded in either a black plastic or a hard black vinyl, Im not sure which.
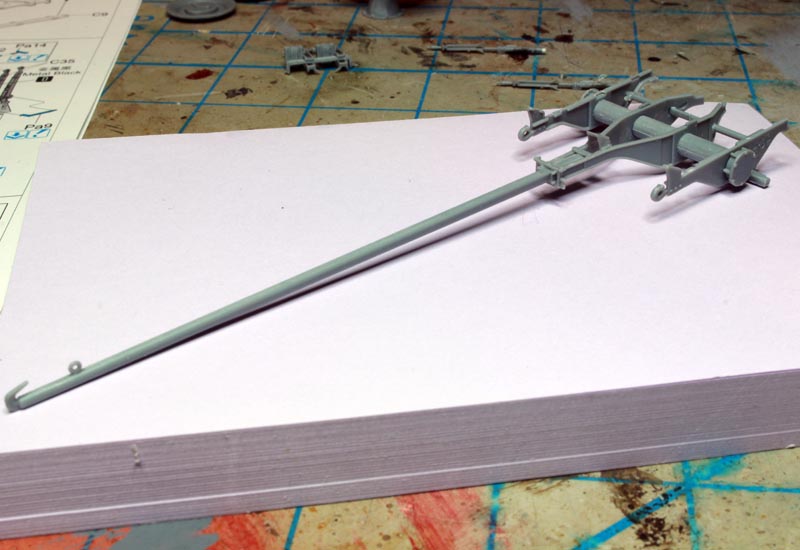
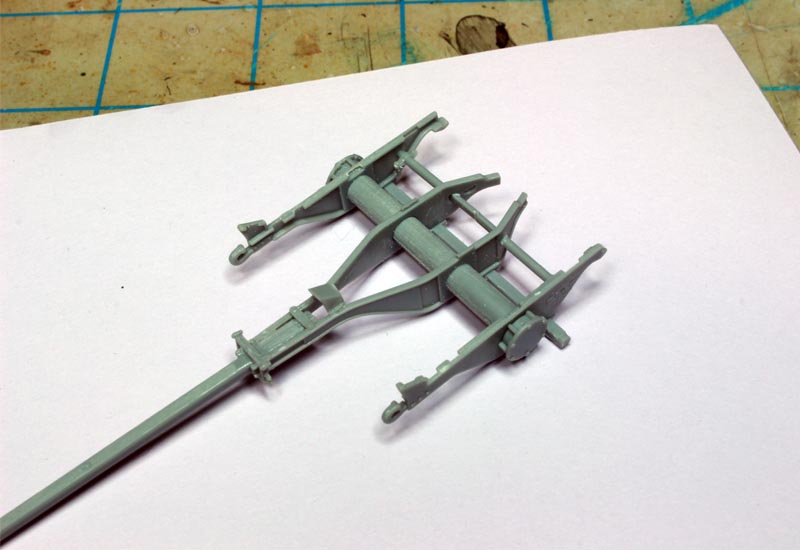
STEPS 13 & 14
This is the frame, shaft and suspension for the front wagon (Vorderwagon). It is similar to the hinterwagon frame assembly in step 1, but a bit more involved. I did run into some difficulty getting the bracket parts C38 to fit properly in the shallow depressions provided on the frame rails as things didnt line up quite as they should, although this is likely my fault.
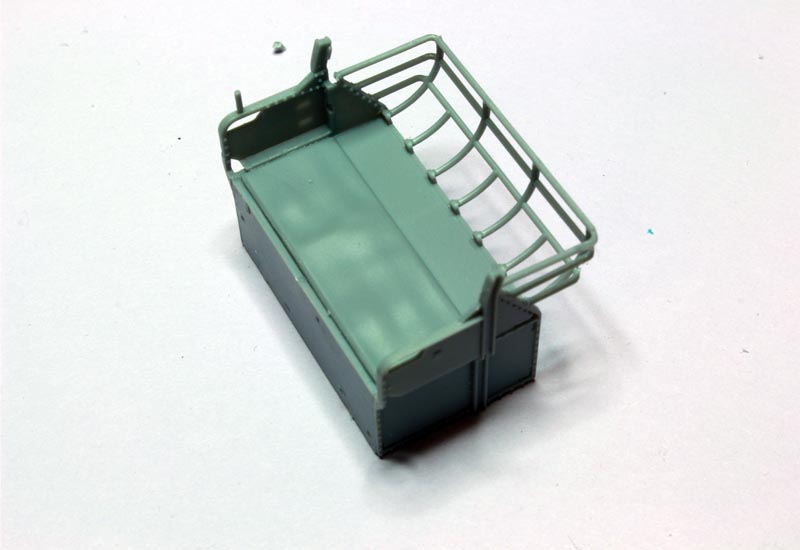
STEPS 15 & 16
Here we assemble the body of the vorderwagon. Again, everything fits together very nicely although the basket railings do require a bit of finessing to line up properly. Not surprising as they are delicate and easily warped, but once lined up they come together very nicely. As is the case elsewhere, there is a fair bit of mould seams to clean up, and it does get tedious with all the small parts in this kit. Another thing to note is that the plastic does seem to be softer than what I am used to, so parts are easy to bend and deform if you are not careful.
The brake lever spring on the side of the wagon looked a bit soft to me, so I cut it off and replaced it with a spring I made myself. I also cut off some of the tool straps and replaced them with foil as they did not stand out enough for me. Once assembled, the vorderwagon body is attached to the frame rails. Some slight fiddling was required because of my earlier issues with frame assembly but in the end it all came together very nicely.
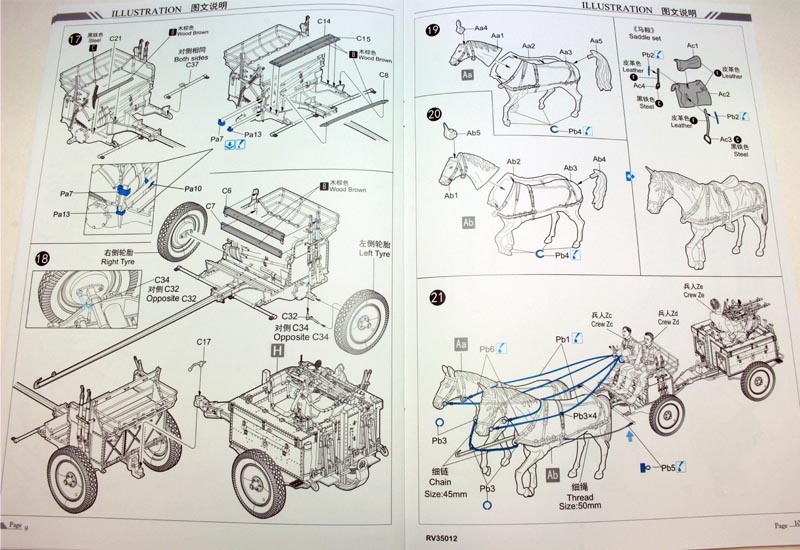
STEPS 17 & 18
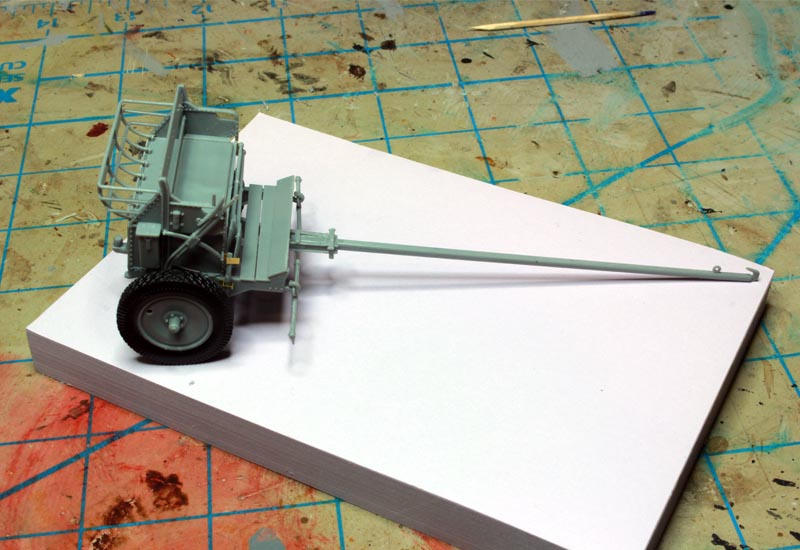
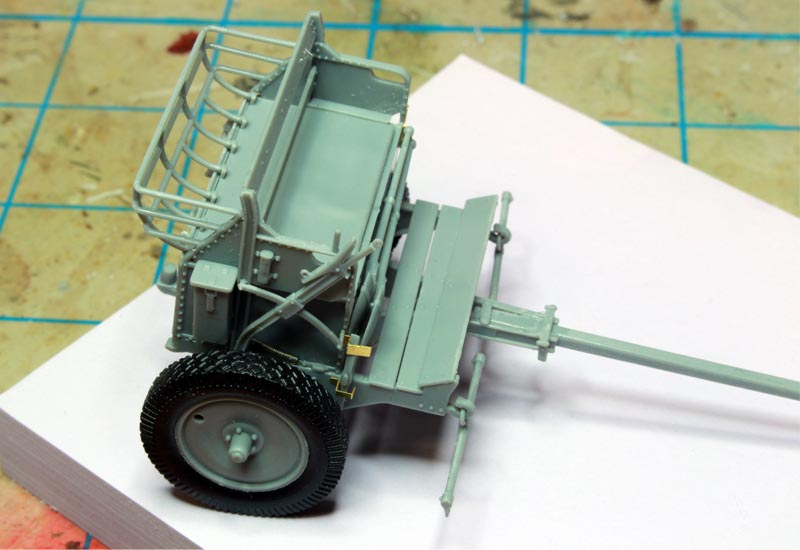
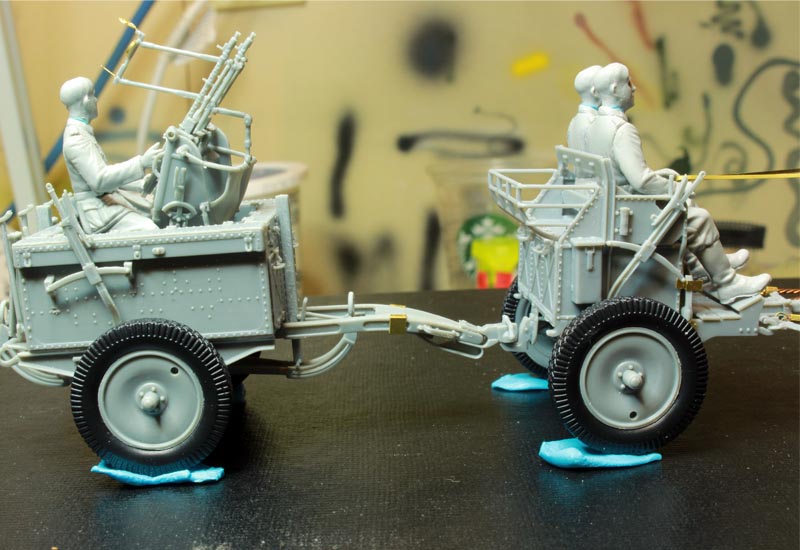
These are the installation of final details, tools, foot and backboards, singletrees and wheels to the vorderwagon, and joining of the vorder- and hinterwagon. Again, fit of the various pieces is excellent.
STEPS 19 & 20
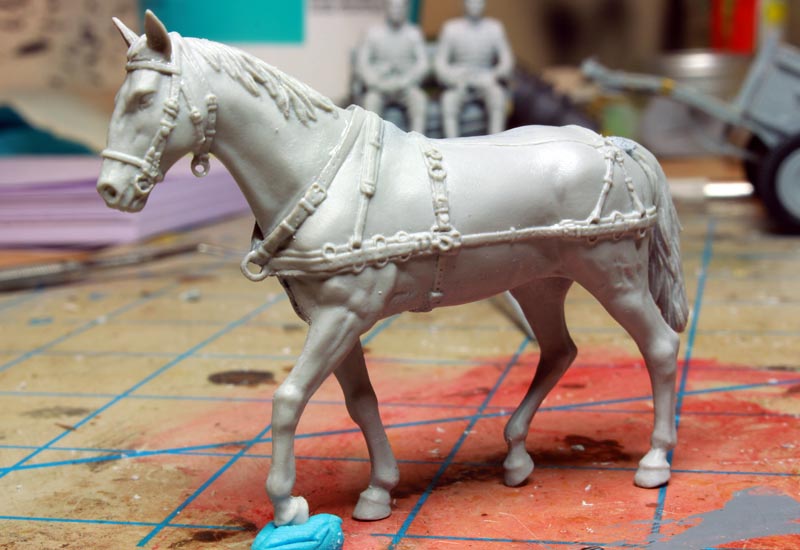
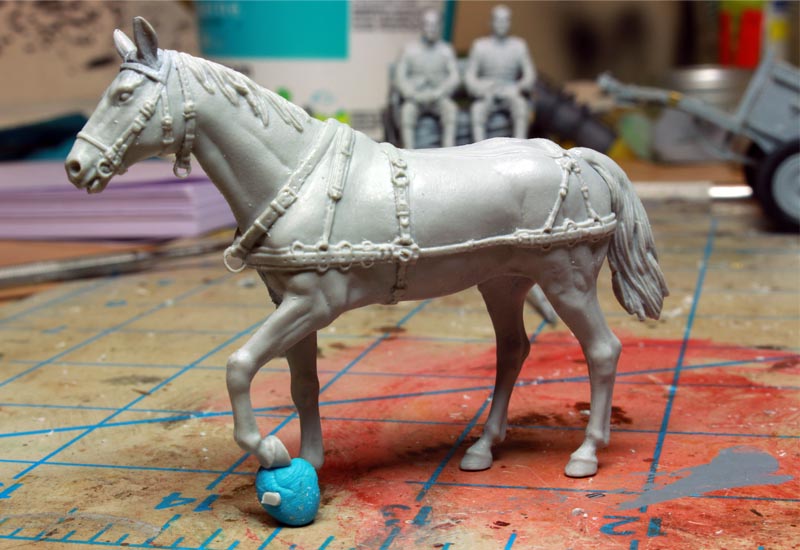
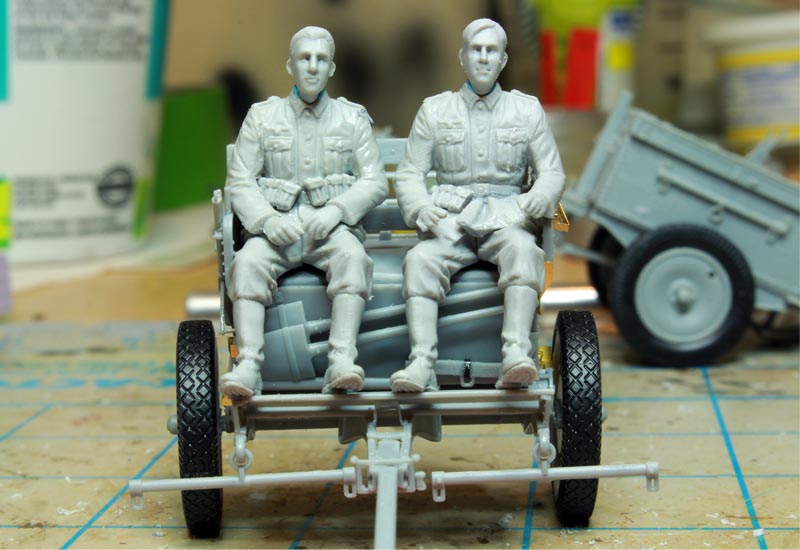
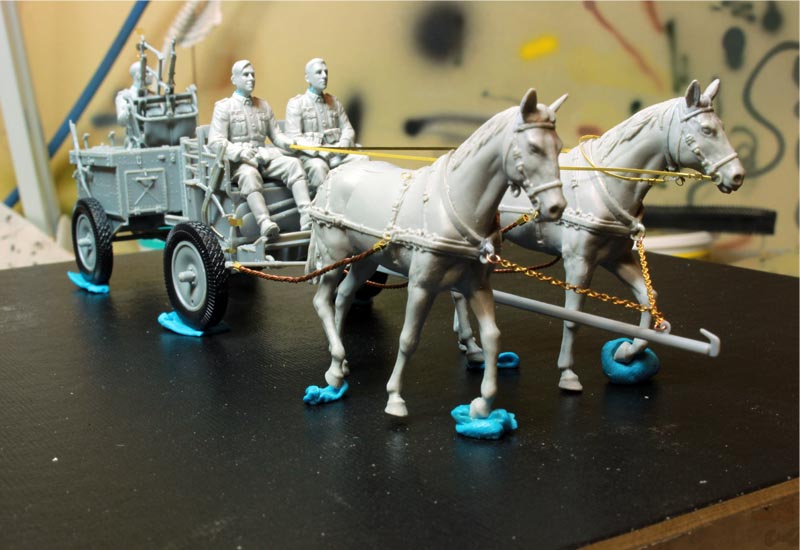
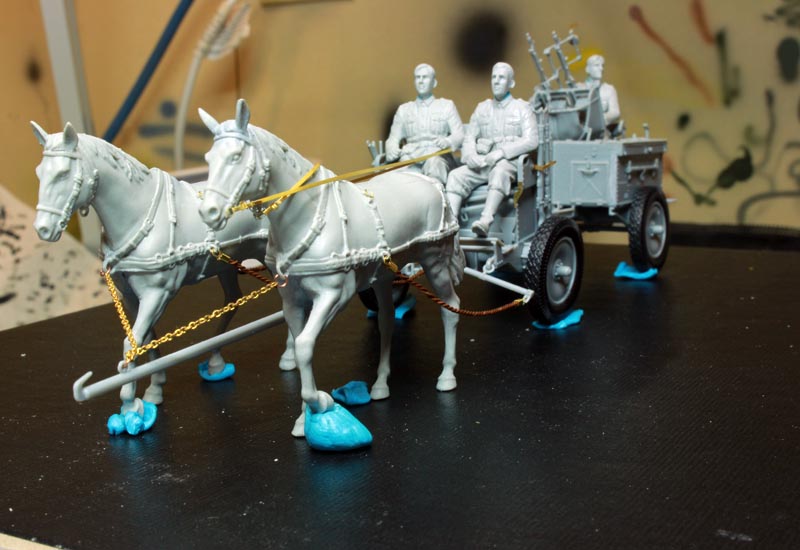
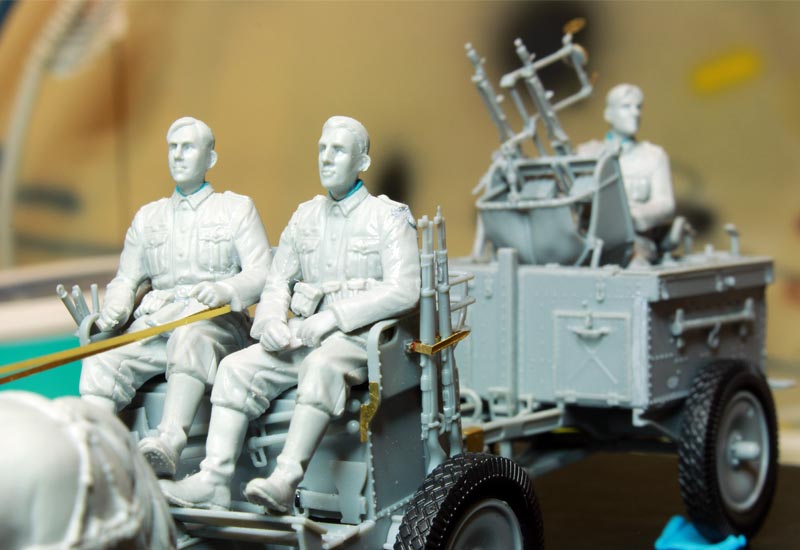
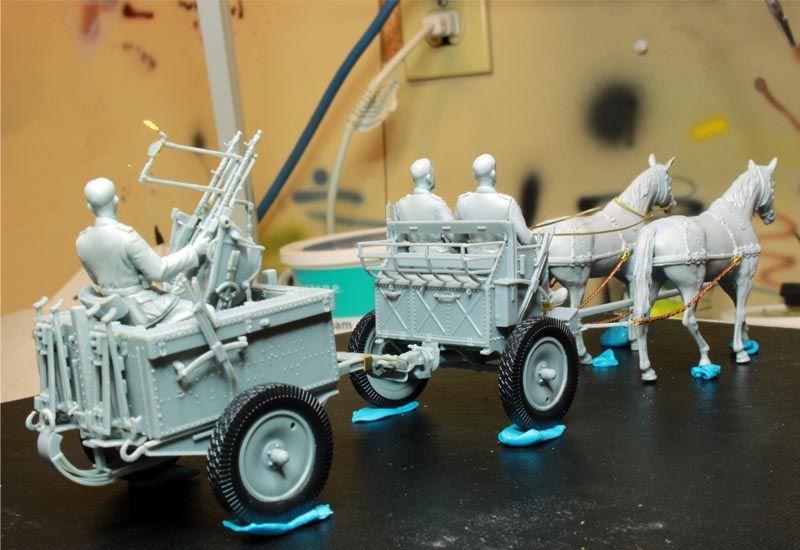
These last steps involve the assembly of the two horses pulling the wagon. Fit of these parts is much more disappointing with prominent mould seams to clean up and significant filling of gaps. I also had to undercut much of the harness rigging to bring out softly moulded detail. There is a saddle included that can be added to one of the horses as well. The figures do not have a separate assembly step called out, rather the painting and decal guide for them simply shows the assembled figures and calls out the various part numbers. Fit of these was a better, but the mould seams were very prominent as well and some detail scribing was required. The driver and his assistant fit the seat of the vorderwagon very well, but the gunner needed a bit of finessing to get into his seat, and once in, his legs are too long to allow the pedestal to sit properly! some surgery on his legs wil be required to make everything fit properly. Both the horses and the figures are of an even softer plastic than the main kit.
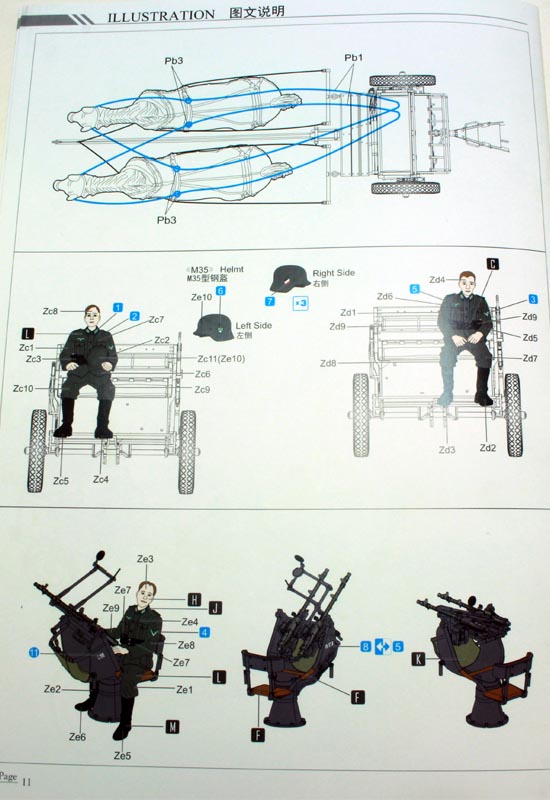
STEP 21
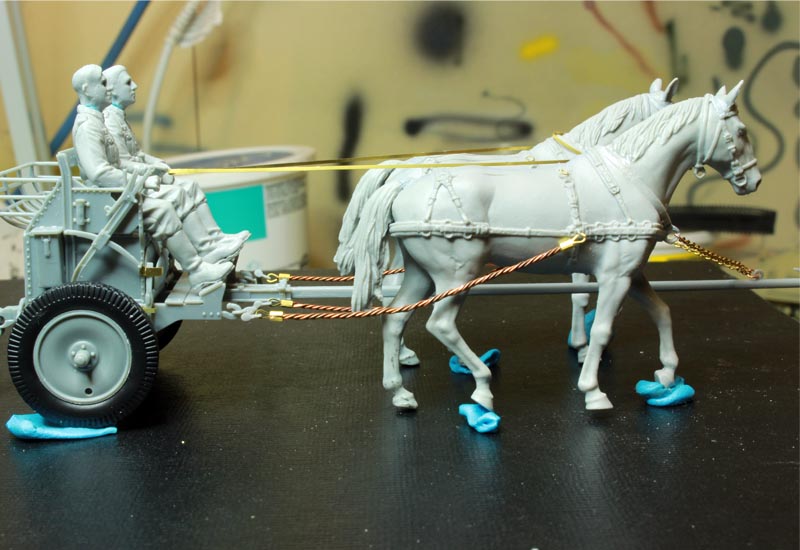
This step details the rigging of the harnesses for the horses pulling the wagon and was easily the most frustrating part of the kit for me. The thread provided in the kit for the main traces frays far too easily when cut and after a couple of attempts I used some cable I had made from copper wire. PE loops are provided for this and are very delicate, causing me some frustration as they keep separating. The instructions show loops on the moulded-on harnesses of the horses to attach these to, but none are provided that can be used without some surgery. I carefully cut the moulded on rings away from the main body and drilled them out, and this allowed me to loop the trace rings through them, but the rings pull apart very easily so a lot of care is required. The chains provided for the pole chains have to be cut to length as well, and I found the 45mm length stated in the instructions would have resulted in the pole dragging on the ground so I shortened them up. The PE rings provided for attaching these are very delicate, pulling apart far too easily so I made new ones out of copper wire. The reins are PE, and the attachment rings on the ends are literally hair thin, pulling apart very easily as well or breaking off completely, so I am going through those and making new ones out of wire. The reins themselves are too short, do not sag realistically, and are frustratingly difficult to work with. They are too fine for heat annealing so I think I will be replacing them with ones made out of foil to get the proper realism.
Conclusion
This was my first experience with a Riich product and my first attempt at a horse drawn wagon, and I have mixed feelings about it. It is a great little kit of an unusual subject that many people are not aware of, with amazing detail, overall good casting quality and excellent fit of parts for the main kit. It would be nice if they could find a way to reduce the mould seams on the plethora of small detail parts as the cleanup of these is rather tedious and the soft nature of the plastic can be a blessing and a curse, depending on what you are doing. It does make cleanup easier but if you are not careful you can easily distort the parts. The horses and figures were more of a disappointment in fit and detail, and the harness was an exercise in frustration for me. There were also a few instances of the instructions not being entirely clear but some pondering and test fitting led go the proper placement. This is definitely not a kit for beginners with so many small parts and delicate harness PE, and it ended up taking much longer to finish off then I had originally estimated for such a small kit. Overall, Riich has done a very good job on most of this kit, but falls short on the figures and harness. For those with the skill and the patience I think it will turn out to be a very detailed and interesting model, only needing a simple road base to complete a nice little diorama.
SUMMARY
Highs: Rare and unusual subject, good detail and fit on wagon.Lows: Soft plastic, mould seams, frustrating harness, poorer fit and detail on horses and figures.Verdict: While there are some frustrations with this kit, I like the end result, but definitely not a kit for beginners. Recommended for those with patience and experience.
Our Thanks to Riich Models! This item was provided by them for the purpose of having it reviewed on this KitMaker Network site. If you would like your kit, book, or product reviewed, please contact us.
Colin started modelling with cars and planes as a young child then moved into armour by rebuilding his older brothers motorized Tamiya Tiger II and winning a model contest with it at age 12. He continued modelling into his teens until university and other distractions got in the way, resuming the...