Introduction
Dragon has released yet another version of its Marder series of self-propelled anti-tank guns, this latest offering is the Early version and offers some new tooling in addition to various existing sprues from previous releases.
My in-box review can be found here:
Marder II 'Early' In Box Review
Build Review
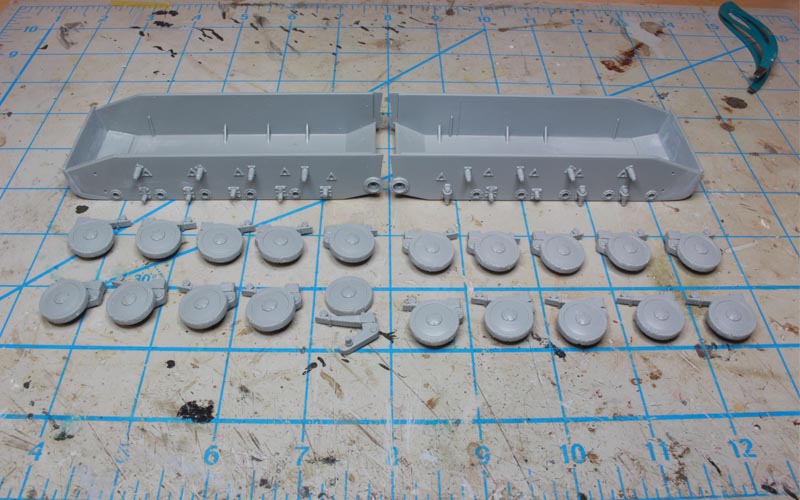
The kit consists of 20 sprues in standard
Dragon Models gray plastic, the hull tub, a small photo etch fret, two bags of Magic Track links and a small decal sheet with a couple of Balkankreuz. There are a lot of parts marked in blue that will not be used, including a complete radio set, pretty much an entire spare superstructure and tool and personal weapons sprues, and there are some that Dragon missed marking in blue as well. The instructions are broken up into 20 steps and two marking options are provided.
Step 1 Suspension/Running Gear/Lower Hull
This is pretty much standard Marder/Pz II assembly and will be familiar to anyone who has assembled any of Dragons earlier releases of these kits. The assembly of the road wheels, idlers and drive sprockets proceed without incident, and as with their previous kits,
Dragon gives you several different options for drive sprockest and idlers to choose from. The multipart suspension arms come together quite easily although there is a significant amount of mold seam cleanup required, especially annoying on the leaf springs! For some reason
Dragon still has you cut off tiny bolt heads to attach to the drive housings rather than molding them on. The first hiccup comes when installing the new suspension stops on the hull sides, parts H1 & H2. Here it becomes an issue of fitting a round peg in a square hole as the locating pins on the stops are not the same shape as the holes provided on the hull sides. This makes it difficult to locate them properly, and the parts do not cover up the holes completely either, so some filler is required.
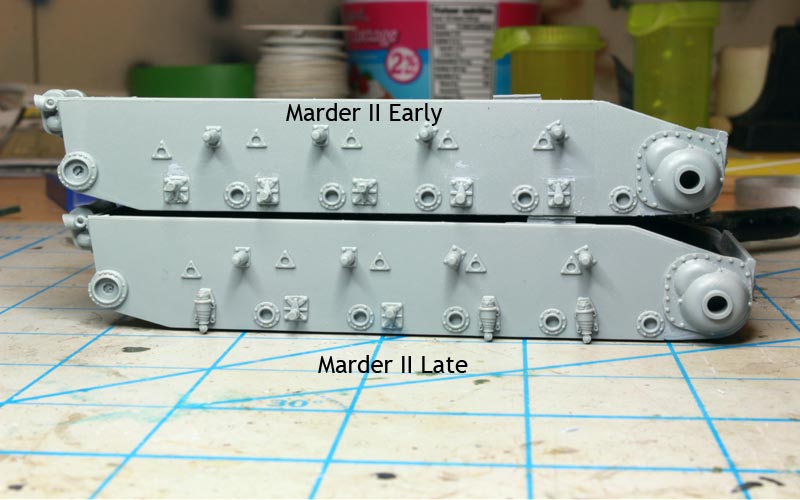
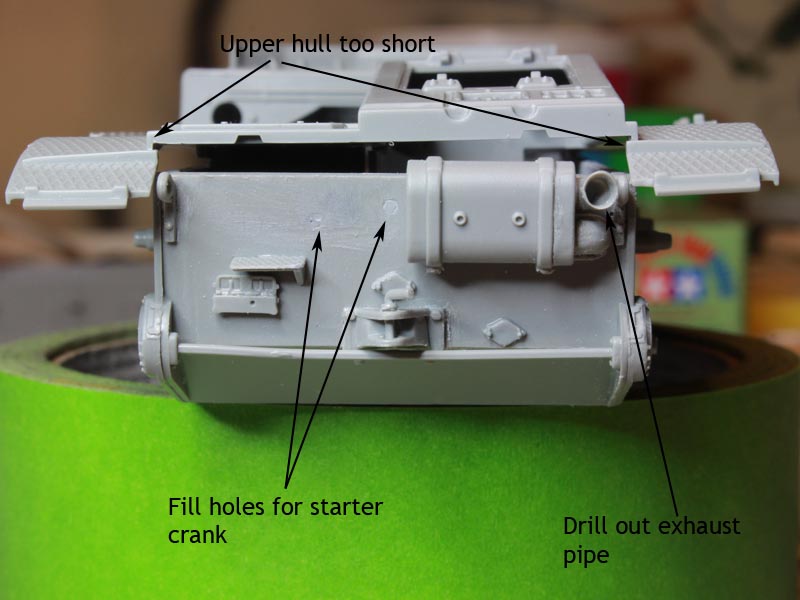
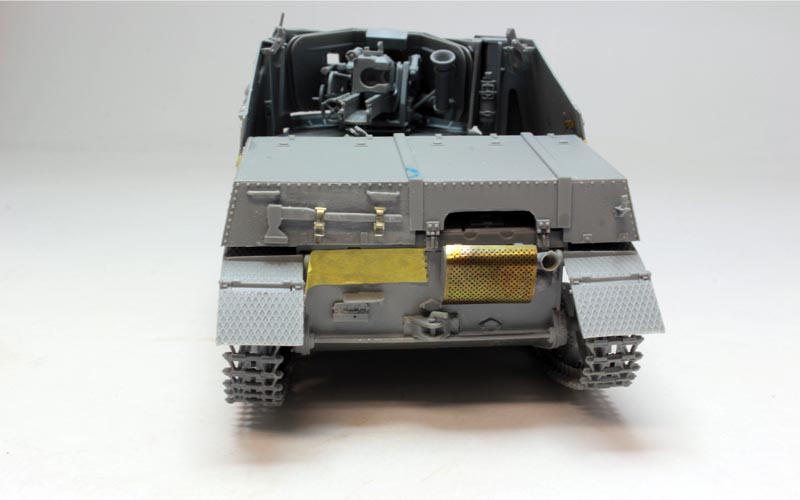
Just like on my late version Marder II I am building in parallel, the front plate fits pretty well, but there is still some filling required on the sides, and the rear hull plate C34 is identical as well, just missing a piece of PE detail on the convoy light. On this model the starter crank is not mounted on this plate, so there are two locating pin holes that need to be filled, although this is not called out in the instructions. I also notice that the towing shackle did not fit well and some filler was required on the bottom of the hull, which is odd because it fit perfectly on the late version kit, probably something I mucked up as they are the same mold. The exhaust pipe is pretty heavily molded, so I drilled it out to a more scale thickness.
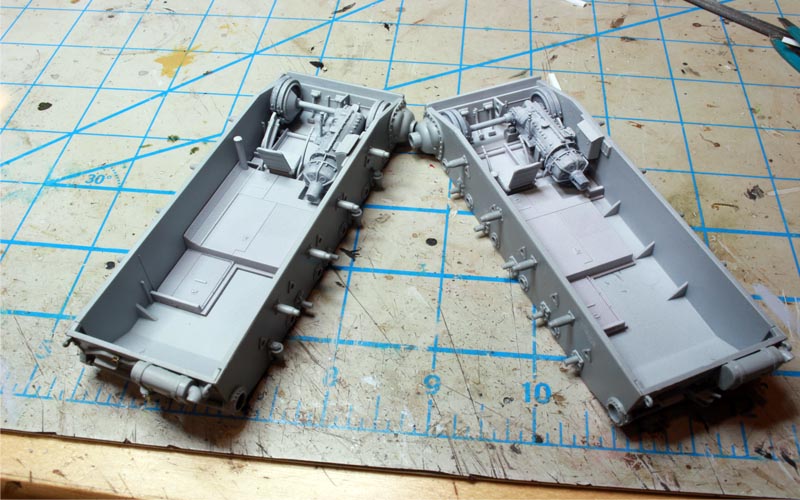
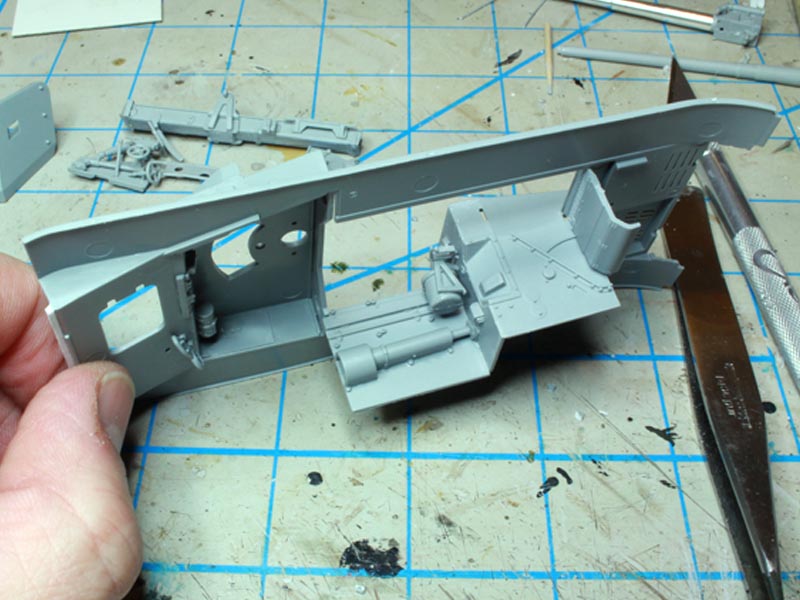
Steps 2,3,4 Hull Interior, Front & Tracks
Again, this step is identical to Dragons other Marder II kits, with locating of some parts involving some guesswork as the details shown in the instruction drawings not actually being present in the actual plastic
but it still builds up into a nice little interior. The transmission is very nicely detailed. Some sanding and trimming is required to get everything to slide in nicely.
The spare track holder and gussets are also added, but if you want to mount any spare tracks, do so now as you wont be able to do so easily later. The tracks are also assembled in this step, I noticed a fair bit of flash on many of the tracks, a sign the molds are getting a bit worn out maybe?
Steps 5-7 Upper Hull Interior
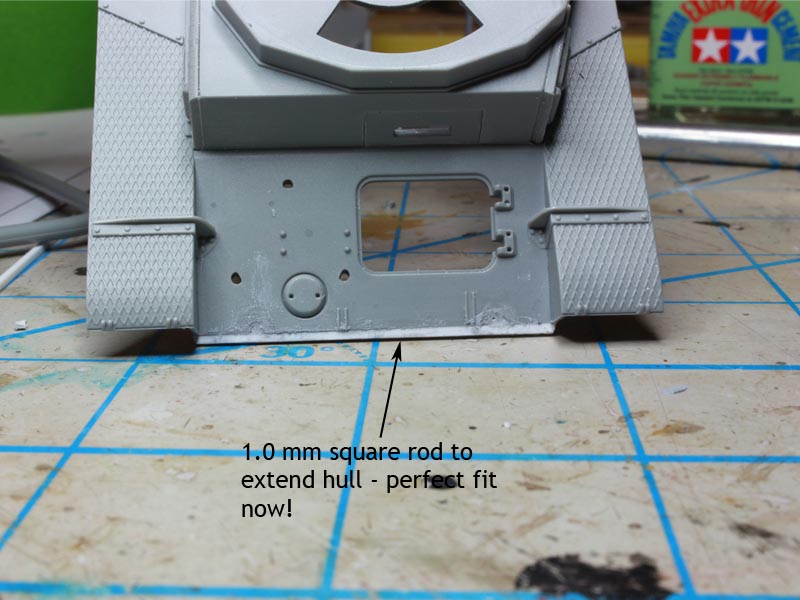
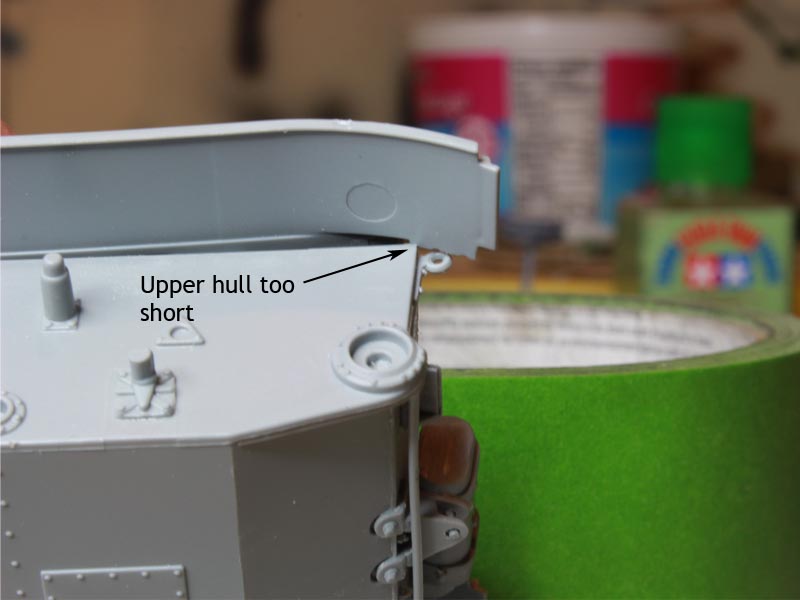
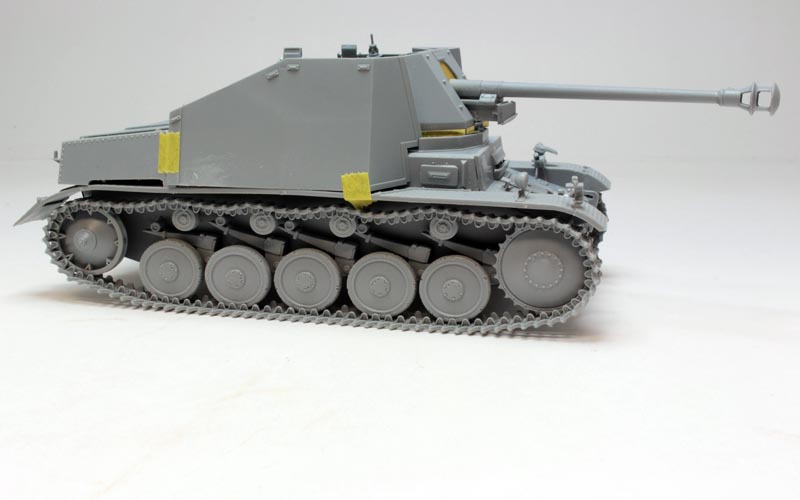
The first few steps again are identical to the other Marder kits, with some nice detail, and some new superstructure armour molded in scale thickness which is very nice if somewhat wobbly. There are same issues with some very tight vision device parts that need to be trimmed to fit properly, but nothing particularly onerous. The instructions do call out the wrong upper hull part A23 when it should be H1, but the differences are very minor with one exception when I test fitted the upper hull to the lower hull I found it did not fit. I muttered over this for a while, and then tested the fit of the older A23 upper hull, and it fit perfectly! It seems
Dragon has mis-molded the new upper hull assembly, with it being about 1mm short. This is easily solved by a strip of 1mm square rod attached to the front of the upper hull. It is an easy fix but another disappointment in the kit.
Steps 8-10 Upper Hull and Superstructure
As I found with the late model kit, the vertical racks(?)/bracing at the front of the superstructure are finicky to put together and the mounting points are not well defined so a little trimming was required later in the build process to ensure the superstructure sides went on correctly.
There is no radio in the early model, so you get one of
Dragons beautiful complete radio sets as a spare.
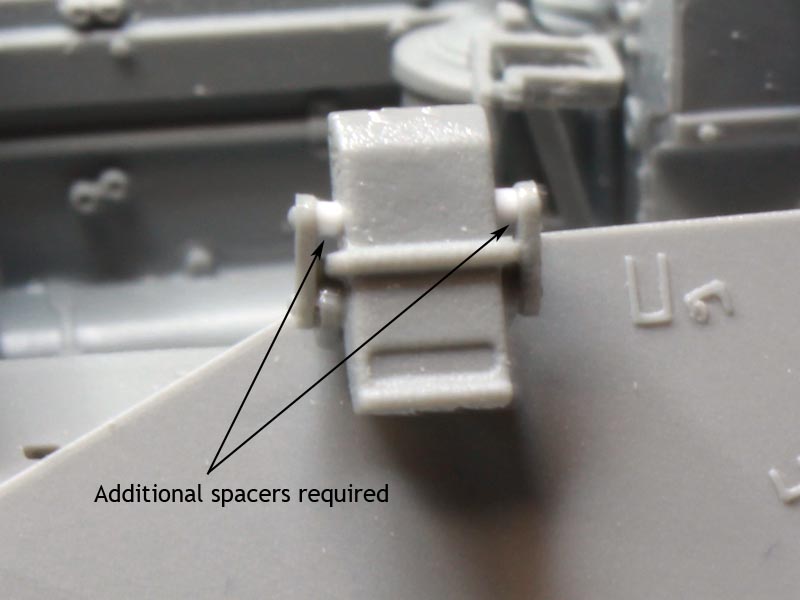
Dragon has also cheaped out and disposed of the clear vision block pieces which is very disappointing. The grey plastic vision blocks are not molded as nicley as the older clear ones, and also are missing the pivots, so some spacers have to be added so they will sit propery in teh brackets. The MG-34 brackets are still PE at least! The instructions again refer to some of the wrong part numbers such as the separate bullet splash A31 that is supplied molded on to the newer upper hull. There are also some holes for the radio rack that are called out to be filled but are not there, and pieces H19 and H20 do not have any locating pins/holes and require some care when placing so they do not obstruct the installation of the superstructure sub-assembly G.
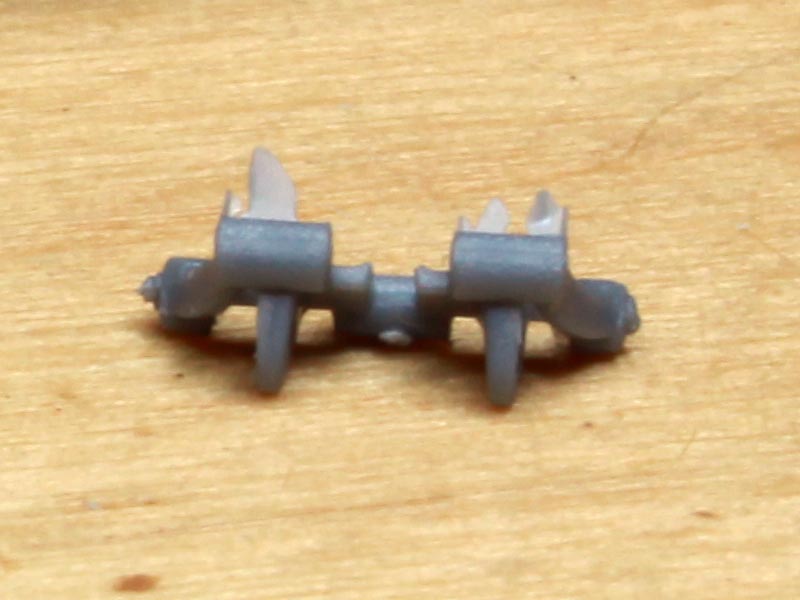
Dragon still calls out the engine access hatches A15 & A16 as being able to be positioned either open or closed when in fact the open option is not possible with the ammunition lockers mounted above the engine deck. There is no engine bay detail provided anyway. The siren and Notek driving lights mounted on the fenders are very nicely detailed. The superstructure sides are only dry fit at this point to make painting of the interior easier.
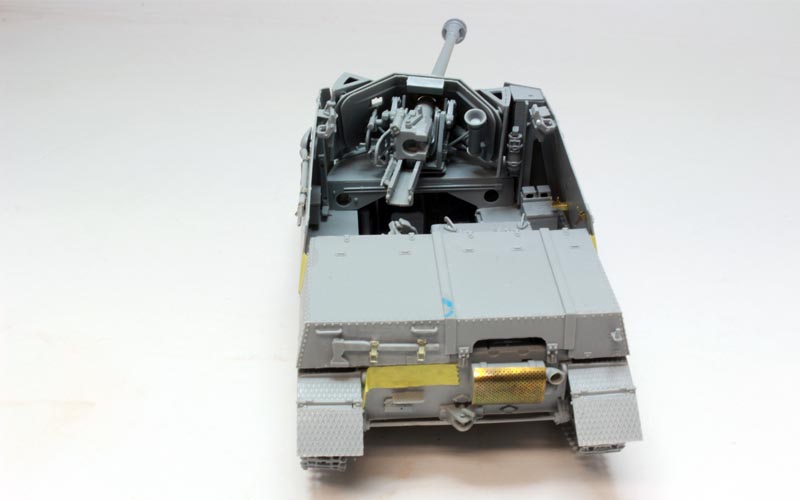
Step 11-12 Ammunition Lockers
Some new riveted pieces for the ammunition lockers are provided, although no ammo rounds as with the previous kits, and posing the doors open is difficult, in fact impossible for sub-assembly L as the guns rear travel lock assembly B3 prevents it from opening. This is the same as for my late model kit, is this an error on
Dragons part?
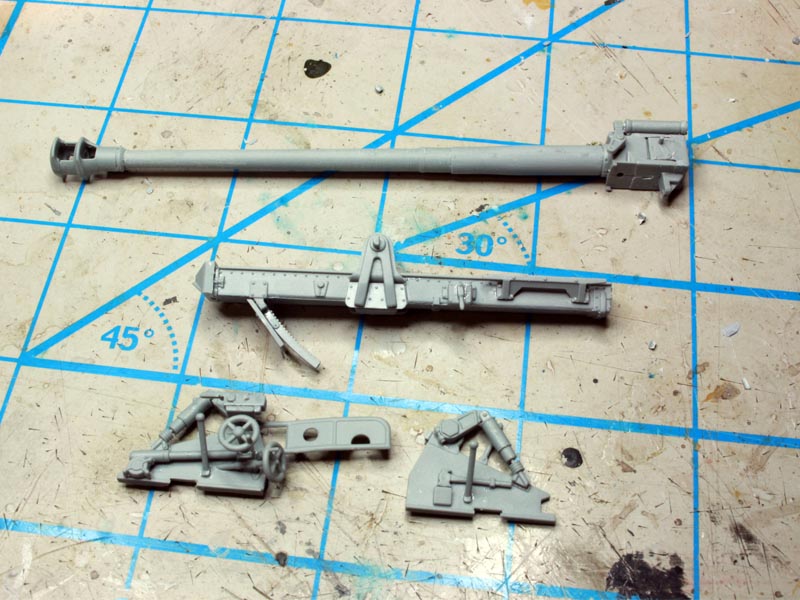
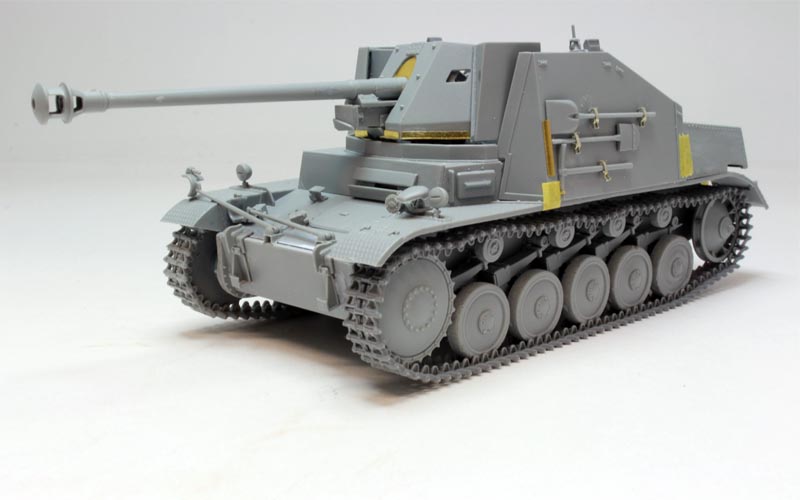
Steps 13 -18 The Gun
These steps are for the most part, cut and paste from
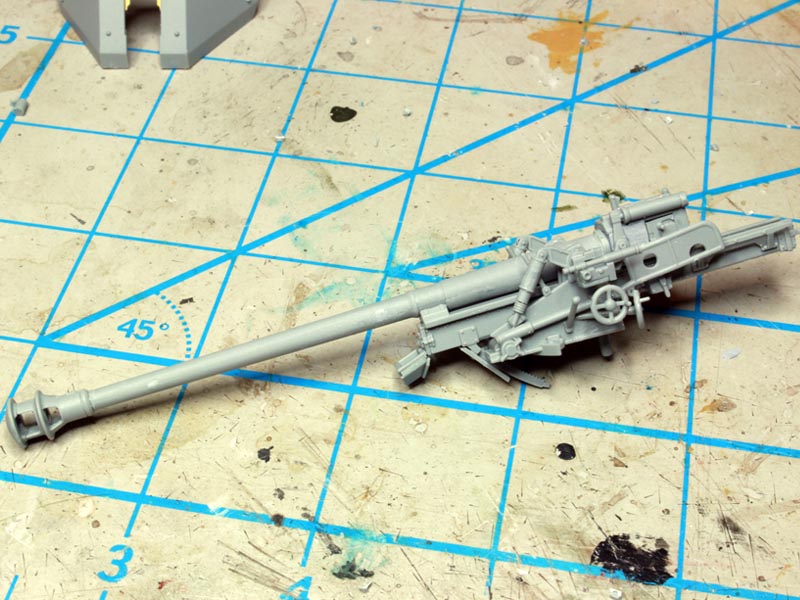
Dragons Pak 40 kit, with three different muzzle brake options. No turned barrel is provided, another disappointment compared to the earlier kits, but at least it is (mostly) one piece with fairly minor mold seams, and there is still a lot of detail in the rest of the main gun assembly with over 40 parts being required. The breech block can be shown in either the open or closed position, but in both kits I had some issues getting it to fit properly some extra work was required. Probably my ham-handed assembly technique. There are also a couple of different sight assemblies provided, along with covers for the slide. The PE insert for the gun shield is a bit tight on the barrel and needed a bit of sanding to allow it to slide to its proper position. Once the shield is on, the extra vision block and casemate armour is added.
Steps 19-20 Final Assembly
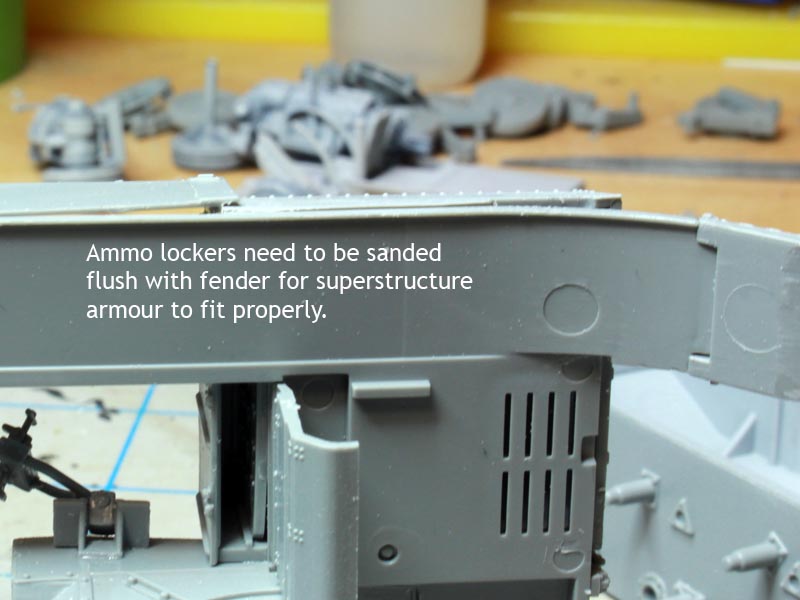
Here we install the gun to the superstructure, and then the superstructure to the lower hull. This is where another issue with the new upper hull becomes apparent. when the ammunition lockers were installed earlier, they hung over the sides of the fenders a bit. At first I did not really take notice of this, but when it comes time to fit the superstructure armour it becomes apparent that it will not fit correctly without trimming down the ammo lockers to be flush with the fenders. Back to my 'late' Marder - no such issue! It seems that in addition to being too short, the upper hull is a bit too narrow as well! After fixing this up I left everything dry fit for the time being to facilitate easier painting. The gun travel lock installed on the hull front back in step 10 is movable and can be positioned in either the travel or firing position.
Conclusion
While this kit does build up into a nice model, it is too obviously another example of
Dragon milking the most out of its existing molds in order to provide a new kit with a minimum of new expenditure. The differences between the early and late Marders are few and will likely not be noticed by the casual modeler, and the upper hull fit issue is very disappointing. Combined with the deletion of numerous extras it makes this kit really not worthwhile unless you are dead set on building every possible model of the Marder II.


Comments