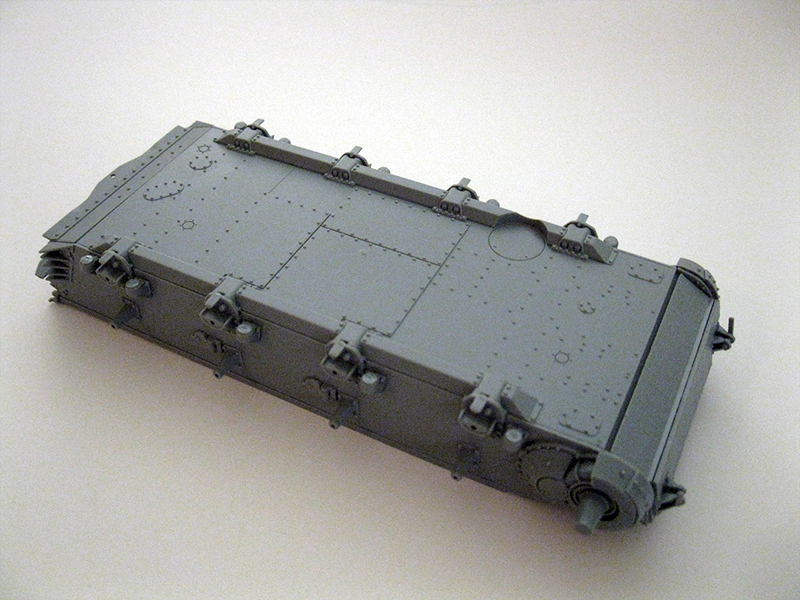
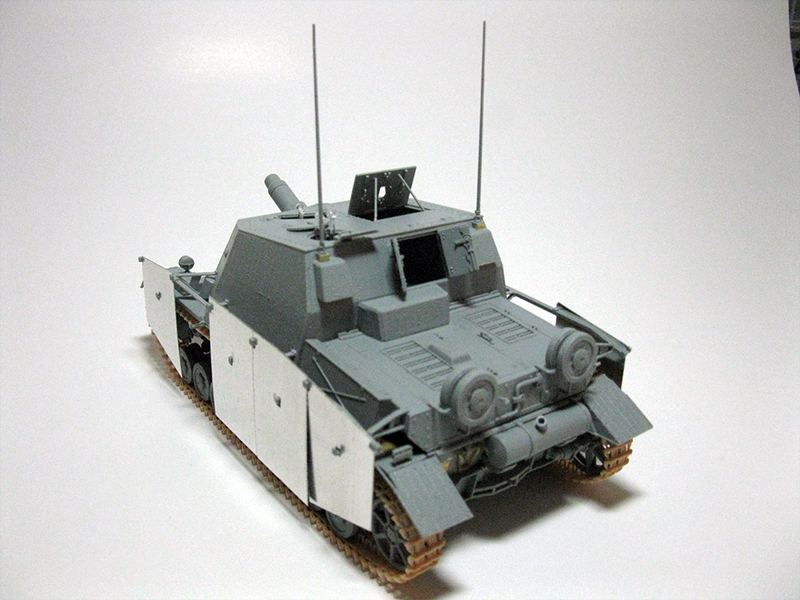
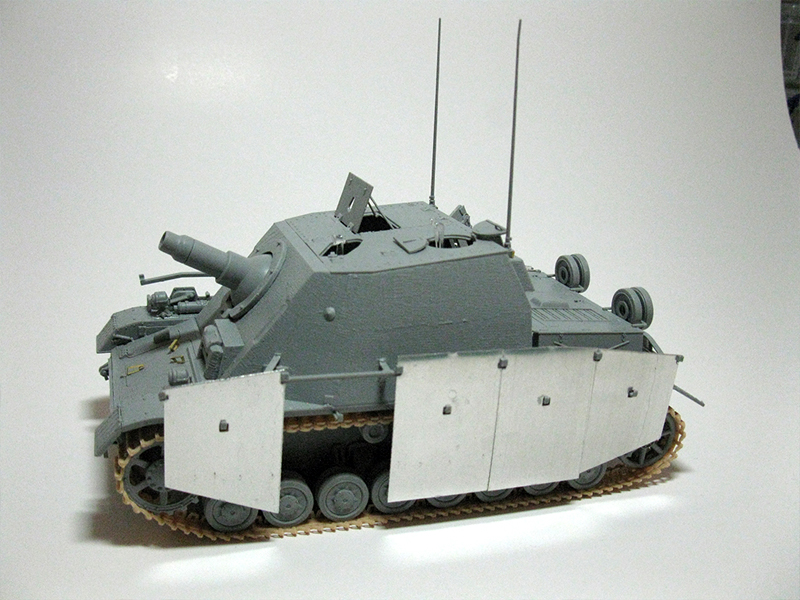
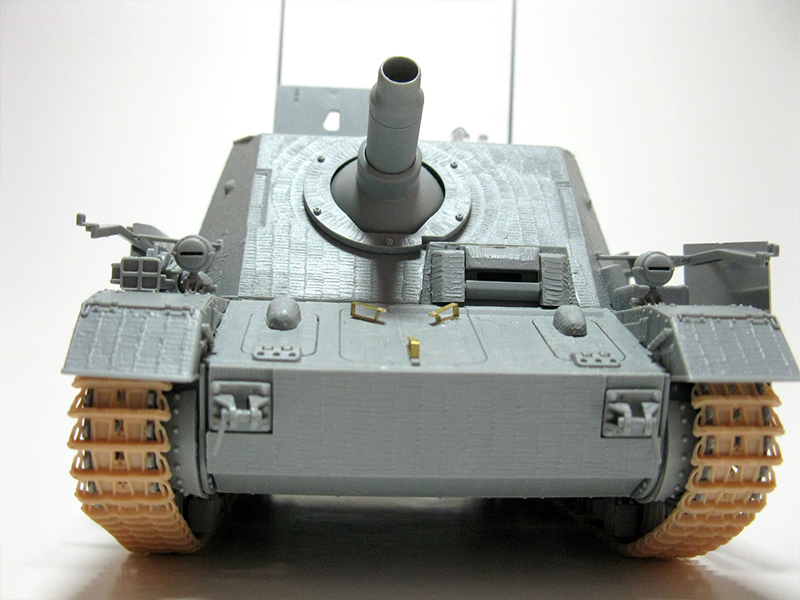
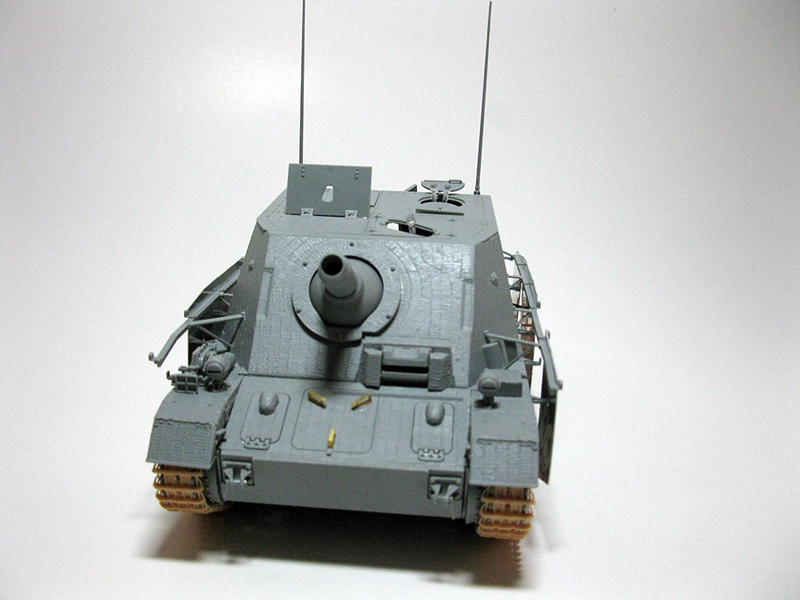
Of all the vehicles that saw their debut at the Battle of Kursk, surely the Sturmpanzer IV or "Brummbär" is one of the strangest and most memorable. A natural evolution of previous heavy guns mounted on Panzer IV Chassis, the Sturmpanzer IV mounted a 150mm Sturmhaubitze (StuH) 43 L/12 on the Panzer IV chassis. The gun was a slightly modified s.IG 33, which had previously been mounted on the Panzer 1, 2 and 3. The Brummbär is also the precursor to the Sturmtiger, in it's super structure, with a heavy artillery piece combination. This kit represents a converted Panzer IV G version, with Zimmerit applied. This suggests that since it has early style Panzer IV Schurzen that it was one of the initial Brummbärs, refitted after the Battle of Kursk. Early Brummbär are easy to identify as they have a Tiger I drivers vision port and no bow MG. The later versions had an extended drivers area and a standard MG34 in a ball high up on the super structure.
Build Review
The kit consists of 18 sprues in standard Dragon Models gray plastic, as well as the super structure and engine deck, 1 sprue of clear parts, a small photo etch fret, nickel schurzen and DS tracks. A pretty stuffed box with plenty marked in blue to not use. The instructions are broken in to 22 steps and two marking options are provided. The decal sheet is only consists of a few Balkan Kraus.
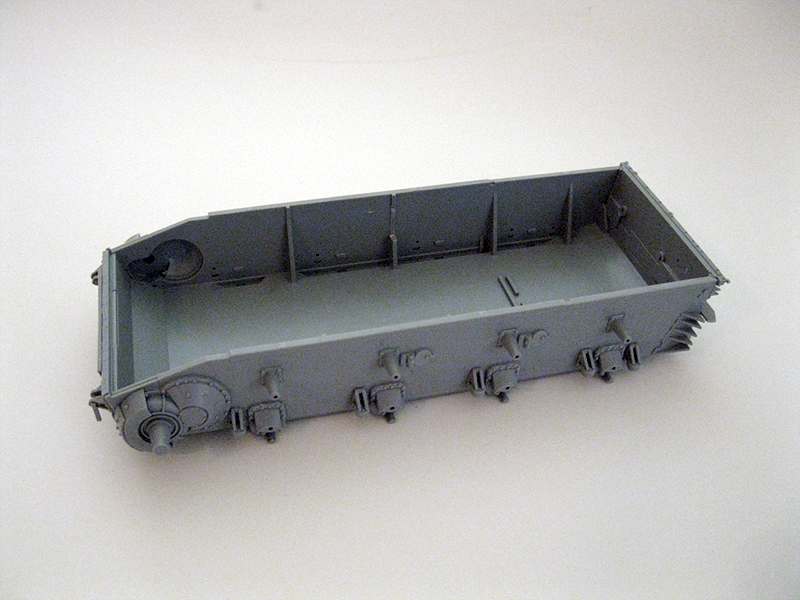
Steps 1-2 Suspension/Lower Hull
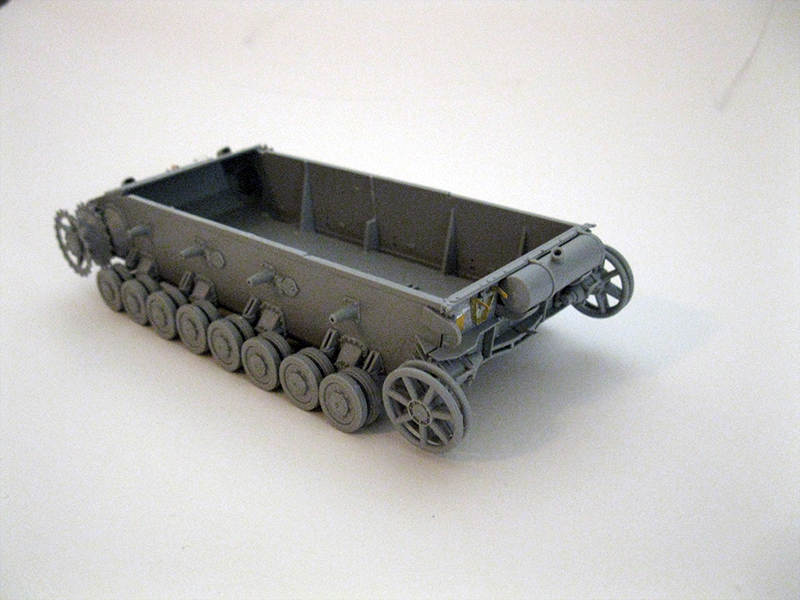
The first few steps went by without incident. All of the wheels, rollers and sprockets are so familiar to anyone who builds Dragon Models there isn't really much to say. I will say that they went together perfectly, no issues. They do have us remove all but 9mm of both sides of the inner support inside the hull. This is so we can fit the interior, but it's a little odd. I used a digital caliper to measure something 9mm long and just held it down in the hull. I'm not sure how much it matters that you have it exact as the hull floor sits on other parts, I think it's mostly that you get it out of the way. There are a few options in this step for different front plates, but all in all this part of the build flies by.
Steps 3-6 Suspension/Lower Hull Continued
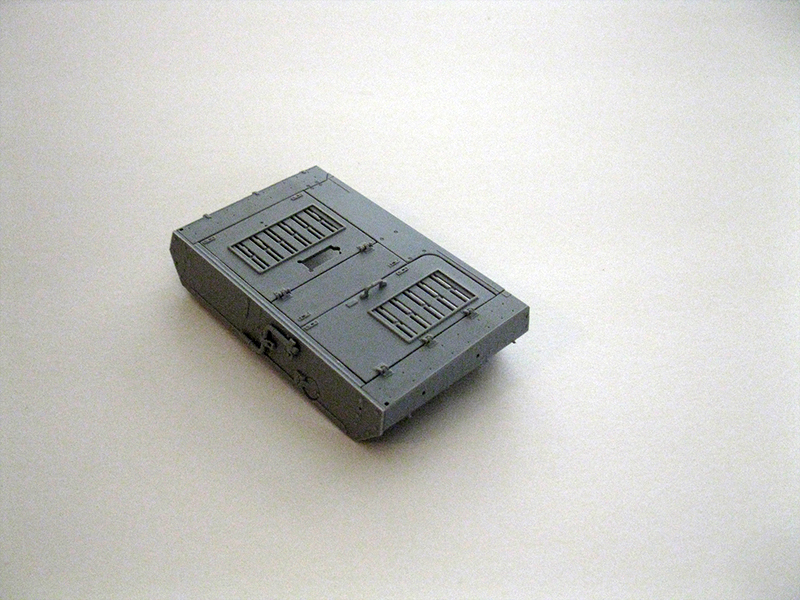
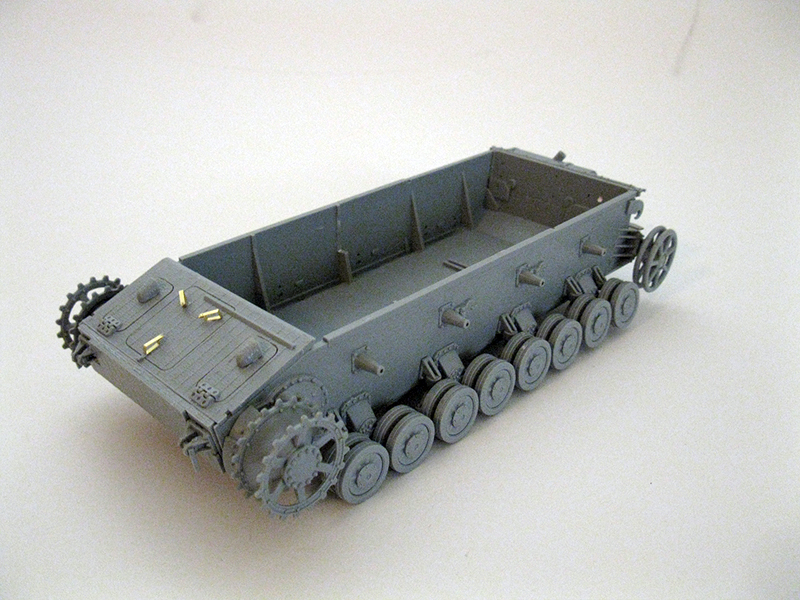
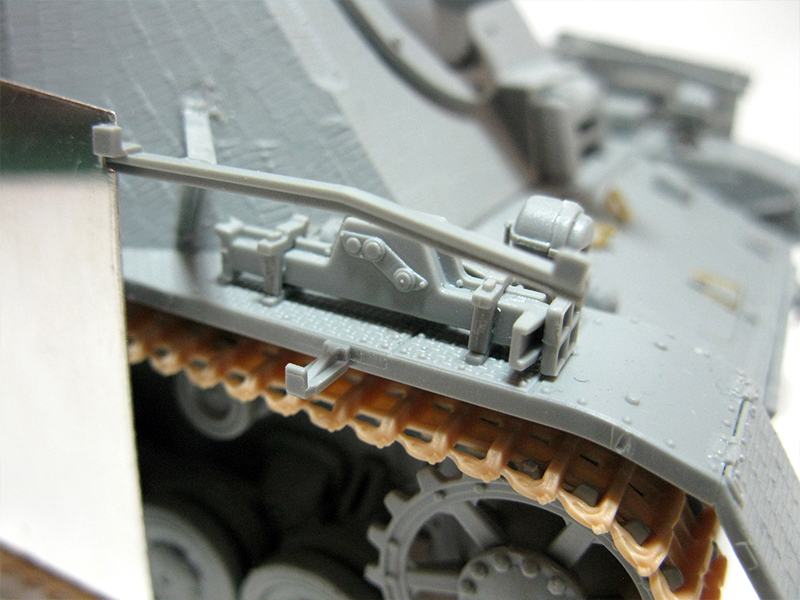
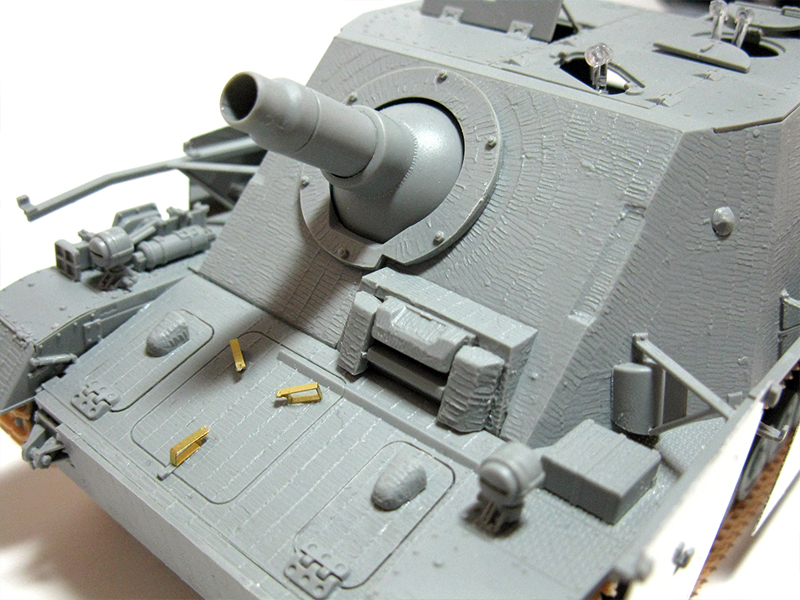
In step 3 the Bogie mounts go on as well as the bump stops and final drive housings. All of this is no problem at all. There is a nice armored assembly over the final drive housing, and then we move on to the exhaust. The exhaust pipe itself is slide molded and multi-pieced, which builds up very well. Here we do run in to some things to deal with though. Dragon Models wants us to fill some holes in the rear plate, which in itself is no big deal. The problem is however that this plate has Zimmerit, so care must be taken in trying to recreate the texture with putty. A few PE parts go over this area anyway, so if you don't do the best job, chances are you can hide it. The idler adjusters are simple and go together fine, as does the majority of the rest of the rear plate. In step 6 though, they have us bend some smaller PE to mount on the front plate, which honestly I had some trouble with. Some of the folds are pretty small, and if you're not the best with bending etch, this may be problematic for you. I got it mostly right in my build, and it looks the part. Last part in this step we mount the bogies themselves, which are the simplified versions, not the workable type.
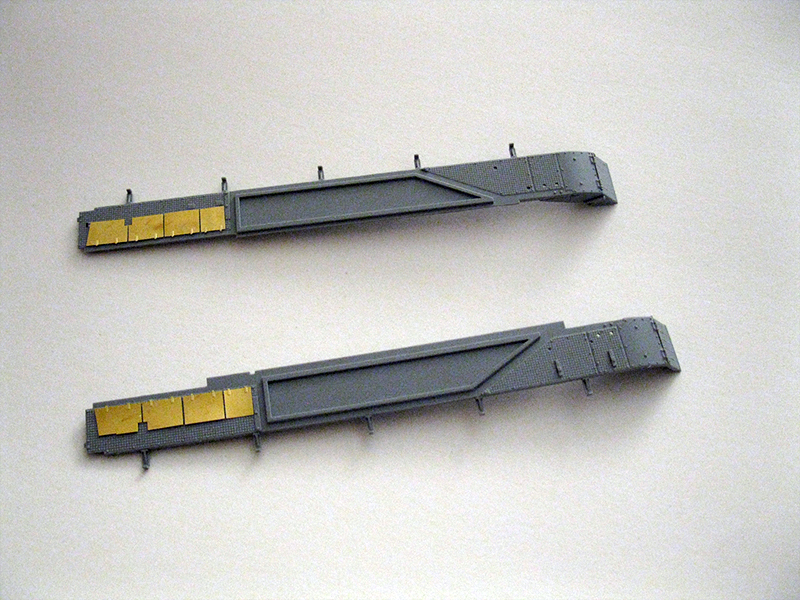
Steps 7-10 Fenders and Engine deck
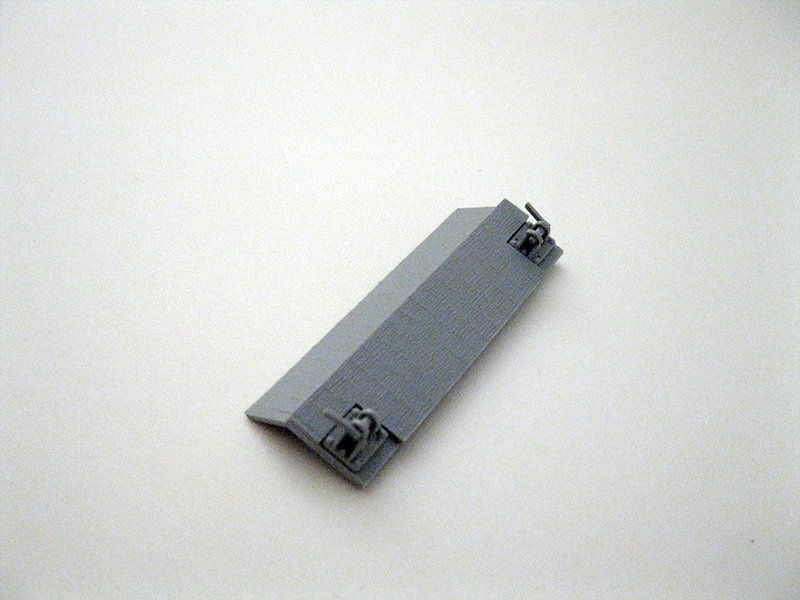
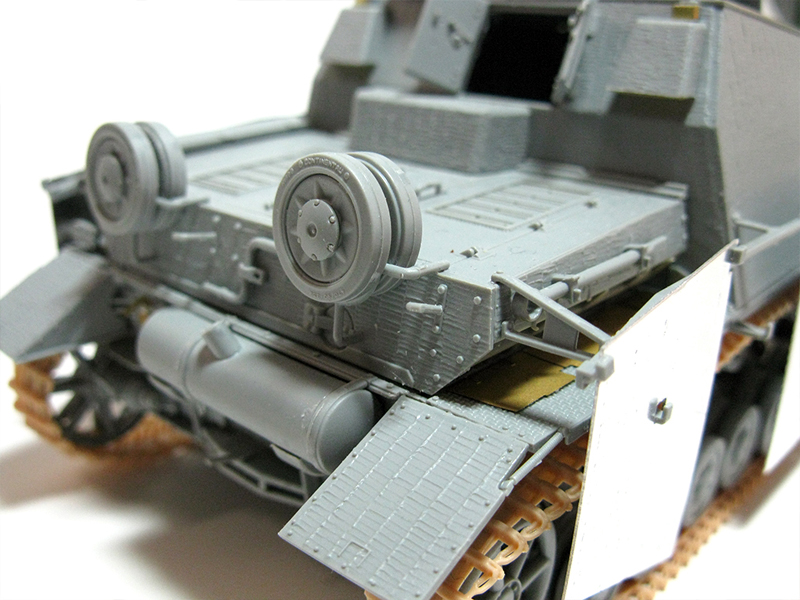
We start step 7 with the fenders, some etch for the familiar pieces that close the air intakes, and then we add the front fenders. The next part is a little ambiguous in that they highlight some areas we are supposed to remove, but I was a bit confused if I was looking at the top and bottom view of one fender, or both simultaneously. It's both, but it took me a minute. They have us shave off a bit along the length and a large chunk from the rear. This is very important for fitting the super structure later, and it's a bit difficult. One might say the build depends upon you accomplishing this step correctly. Step 8 is familiar OVM bits going on the fenders and a hybrid PE/styrene part which you should not install. Later on in the build I discovered that because this kit represents a Befehls variant, the toolbox and idler adjusting tool are on opposite sides of the rear engine deck, thus taking up the space where this part would live. So you can choose to either not install it, or put it on the opposite side. I left it off. Step 10 sees us starting the engine deck and roof of the super structure. Nothing to report here, everything went together correctly.
Steps 11-14 Engine deck/Super structure
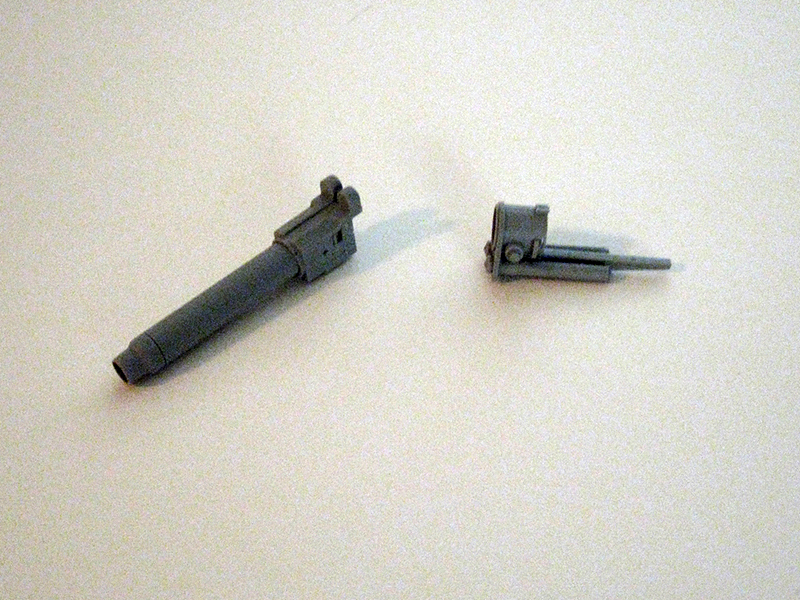
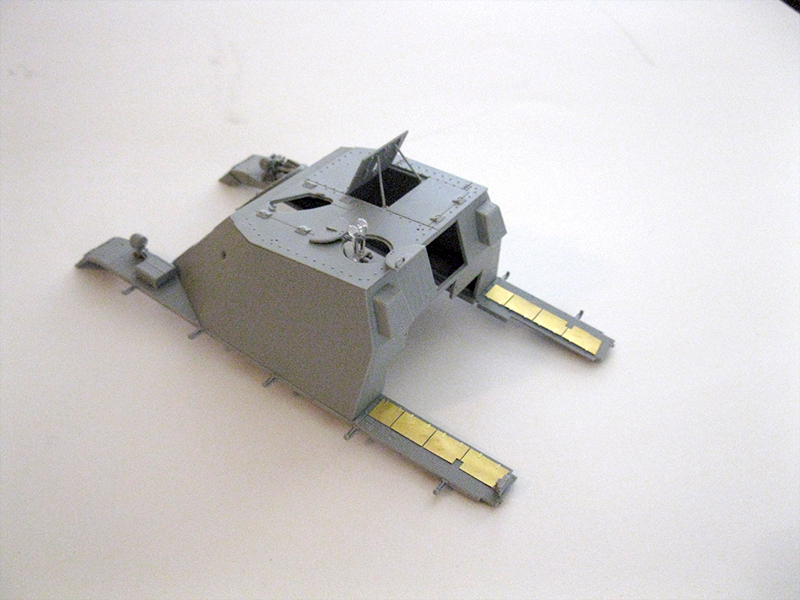
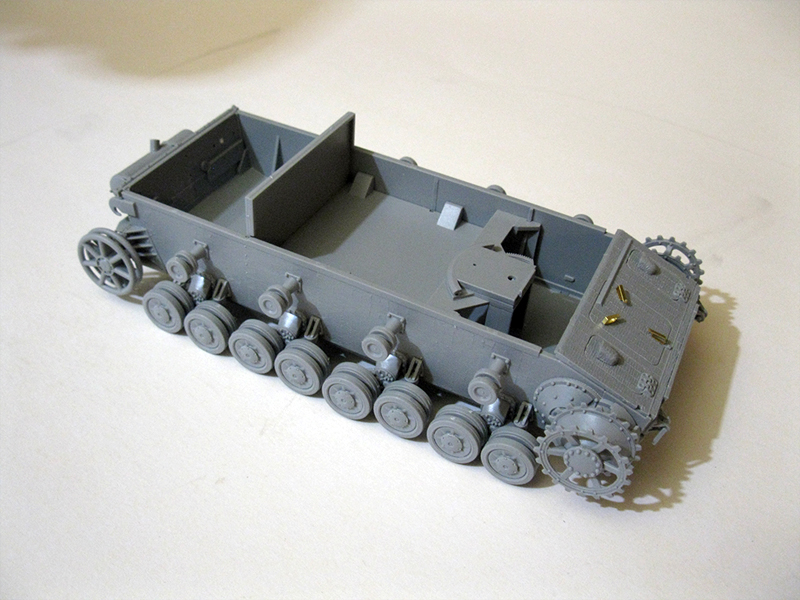
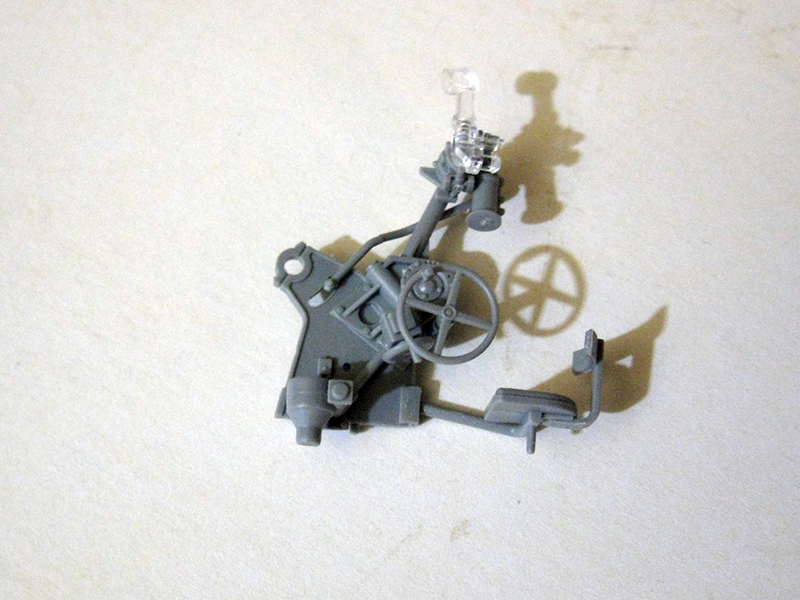
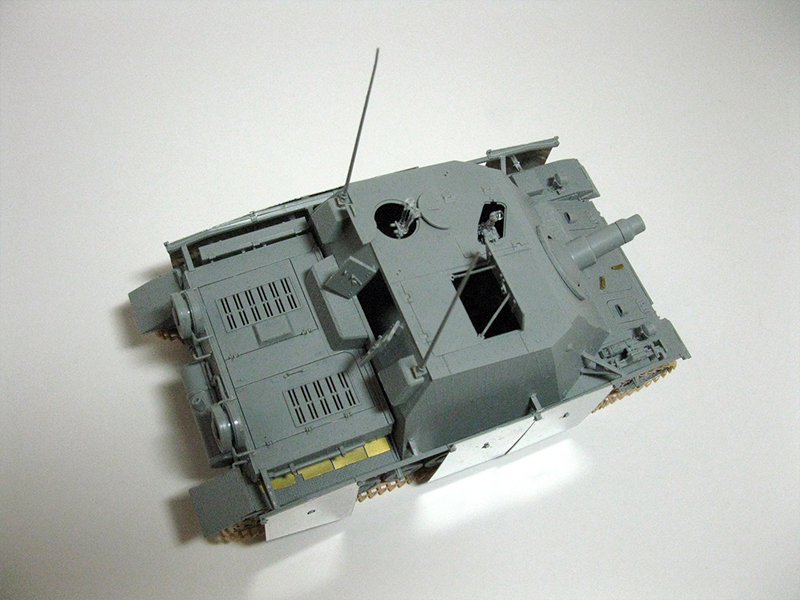
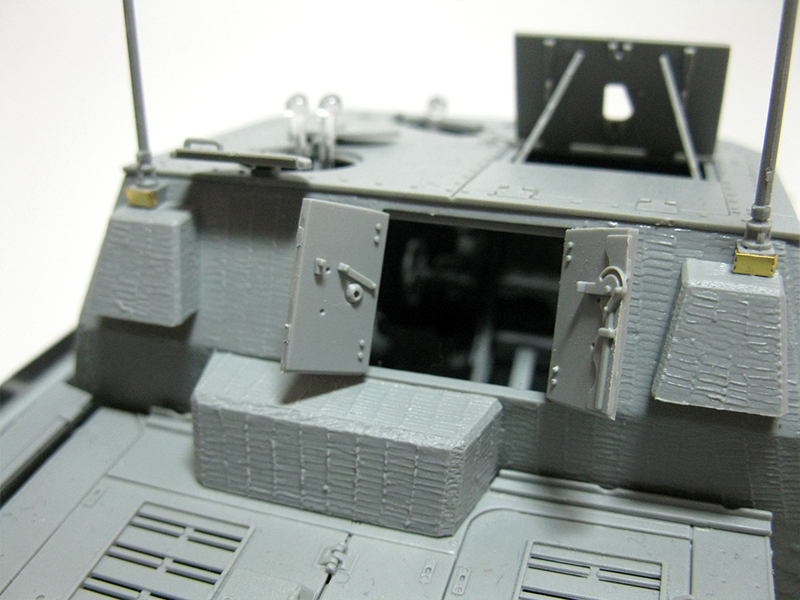
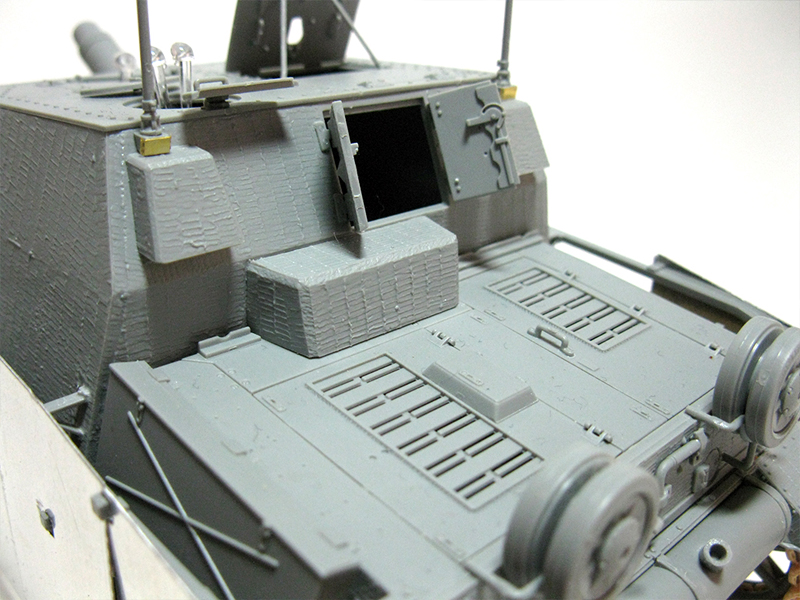
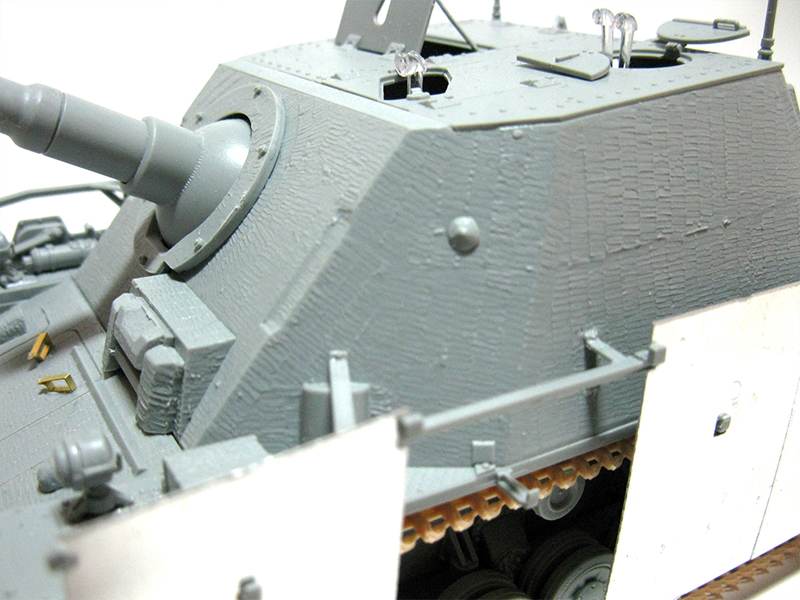
This all begins with the MG mount on the roof, which I left for later. The rest of these parts all go on nicely, but I left off parts E11 and E12 so that I could paint the sight in inside later. The antennas are a nice touch, and the PE that wraps around them adds a nice bit of detail. The PE underneath the boxes right below them is a nice touch as well. I chose to model the rear doors open as the kit has some interior. Last bit in this step is the vision port, which can be made workable and the pistol ports.
Steps 15 -18 Interior
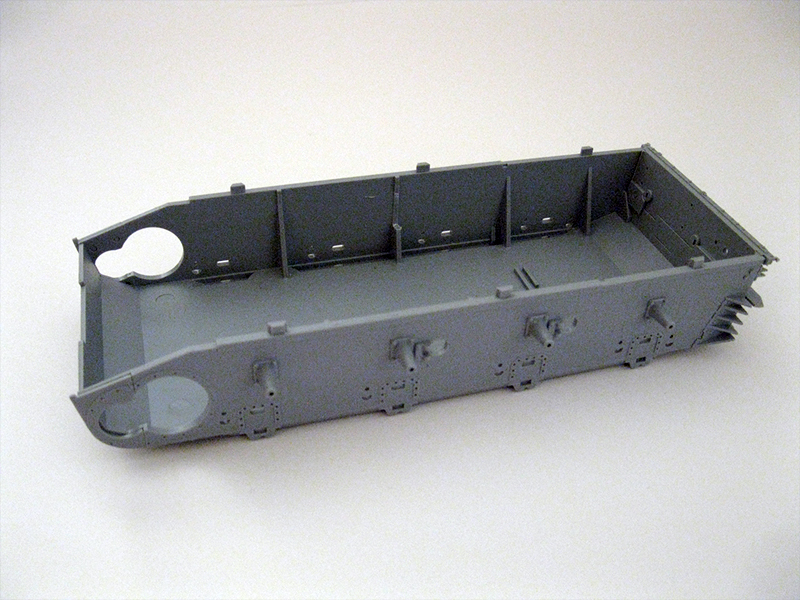
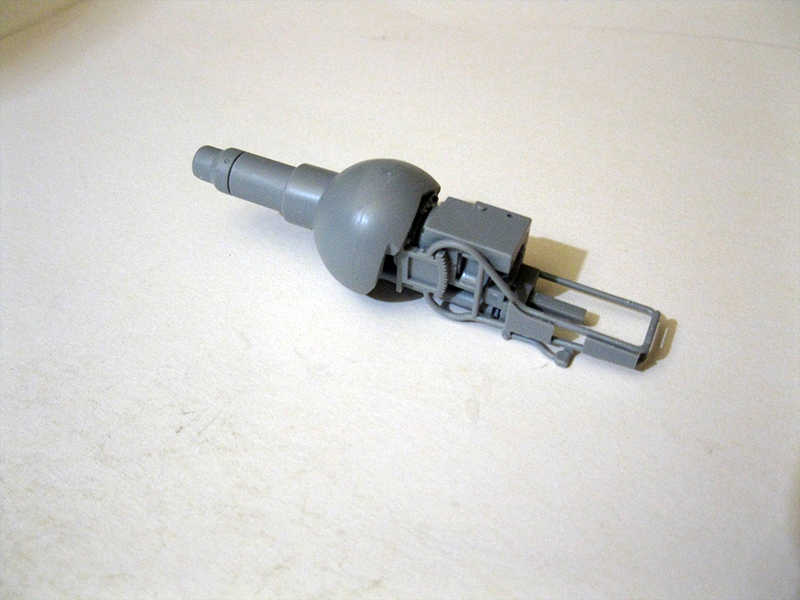
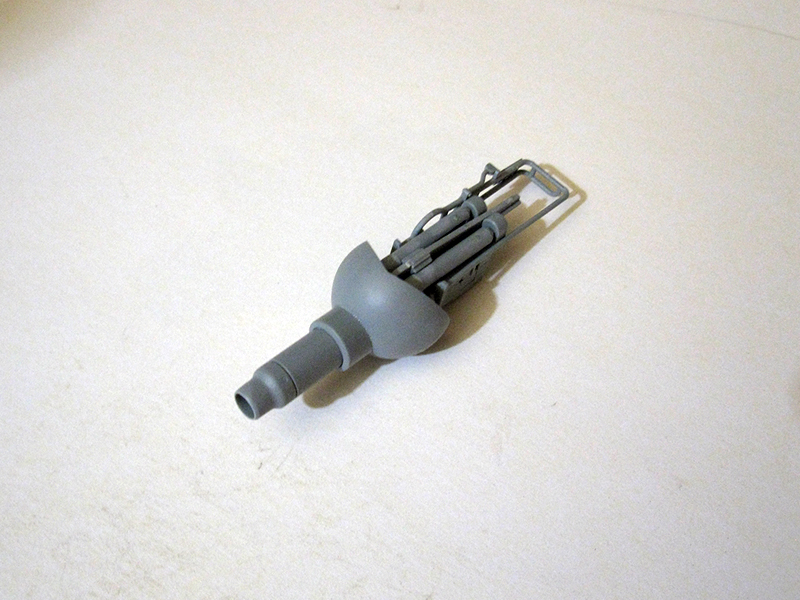
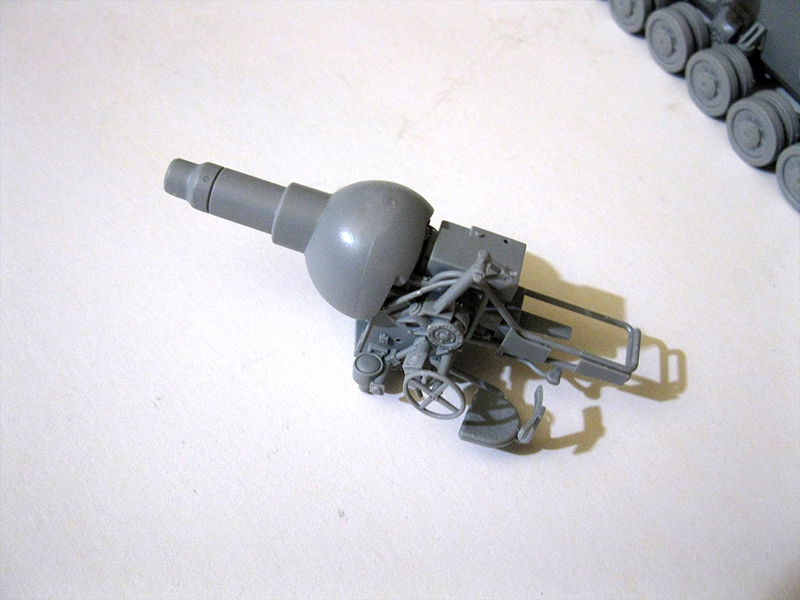
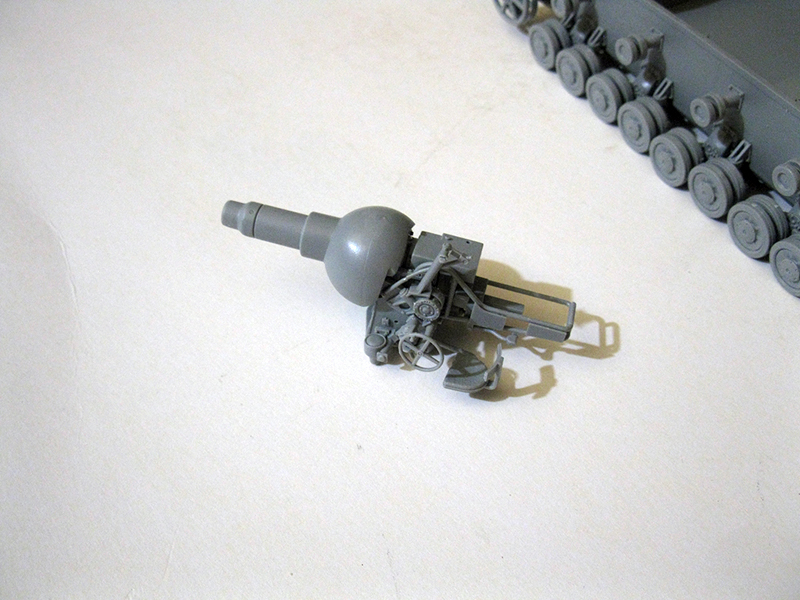
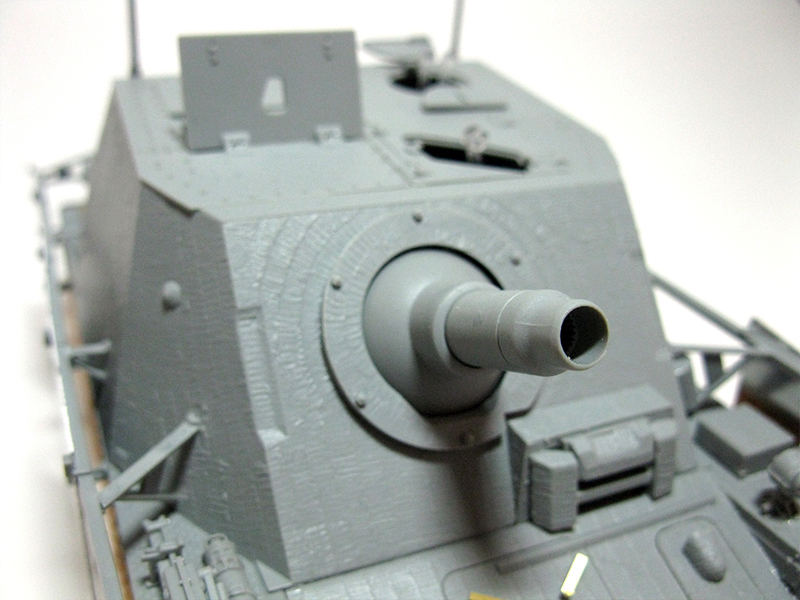
The gun is how we start building up the interior, and it's a pretty intense build by itself. The gun is slide molded, and the breach guard has some delicate but easy to assemble parts. The seat, sights and elevation wheels all are very nice moldings and that assembly builds up much like the StuG III kits from Dragon Models. After quite a while of putting tiny gun parts together we finally mount the gun to the interior mount and ball mantlet. This part of the build was easy and reminded me why I love Dragon Models, lovely stuff. That being said the next step has us mount the roof on the super structure, which reminded me why I don't love Dragon Models. There isn't sufficient surface area to glue the roof to the vehicle itself, so I had to be very careful in how it set as I glued it. The whole seam between the front plate and roof has contact point to glue. You could fix this by adding some styrene support inside the hull as I don't think you could see it when the roof is on.
Steps 19-22 Final assembly and Schurzen installation.
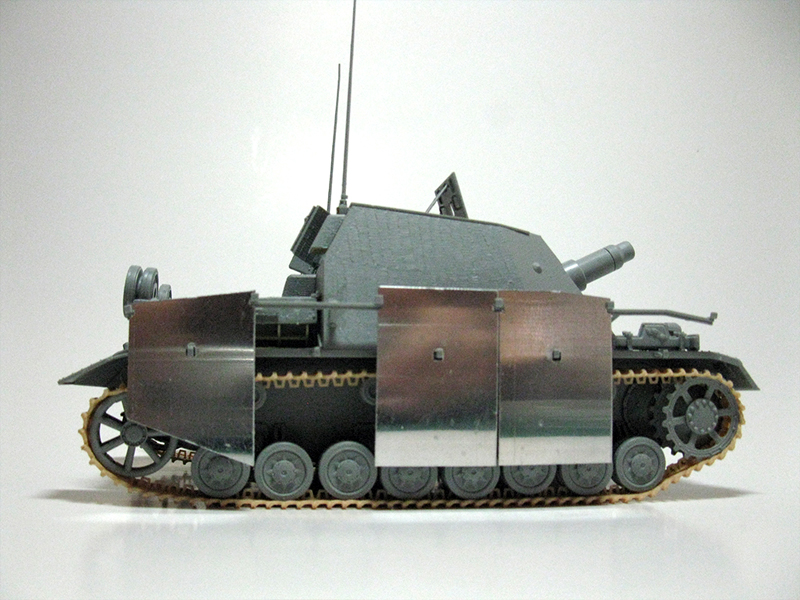
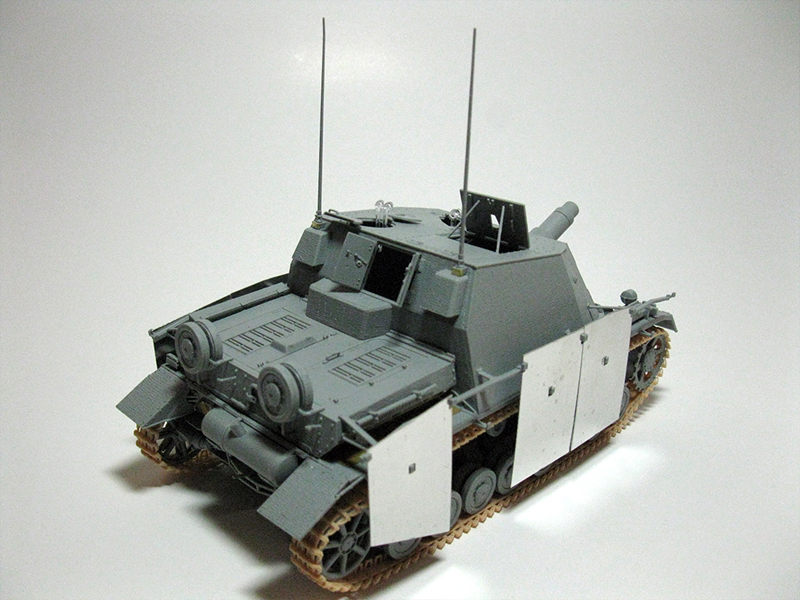
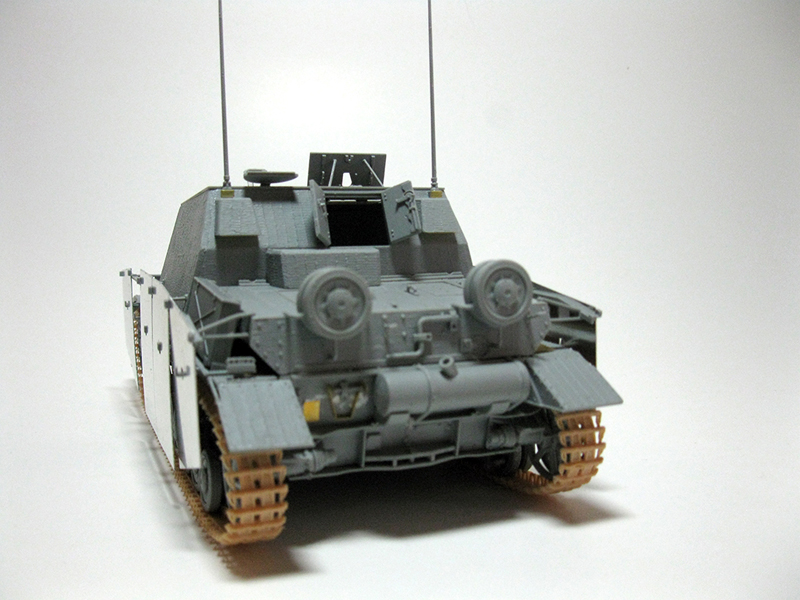
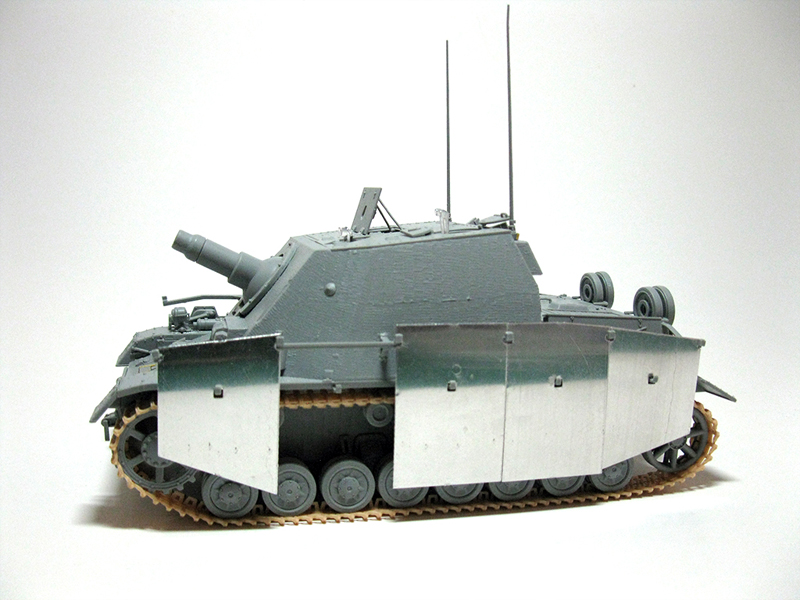
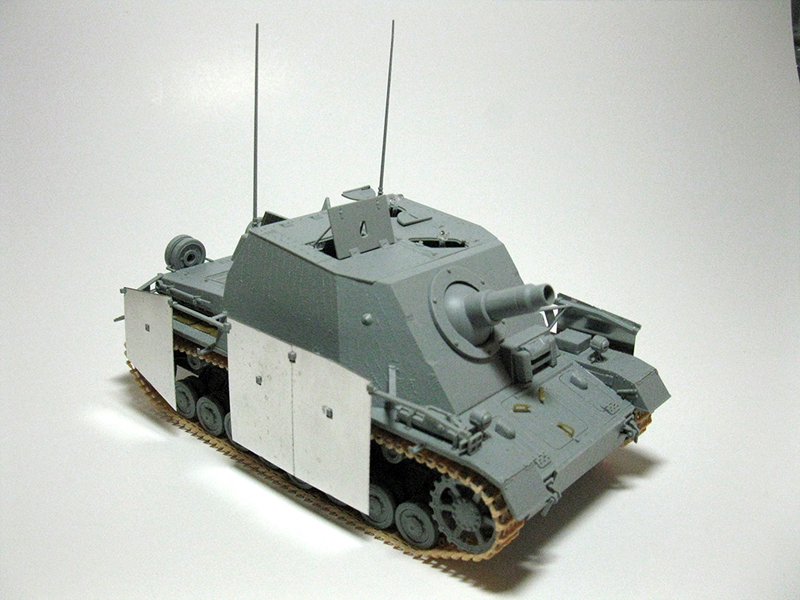
Here we install the fenders to the super structure, then interior to lower hull. Then super structure to lower hull, and finally engine deck. At least that's how I did it. Again be mindful of the parts you needed to remove from the fenders early in the build, or the super structure/fenders will not fit over the firewall that is part of the interior assembly. Dragon Models also have us install DS tracks here, and there was nothing much to report there. They fit, kind of. The RHS track on my example was a bit too long, and I suppose you could try and adjust the position of the idler arm to compensate, but I'd prefer we just had Magic Tracks in the kit so we could use track sag to compensate. After all of that is done we get to install the schurzen or just some mounting lugs for the brackets. I chose to install the schurzen and it went pretty smoothly. There were no visible mounting points for the brackets, so I did it a bit backwards by gluing the brackets together and then figuring out how they could fit based on reference. The nickel Schurzen works pretty well except I couldn't get all of it to fit snugly without creating problems. To solve this I left a few off to create "slack" and it looks great. I'm sure you could sand down the plates a tiny bit as well if you wanted them all installed.
SUMMARY
Highs: Builds up well, cleanly moldedLows: DS Tracks, errors in the instructions, 100% reused spruesVerdict: Nothing new in this kit, get the older Zimmerit kit for half the price on ebay.
Our Thanks to Dragon USA! This item was provided by them for the purpose of having it reviewed on this KitMaker Network site. If you would like your kit, book, or product reviewed, please contact us.
About Adam Mann (Mannloon) FROM: WISCONSIN, UNITED STATES
I am a professional video game artist specializing in hard surface modeling and PBR texturing. I started making armor models a few years ago and have been trying since to translate my digital skills to paint and plastic, which isn't always easy. My specialty is German Armor in 1/35.
Looking at the two kit's contents there seems to be quite a bit different:
6596
6819
Looks like a new/different lower hull and details, rear hull, and schurzen and mounts. The Magic tracks of 6596 are desirable though.
KL


Comments