Firepower is one of the most important characteristics of any tank on the battlefield. The main gun of any tank is distinct and can provide tell-tale features and details for specific nations.
The size and performance of a tank main gun is directly relative to the threat it was designed to destroy. In the 1950s the NATO Allies had grave and real concerns about the Soviet and Warsaw Pact armoured forces. Using or upgrading WWII guns as the Cold War progressed was insufficient with tanks such as the T-55 were moving on mass across Eastern Europe. The 20 Pounder on the Centurion was a very good gun but it was quickly out matched on potentially future battlefields.
Royal Ordnances development of the L7 rifled tank gun was a major advancement for NATO. The L7 could be adapted to a variety of tanks including the Centurion and over a dozen other Main Battle Tanks. One of the most recognizable tanks using the L7 (or variant) is the Leopard 1 Main Battle Tank. From first development to the current day the Leopard 1 has mounted the L7 gun with proven success in combat in Bosnia and Afghanistan.
In the past model manufactures have for the most part stuck to their guns with providing two piece plastic barrel in kits. The result was ugly mould seams, generic details, and lack of barrel rifling for those discerning modellers. There have been several aftermarket ventures into producing the L7 in resin or turned metal. The results have overall been very good but there have been observed issues with resin warping, inaccurate production, or an absence of the finer details.
The up and coming Aftermarket Company Leopard Workshop has produced several new Leopard 1 barrels to suit the needs of detail minded modellers. Using a wealth of reference information the Leopard Workshop has taken a hybrid approach to producing the L7 by combing both resin and turned metal to capture all the details required to display the L7 in multiple configurations.
Contents
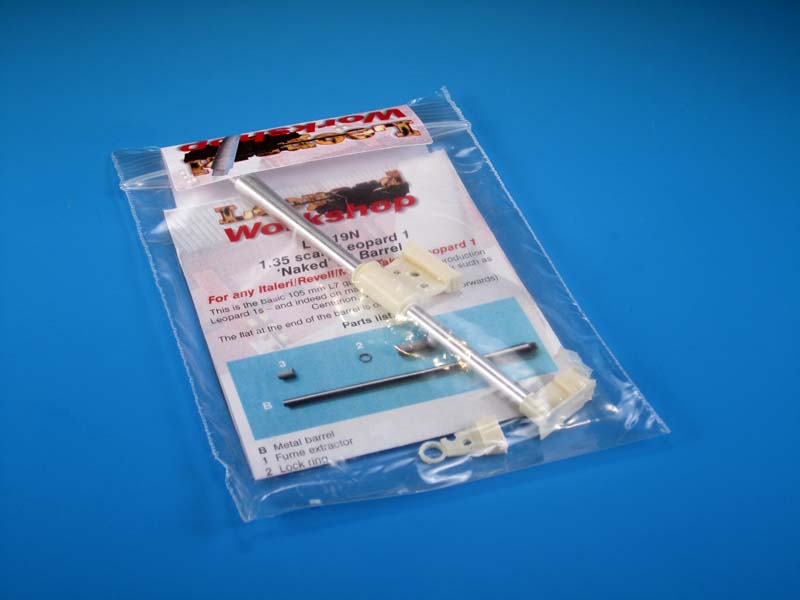
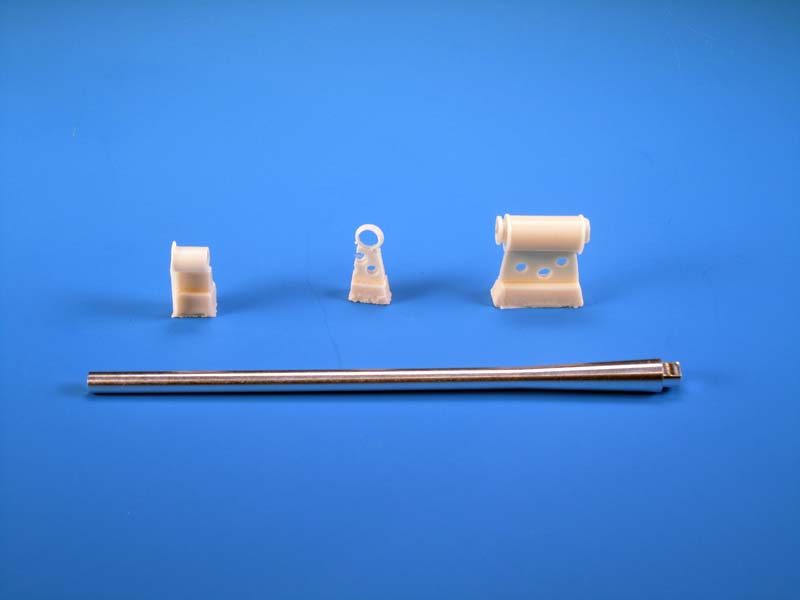
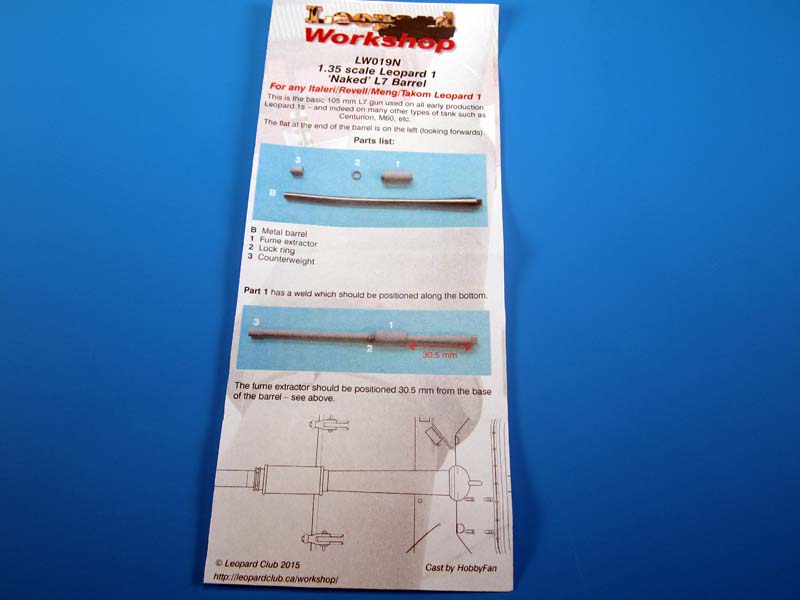
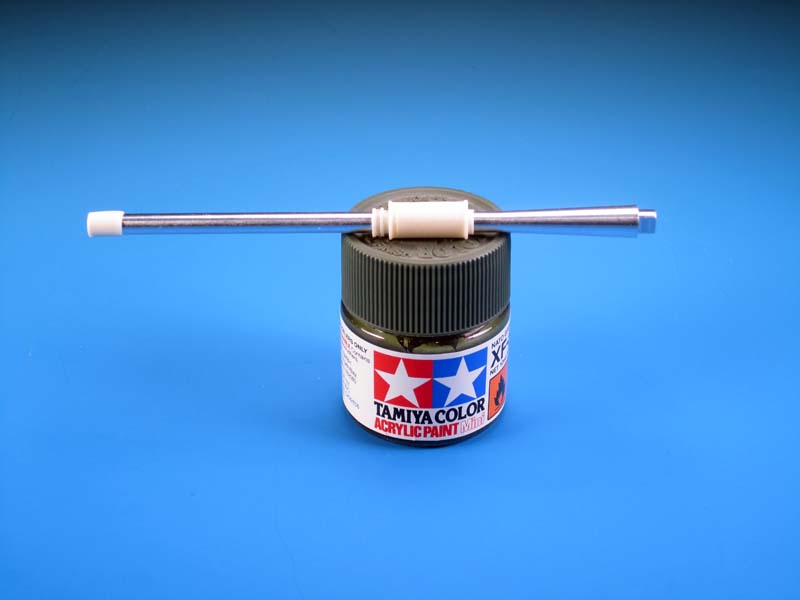
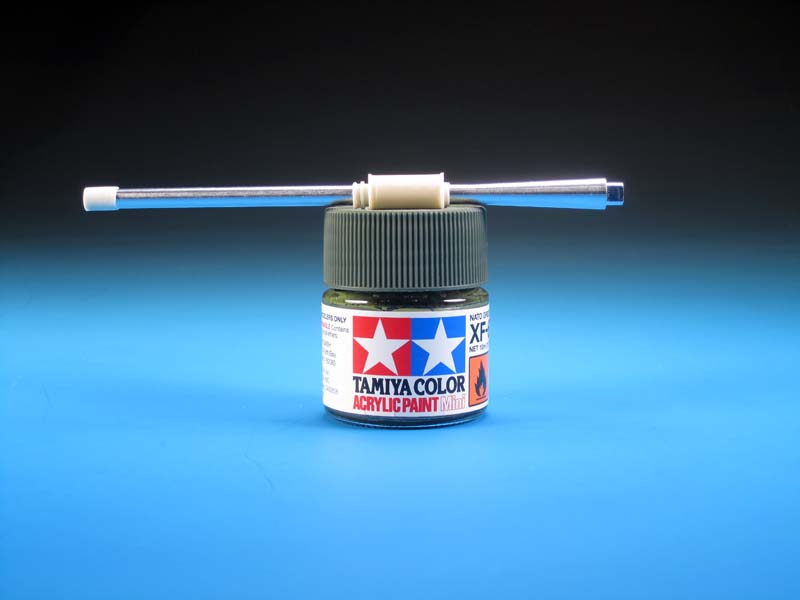
The L7 Naked gun barrel is not an official term. It simply denotes that the L7 in this case has been produced in 1/35th scale as a basic rifled tank gun. There are no barrel jackets or muzzle reference system components. The LW019N Leopard 1 L7 Gun Barrel set consists of the following parts:
These four parts will create the L7 in its basic form and can be used on Leopard 1 versions based on timeline and deployment. While the basic L7 is primarily associated with early versions of the Leopard 1 in many casees tank crew would remove barrel thermal jackets due to damage, maintenance, or a different role such as OPFOR.
Review
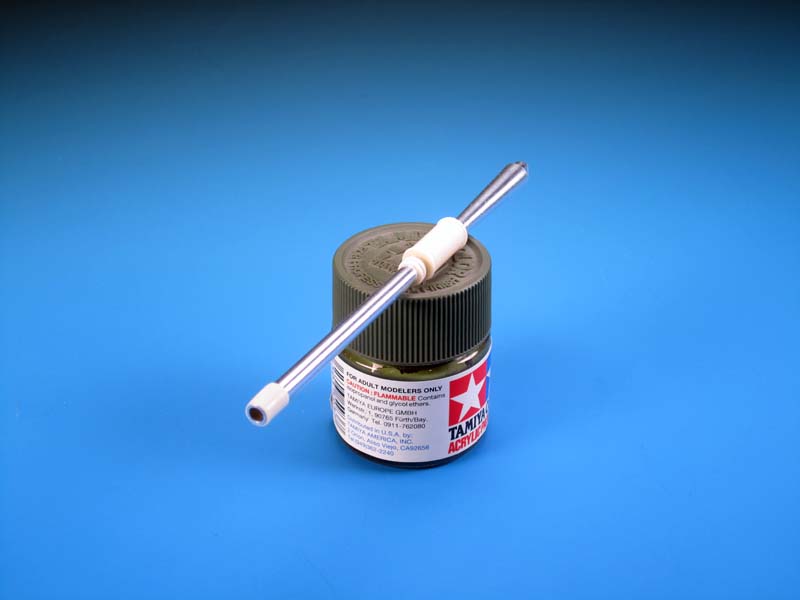
The turned metal barrel is nicely produced. The taper is visible and adds to the look of the barrel as it reaches the gun trunnions and mantlet area. The barrel is designed for use on the Italeri, Revell, Takom, and Meng Leopard kits. This is a great option for modellers with old or new kits awaiting refit with a new aftermarket barrel.
The rifling depicted in the turned metal barrel muzzle is easy spotted. For the perfectionists the rifling is not angled into a twist. I was not overly concerned with counting the lands and grooves to ensure absolute accuracy.
The Fume Extractor and Muzzle Counterweight are nicely cast in cream coloured resin. Both parts will require clean-up to remove the casting blocks. Be careful not to remove the weld seam on the bottom of the Fume Extractor as it is supposed to be there. The resin Locking ring is a nice touch and a great little detail. I noted on the Fume Extractor an inconsistency with the surface. On one side of the part there is an odd indent. This creates an uneven surface around the circumference of the Fume Extractor. I think some filler will be required to fix this blemish.
Assembly of the barrel is simple once the resin parts are cleaned up. Clean-up included cutting off casting plugs and then sanding off the seams. This was fairly straightforward on the Fume Extractor. The locking ring and the muzzle counterweight are fragile. The muzzle counterweight lip chipped almost immediately. The locking ring casting requires a delicate touch and the instructions are a bit difficult to determine which way the part fits. I had to sand the inside of the ring in order to get it to slide up the barrel.
The Fume Extractor is to be placed 30.5mm from the mantlet end of the barrel (I am sure if you went 30 or 31 mm your secret would be safe). The Locking Ring slides on next and butts up to the Fume Extractor. Finally, the Muzzle Counterweight is added to the muzzle. Make sure this part is flush on the end of the muzzle.
I did some non-scientific measurements with a metric ruler in comparison to the 1/35th scale Leopard 1 drawings in Volume 1 of the Leopard Trilogy. I was surprised to see the lengths were different. The Leopard Workshop barrel measures up at the muzzle end about 2mm shorter than the 1/35th scale Leopard 1 drawing. If this a fatal flaw, no. I dont think that 2 mm is a life changing discrepancy whether the drawings or the barrel are correct or incorrect. Ive misplaced my own 1:1 scale L7 so I wasnt able to figure out 100% if the drawing or the new barrel is off in size.
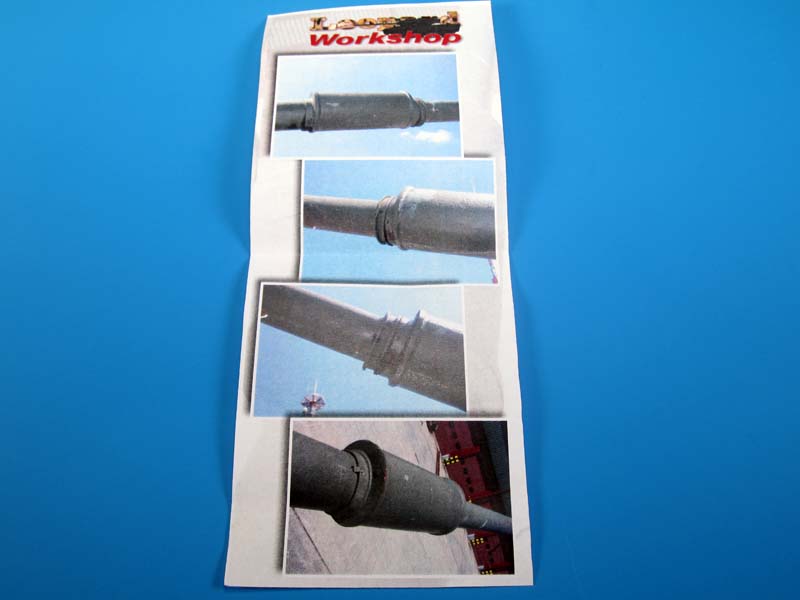
The instructions are simple and straight forward. A single sheet provides a view of the parts, the proper placement of the parts, and the positioning of the barrel on the mantlet. There is a flat notch on the end of the barrel that should face to the left side in order to use the barrel universally on all the Leopard kits previously mentioned. There are four small colour images on the reverse side of the instructions that show close ups of the Fume Extractor details. It would have been good to have included a single image of the muzzle end to confirm for modellers the placement and look of the real muzzle counterweight.
Conclusion
This is a simple very crafted and nicely detailed set to improve the look of your future Leopard 1 or any other Main Battle Tank using the same L7 tank gun.
The metal barrel is on par with other aftermarket products. The addition of the resin parts adds to the detail without a large jump in cost.
SUMMARY
Highs: Very nice details on the metal barrel and resin parts.Lows: Careful cleanup of the large casting blocks is required on the very delicate resin parts. Instruction images could be expanded upon.Verdict: Recommended.
Nice, but to be honest I don't like the resin "counterweight". I understand that it was made separately to allow for inserting the fume extractor part from the muzzle end, but the way it was done makes the diameter of this counterweight too big. This is a minor flaw, but noticeable for me. In reality the difference in diameter between the barrel and this counterweight is minimal - sometimes even hard to notice in photos. But resin casting limitations meant that the part couldn't be made as thin as it should be to be fully accurate. Much better solution would be to machine a muzzle tip of the barrel to reduce its diameter slightly on the length of the counterweight. This way the fume extractor could still be easily put on the barrel and the counterweight could be of more correct diameter, as the thinner barrel tip would allow for thicker wall of resin part, without making the external diameter too big.
If I decide to buy this barrel, I will replace the resin counterweight with a single layer of Tamiya masking tape around the muzzle end - it should be enough and more in scale thickness. If cut precisely the ends of the tape should meet without any noticeable gap - and it could be placed on the bottom side anyway.
Thank you for your comments Vodnik. We decided to do the counterweight this way as this is one of three versions of this gun. The remaining two have sleeves which need to slide along the barrel. This is impossible with a turned counterweight and also makes the alternatives of two different collimators equally impossible.
Mike I have only one concern about resin collars over a metal barrel and that is that resin does tend to shrink. Is there a risk of the resin spliiting in time?
Mike, my suggestion of machining the muzzle end of the barrel to reduce the diameter at the length of the counterweight would still allow you to slide the sleeves along the barrel, and at the same time you could make more accurate counterweights with or without the colimators.


Comments