introduction
The Tiger I tank needs no introduction.
Although it is commonly thought the Tiger was developed to counter the shock of encountering the T-34 tank, development actually began a month prior to the invasion of the Soviet Union. Nevertheless, the tank proved a necessary antidote to the upgrunned, uparmored tanks being introduced onto the battlefields of WW2. The Tiger I was considered a formidable foe because of its armor-plate and firepower that allowed it to out-punch just about anything the Allies or Soviets could throw at it. It was mounted with the deadly 8.8cm KwK 36 (a cousin of the PaK 43 anti-tank gun) developed by Krupp after Rheinmetall's 88mm design was preferred for what was Germany's best multipurpose cannon, the FlaK 18/36/37). With its dreaded "88," the Tiger could knock out most tanks before they could get in range to do battle. Stories abound of anti-tank rounds bouncing off its armor, or of commanders like Michael Wittmann single-handedly destroying 29 tanks and APCs at the battle of Villers-Bocage in June, 1944.
However, the Tiger was developed too late in the war, was significantly underpowered for its large size and weight, was expensive to build, and was built in numbers too small to turn the course of the land conflict in Germany's favor. Grouped into specialized Tiger battalions (
Panzer Abteilungen), the tanks were more often used as mobile "fire brigades" sent in to stave off defeat, then withdrawn and sent somewhere else to quell a breakthrough. Yet despite its small numbers and propensity to break down (or worse, run out of gas), opponents insisted no other tank was as feared as the Tiger.
Historians (and model geeks) usually divide the Tiger I's operational life into four variants:
Initial
Early
Mid
Late
The terms were not official Wehrmacht nomenclature, but instead are used today to distinguish the various changes and modifications to the vehicle, whether the change in tracks (from "mirrored," matched ones in the beginning to the same tracks mounted on opposite sides), all the way to the steel wheels fitted to later models when the early rubber-rimmed wheels wore out too quickly. Variants weren't "discrete," however, with changes made along the way, so that "Late" Tigers built a few months apart might have distinct differences. The terms are more elastic than we might prefer.
Tamiya and Dragon have long dominated the Tiger I marketplace, while Korean manufacturer
Academy issued Tigers that hard-cores like myself saw as inaccurate-- and inferior. Now the company has attempted to rectify at least some of the problems by releasing two new, upgraded kits recently: a mid-Tiger (
reviewed on Armorama by David Foster) and a late version, reviewed here.
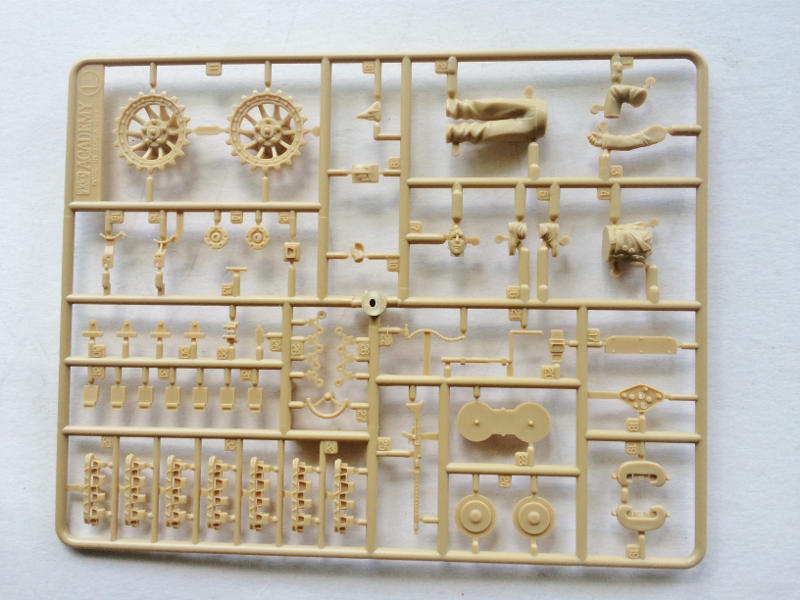
kit contents
Inside the usual brightly-colored
Academy box are:
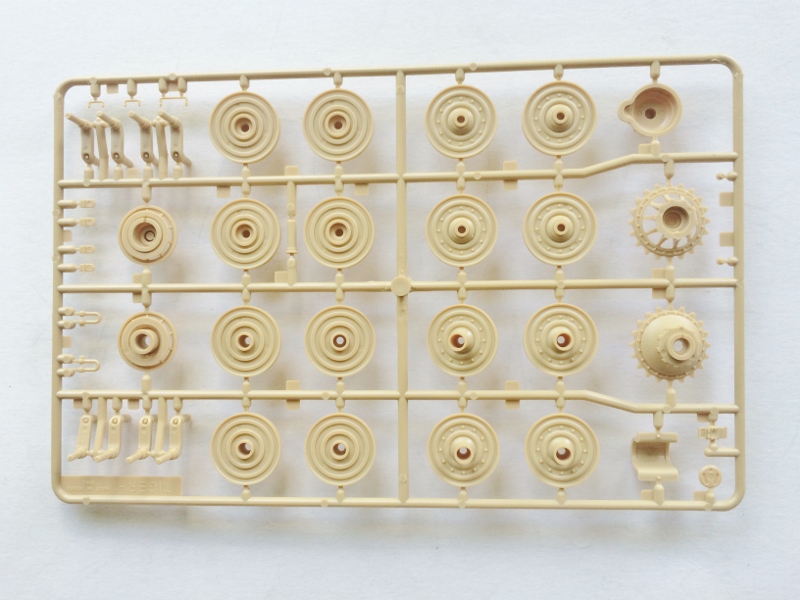
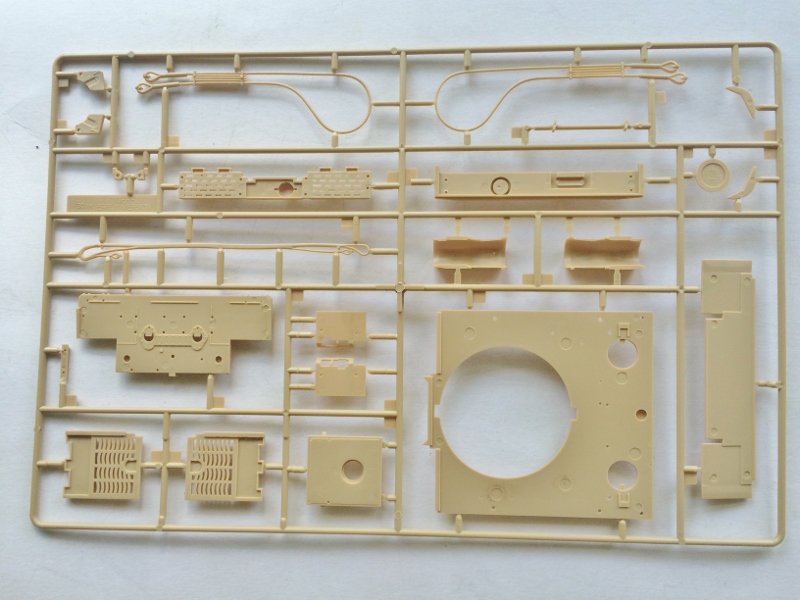
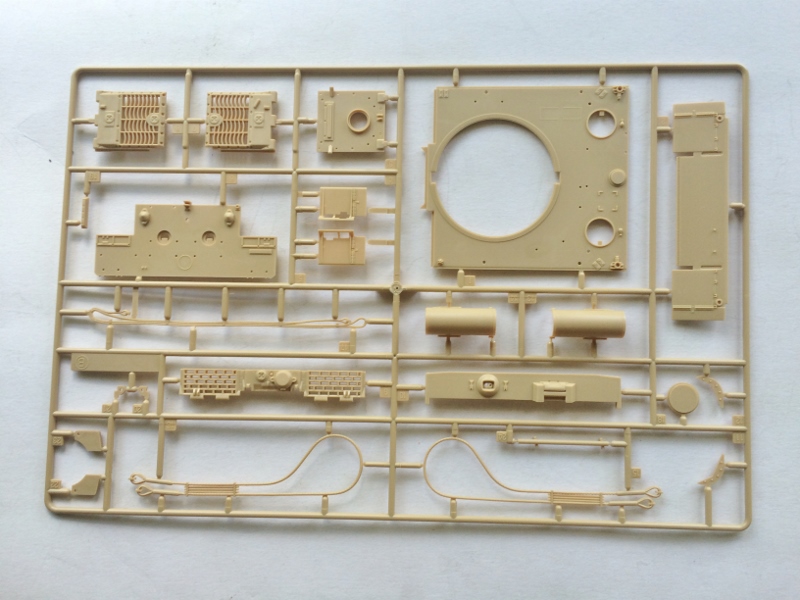
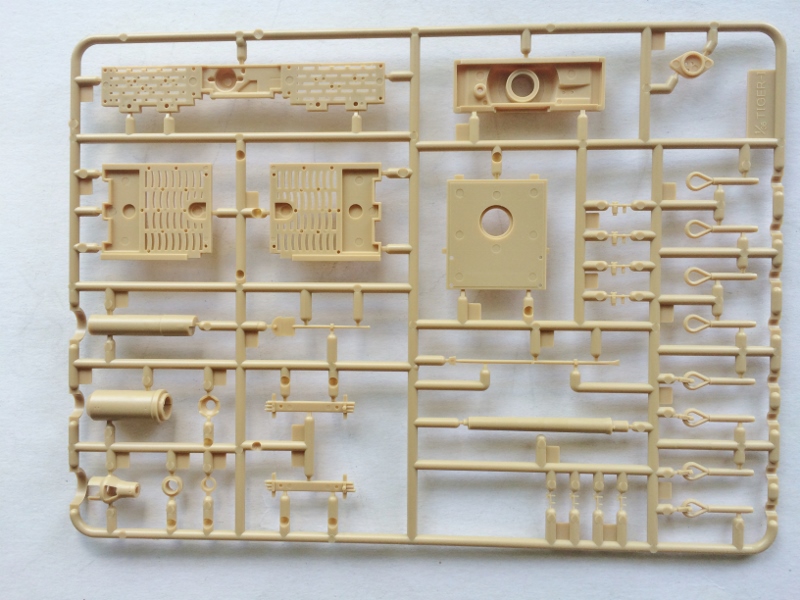
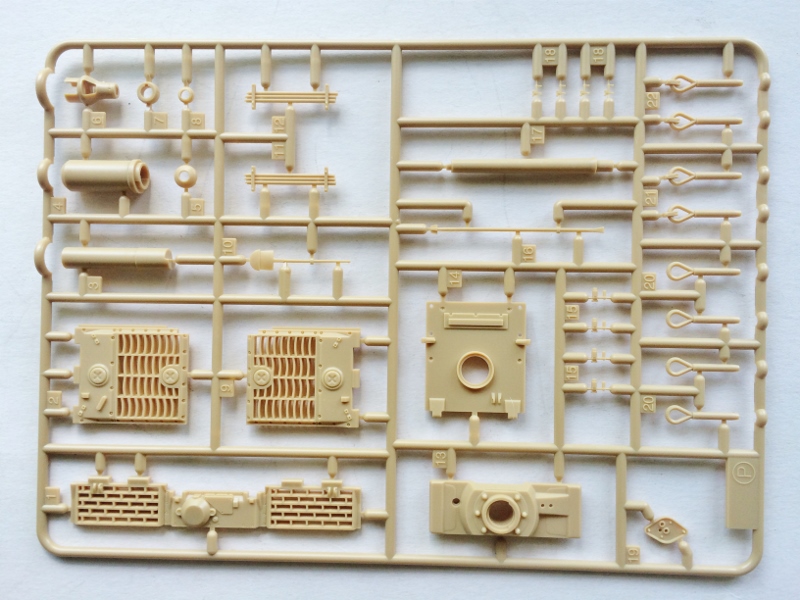
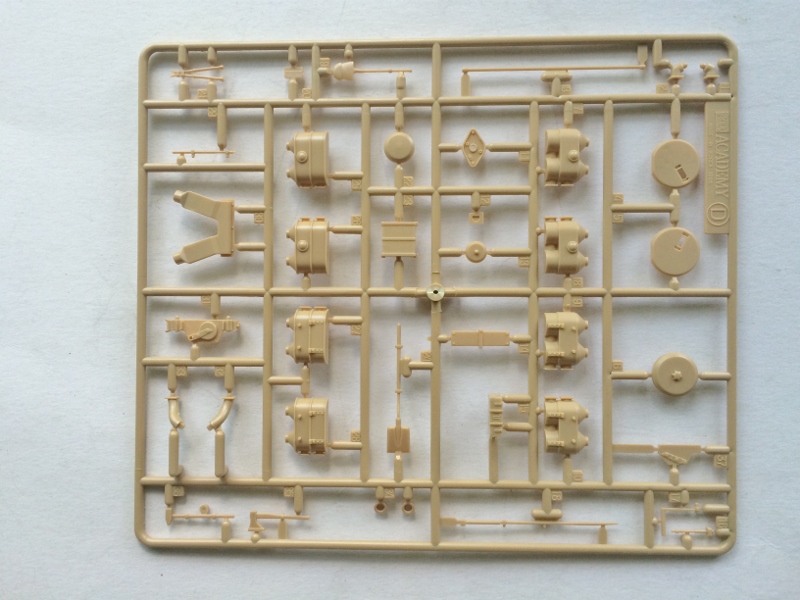
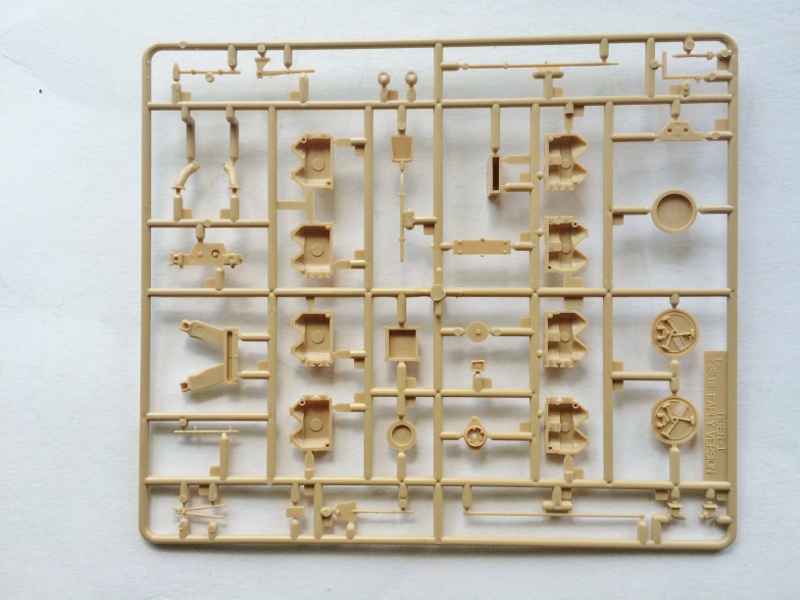
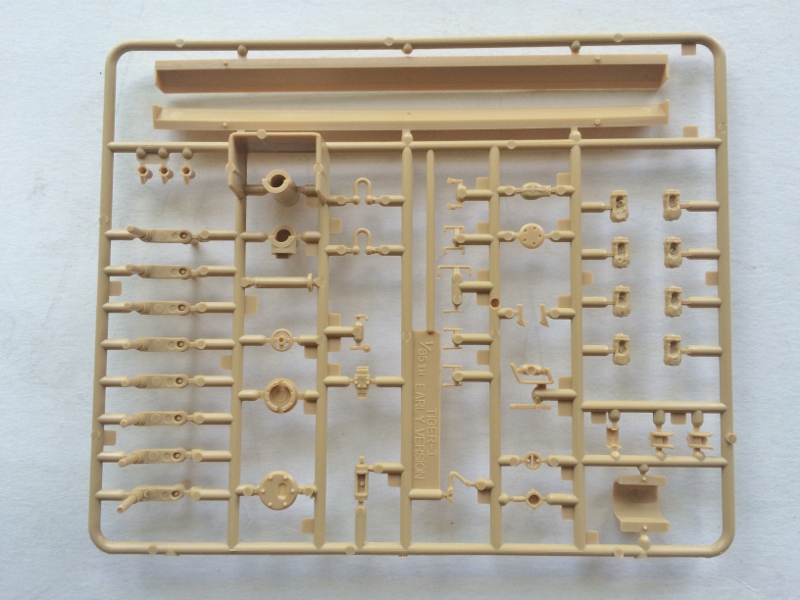
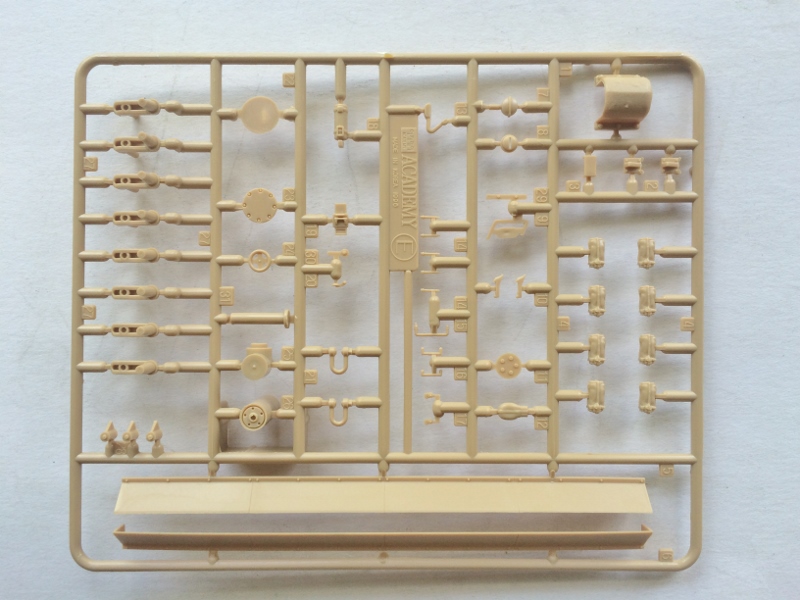
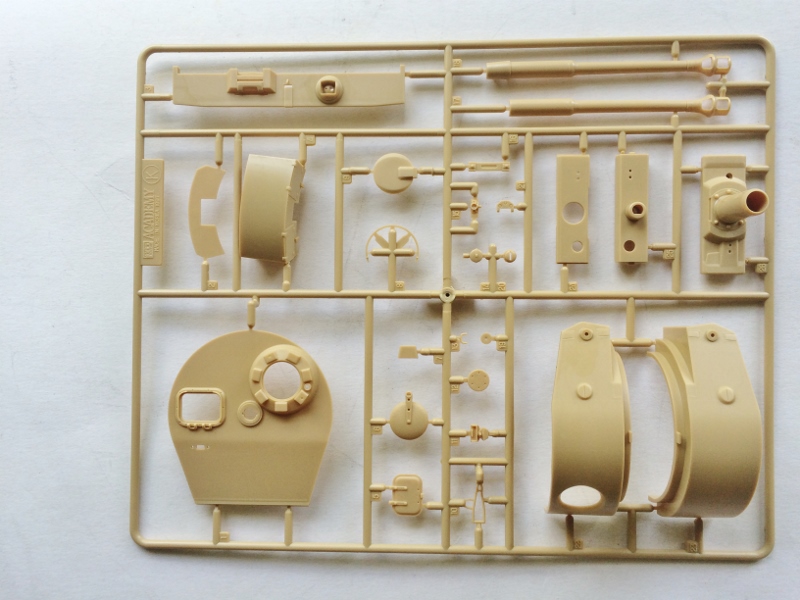
11 sprues of yellow styrene
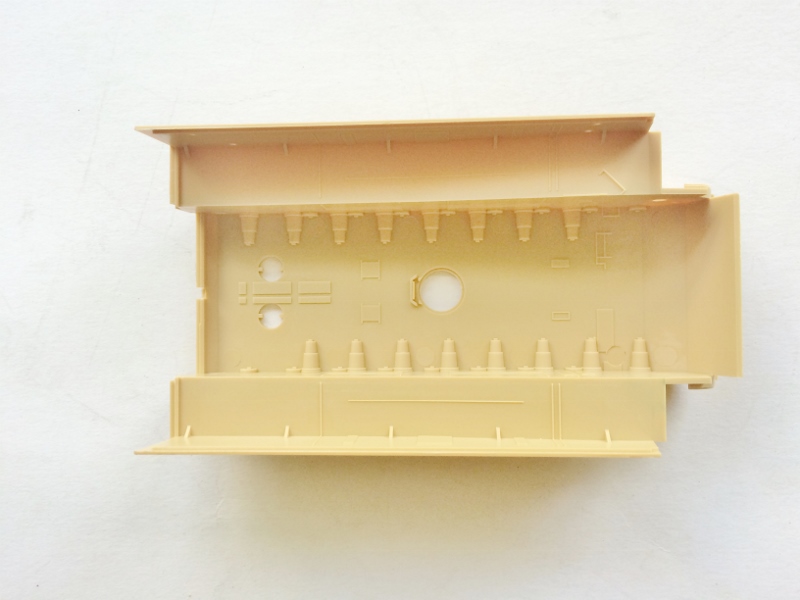
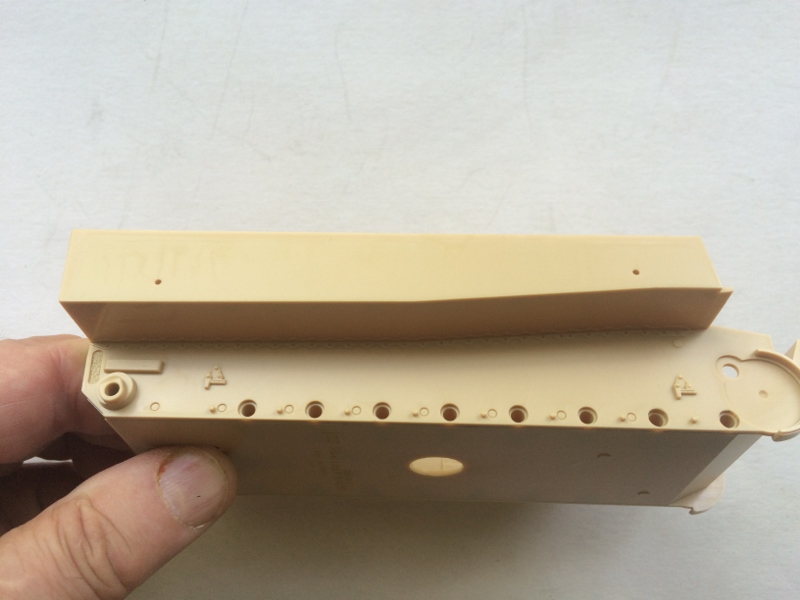
1 hull tub
a length of string
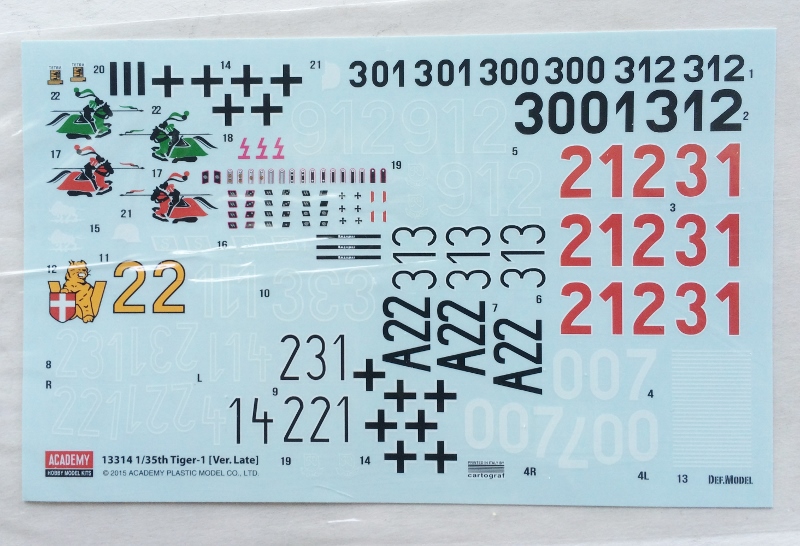
small sheet of decals printed by Def.Model
a strip of poly caps for the wheels, etc.
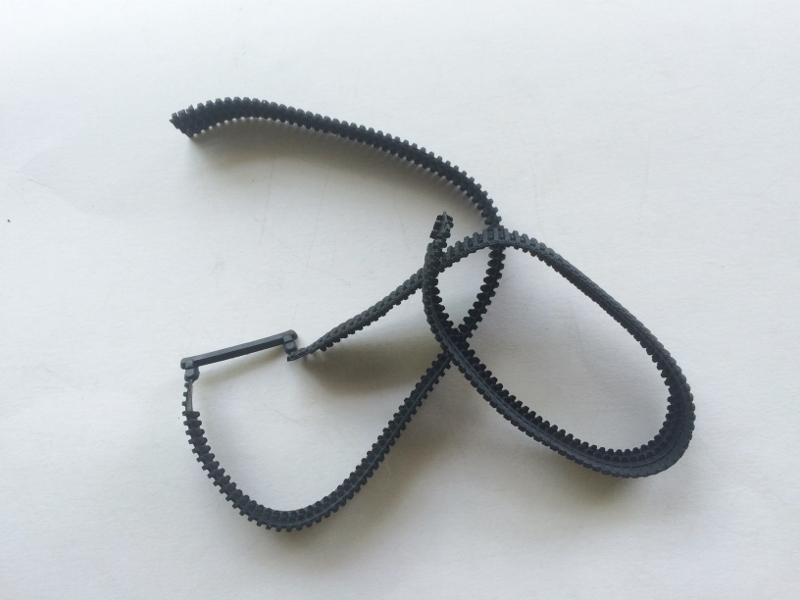
two strands of "rubber band" tracks
8 page painting & marking guide
8 page instruction booklet
small free of PE with engine screens & a Zimmerit tool
the review
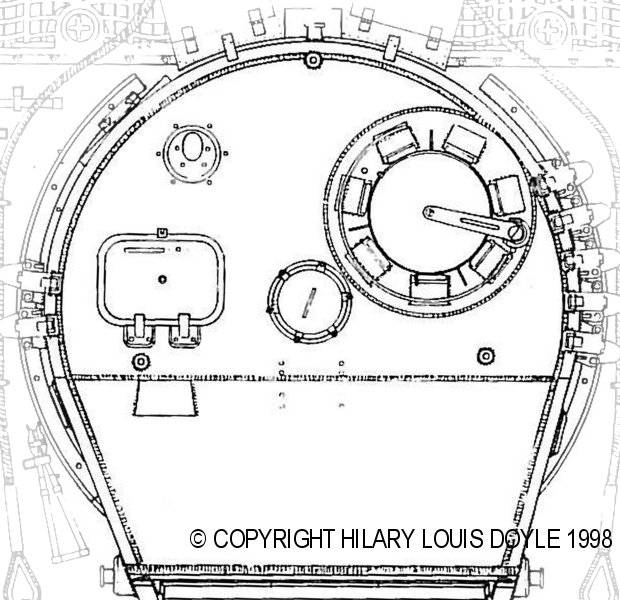
First of all, I want to thank Tiger expert David Byrden for helping me to review this kit. I know of no one who knows more about Tigers and their differing details than David, though he has modestly disputed my saying so. He has graciously pointed out the accuracy issues of the kit, along with its strengths, and helped walk me through all the problems large and small. In addition, David secured permission to use the illustration from Hilary Doyle (at right) showing how a Tiger's turret roof should be laid out.
As pointed out above, this isn't a brand-new kit, but a combination of older
Academy Tiger parts and new sprues with updated and upgraded components, as well as spiffy new decals from Cartograf. The changes include a new stab at a proper asymmetrical turret, a slide-molded 88mm gun (replacing the previous two-piece barrel), two new mantlets, two muzzle brakes, etc.
Turret
The new turret is of particular importance, since one of the areas that has concerned modelers in the past has been the inaccurate turret configuration on
Academy Tigers. A small cottage industry of resin "fixes" sprang up to correct problems with the kits, along with those of Tamiya (whose accuracy issues have come in for far less scrutiny and criticism). While mostly well-molded, the earlier
Academy kits often have wrong dimensions and a softness of detail.
The good news is the company has rendered the asymmetrical turret (Parts S1-2) properly for the most part with what David Byrden calls "proper angles, or very close to them." The wider vision ports are present, though the welds are positioned for an Early Tiger (likely the prototype used during the design phase). Consign Parts K22-23 to the spares box, as these are for an Early Tiger.
Sadly the good news about the asymmetrical turret is dampened by the problem of the turret roof. Three are provided in the kit (the older K1, along with new molds Q11 and S3). K1 and S3 are the older 25mm thick roofs; Q11 is the later 40mm roof. The 25mm roof is a Mid-Tiger feature, along with the very earliest Late-Tigers (got that?).
Yet the 40mm roof isn't correct, either. It has a central weld line (May '44), cupola drain slots (June '44) and the "mushrooms" for attaching a crane (
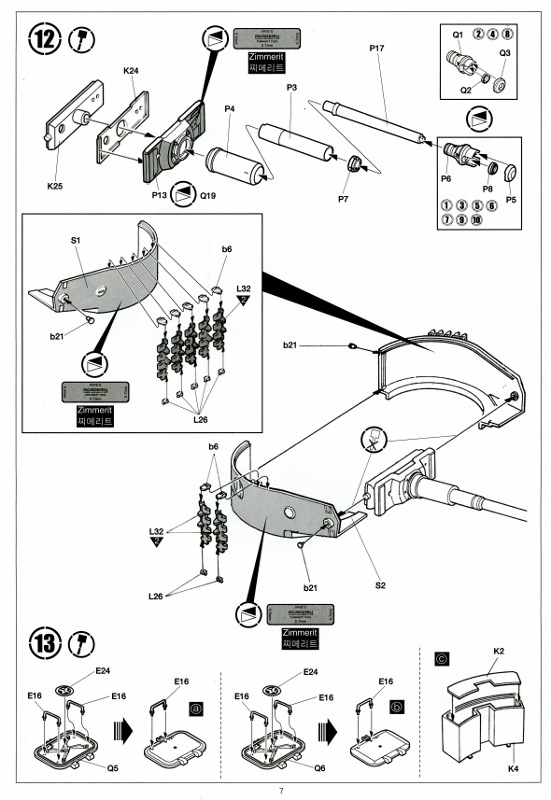
Pilze, from June '44). For this reason, it's appropriate only for the the final version of the Tiger I. You can remove the three features, but that would interest only rivet counters like myself. Using Part S3 will not solve the problem, since it has the wrong loader's hatch configuration, and lacks a flare pistol port. For sticklers, the port is located too far towards the rear of the roof. Step 13 says either loader's hatch (Parts Q5 & Q6) can be used, while only Q5 is correct.
The final problem with the turret is the beveled escape hatch (Part Q15) which is suitable only for an Early Tiger.
These are not fatal errors if all you want is to build "a Tiger I." But for those who want to build one of the ten specific vehicles in the painting guide (see below), it's annoying and somewhat disappointing.
Other errors associated with the turret are the bin and the "notch" that faces the turret: this does not extend all the way to the base of the bin as in the kit, but only about 1/3 of the way down. You will need to putty-over and sand smooth the fill (check out
this cross-section of a proper bin).
Turning to the business end of a Tiger's turret, there are two mantlets provided in the kit (Parts P13 and Q19). Part P13 is good for most Late Tigers, but Q19 has only one eye-hole, making it work strictly on Tigers produced after April 1944.
Not all the kit's issues are molded: the instructions are sometimes vague or wrong. For example, in Step 12, the extra tracks are shown being glued on upside down with the guide horns toward the top, instead of the other way around.
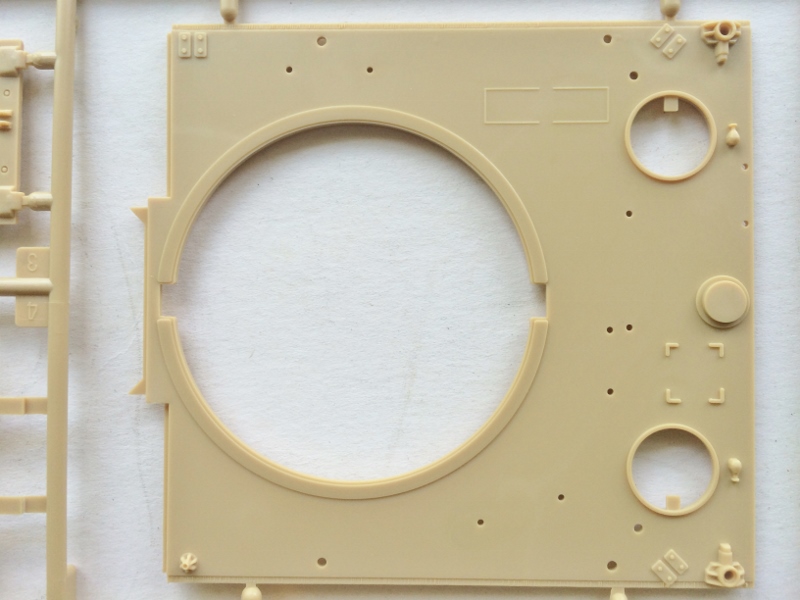
The Hull
The hull's "roof" has the protective ring around the turret that was added in February, 1944, right after steel wheels were substituted for the rubber-ringed ones on the earlier versions. This makes the hull roof suitable for almost all the Late Tigers. The pattern of bolts in the turret protective ring aren't correct, but this is a small problem. The tools intended for placement on the hull roof are in the correct positions, though the instructions don't tell modelers how to angle the tow clevis/hitch (Part L9).
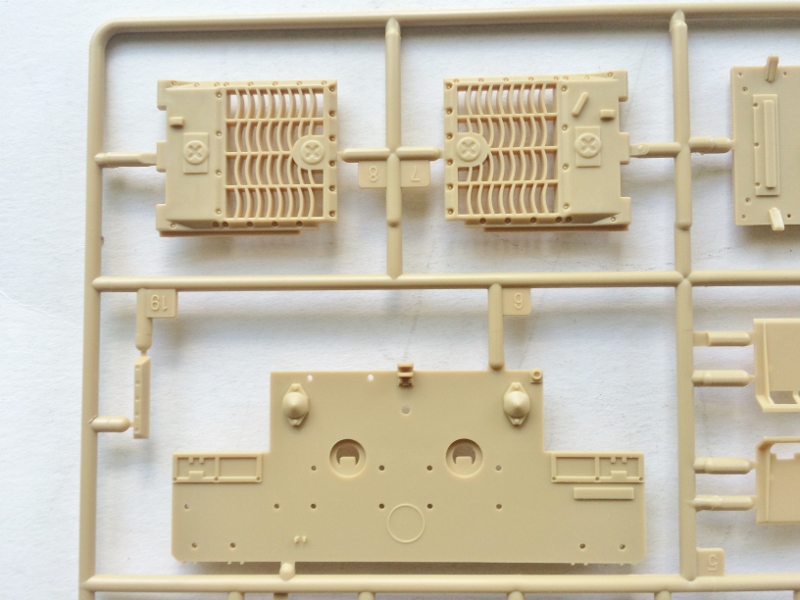
The engine covers have the correct patterns for the heavy grilles, and the engine hatch is correct for Late Tigers. The wiring tube from the hull roof to the headlight is not present, but this can be scratch-built. The 6-piece gun cleaning rod is provided, though one of the pieces should be noticeably shorter than the others (none is, though this is easily remedied with a hobby knife).
The hull itself has the correct "notched" towing hook eyes. However, the rear wall (Part B6) is correct for Early Tigers and will need modification (some filling of holes and cutting off details). For example, the raised bar meant for the tool box should be removed. The "frames" underneath the mudflaps are molded onto the wall, but they were not present on Late Tigers and should be cut off. The adaptor plate (Part L18) is supposed to be glued flush to the hull wall, but was actually attached to two rods and stood off from the wall.
The rear mudguards have a cross-shaped hole in each one. These are from Early Tigers (Late Tiger mudguards had a rectangular hole). While the armored covers for the exhaust holes are too thin, the shields will conceal this problem. The small flapper valves on the exhausts (Part E20) did not exist on Late Tigers and should be discarded.
One of the decal options is for a Command Tiger (see below), and the special arrangement of tools on the rear wall is correctly-indicated for this type of vehicle (it's OK to cheer now).
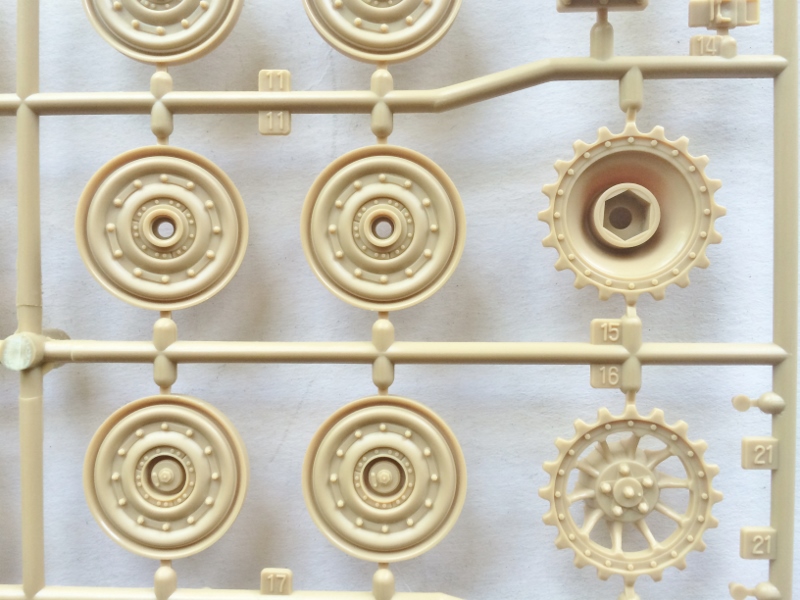
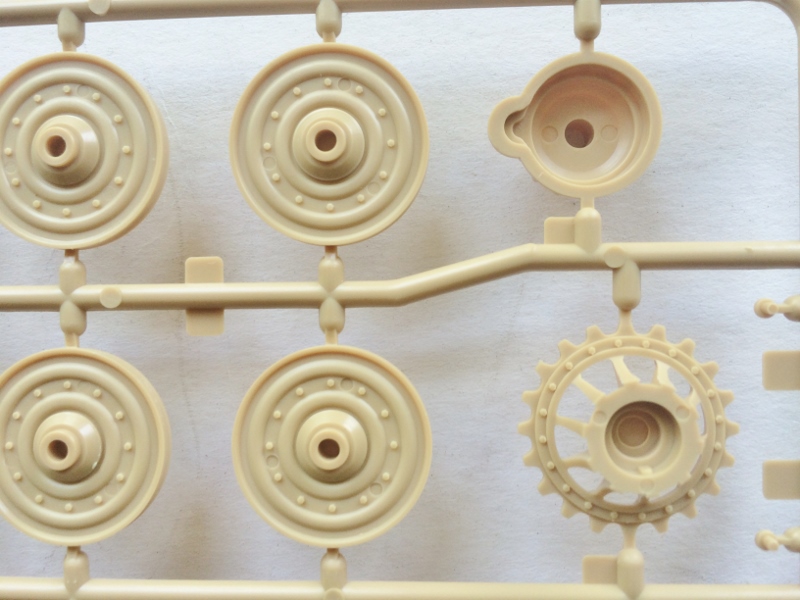
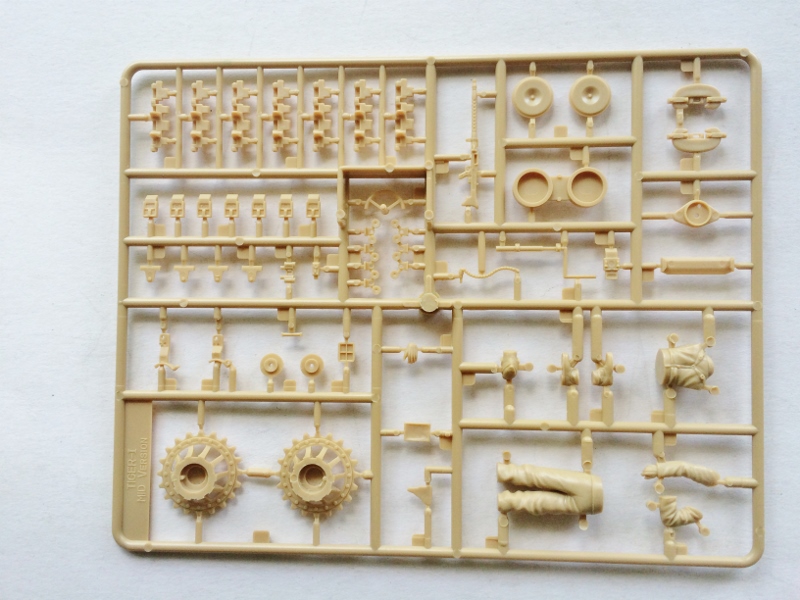
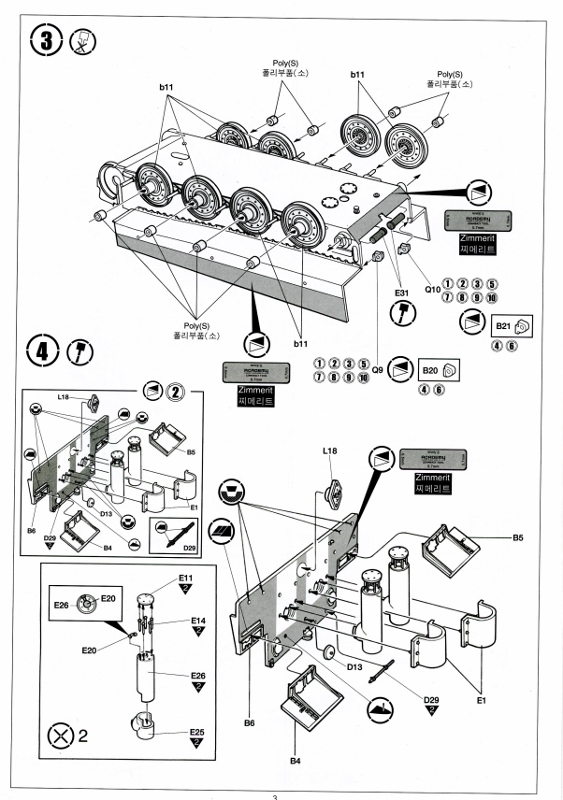
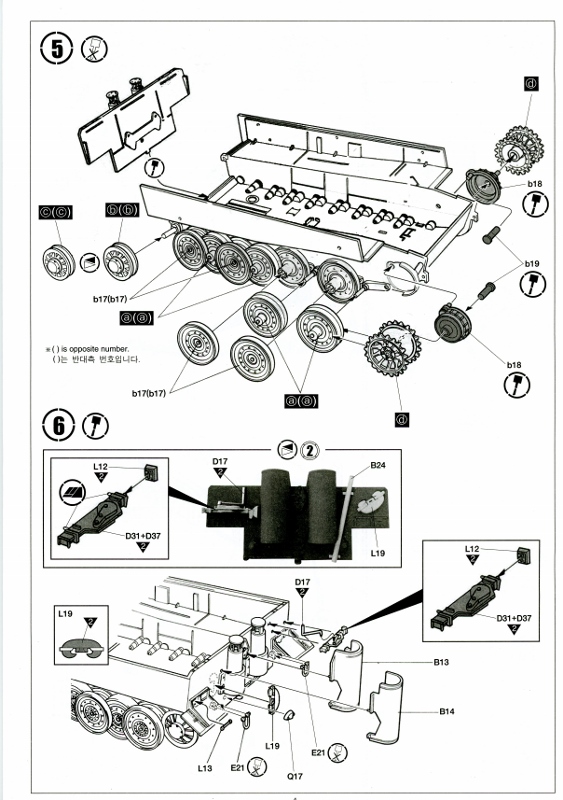
Running Gear
The kit contains the small idler that was found on most Late Tigers, as well as the large idler. While the instructions show the large idler as an option, it will work only on the first few Late Tigers. In addition, using the large idler requires modifications to other kits parts or else requires parts not included in the kit at all.
The hull bottom has two round hatches under the engine (Part E23). Late Tigers had one round and one rectangular hatch.
The front edges of the hull have the notched armor
by the towing eyes suitable for most Late Tigers, and the older version is offered as an option for certain decals.
Zimmerit
Late Tigers had Zimmerit coating, and this kit does not. In the photo etch included for the engine grills is a tool for zim-it-yourselfers. If you're comfortable doing your own Zim, then all you will need are some reference photos to get the right pattern. Otherwise I would suggest ordering an AM Zimmerit product like the Atak one intended for the
Academy Mid-Tiger. I purchased one for my planned build of this kit.
painting & decals
Take a note, Dragon:
Academy hired Def. Model to put together 10 TERRIFIC variants, and Cartograf to print the necessary decals. None of the usual "unknown unit" cop-outs we see in so many of your kits (though not the recent Tiger releases). The painting guide runs the gamut from stripes over
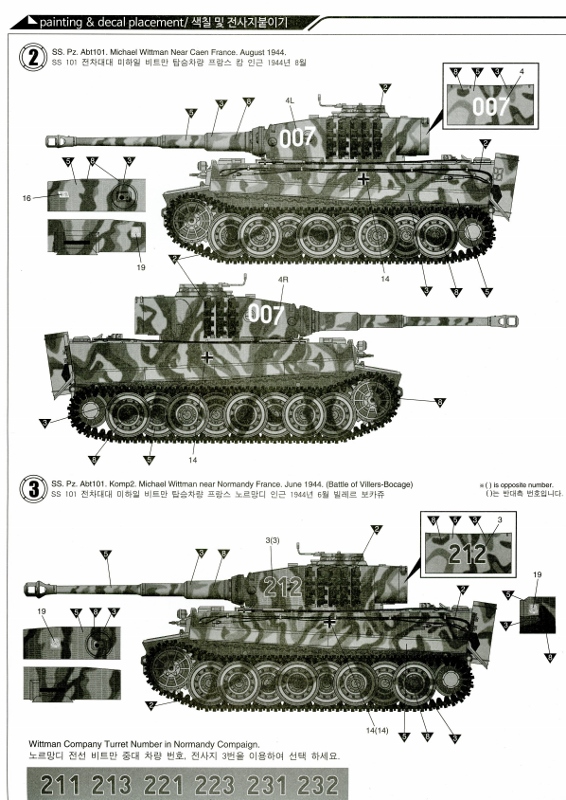
Dunkelgelb to tri-color camo. And some of the most-famous and most-colorful units are included, along with two tanks commanded by the almost legendary Michael Wittmann.
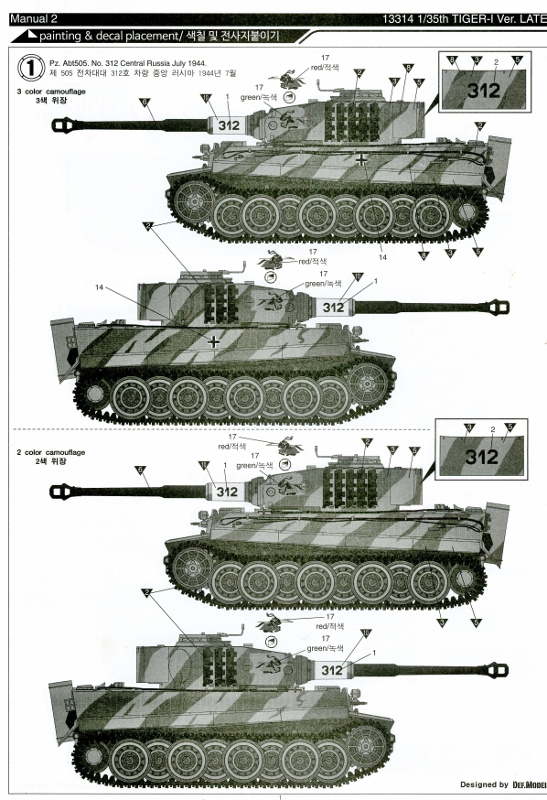
Option #1: #312, Pz.Abt 505, Central Russia 1944; tricolor stripes with the red version of the knight on horseback; tank has Panzer Grey barrel with yellow ring on the recoil chamber. According to David Byrden, this isn't the first "312" of this unit. Since photographs are unclear about the camo and markings, the kit gives you either 2-color or 3-color options. Ditto the large knight logo painted on each side of the turret: both red and green versions are included, since no one is sure of the correct color.
The instructions correctly call out the large muzzle brake for this Tiger, but the kit does not include a correct turret roof. 312 did not have the
Pilze ("mushroom") lumps on the turret roof,
nor the weld line running across the middle. It had a spare track rack at the hull front, which is not supplied by the kit, but could easily be scratch-built. It is unknown whether the tank had one or two eye holes in its mantlet, but the kit has both. The instructions don't specify which kind of idler wheel to use, but the small one is correct. Q5 is the correct loader's hatch.
Option #2: #007 SS Pz.Abt. 101, Michael Wittman, near Caen, France, August 1944; tricolor Xs and stripes, including wheels. This was a Command tank, which is somewhat different from a standard Tiger I. The kit includes the correct parts and instructions for modifying the rear hull wall for a Command Tiger. However, the kit does not include the extra radio equipment and unique mantlet (without MG firing hole), nor do the instructions indicate their necessity. While it might seem quibbling, the decals render the "7" digit with a gentle curve, while the photo of the tank shows an angled bend. No one is certain what kind of roof it had, so the Mid Tiger roof included in the kit may be correct. If it had a Late Tiger roof, then the kit does not include the correct one.
The instructions call for the small muzzle brake, but this is incorrect. Nor do the instructions indicate Part Q15 is the correct hinge.
Option #3: #212 SS Pz.Abt. 101, Michael Wittman's legendary tank from the battle of Villiers-Bocage, June, 1944; tricolor camo in Xs and stripes, including wheels (also additional numbers to build six other tanks from Wittman's company). The Wittmann Tiger had a length of spare tracks mounted on the front of the hull (not included). It is unclear whether it has the weld line across the middle of the turret roof. The kit's roof does have the line. The small muzzle brake, small idler wheels and mantlet with one eye hole are all correct for this Tiger, although the instructions mistakenly call for the large muzzle brake.
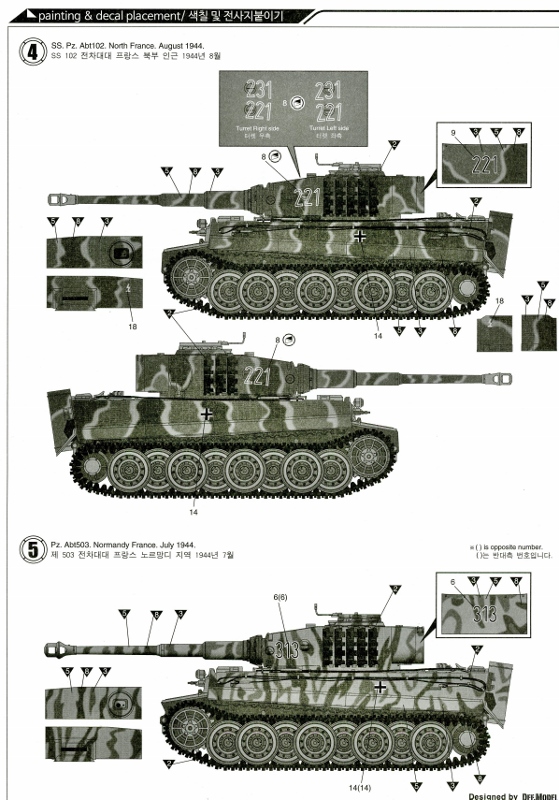
Option #4: #221/#231 SS Pz.Abt. 104, Northern France, August 1944; predominantly brown and green with disruptive stripes of
Dunkelgelb. The kit calls out the straight hull front, while photos clearly show the later "notched" hull front. Again, it's unknown whether the turret roof had the weld line across the top (it's present on the kit roof). The small idler wheels and the mantlet with one eye hole indicated in the instructions are correct for this Tiger.
Option #5: #313 Pz.Abt. 503, Normandy, July 1944; brown and green stripes over predominantly
Dunkelgelb. The instructions wrongly indicate the large muzzle brake, however, the small idler wheels and the mantlet with one eye hole are correct for this Tiger. This is also an option where it's correct to leave the
Pilze lumps on the turret roof.
Option #6: #300 Pz.Abt. 505 (red or green knight on horseback), Central Russia, July 1944; predominantly
Dunkelgelb with disruptive stripes of green; Panzer gray barrel. This is not really a Late Tiger, but a Mid upgraded with new wheels and tracks. According to David Byrden, the kit contains "almost enough parts to build it, because of the sprues containing parts from the Mid Tiger kit. But you would have to diverge greatly from what the instructions say." Here is his breakdown of the changes needed:
The turret dates from October 1943. The correct roof is K1 or S3, though those parts both lack a weld line across the front (In fact I'm not sure that S3 represents any roof correctly).
K5 is the correct loader's hatch.
S1, S2 are the best turret wall parts in the kit. Use the pistol port K19.
Use the large muzzle brake, P6 and the oldest hatch hinge, K21. Use P13 for the mantlet.
The kit doesn't contain a correct hull roof for this Tiger. You could use Q18 only if you cut off the raised partial ring that surrounds the turret. You could also use B1, but you'd have to cut off the headlight stands, the S-mine brackets, and move the headlight lighting wire for the middle position. Also, move the wooden block backwards slightly, to clear the headlight wire. In summary, make B1 look like Q18 without the raised ring (but put P16 along the left side of the turret, not in front of it).
At the hull front use B22, B23. The only hull rear that they provide is B6, which needs some work in any case. For this Tiger, you should add the welded mounts for Feifels, but not use the Feifels themselves.
Use the Travel Lock, which is on the L sprue. See the instructions for Academy's Mid Tiger 13287.
Use the large idlers B4, B5.
Option #7: #2 Pz.Abt. 506, Ukraine, Spring 1944; predominantly
Dunkelgelb with green & brown stripes; tiger rampant with shield unit emblem. According to Byrden, "this is almost a speculative scheme. There is only a single photo that supposedly shows a Late Tiger "2" of the 3rd company, and it's hard to be sure what the turret number really is."
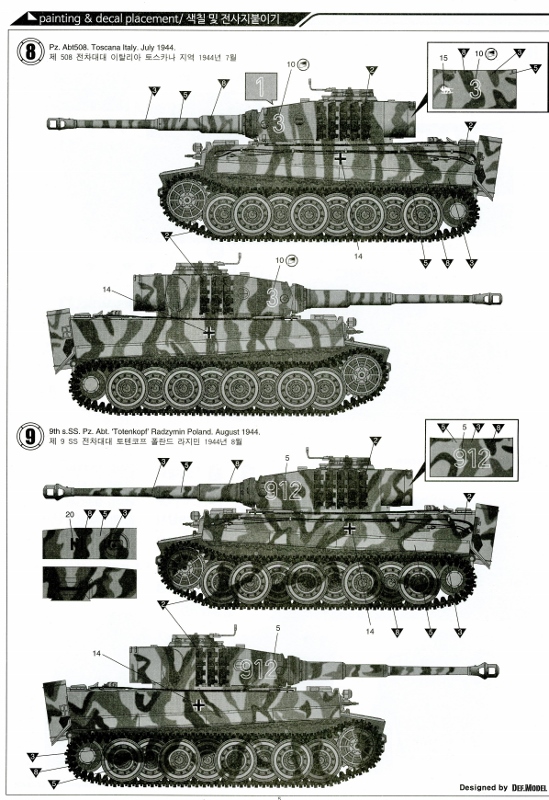
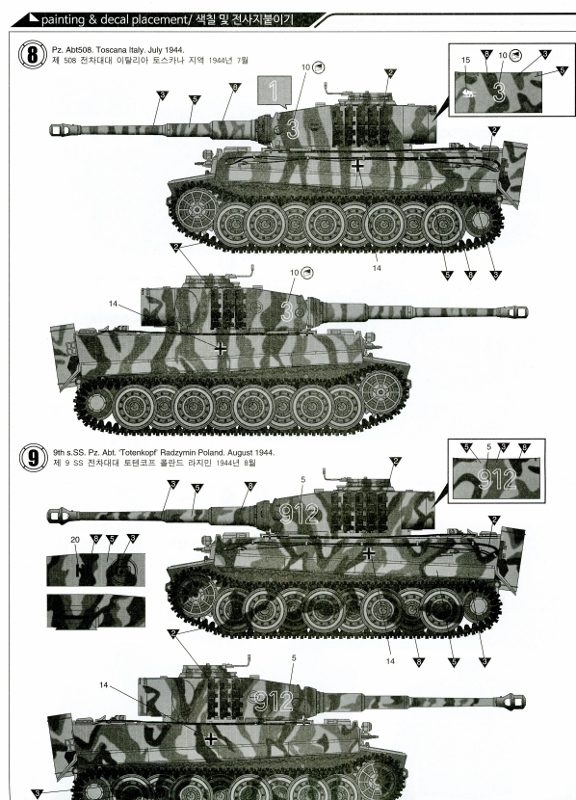
Option #8: #3 Pz.Abt. 508, Tuscany, Italy, July 1944; predominantly
Dunkelgelb with heavy disruptive striping of green and brown. According to David Byrden, "these decals don't represent specific Tigers, because this unit, at this time, did not give its Tigers unique numbers; only a company number." Because the photographic record of this unit's Tigers is sparse, we only know that they received 27 new tanks in June, 1944. So you're safe to use these decals for final-version Tigers. That means leaving the
Pilze bumps on the turret roof, using the small idler wheels and the mantlet with one eye hole.
Option #9: #912 SS. Pz.Abt. "Totenkopf," Radzymin, Poland, August 1944; equal balance of
Dunkelgelb, brown and green, including wheels. Another final-version Tiger, so all of the latest features would be used EXCEPT it has the large muzzle brake as shown in the instructions. Again, the crane mounts/
Pilze should be left on the turret roof, and the small idler wheels and one-eyed mantlet used. However, the cupola should have 3 drainage slits, which are not available with this kit.
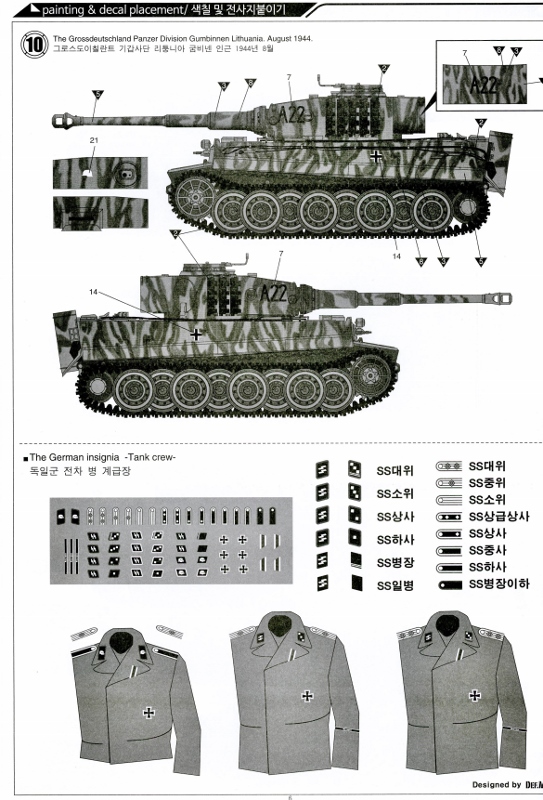
Option #10: #A22 Großdeutschland Pz. Division, Gumbinnen, Lithuania, August 1944, disruptive heavy stripes of green and brown over
Dunkelgelb. Another final-version Late Tiger, so all of
the latest features should be used (
Pilze "lumps," small idler wheels and the one-eyed mantlet). As with #9 above, the three drainage slits for the cupola are missing. The instructions also incorrectly indicate the large muzzle brake.
At the end, the painting guide also includes a nice overview of tanker uniform insignia which are included among the decals.
conclusion
So with all the lingering issues, is this a good kit?
Given that some of the Michael Wittmann Tigers from Dragon and Cyberhobby now fetch the price of a small car, this
Academy kit may be the most cost-effective means of recreating the celebrated tanker's last rides. The company's mid-Tiger traffics in the fame of Otto Carius, so perhaps
Academy is prepared to give the rest of us a chance to have famous tankers' tanks after Dragon has let their versions become collector's items.
As to the kit's many issues, they have been presented here so that modelers can assess if they will detract from the enjoyment of the kit and its build. And while Dragon has availed itself of David Byrden's expertise to improve its Tiger kits, at least here at Armorama, we have that same expertise in assessing this
Academy kit and even showing the way to improving it.
The bottom line is: the kit has many inaccuracies, but some can be corrected by following David's corrections here in this review. Overall, the kit is a big improvement from
Academy's earlier offerings. Other issues will be more challenging, and it will depend on how much of a stickler for detail you are whether you want to fix them. There may be a place for some AM resin fixes, too, for things like the turret roof. Scratch-building a fix for that will be a PITA, and it would be nice to see someone do a correct roof.
Thanks to Model Rectifier Corporation for providing this review sample. Be sure to say that you saw the kit reviewed on Armorama when you purchase yours. And a big round of applause for our own David Byrden for helping me with this review.


Comments