Civilian figures have continued to gain popularity over the past several years as more and more modellers are seeking dioramas and vignettes with a combination of military and civilian components. Many dioramas ranging from World War II to the modern day can easily integrate military vehicles and civilian figures. The realistic tragedy is that civilian populations were wounded, killed, and displaced by conflict around the globe. Taking a common sense approach to creating civilian figures for the 1/35th scale market has proven positive for multiple model producers. Over the past decade most of these figures have been produced in resin. Master Box Ltd has created a number of unique sets combing military and civilian figures as well as standalone figure sets.
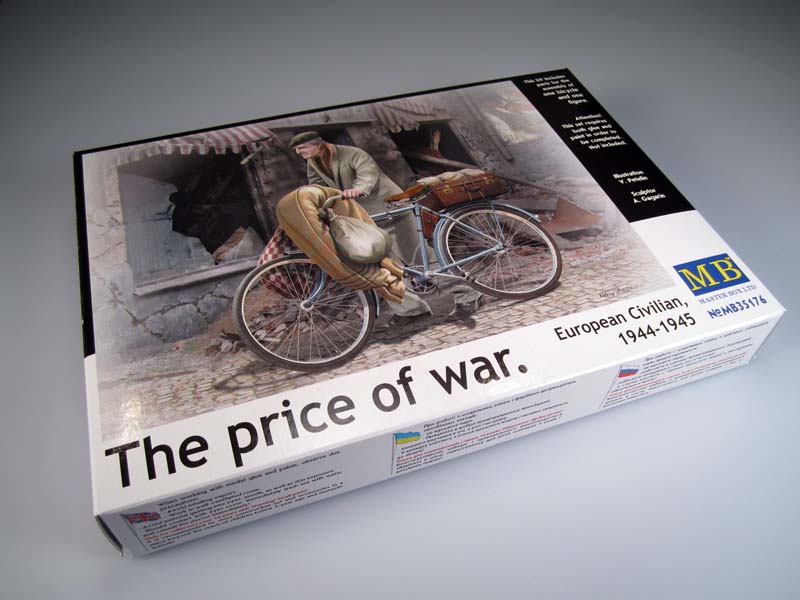
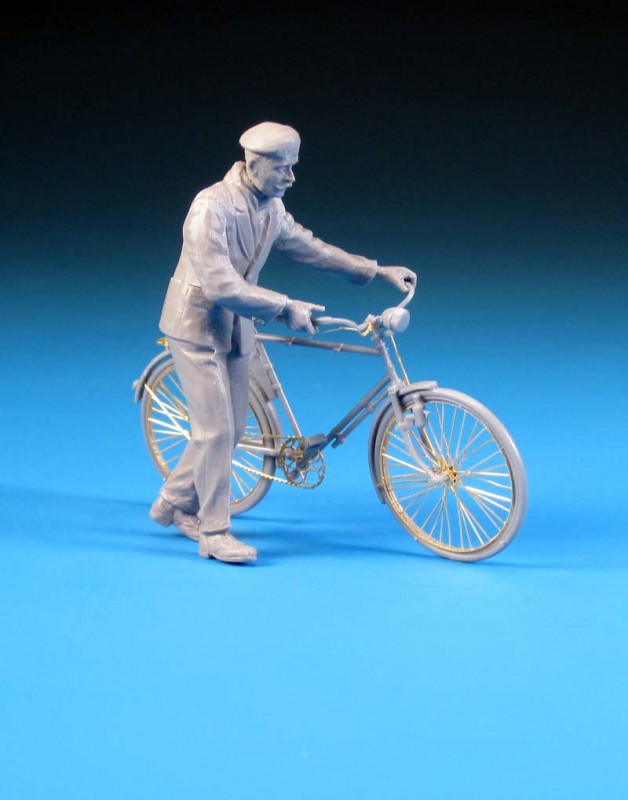
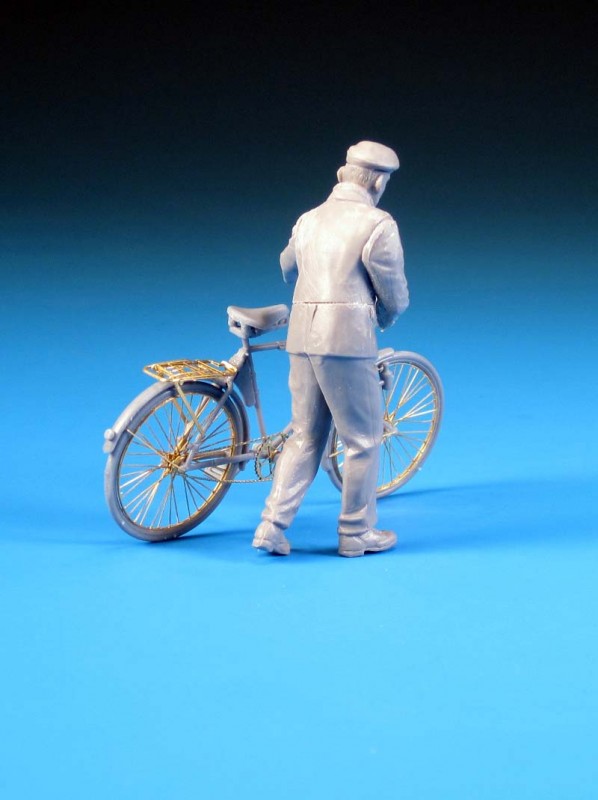
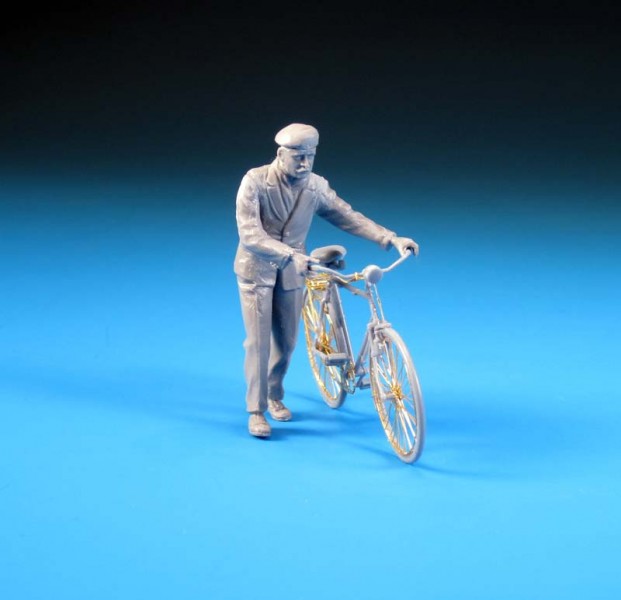
Master Box Ltd has continued with their 1/35th scale civilian figure sets by releasing The price of war European Civilian, 1944-1945. The set comprises of an elderly male figure pushing a bicycle laden with personal belongings. In scenes repeated in many European countries during World War II displaced civilians pushed bicycles through rubble carrying only what they could salvage from their destroyed homes and businesses.
While this figure/bicycle set does not depict a specific locale I suspect that France or Germany would be a reasonably accurate setting.
CONTENTS
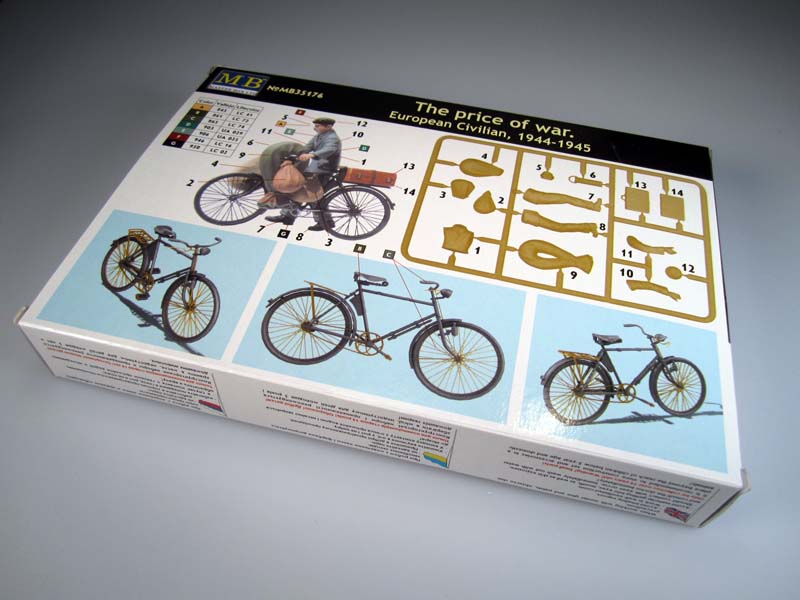
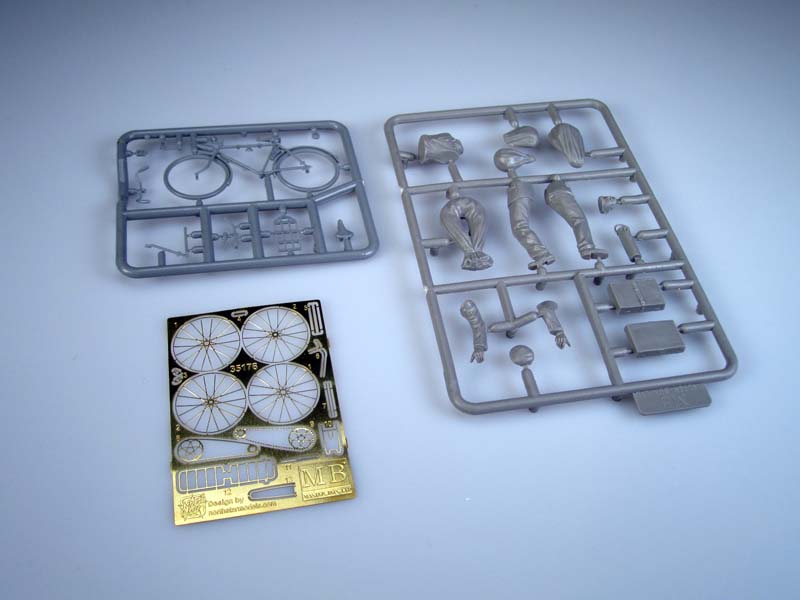
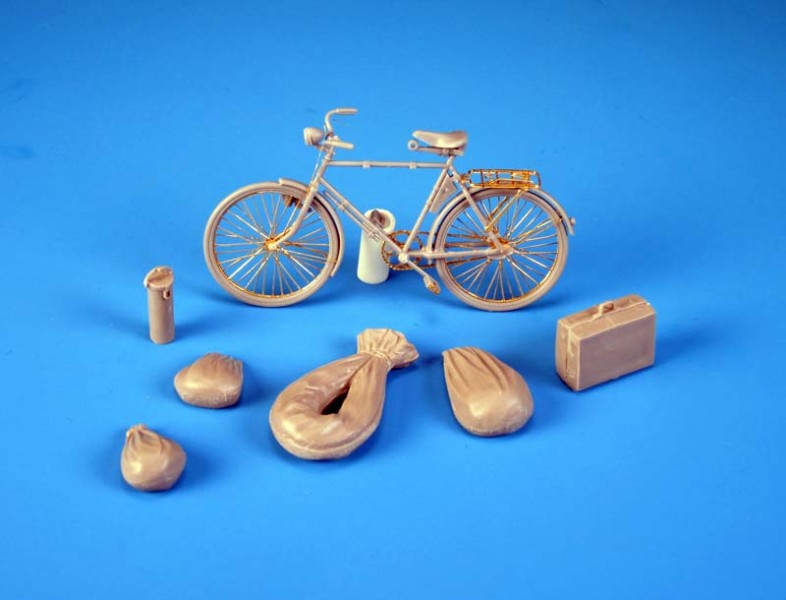
The kit consists of nine injection moulded parts and sixteen photo etched parts for the bicycle. The single male figure is created using seven injection moulded parts. There are seven injection moulded parts depicting a bed roll, a suitcase, a food/beverage container, and two three canvas sacks.
Review
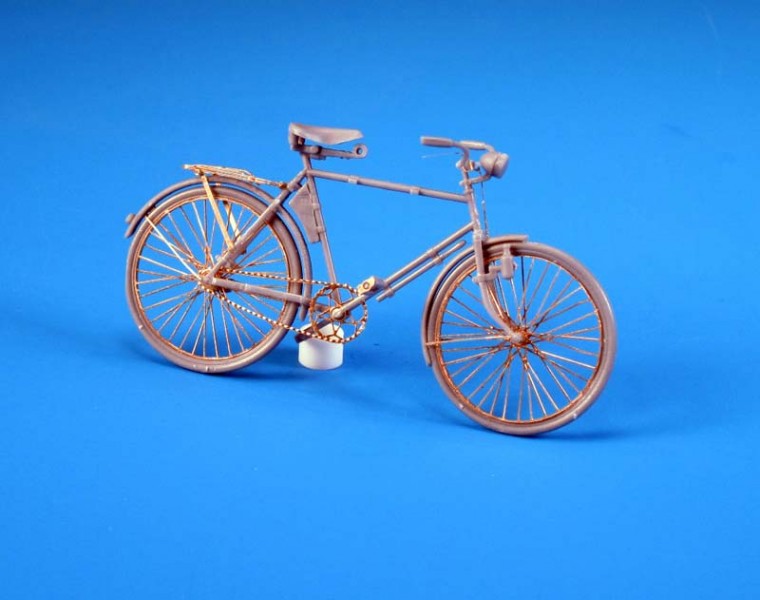
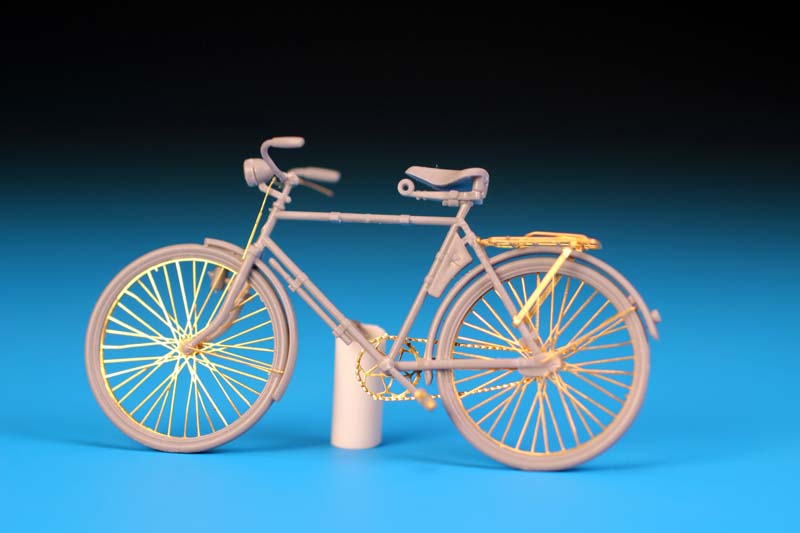
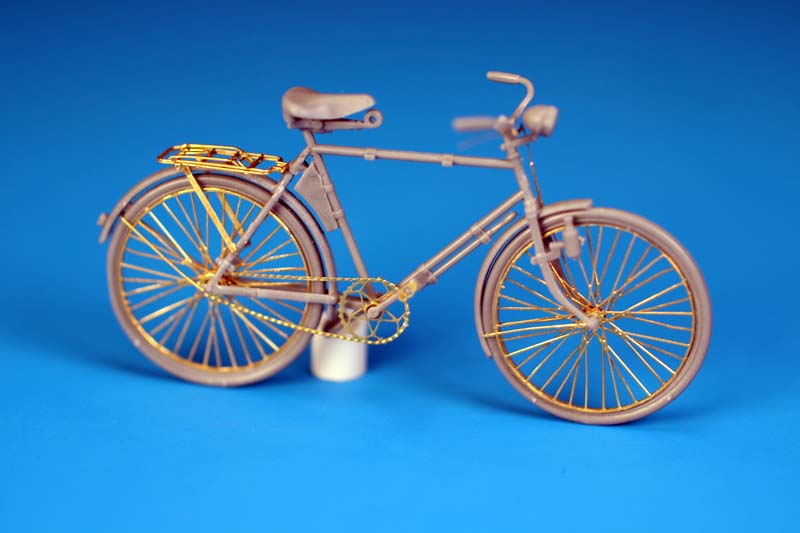
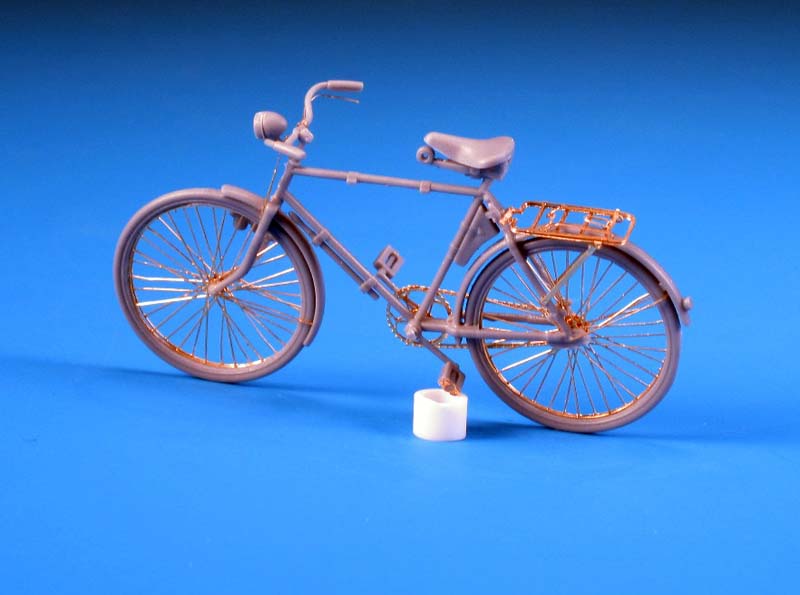
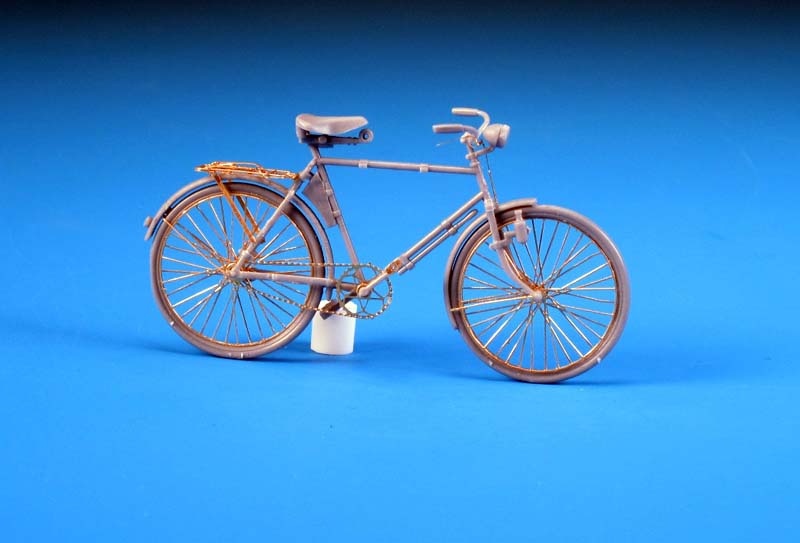
The plastic parts for the bicycle are moulded with very nice detail. The pedals and handle bar parts look delicate and in scale. In looking at the parts and comparing the parts to the Master Box Ltd German Soldier/Bicyclist Kit #35171 it appears the bicycles are very similar. On the part sprue there are two unused parts that appear to be intended for use on the German military bicycle version. The bicycle frame integrates the wheels, fenders, seat spring, and left fork. The result is a detailed frame without looking chunky.
1/35th scale bicycles have been a bit tricky to create realistically due to the fine nature of the spokes. Master Box Ltd does an excellent job of including overlapping photo etched spokes that attach directly to the wheels.
The photo etched parts and very fine and careful handling will be required. The rat trap rack is provided in four photo etched parts and replaces the unused military style rack. The gear and chain assembly is very detailed and you can easily make out the gear teeth. Other small photo etched parts consist of the hand brake assembly, pedal end caps, and frame fork supports.
Finishing off the bicycle is a comfy seat, the right fork with headlight generator, a headlight, and a tire pump are added.
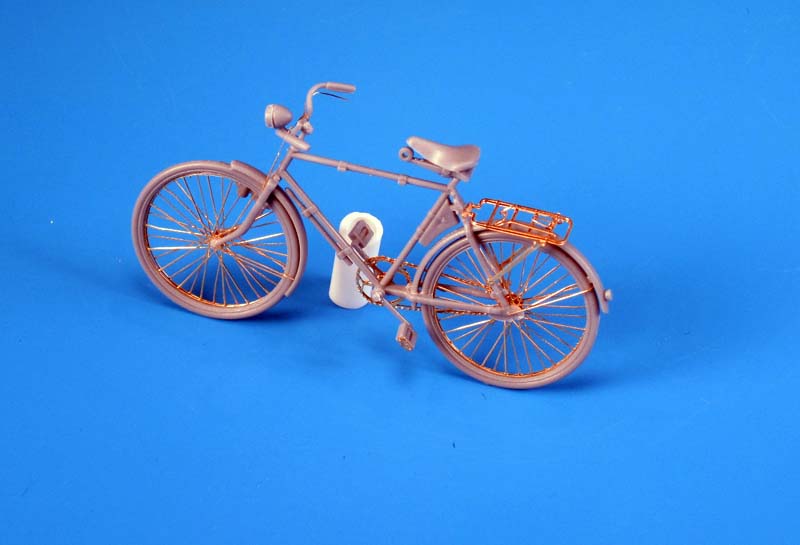
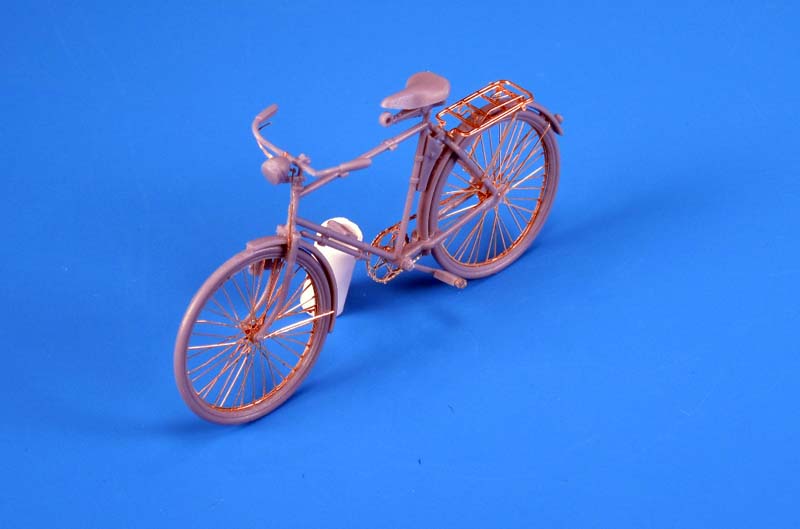
This is a very detailed little kit in itself and it is obvious that Master Box Ltd paid attention to details. The elderly male figure is much more simplistic and parts consist of a torso, head, arms, legs, and a cap. The figure appears to be dressed in a generic waist coat/suit jacket with tucked in scarf, pants, Oxford type shoes, and a cap. The cap sort of looks like a combination of a soft beret and a flat cap. I found that the mould lines are fairly evident but in some respects follow the natural seam lines of the clothing.
The level of detail on the hand and face are OK but not up to current resin standards. Detail on the palms of the hands is little to none but with proper placement on the handle bars this wont be visible. I like the pose of the figure as it properly reflects a human pushing a well weighted bicycle. Master Box Ltd did a good job of giving the figure a slightly forward bend and an inwards to show a bit of strain and tiredness.
The accessories consisting of the bed roll, sacks, and suitcase are well formed but lack the details found on the bicycle. The bed roll is a single part designed to slide over the handle bars. The other three sacks can be attached where you desire, but bear in mind that they should have some type of strap or string attaching them to the bicycle. Using them properly will enhance the gypsy wagon feeling of the bicycle. The suitcase is supplied in two pieces with an extended handle and a strap around the centre. The suitcase is designed to be attached to the bicycle rack. Again, some type of strap should be added to properly secure the suitcase. The last accessory is a metal thermal container that can be attached where you please. All in all the accessories are OK, but not overflowing with detail. With the level of detail put into the bicycle its almost a shame to cover it up with the accessories.
ASSEMBLY
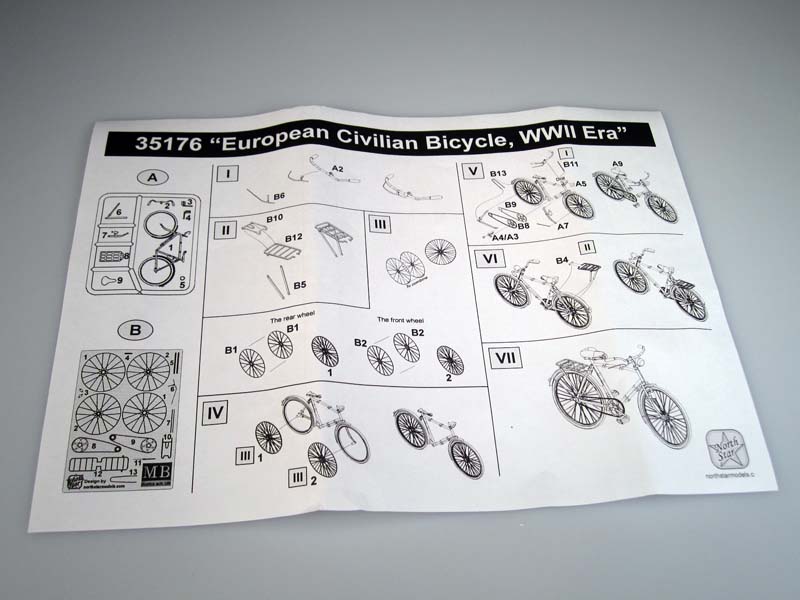
The instructions consist of a small sheet showing part placements. The images are pretty small and careful scrutiny is required to understand which parts go where. On the back of the box there are CAD images showing the assembled bicycle which will aid in the photo etched parts placements. An image of the completed and painted kit is also included so you will have a feel for where the accessories can be placed. A painting guide is also included on the back of the box to assist with the accessories and the figure. Vallejo and LifeColor paints are mentioned in the painting guide.
Assembling the bicycle was an amazing exercise in meshing well-formed injection moulded parts with a plethora of extremely small and well detailed photo etched parts. I am amazed at the quality of the photo etched parts in this tiny kit. If 1/35th scale AFV kits contained this amount of detail with photo etched parts they would all be amazing builds.
Following the instructions proved a bit challenging with respect to the photo etched part placements due to the small size of the images in the instructions but it is only a bicycle so it cant be that difficult.
Assembly starts with two subassemblies; the handle bars and the rear panier rack. I chose to skip to steps 3 and 4 first to deal with the spokes on both wheels. The photo etched spokes are excellent and two parts are provided for each wheel to get the overlapping look. The axles on the wheels required some slight shaving down and sanding to have the spokes properly fit all the way down. Once in place a light application of CA glue around the rim sealed them in place.
Step 5 deals with the chain and sprocket assembly, the seat, the pedal assemblies, front fork, fender supports, handle bars, headlight, and rear frame. It has been created with fantastic definition on the chain and sprocket. Two photo etched parts meld together to give the chain and sprocket a better 3D effect.
I found the pedals with the attached crank arms easy to attach to the bicycle but the pedals are attached to the crank arms. As there is no ability to move the actual pedals they dont have the spinning appearance of a real pedal.
The front fork and rear frame support are nicely detailed parts but due to the large sprue attachment points not easy to remove. Both parts broke when I removed them but were easy enough to place and glue back together on the bicycle frame.
I next jumped back to step 1 and attached the very fine photo etched brake lever/cable part. The instructions have you drill a hole in the handle bars to fit it to the frame head tube. You will definitely need a small pin drill bit and a steady hand. I used several small drill bits to slowly create the hole and then increase the hole before fitting it to the frame. The final part to add to the front of the bicycle was a thin photo etches brake line running from the handle bars to the wheel.
Before moving to step 6 I built the rear panier. This consists of five photo etched parts and assembles without any difficulty. The one point to pay attention to is the panier support arms that attach to the rear frame. They require a bit of bending on both ends and careful alignment to ensure the panier is centered and level above the rear wheel fender.
The figure is easy enough to assemble. There are fine mould seams that should be removed from arms, legs, and the torso to make the clothing look more realistic. Fit of the arms to the torso is fairly straight forward but some test fitting is required to get the hands placed on the handle bars in such a position that the bicycle will be angled toward the figure to simulate the weight of the blanket and sacks. The back of the figure will require some filling of the gaps created by the legs and the torso. The back of the jacket should be smooth and eliminating the gaps will solve this issue. The hands lack fine detail and dont properly grasp the handles bars. This creates a bit of a floating look of the hands on the hand grips. The face is nicely detailed and the moustache gives and old man type of look. The soft cap/beret looks bulky and should likely be reduced in height or turned so the sloped peak is fully forward.
The rolled blanket and sacks require no assembly. Straps will have to be added to the sacks to hang them on the bicycle. The rolled blanket has a continuous mould seam that should be removed. The blanket fits easily over the left handle bar and there appears to be a slight indent in the blanket where it should sit on the handle bar to simulate weight. The suitcase is simplistic and it would have been great for Master Box Ltd to have included a couple of photo etched buckles and straps to give it some bling. The little thermal bottle can be hung where you please. There does not appear to be any mention of it on the box instructions.
The painting of the bicycle, figure, and accessories is essentially at your discretion but the box rear does provide a bit of guidance and ideas.
CONCLUSION
Having never built a 1/35th scale bicycle before I was very impressed with the detail it presents after assembly. I did not have the same level of enthusiasm for the figure or accessories and in my opinion it would be a shame to cover up the bicycle with the blanket, sacks, and suitcase. The figure pose is good and the seams and mould lines wont take much to clean up. This is a great kit to supplement a wartime or peace time vignette or diorama. Given the generic nature of the figure and bicycle it could easily pass for WWII through the Cold War settings.
SUMMARY
Highs: A welcome set in order to add a civilian figure and a sense of humanity to military dioramas ranging from WWII to the Cold War.Lows: An amazing amount of detail put into the assembly of the bicycle.Verdict: The figure and accessories are much lesser in detail than the bicycle.
Our Thanks to Dragon USA! This item was provided by them for the purpose of having it reviewed on this KitMaker Network site. If you would like your kit, book, or product reviewed, please contact us.


Comments