Introduction
AFV Club originally released the Wiesel back in 1996 in two forms, the MK 20 cannon-armed version and the TOW missile version. They have now re-released the TOW version, with the MK 20 to follow soon. As a result, this is not a new kit but it has been brought up-to-date with the addition of few new parts and decals.
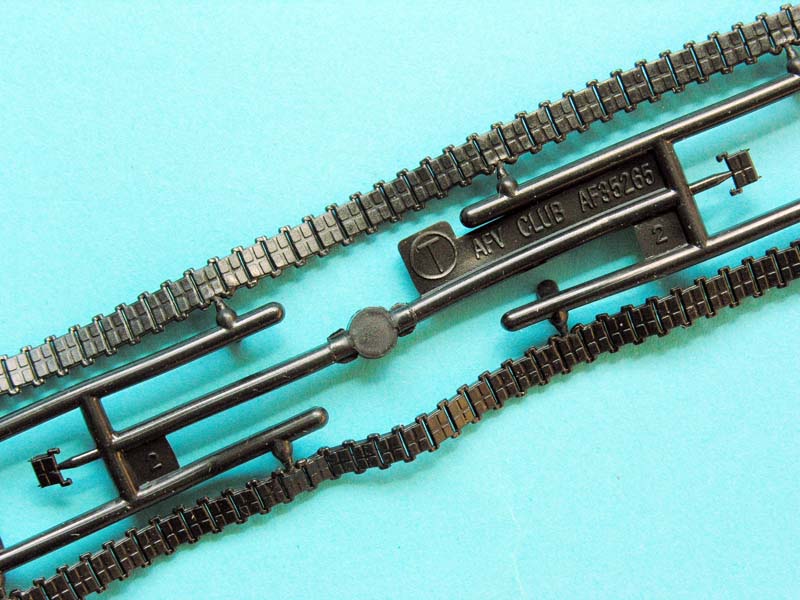
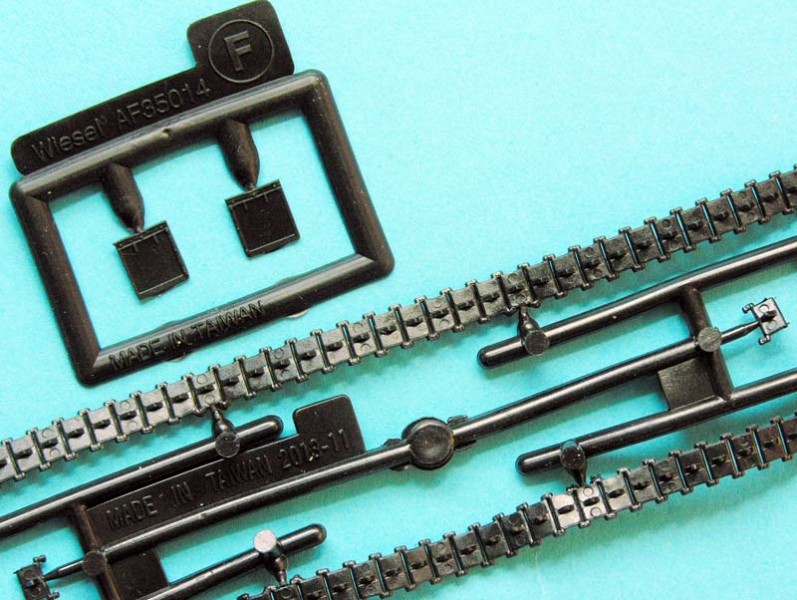
The most notable difference is the tracks. The 1996 kits had the original continuous rubber-band tracks (literally). These had a reputation for being very tricky to fit and also very tight. They were the old-fashioned "melt the pins type" with four locating holes and pins. This new kit represents the more modern Diehl 622 tracks, as described above. This also involves a new pair of sprockets. The new track is made from more friendly soft plastic (without holes and pins) which can, apparently, be glued with conventional polystyrene cement. Having experienced
AFV Club's Stuart tracks in the same material, they should work.
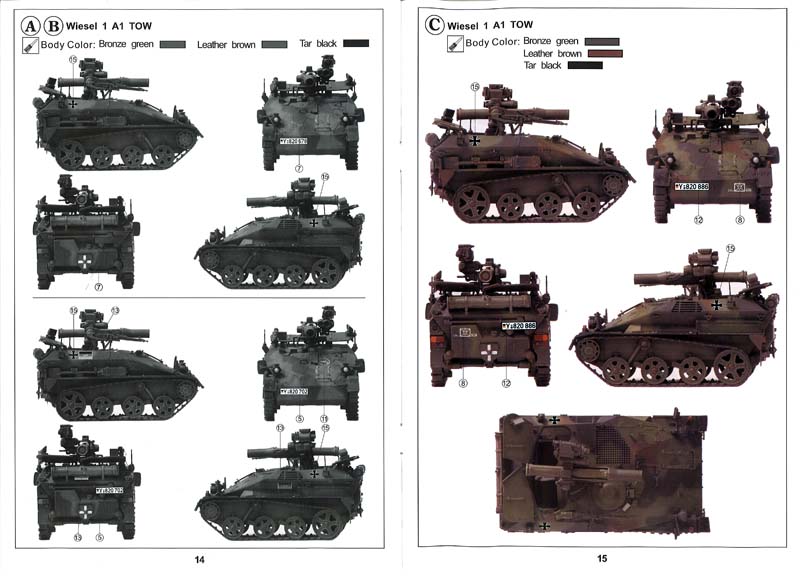
The other differences are relatively minor. The original TOW kit depicted the Wiesel 1A0. With the new kit, a Wiesel 1A1 or 1A2 TOW can be built. 1A1 (and 1A2) TOW has the addition of a 7.62 mm MG3 as secondary armament. These were originally developed in the field, but have since become official factory fits.
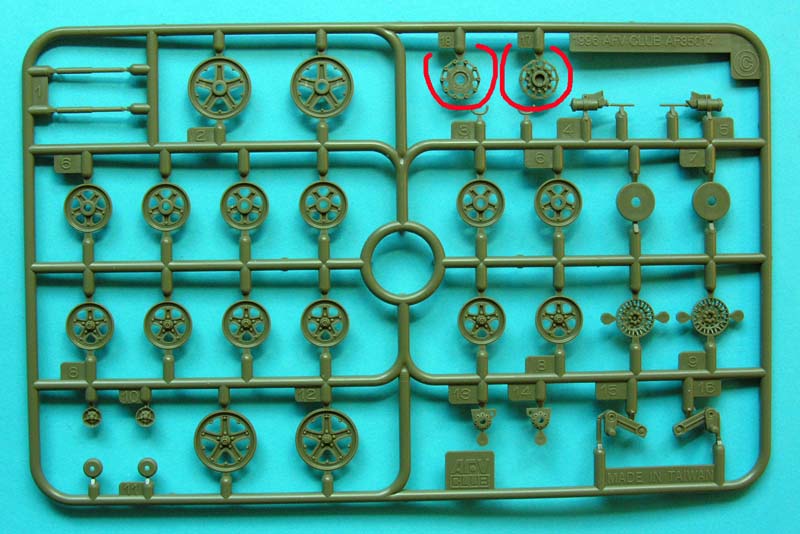
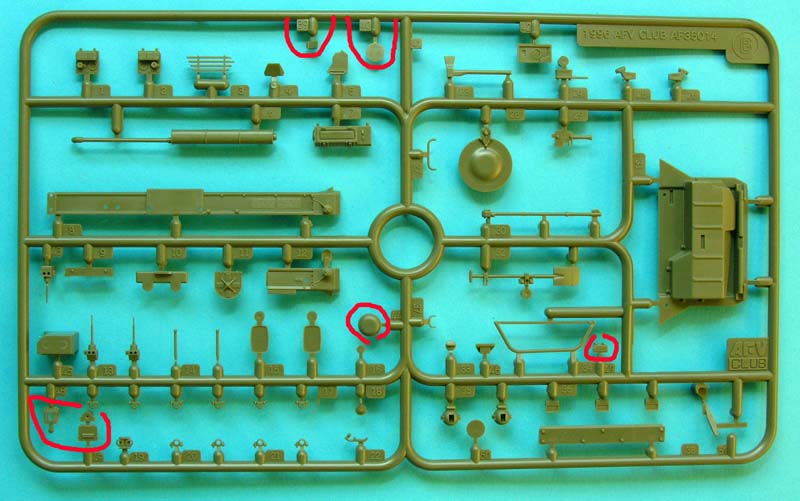
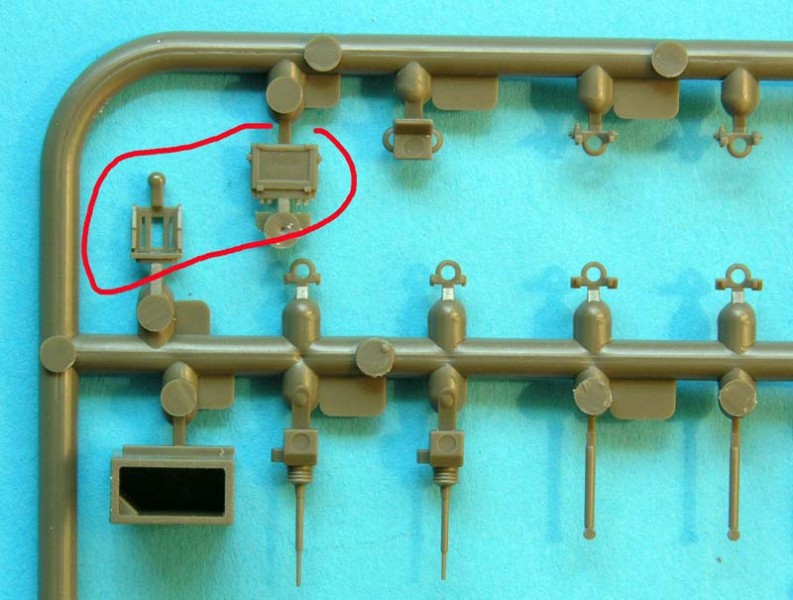
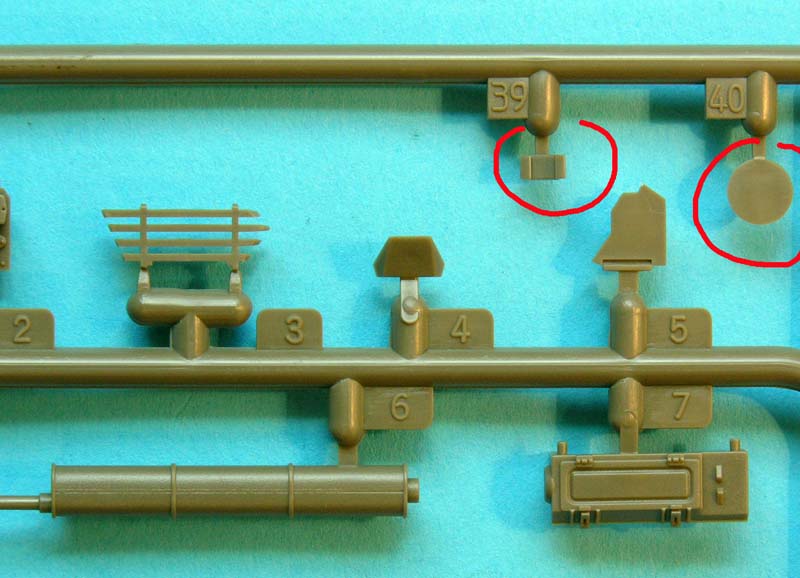
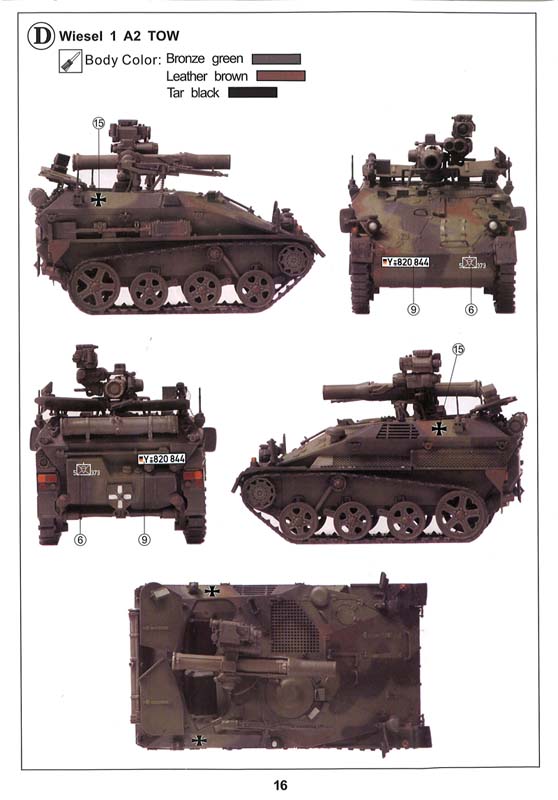
Wiesel 1A2 TOW is upgraded further with a battlefield information, command and control system which is basically a computer suite with a GPS (Global Positioning System) antenna. The touch-screen control terminal (called Panther P8 APC4), normally mounted inside, can also be mounted on a bracket outside for the commander's use. The GPS is mounted to the right of the driver's hatch. A dome-shaped digital wireless antenna is mounted on the left side of the glacis plate. I have highlighted the new parts in red on the sprue shots.
Development
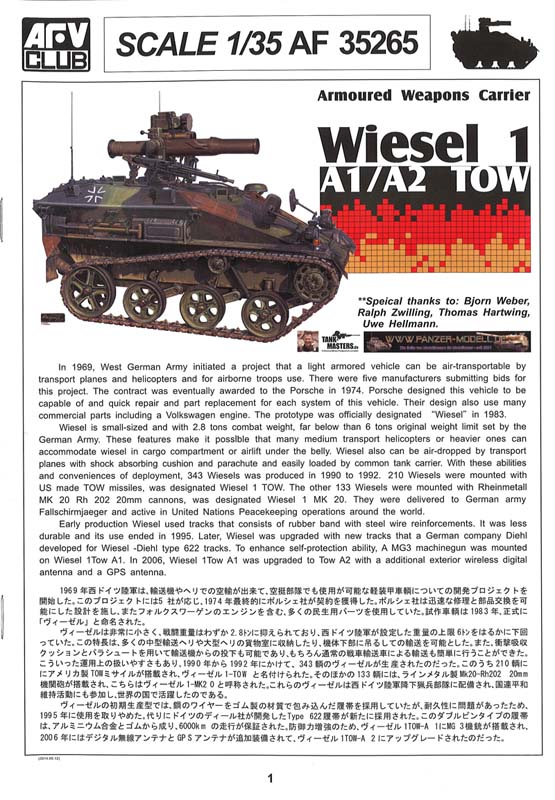
The Wiesel 1 air-transportable armoured weapon carrier which was developed to meet the requirements of the German Army by Porsche as a replacement for the Faun Kraka a small four-wheel drive buggy used by the German airborne forces for general load carrying and as a weapons platform. MaK System Gesellschaft became the Wiesel design authority of different variants for use by the German Army.
Although the German Army took delivery of 345 Wiesel 1 between 1989 and 1992, in early 1997 it had a total of 343 vehicles on strength, 210 armed with the Raytheon Systems Company TOW anti-tank guided missile system and 133 armed with the Rheinmetall 20 mm cannon. Several Wiesel 1 armoured weapon carriers, in both 20 mm and TOW configuration, were deployed by Germany to Somalia as part of United Nations forces in 1993.
In addition to the Wiesel 1, MaK has more recently developed the multi-purpose carrier Wiesel 2 which has an extended chassis with one more wheel station and nearly double the internal volume. It therefore offers a much wider range of roles and missions.
Description
The hull is of an all-welded steel construction providing the crew with protection from 7.62 mm small arms fire and shell splinters. The driver sits at the front of the vehicle on the right and has three periscopes for observation to the front and sides; the centre one can be replaced by a passive periscope for night driving.
The engine, which is a standard Volkswagen production model, is to the left of the driver with an access hatch in the glacis plate. The engine drives via a three-speed ZF automatic transmission and a Porsche two-speed reduction gear with integrated Cletrac steering gear. The complete power pack can be removed and replaced in ten minutes.
Suspension consists of three dual road wheels, drive sprocket at the front, idler at the rear and one track-return roller. A Belleville spring assembly automatically provides track tension when the vehicle is travelling. The track was originally an endless rubber band with wire reinforcements. To replace this, the German company Diehl developed a new, more conventional track with separate links called the Type 622.
Airlift capability
Wiesel 1 is air-transportable in a variety of aircraft. For example, two can be carried internally in a CH-53G helicopter or one underslung.
Wiesel 1 with TOW
This was built to meet the requirements of the German Army and is fitted with a Raytheon Systems Company TOW ATGW launcher on an elevating pedestal with a traverse of 45° left and right and an elevation and depression of 10°. Seven missiles are carried, of which two are for ready use. This model has a crew of three - driver, gunner and loader.
Review
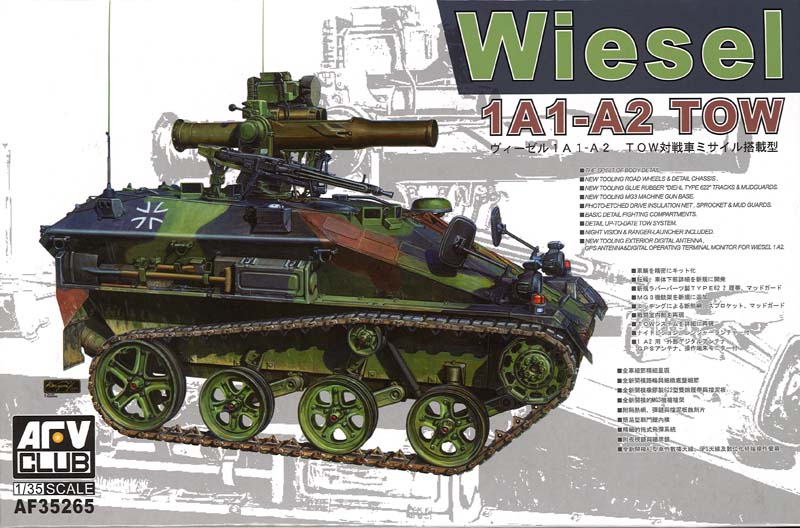
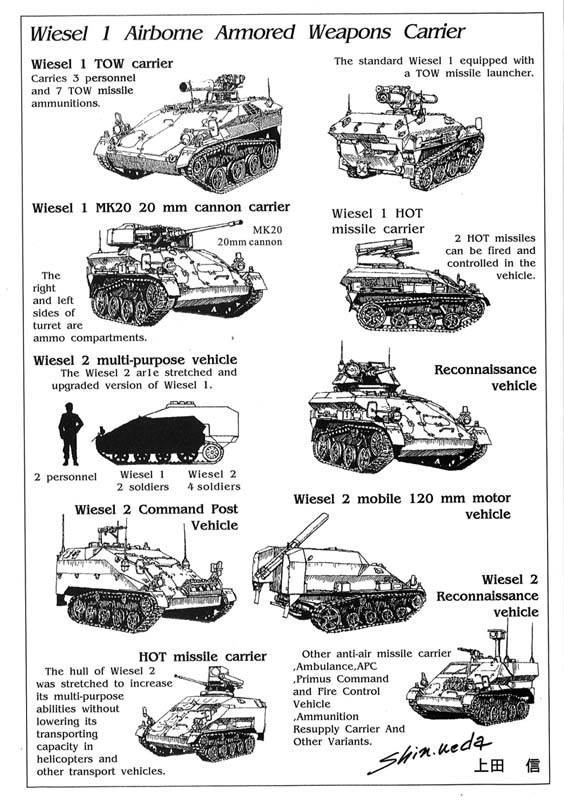
The box itself is three-quarters the size of the original kit but it packs in more sprues! The instructions are glossier than the original. 16 pages on glossy paper with four of them in colour. The 22 stages of construction are pretty much the same as the original as you might expect. In the box you also get a separate sheet with a brief description of the Wiesel family using line sketches (which misleadingly includes several non-service prototypes) and an 'art print' of the box top illustration without the descriptions and branding, but mine was quite dark.
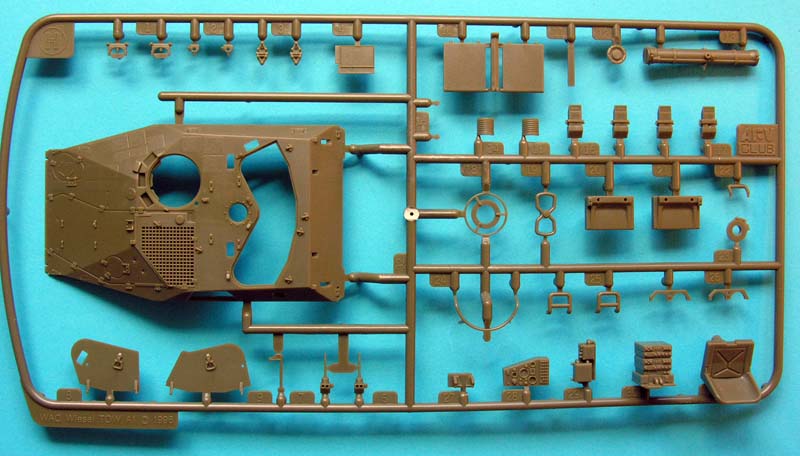
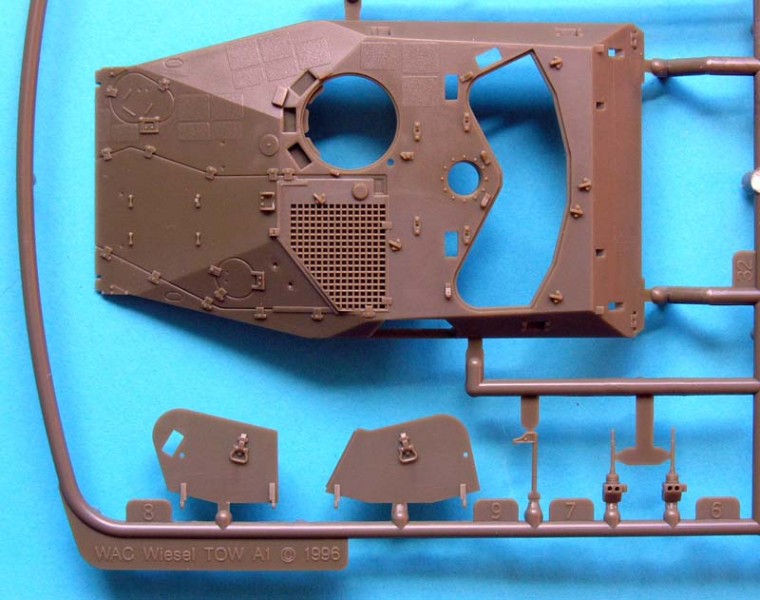
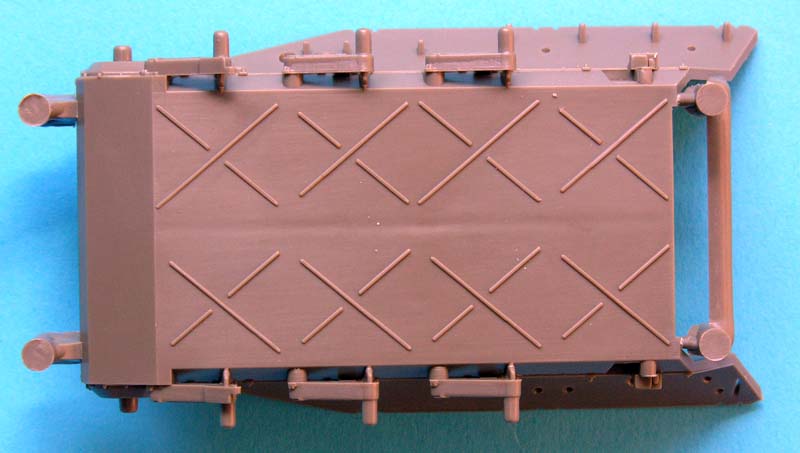
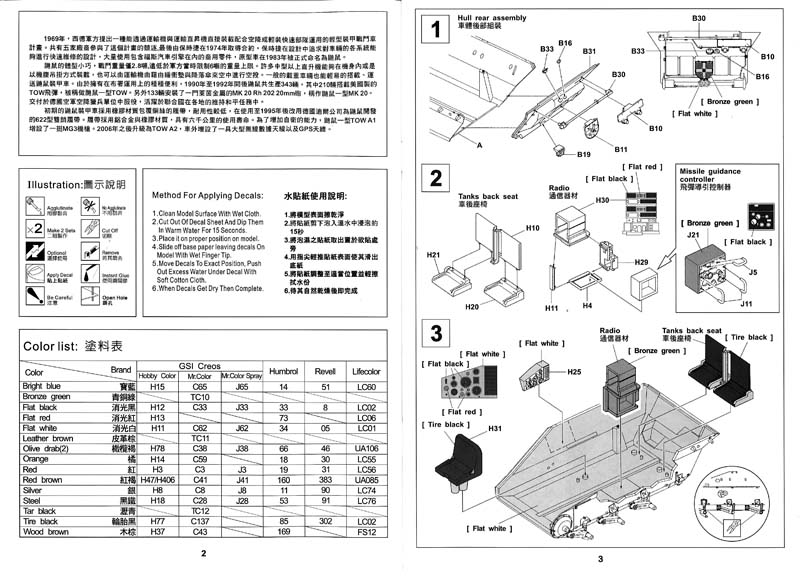
First comes the hull tub. There are two problems here. One is present either side where vertical sink marks appear on the hull side. These were present on the original releases and, surprisingly, they are still here. The other problem is the fluting under the hull floor. This should be recessed upwards into the floor, and not ribbed as it is depicted. However, how many people actually look at the underside of the hull when the model is finished?
The TOW version has a partial interior and I was hoping that the new version might improve on the original. The biggest problem is the total lack of an engine compartment wall; it is still lacking one. The instructions cover the interior in the first three stages along with adding the rear plate to the main hull tub. Colour call-outs are included for the various bits of interior equipment. Eduard do an etch set (35 842) which was designed for the old kit but will, of course, still work with the re-release. To fill out the interior a little, this etch set has some additional interior fittings (but no walls), so this is worth considering.
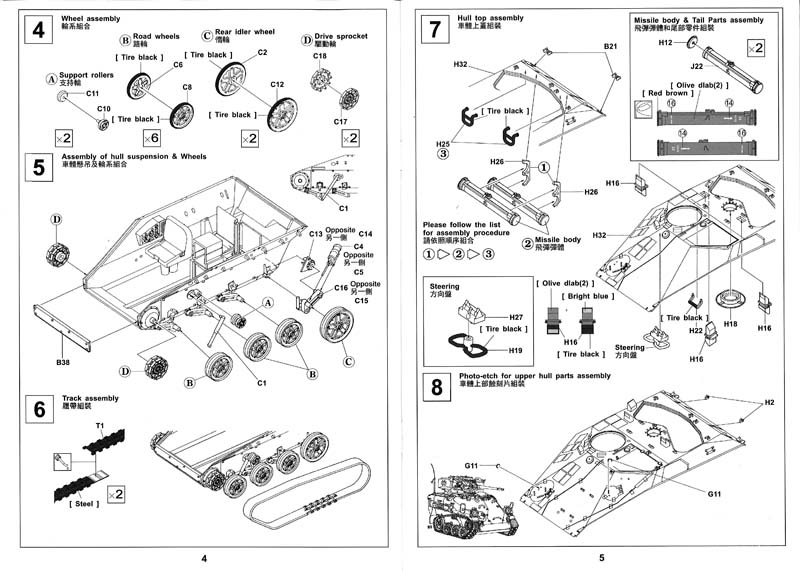
Next comes the suspension. The swing arms are moulded in place on the tub and have vertical support bars attaching them to the hull. These supports should be removed, though they could be left in place as they are largely hidden by the road wheels. The new sprockets are simple two-part affairs which do not have the headache of fitting two sets of photo-etch teeth like the originals. Oddly enough, the sprocket teeth are still included on the etch fret and the old sprockets on the plastic sprue. In this kit, you get two sets of wheel sprues simply because only one new sprocket is included on the sprue! So plenty of spares!! As mentioned before, the track ends can simply be glued together and fitted. The type of flexible plastic used in the tracks may not take too well to being painted and stretched over the wheels, so I would suggest leaving this until the end, along with the sprockets.
As an alternative, a company called Djiti Productions make a superb set of resin tracks and sprockets. http://djiti.production.free.fr/35022.htm. Originally intended to replace the vinyl tracks of the first kits, they represent the same replacement Diehl 622s. The casting on these has to be seen to be believed. Even the guide horns are hollow and they are tiny; just beautiful. They will really set your model off.
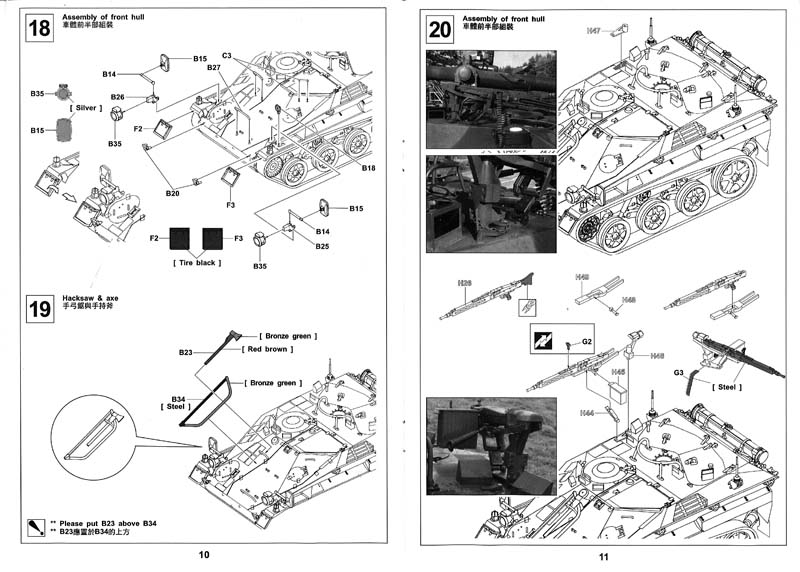
Next comes the hull top. In Step 7, more interior detailing is done by fitting periscopes, steering wheel and traversing wheel for the TOW launcher. Inside the hull rear, a pair of missile containers are stowed. Decals are supplied for these along with painting instructions.
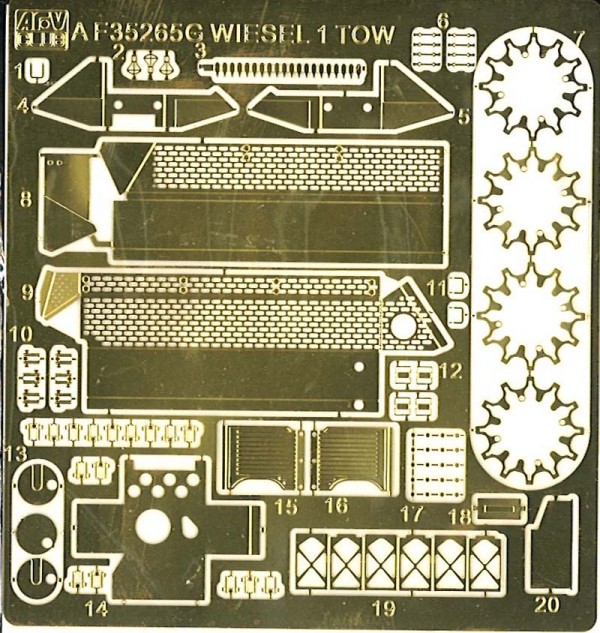
Step 8 is titled photo-etch for upper hull. However, only two tiny handles are mentioned - better replaced with thin wire. The hatches on the glacis have numerous bolt-down clamps to keep the access panels in place. Although the instructions have their positions marked, there is no mention of the dozen or so etch parts (no.10) that need to be attached.
The hull top is now added to the bottom in Step 9. Once on, some careful cleaning up of the seams will be necessary (with the help of some filler from previous experience). One thing that benefits from being replaced is the slatted intake grille on the left side, though the plastic one in the kit is OK. This is taken care of quite nicely in the Eduard etch set. You will need to fit a blanking plate behind this unless otherwise daylight will show through - or make your own engine compartment walls.
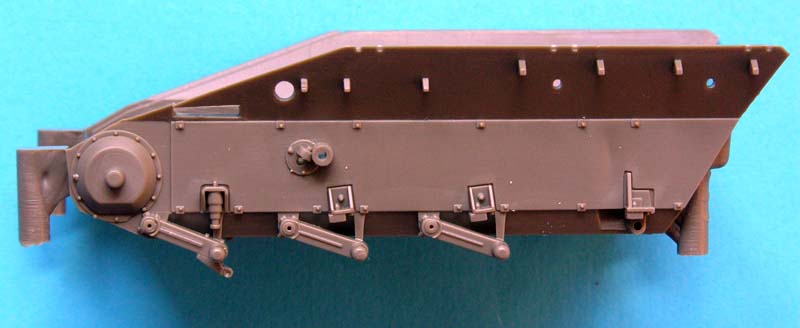
Step 10 takes us to the right hull side and the right track guard which is the full length of this little vehicle. Here are stored numerous tools which have the mounting clips moulded in place. These are quite nice too, but the fuss-pots amongst us will no doubt replace them with etch. A standard piece of kit is a brush for cleaning the soles of the crew's muddy shoes. Even this is included. The rear fenders are fiddly affairs made from plastic and etch, but go together nicely. Aerials are best left off until the end.
Next is one of the new options where we have the choice of using the original crew vent alongside the driver (for 1A1) or the GPS unit for 1A2. The GPS head has tiny protective bars either side which have been moulded solid. Cut them off and replace with thin wire if you are skilled enough. They are very small!
Talking of fiddly, the most notorious part of the kit comes next - the exhaust shields. These are beautifully etched, but the ones in the original kit parts in aluminium etch had a reputation for being very hard and difficult to fold. The new etch appears to be brass, so hopefully it will fold easier. Again, the Eduard etch might prove easier. I would recommend painting the exhaust and bodywork behind the screen before fitting it. You will also need reference photos to figure out how to fold the photo etch as the instructions are none to clear - to me at least. Photo etch is notorious for breaking if you fold it in the wrong direction more than once.
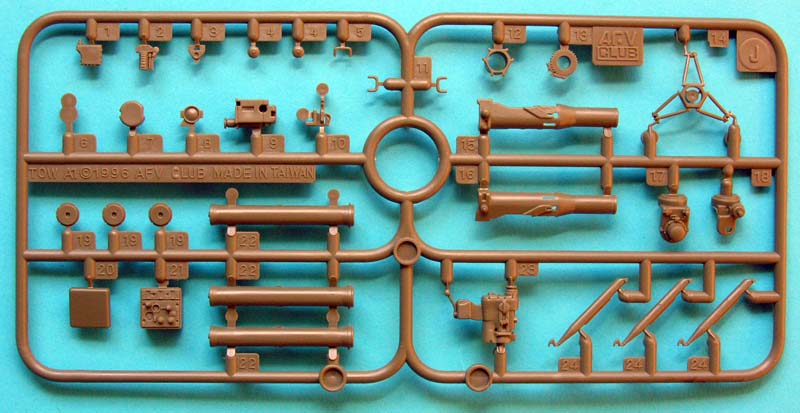
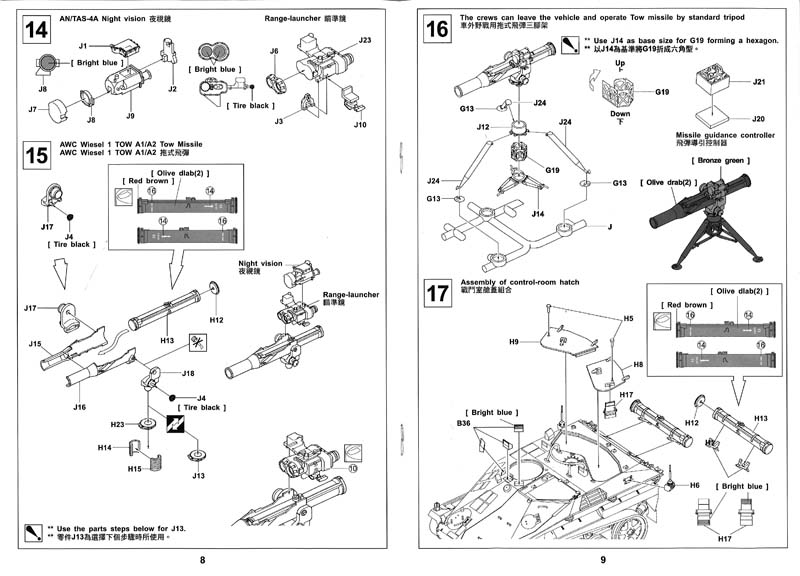
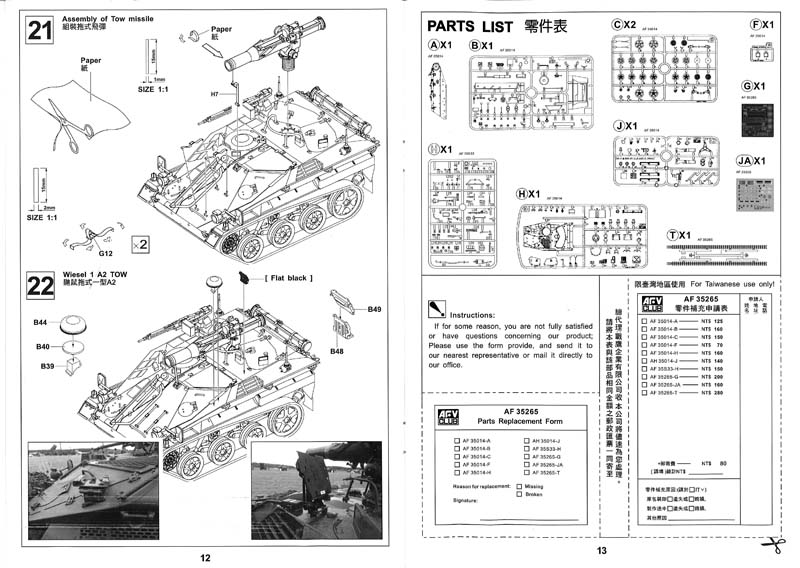
The TOW launcher has a night vision sight and launcher site on top. The launcher itself comes on a separate sprue J which allows you to build it on a free-standing tripod. When building it for the vehicle, use H23 (a toothed wheel) instead of J13 (similar for the tripod fitting). TOW containers can be fitted inside the launcher, although there is no reason why they cannot be left out unless you want to depict it in launch mode - or public display mode as they are often shown in the launcher. The containers, in real life, are very scuffed up which could make for a nice contrast when painting the model. The concertina lower neck of the launcher is in two pieces and will need careful finishing to remove the seam.
The next three steps (17-19) complete the fitting out of the vehicle with hatches, handles, tools, driver periscopes, TOW containers on the rear hull, front mud flaps, headlights and mirrors. The headlights could benefit from being drilled out and suitable lenses sourced as they are quite prominent features on such a small vehicle. I am surprised
AFV Club didn't upgrade them. The driving mirrors are also huge, so unless they are folded flat, the mirrors will benefit from something other than just being painted silver. Echelon make a set of stick-on reflective mirrors (M357105 - 8 per sheet) which will be an improvement.
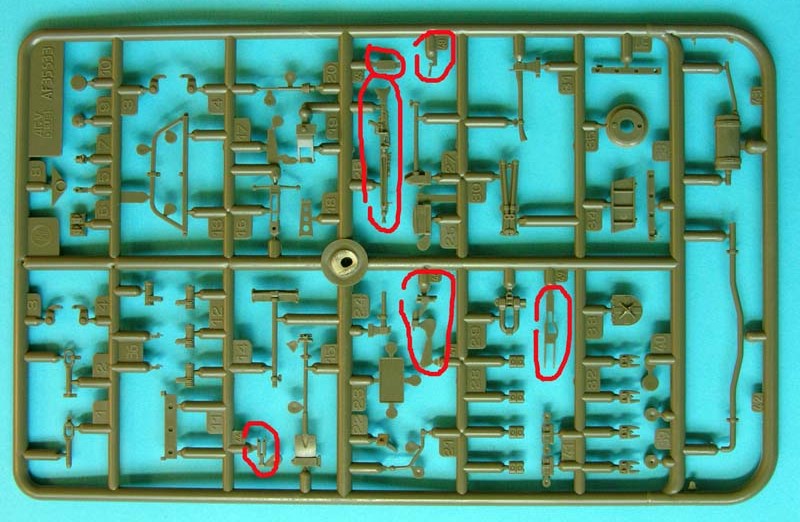
An additional sprue has been added to the kit from
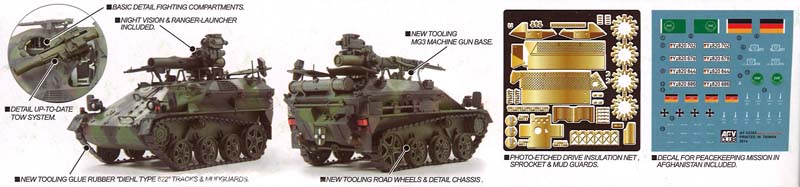
AFV Club AF35S33 (M88 ARV) with some extra Wiesel items engineered (squeezed) in. This is a bit confusing at first because there are two H sprues - one from the original Wiesel kit and one from the M88 kit. The second sprue is differentiated in the instructions by using an outlined H. This gives us the necessary MG3 secondary armament which has the addition of a (2-dimensional) photo-etched ammo belt for both the 1A1 and the 1A2.
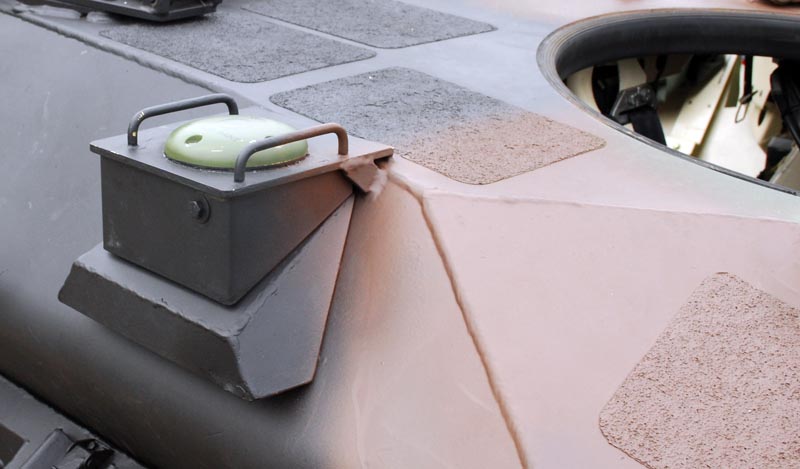
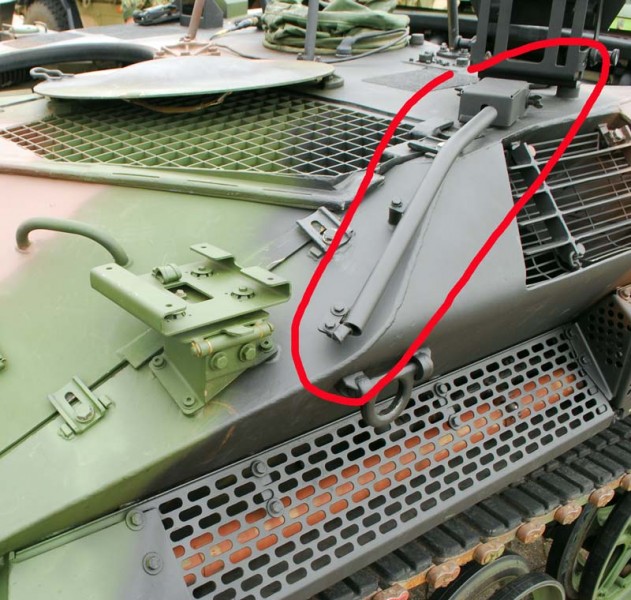
The last updates for this kit are in the final step in the instructions which detail additions for the 1A2 version only. These are the digital antenna which goes on the left side of the glacis and the Panther screen and mount just in front of the commander's hatch. An obvious feature of the real vehicle which is missing in the kit is an electrical tube and junction box which goes between these two items. See photo.
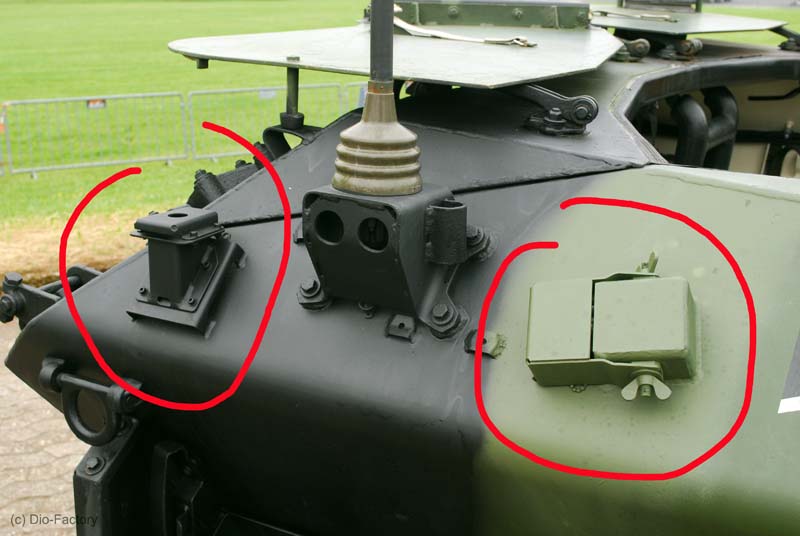
Also missing for the 1A2 version only, are two other items either side of the right side aerial. One is a second junction box (identical to the missing one on the left) and a mount for a GSM (Global System for Mobile Communications) antenna See photo.
Decals/colours
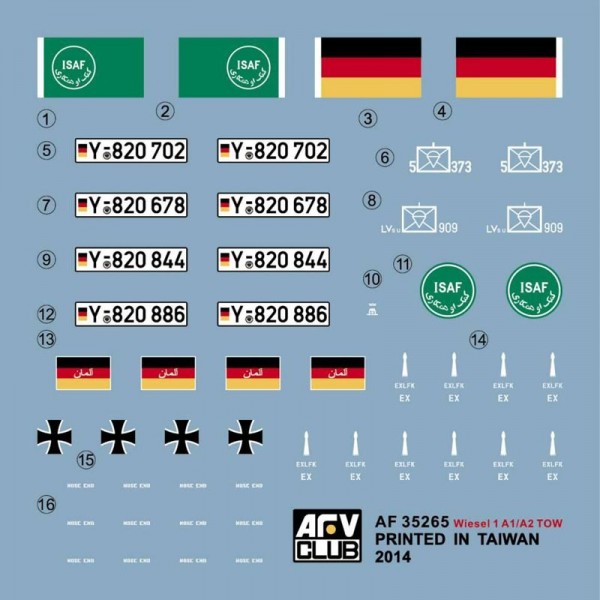
Three alternatives for 1A1: two in three-tone NATO (both nondescript units), one of which has ISAF decals, and one in sand colours of sand brown, sand beige and grey beige (Fallschirmjagerbattailon 373). The single 1A2 scheme is also in the sand scheme (FschPzAbwKp 909). The two latter schemes have incorrect swatches for NATO camouflage. Also, the sand colours are not included in the colour list on page 2 of the instructions with matches to various paint manufacturers! The units are not identified in the colour profiles, so if I've misinterpreted the decal sheet, I stand to be corrected.
References
Tankograd Spezial No. 5022 Waffenträger Wiesel 1 by Ralph Zwilling (the ultimate reference for the Wiesel)
Waffenträger Wiesel; Military Ordnance Special #14, Darlington Productions
Certain Shield, The Multi-National Airmobile Division on Exercise; Concord Publications
Unitaf In Somalia, Vehicles of Restore Hope Forces; Concord Publications
Cybermodeler review Live links
Web walkaround Live links
Web walkaround Panzer-Modell.de Go to References, then under Bundeswehr Kettenfahrzeuge, scroll down to Waffenträger Wiesel 1 TOW (A1 - A2)
Panzer-Modell.de Live links


Comments