introduction
Already in 1942 it became clear that Panzer III were getting weak and not capable of providing enough firepower against Soviet tanks. It led to a number of improvements like an increase in gun barrel length, the addition of side skirts on the turret and hull and so on. However the majority of the chassis were used for StuGs. Some vehicles were converted into command tanks by installation of additional radio equipment and were designated as Panzer Befels Wagen. Unlike the observation vehicles (PanzerBeobachtungWagen) PzBefWg retained their main armament (5cm gun) but lost the bow MG and often the turret MG as well. The increased space was used for extra radio sets and these vehicles had 3 antennas one on each side of the hull plus a star antenna on the rear. Around 100 Panzer III Ausf J were converted for that purpose and some of them were given late model modifications turret and side skirts.
The Kit
This current kit 6570 was released in 2014 and knowing that
Dragon have covered most of the Panzer III variants this release is one of the more unique versions. I do did feel that this was a novel release. Actually, after browsing
Dragon Models website I found a kit 6544 which is also PzBefWg III Ausf J, but without the hull side skirts and some other minor differences. Nevertheless, it would be of interest for Axis interested modellers as these tanks could be seen from Kharkov and Kursk to Eastern Germany in 1945.
contents
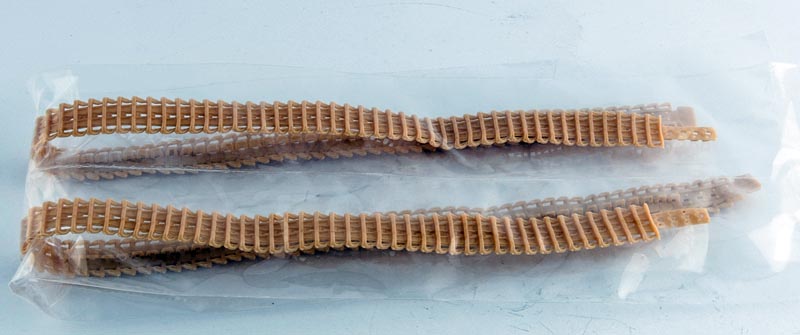
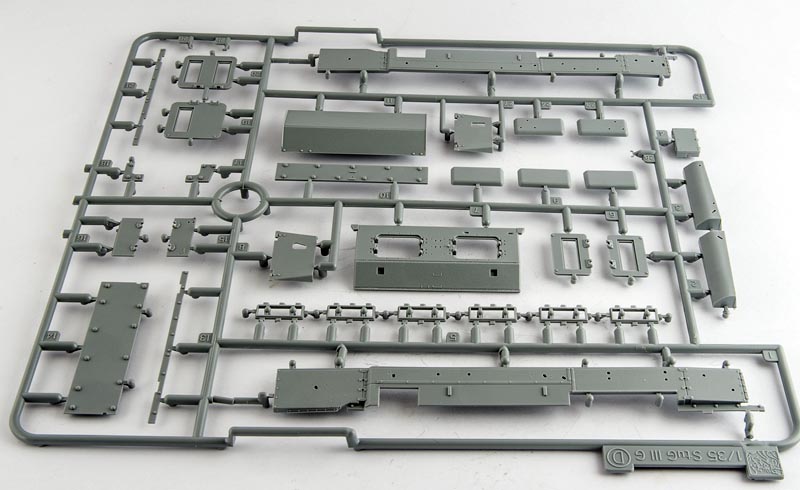
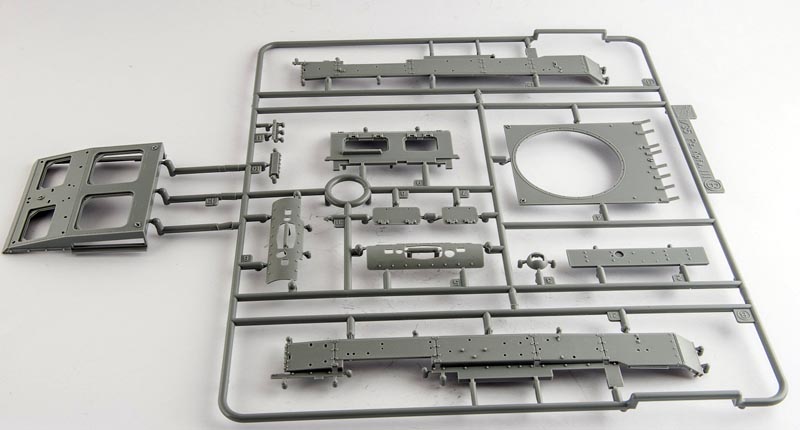
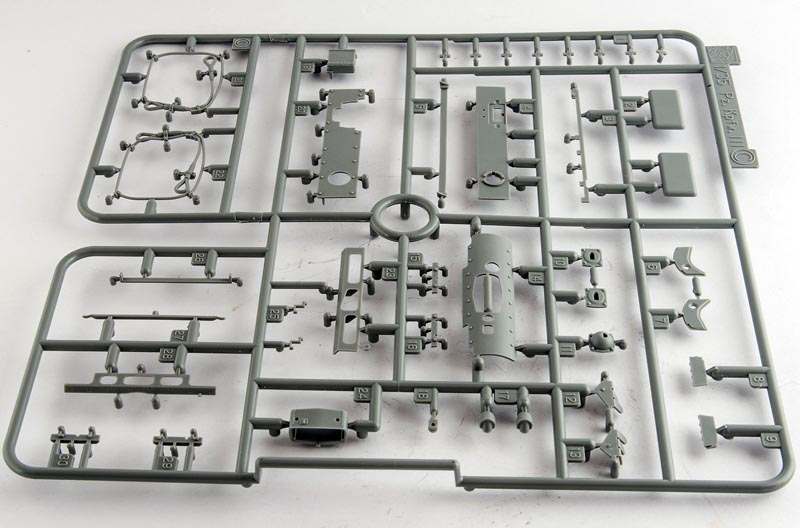
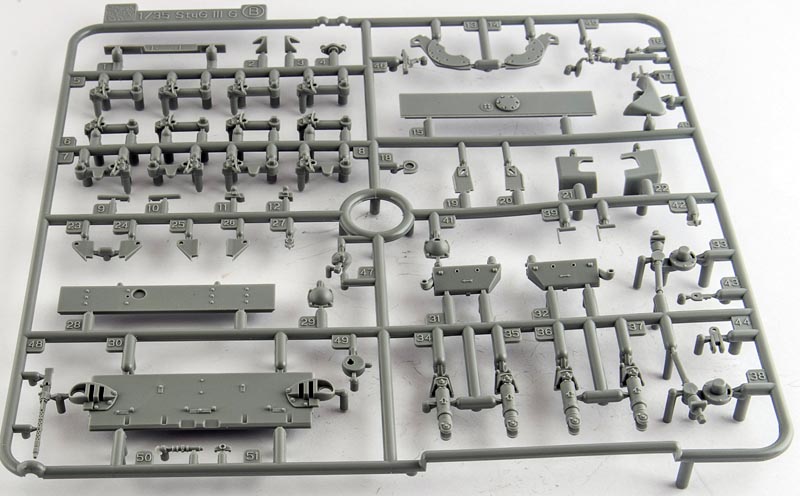
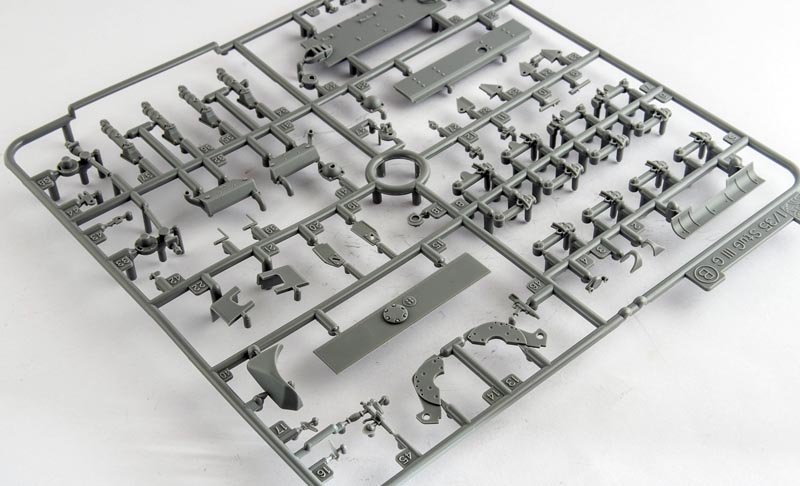
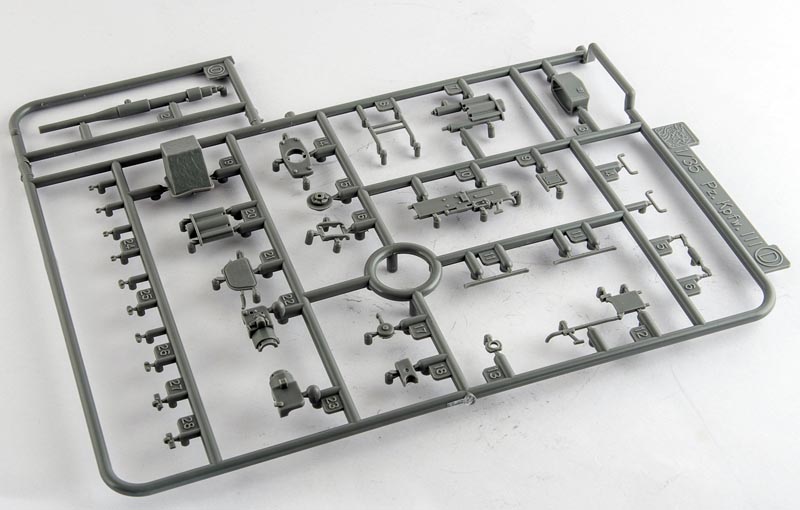
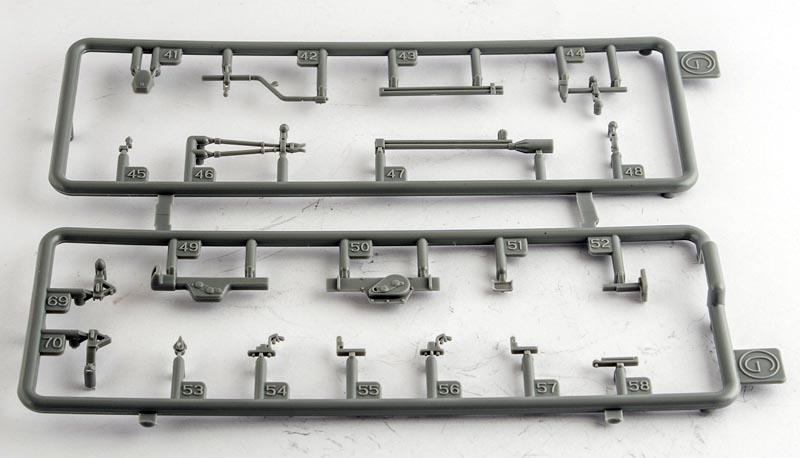
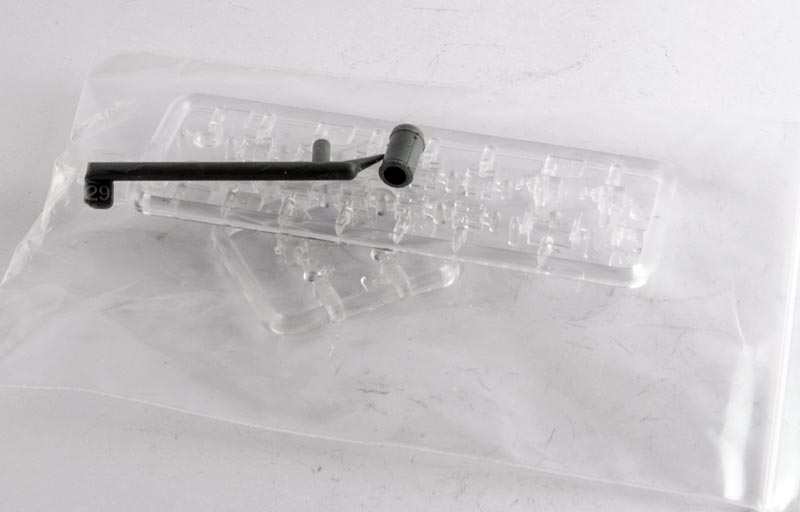
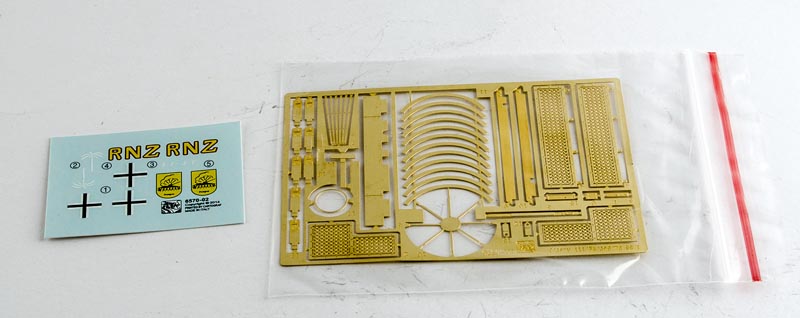
The kit comes in a standard DML thick cardboard box with artwork showing PzBefWg III in the field and Ferdinand (Elefant?) in the background. The kits features are mentioned on the sides and rear surface of the box. Inside there are 17 sprues of grey styrene, 1 clear sprue, lower hull tub, vinyl tracks, aluminum side skirts and a photo-etched fret. The quality of moulding is similar to
Dragons kits produced during the last 5 years, meaning minimal clean up and thin connections to the sprues. In the text below I would like to focus on the features of the kit that correspond to particular modification of the original tank as well as note the minor issues that occur during the assembly.
build review
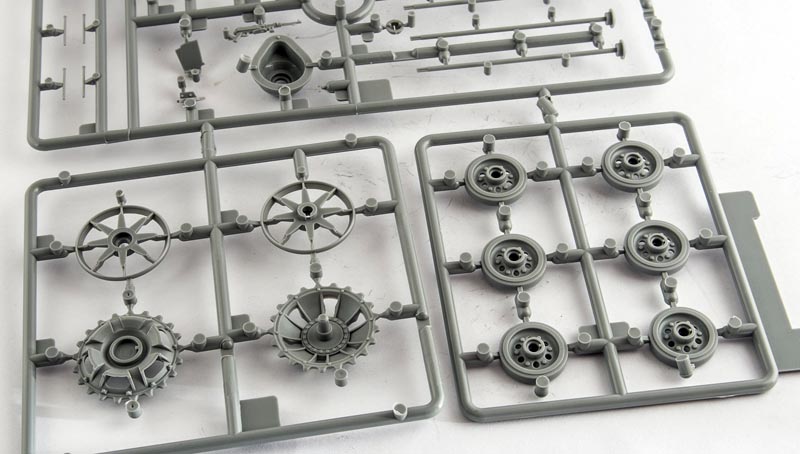
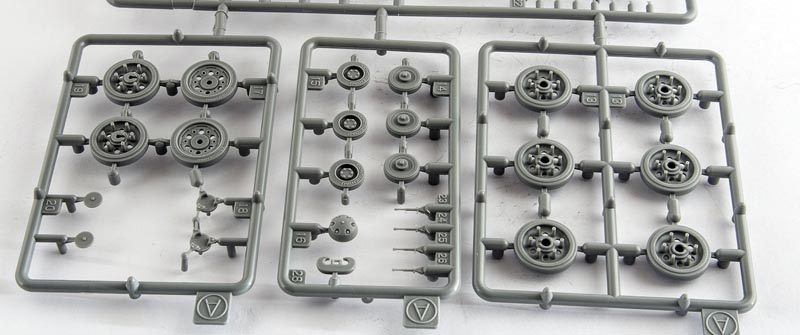
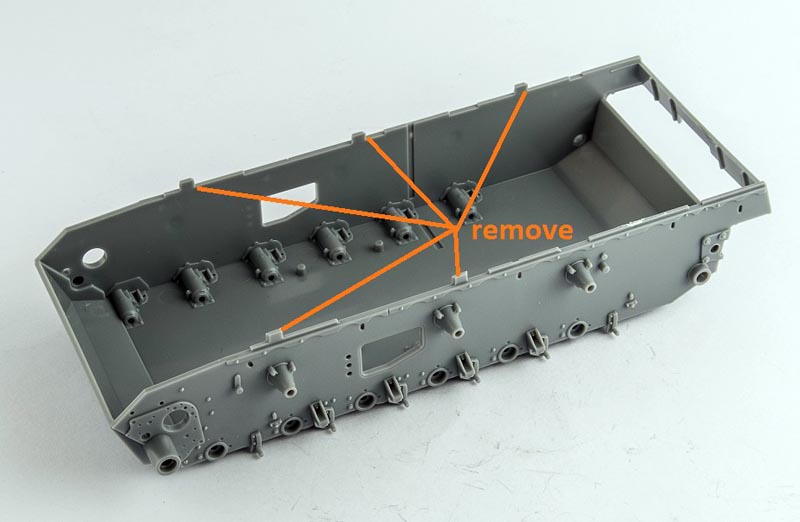
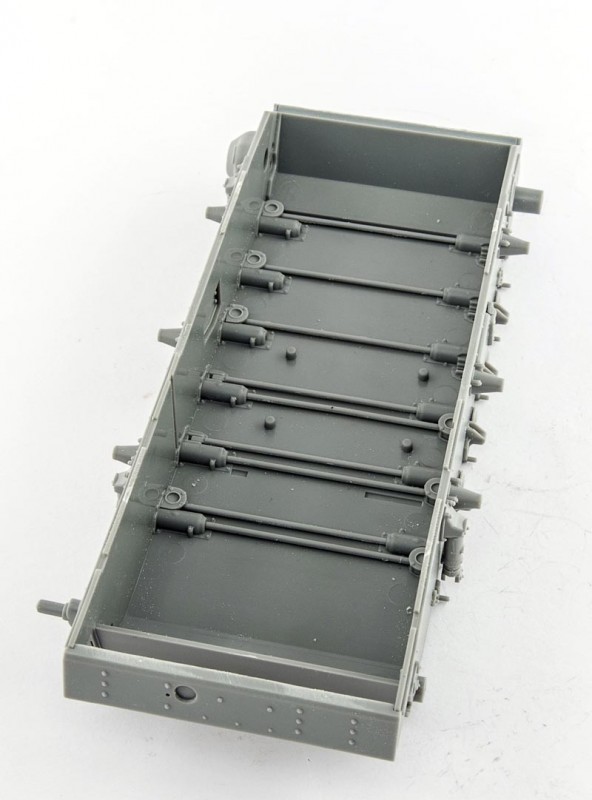
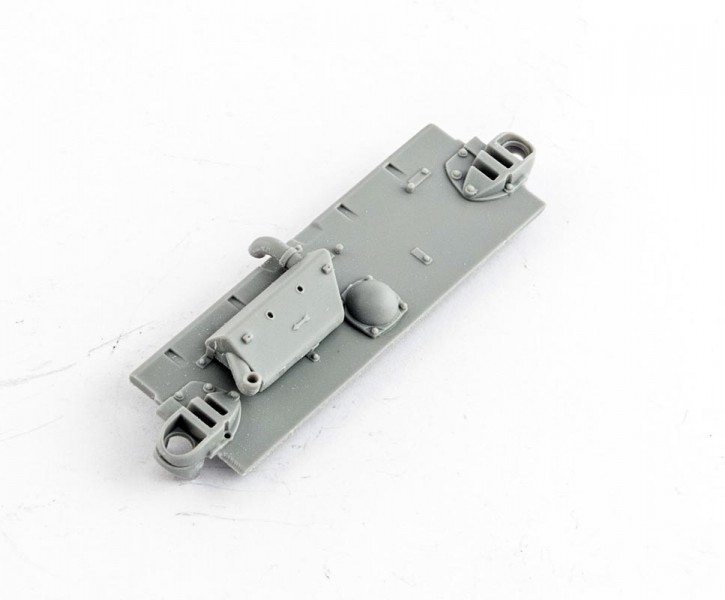
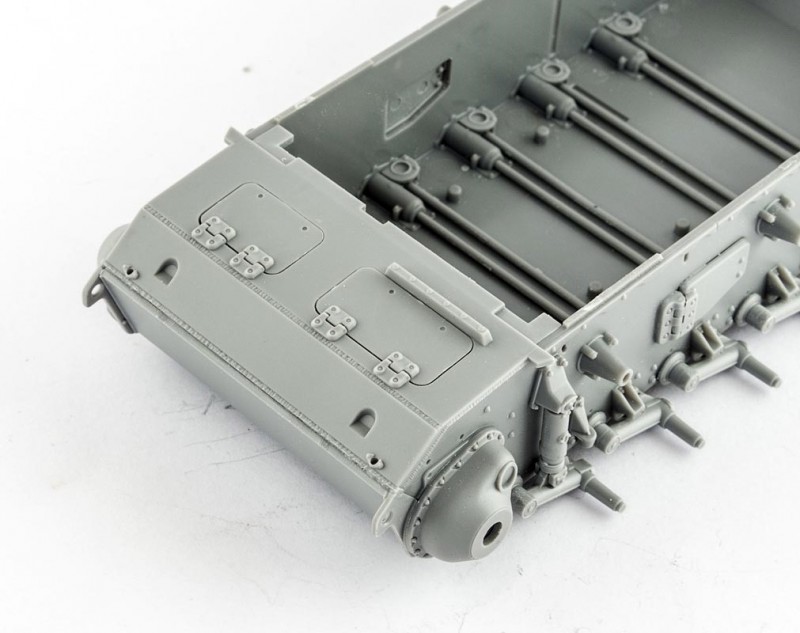
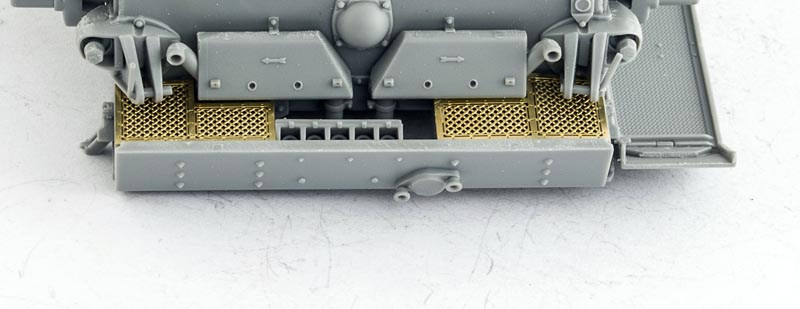
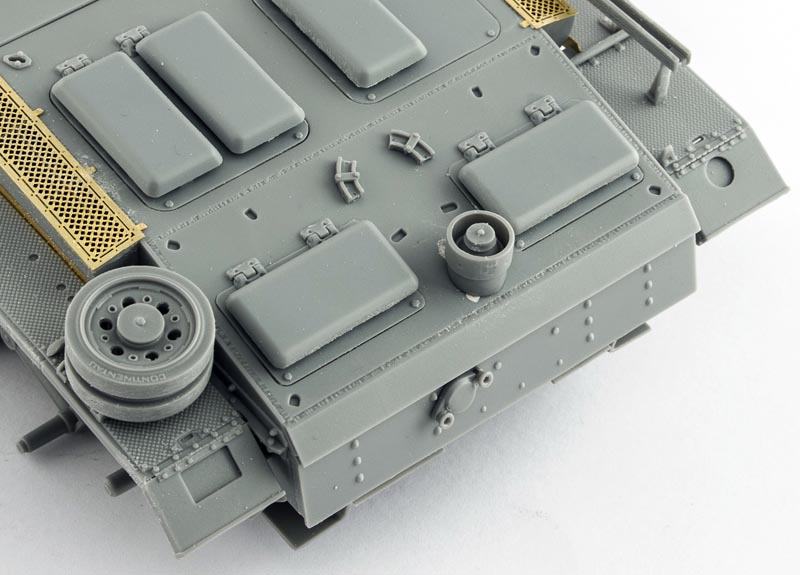
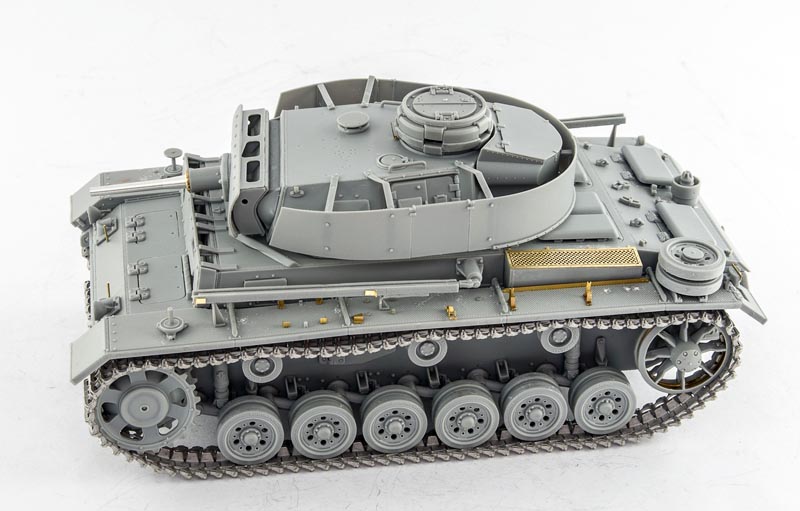
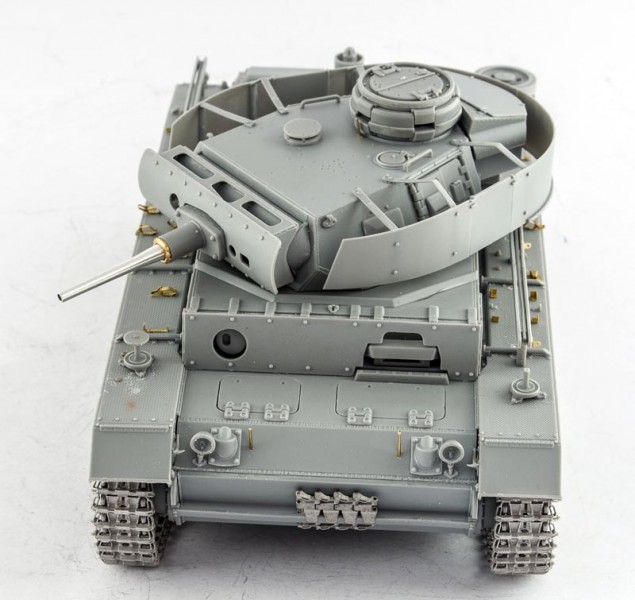
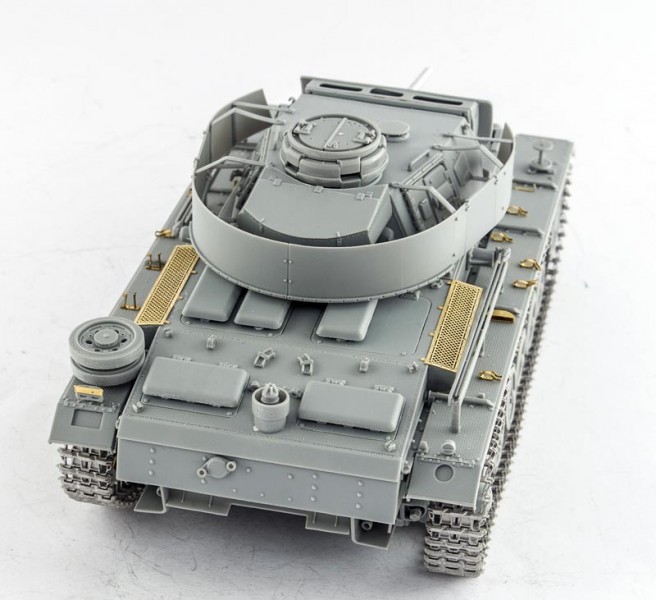
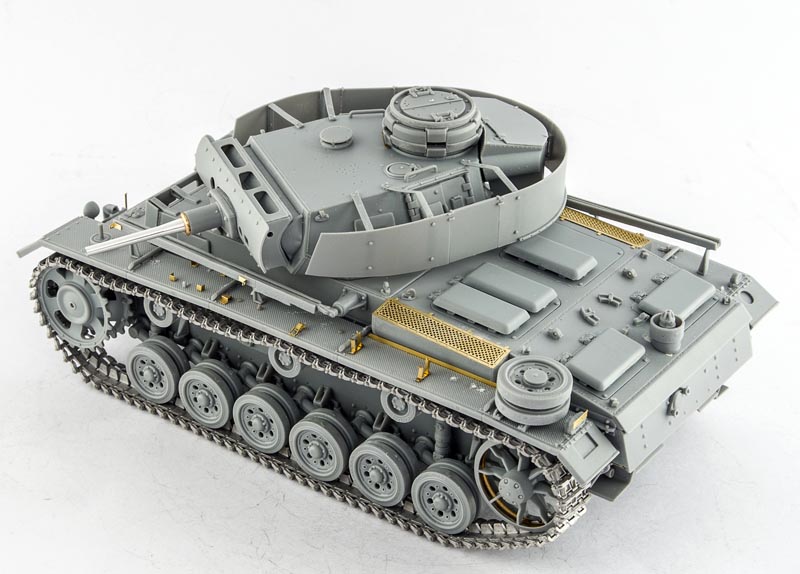
The running gear is correct for Ausf J including the detail on the drive sprocket, idler, idler tension mechanism and shock absorbers. The lower hull has escape hatches which is correct but the part numbers are reversed in the kit. It is very important to note that there are two sprues marked A in the kit. One is highlighted in blue and the other is in black, the same applies for the B sprue. When gluing the torsion bars the locking mechanisms (part A4) ensure that the first left one is part B18 which has lower profile as it is located closer to front armour. The hull rear has the correct features seen on the Ausf J, including the 50mm armour plate, relocated smoke candle rack under the rear armour, the deflector and new crank port cover. At the front there is the 50mm armour plate with spare track holder and correct towing eye brackets. The brake cooling intakes are of the correct welded type and the front inspection hatches are one-piece. The engine deck has one piece access hatches along with armoured air intakes. The main air intakes have photo-etched meshes on top of engine air inlets.
The star antenna mount should be also be installed on the engine deck and it is necessary to do some cutting and sanding before that. The star antenna itself is a combination of styrene and photo-etch and should look nice when complete. The tracks are one piece Dragon Styrene (DS) and personally I would have preferred magic tracks, otherwise they depict correct open guide horn 40mm tracks.
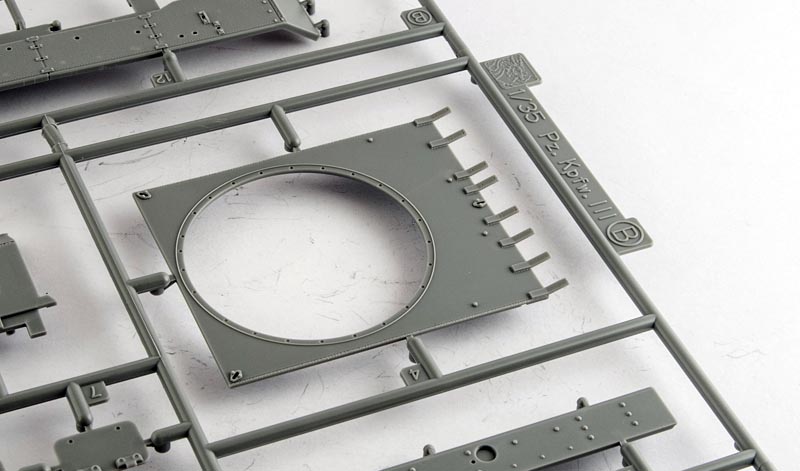
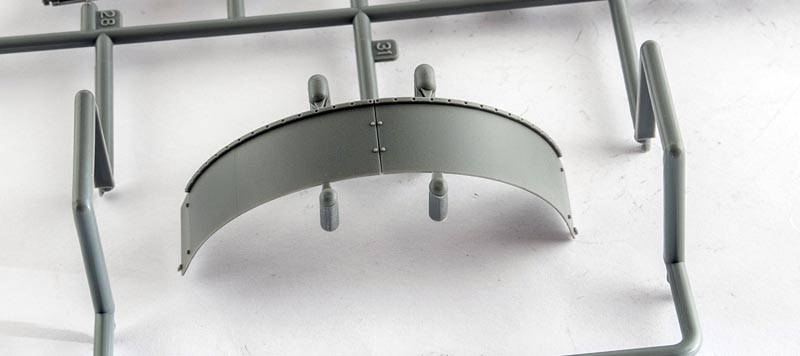
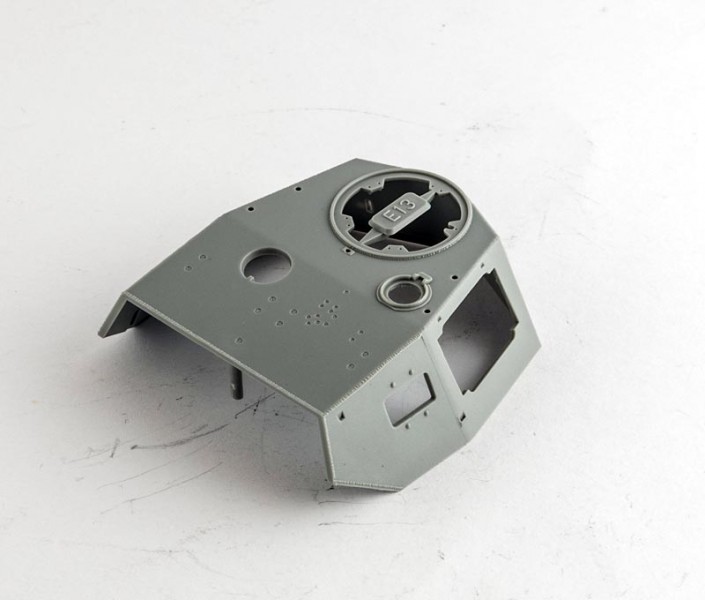
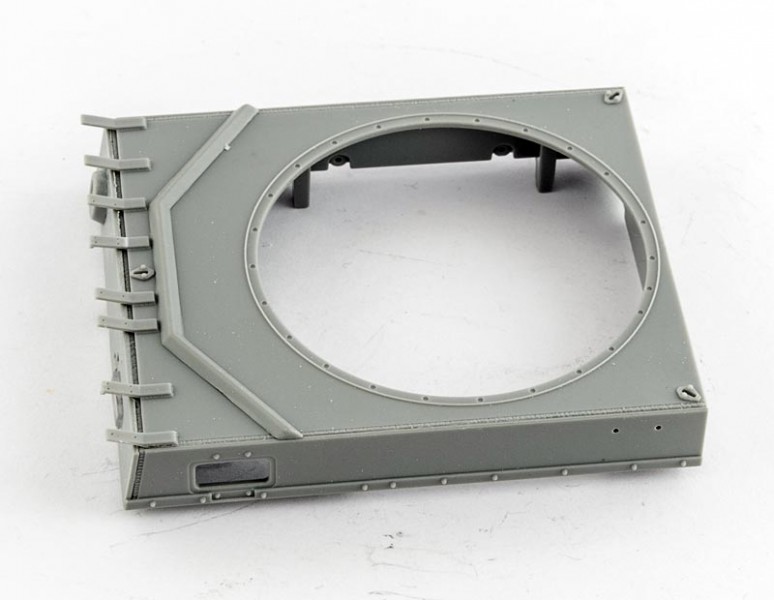
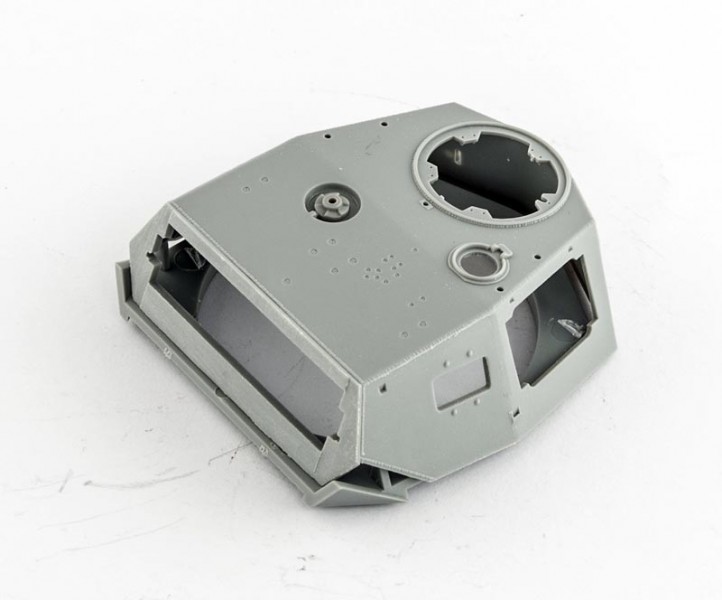
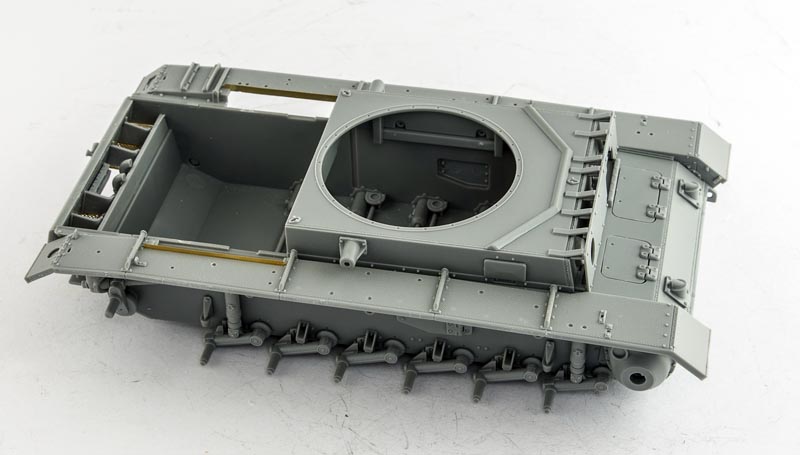
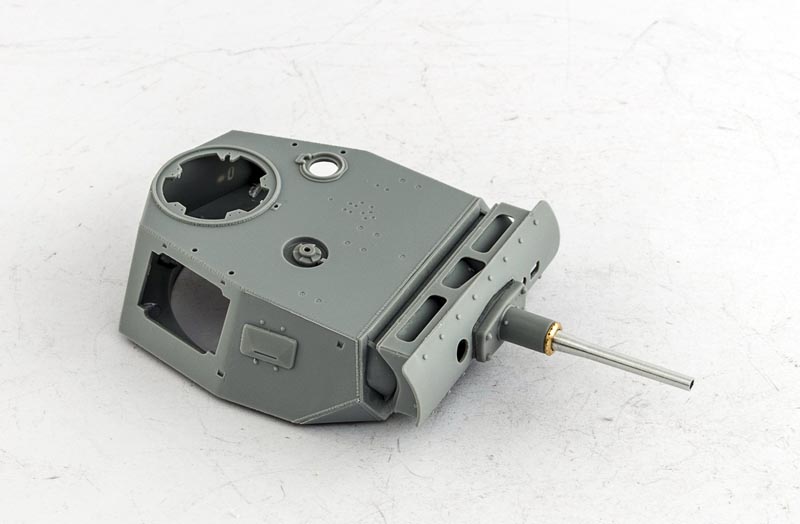
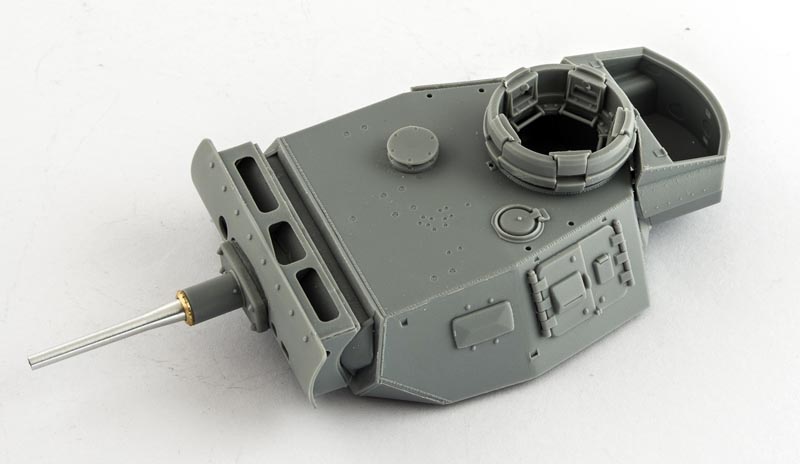
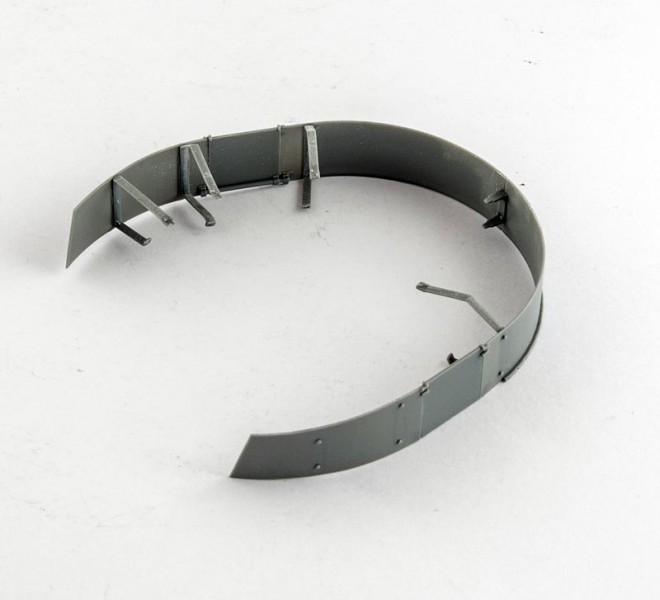
The superstructure features the drivers visor with a splash guard, the 50mm armour and a spaced armour plate this is a feature of both the late Ausf. J and Ausf L. but as there are side skirts this is correct. One thing that identifies that is it still Ausf. J and not later modifications is the presence of the turret splash guard on top of the superstructure. The kit parts that close the space between the spaced armour plate and front armour of the superstructure are also reversed in the instructions. As this is a command version of the tank it is necessary to open holes on the left side of the superstructure for the antenna mount. Also note that the ball MG mount is replaced with a pistol port in this kit. The side visor ports can be assembled open if desired. The fenders have OVM tools and lights as well as the antenna racks and tool boxes and spare wheel mounts, the locations of these can vary vehicle to vehicle so it is advisable to refer to war time images if you going for particular paint option. The tools are well moulded, but personally I prefer it when DML puts OVM tools without clamps. This avoids the need to remove these rudimental plastic clamps moulded on the tool itself. Another minor issue is that the location holes on the fenders are pre-opened meaning that you will have to fill them if you want to relocate something according to a particular reference images, I would have preferred that the fenders were plain with the option to open the holes. Once the superstructure is fixed to the hull the side skirts mounting brackets can be installed and it is possible to glue the remaining support rail as well.
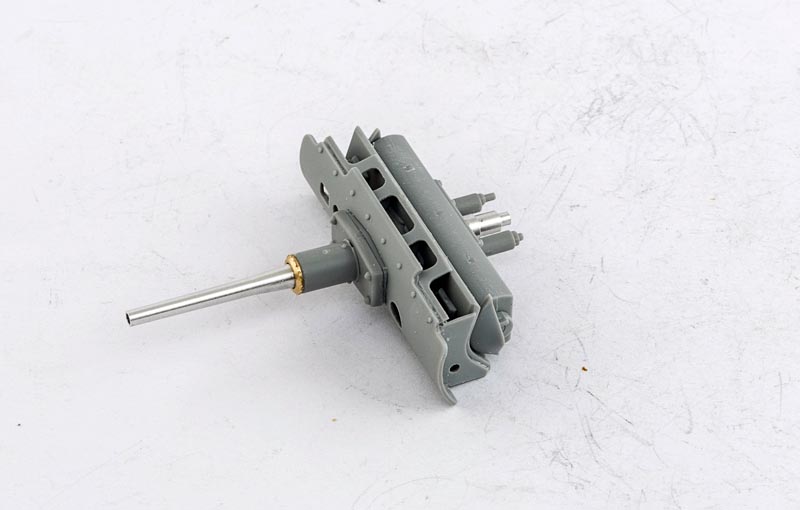
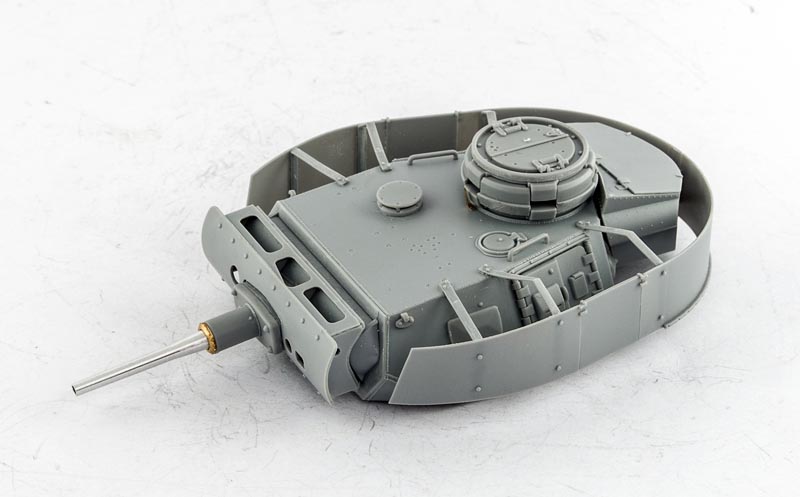
The turret is correct for early Ausf. J with the 5cm KwK gun with a short barrel, with the additional spaced armour plate on the mantlet as well as the suplmental turret skirts. The commander cupola comes from Panzer IV kit and it has separate clear parts for periscopes and these can be individually opened or closed and the hatch is two-piece. There is a possibility to select parts with turret coaxial MG installed or removed, rudimental turret interior includes details for the gun as well as a seat for the commander. The turret features side visors that can be open or closed, but why would you do that on a vehicle fitted with side skirts? The turret stowage basket is correct for a tank with side skirts as it has no wood strips (these have been transferred to side skirts) these act as an insulator and prevent the antenna grounding on any metal part on the tank. The remainder of the turret has a ventilator cover, signal port, lifting hooks and side hatch stoppers. The spaced armour on the mantlet was welded and the weld beads are not moulded on this part. When mounting the brackets for turret side skirts I had a feeling that these are also reversed in the manual, but I had no possibility to test that as I already glued them to the skirts before installation to the turret. Later examination has confirmed that the instructions are once again incorrect.
painting and finishing
The painting options suggested are s.Pz.Rgt. 656 in 1943, Pz.Rgt. 7 from DAK in 1943 and 2 unidentified units at the eastern front (one in whitewash). The decals include German crosses, DAK palms and unique tactical IDs for s.Pz.Rgt. 656.
conclusion
Overall, it is a very good kit if you are looking for that particular variant of Panzer III. The detail is good and I dont see any major obstacles in replicating the command version of the tank as it captures the original rather closely.
Note: Please disregard the metal tracks and fender equipment rearrangement with photo-etched tool clamps as shown in my photographs. These alterations were made to represent a particular example seen in a period photograph.
related review
Dragon 6544 Build Review Live links
recommended reference
Panzer Tracts Vol 3-4 & Achtung Panzer No 2.


Comments